A Real-Life Example of Edge-Abusing Wood and How to Plane Through it

Except I wasn’t working on a “real life project” while doing it. This is also a poo-poo of hard maple for hand tool work, which I think most people will come to if they try to work from rough to finish by hand with it.

I’ve mentioned woods that cause edge destruction. I don’t think anything other than silica is usually responsible for this. I find it in rosewood, cocobolo, etc, and for a regular tool edge, you can usually figure which will destroy edges not by hardness or some other easy boast, but by the fact that there will be visible silica. In rosewood, it shows up in pores – just look close. It looks like little white balls.

Note the white dots. Silica. They’re loose and you can brush them out or vacuum them out, but as soon as you plane through the pores, the next set of pores presents a new set.

You can see them in some soft woods like mahogany and limba, and they just do what you would guess in those. They make a plane dull quickly, but in soft woods, the planing seems nice and easy and suddenly the plane is dull.

Except, in maple, I don’t see anything like this. I see gray or brown spots that just look like minor discoloration and destroy edges as bad or worse than these little white balls do.

This stuff ruins tests

You can plane a few hundred feet and see nothing of these, and then find a discolored area that’s a couple of hundredths deep and gone. Before you get through it, though, it will prevent planing and it doesn’t have to damage much of the edge width to stop planing. A few small areas creates blunt damage that you can feel, and of course, you can feel the ridges on wood.

I was patterning carbides in the 10V test iron by literally just setting the cap iron close and planing wood to wear the matrix of steel away leaving carbides proud. And as I’ve seen this in maple before, I have planed probably a few thousand feet of shavings in “real work” as well as trying to get carbide patterns. No gray stuff. But it showed up here. Because they look innocent, I always think “i’ll bet this one will be all color and no edge destruction”. I think I’ve been wrong every time. Here’s what it did to 10V, magnified at 150x.

Ouch. About 1/8th of an inch of the edge length looked like that. It stops the plane from being able to enter a cut not just due to the dents, but because there is a 3d component to this. The edge is pushed back but also with deflections coming off of it going up and down. You can hit it on a hone quickly and remove the deflections and plane a little bit, but not for long.

The next two pictures show close up what these deposits look like both on the wood and in a shaving. Looks innocent.

When I first found these weird spots testing a bunch of plane irons 3 years ago, of course, I used the occasion to plane every iron through the spot to make sure all of them got destroyed the same way. They did. All with a 35 degree total final bevel. The harder the iron, the better it fared, but none planed long. Perhaps 8 or 10 strokes and the work stops, and you have 5 or 6 thousandths of iron length to remove before you really know for sure it’s gone. And that is *a lot*.

So, what do you do when you encounter these? you may have wood that destroys edges like this from time to time and have no clue what’s going on. If you were planing across a board with a little brown or gray spot smaller than this one, fun ceases quickly. You may not believe that the little spot that shows nothing shiny or gritty is doing it and start blaming things on a defective iron. If you sharpen without actually being able to look at the edge, I can almost guarantee you’ll leave damage in and then blame that on the iron a second time.

And then go shopping for supersteel. Except that will probably make your life worse, because it just gets harder and harder to get the damage out.

The old texts and some gurus talk about “planing teak and woods like teak” by increasing the angle 10 degrees. I wonder if some of them have planed teak. You can certainly increase the angle and at some point it will probably plane OK but be intolerably steep.

The answer in this case is to buff the bevel side and maybe the back a little bit. If you buff enough, you’ll have trouble planing at all. If you buff too little, you’ll still find some damage, but a moderate amount of buffing will make it so that you can plane all the way through the damage, deal with the strange feel (a freshly sharpened iron that doesn’t dig in quite as easily) and move on. The level of damage that’s in the edge will probably be removed in one or two normal sharpening cycles, or only 1 or 2 thousandths deep, and if you get it dead right, there won’t really be any.

If you find wood like this and it’s not really pretty, then it’s wood to avoid with hand tools. Cut it with power tools and sand it. Maple is worth it for guitars, and you wouldn’t tolerate the discoloration in the first place in higher cost wood, so it won’t be encountered. Rosewood, mahogany, limba…obviously worth it sometimes, too.

Just don’t kid yourself that spending a lot of money on another iron will fix the issue.

I ended up buffing a 26c3 (razor steel, similar to white or good file steel) iron that’s very sweet but not very long wearing. It was fine planing through the gray area, at least with the concession of loss of clearance and increasing the shaving thickness a little bit. The resulting damage was about 1/4th as deep as the pictures above or less, and the deflection was minimal. The nice thing about steels like 26c3 is the buffer can polish them reasonably quickly.

10V, I haven’t experimented that much yet, but would expect you’d have to buff it for a *long* time.

Magnacut vs. 80CrV2 – Carbides and Edge Smoothness

After the debacle in the first three posts about Magnacut where it looks like my sample benefitted from having the initial bevel ground off to get to harder steel, I figured it would be interesting to pattern carbides. I’ve only had one steel that wants to defy this – AEB-L. AEB-L wears in a kind of weird shape, and very smoothly and it just looks like grease or clay on the worn surface. This would seem to be a good quality as it suggests “ultra fine” visually, but AEB-L wears longer than 80CrV2 and O-1 – without cutting as keenly as it dulls. It’s noticeable, especially if you use both in the same board and there is figuring or anything other than easy planing.

My typical trick to expose carbides is to set the cap close so the chip rubs against the back of the iron and then plane cherry, which has a “dry” feeling when planing. I have the same maple from the third test in the vise, though, so I’m using that. I noticed three years ago that the wear on irons looks different from maple than it does from cherry or beech. I don’t know why this is, but it leaves a smoother looking surface. Maple is less nice to plane than beech because it doesn’t accept an edge into the wood as easily, but it doesn’t seem to plane much less in footage before dullness.

Anyway, I expected to see a dense matrix of small carbides in both of these samples based on what I saw from cherry, but the pictures show a little more subtlety.

What to look for

I’m generally comparing what the edges look like, the carbide size, uniformity and prominence, and then feel as the edge dulls. You can’t get the last from reading this. Feel importance to me is how easily an edge planes and how cleanly it planes features. For example, 52100, for some reason, is never as sweet as O-1. If you plane a figured surface with it once it’s even been in the wood 100 feet, it will require more effort to stay in the cut and the actual surface will be more scuffed and scratchy feeling.

Surprisingly, AEB-L with its ultra-fine look also does this. O1 is reasonably “sweet”, 26c3 is very sweet (but less long lasting than O1) and 80Crv2 is very sweet, meaning that even as it dulls, it seems to enter the cut and stay in it better. Simply put, I’ve tested AEB-L in the past and found that it would last a lot longer than O-1, but I would use O-1 because it’s less work to use, anyway. Neither is hard to sharpen, but O-1 does sharpen and grind a little faster, which you’d expect.

You may not feel how drastic this difference is between various steels without sharpening them similarly and then planing alternating in the same piece of wood.

You’ll have to take my word on sweetness because I haven’t found a visual characteristic that’s 100% reliable aside from a ragged edge will not be that sweet, but not every uniform looking edge is that sweet. V11 looks like 52100 on steroids (same type of carbide), but V11 has pretty good sweetness if you can avoid chipping, and 52100 doesn’t. Seems backwards since V11 looks more toothy.

Magnacut Smoother Wear

Magnacut 300x magnification – smooth look, decent edge, but strangely wavy with wear. Reminds a lot of AEB-L even though the composition is much different.

Notice the red arrows. it’s no easy to see the carbides, and it appears the final sample as mentioned before shows the advertised fineness.

Carbides and steel grains aren’t the same thing. The actual steel matrix grains are bigger, but I can’t show them without nitric acid, which I’m not looking to deal with as it would necessitate storage in an external shed based on my physical carelessness with things. So, the grains are an unknown, but the carbides are definitely small and no big odd ones appear.

At the edge of the arrow, you can see a carbide with its “comet tail” where steel was protected behind it. The rest of the smooth structure reminds of AEB-L. which is better would be up to you – AEB-L irons could be made available pretty easily, but I’m not sure there’s a market for them and personally, the sweetness of 80Crv2 is worth a lot more to me than the extra edge life of AEB-L. The comparison of the two steels here finds the same with Magnacut. It’s an interesting steel, but I wouldn’t swap it out vs. 80CrV2 or O-1 at an appropriate hardness level (as in, not soft, and not pushing the upper limits of the tempering range).

To get an idea of how small these carbides really are and how fine for both of these vs. a steel with larger plentiful carbides, I’ll toss a picture of XHP’s (PM-V11) carbides at the end.

80CrV2 Smoother Wear

I put a picture of 80CrV2 wear in another post already, but this is different wood, so it’s appropriate to take another picture. I got lost a little bit in planing with this so it may have planed a few more feet than the Magnacut iron. Regardless, it’s clear that it wears faster when planing, but it has excellent sweetness remaining keen as it dulls. As good as anything.

80CrV2 at 300x – notice the smooth but considerable wear, and the smoothness of the edge. The tiny dots of carbides are easy to see. The faint diagonal lines across the wear bevel are oil even after wiping off the bevel four or five times. This is an illustration of why even when you think you don’t have oil on your tools, they will benefit greatly from using oilstones to sharpen instead of waterstones.

Visually, 80CrV2 at this very high magnification looks more uniform at the edge. It feels like it as it just cuts more smoothly in wood. Edge life is similar to higher hardness O-1 based on my testing and may be even a bit less. Not much, but a little.

Day to day cost neutral, I’d pick this over Magnacut. There’s not much technically interesting about it compared to newness of Magnacut, but it’s just a little nicer to use. It’s also nice that it’s dirt cheap but for that barrier that you need to make your own irons if you use it. It’s also not stainless, but stainlessness of irons only became a “thing” when the folks imagining woodwork became the majority over those who are actually doing it, and the whole tool care hocum is a product of selling nonsense to beginners who think there’s magic in little 1 ounce bottles of “nano-quark” rust preventive pushed by their favorite ethically-deficient influencer. My suggestion? Use oilstones. If that doesn’t stop rust, then cut back the number of tools you have and use until they’re not rusting.

My eyes are still open for the next steel that’s going to be better, functionally, without making conditions. Like something that wears twice as long as 80crv2, but has the same sweetness and actually makes for less work. I don’t know if that’s practical. Magnacut is a good attempt, but all things considered, it doesn’t get there cost neutral, but it would make a dandy kitchen knife at this same hardness.

Dandy enough that I think Lake Erie Toolworks should think about finding someone who would grind chef and paring knife kits out of Magnacut leaving just a bit of finish sharpening and handle fitting for folks. It’s again something I wouldn’t be interested in, but there’s the inclination in my mind for someone to “adopt a steel” and be willing to buy more than just irons. Especially if they can get them at the same place. They would have to be expensive given the cost of the steel, but none of this is aimed at the teenager who is choosing between their next plane and duct taping shoes for a couple of months.

And, finally….the picture of XHP that I mentioned I’d link here again for comparison – this really puts into perspective how small the carbides are in the two steels above.

CTS-XHP wear after planing – 300x magnification. Notice the density and size of the carbides. This is likely the same steel as PM-V11, and if not, it’s insubstantially different. The large carbides do not, though, correlate with poor keenness while dulling. V11/XHP have nice sweetness while wearing, with some tendency to nick and a long potential edge life that increases the chance you’ll gather nicking.

Magnacut 3 – Testing after Grinding Off Length – ahhhh….relief

It’s still the same day as posting the prior two posts. I intended to let this sit a while until I had a practical task, but something about the other results didn’t sit right. The results are negative, but maybe it really is just heat at the initial edge. I walked to the shop to think about it and grind off most of the bevel. More than 1/8th of an inch, though that may not have been necessary, I don’t want to inch up to seeing if this is fixed by getting away from the factory grind.

So, I also noticed that I have a few maple shorts left that I’ll never used – I forgot about them. That gives me a chance to bungle up their edges with the cordless circular saw and then plane them and time the planing.

I figure that I planed about 8 minutes on maple with the prior edge in test #2, and 2 in poplar (go ahead and say it…”popular”). So, that’s what I did except I skipped the poplar.

Grinding: uneventful. it grinds relatively nicely, it’s fine and it doesn’t get that hot and at no point was any part of it – not even the very top, hot enough to boil water or burn my hand.

With a belt grinder and ceramic belts, this whole process, even being careful, takes about 5 minutes including installing the updated edge.

Noticeable Change!

When I went back to the stones, the updated bevel is harder to hone. I’m somewhat surprised by this, but I’m a feel toolmaker. Test and observe outcomes, but get feel at the same time. I was surprised how easy the initial edge was to hone, but it doesn’t have bad wire edge / burr behavior, so I ignored it. Maybe it was easy to hone because of the small carbides – this is actually a thing in heavier honing – small carbides will make things a little easier until fine polishing.

This seemed very positive, except it does seem like I shouldn’t have to find the heart myself. I don’t use machine shops for anything, so I can think of (as someone who has done practical heat treating) two possibilities. An exposed bevel that gets heated a bit too much in temper, or one that is ground and even though doused with liquid or cut intermittently – either will work – done just a bit too fast.

The resistance on the diamond stone, india stone and then through the 1 micron diamonds on cast seemed greater, but again, the wire edge came off nicely without any fanfare (this is a good thing).

I proceeded to plane 8 minutes timed, stopping the timer each time I ran out of edge and had to cut some width off with the cordless saw, and then resuming again planing with the timer on.

Far better results

I didn’t bother trying to make this take longer and test several irons against the Magnacut iron – I just wanted to see if the same task could be a little better. By feel, too, the shorts that I had were a little more agreeable than all of the bed slat boards, but they’re still hard maple, and I didn’t baby them.

The edge damage this time is far more minor, and this is an iron that has a better feel of being something I could live with. It’s now slower to hone, but that’s a trade we expect to make with plane irons. I should wear almost as long as V11 in an idealized situation.

Magnacut 150x – after grinding of significant length – typical minor damage. This is inconsequential and most of the length of the edge used looks like this or better. Regular honing will remove all of it, which is important. We always want to have an edge that has damage no deeper than regular honing because the talk of “stopping to grind out nicks” is something that sounds good in a Pop Wood article, but you will tire of it about like you would a girlfriend who is never there on time but OK otherwise. It makes you wait for something you don’t need to wait for.

Magnacut 150x – typical minor deflection – but even at that, not occurring on much edge length and not worrisome.

Only one more signficant deflection occurred. Fortunately, you don’t have to ask if this is a carry-over from the prior test as I removed a lot of edge length grinding the bevel back.

Magnacut 150x – worst damage encountered in the third test. Wide, but note how shallow it is. Not as bad to hone out. Note that the wear doesn’t look as significant. The wood could be a little more favorable – wear appears to show up as darkness in these pictures.

This is a resounding difference vs the factory edge, both in feel and in the depth of defects. None of these will leave large topographical lines and most probably won’t leave anything you can discern, and a full wear cycle may remove a good bit of them.

Too, with that, just minor buffing (and not edge life reducing large amounts in nature) could also eliminate the defects. And this is on interrupted hard maple.

I am glad I didn’t sit on this, though I no longer have the fervor for testing, I do have it for fairness.

I didn’t expect that the initial edge would be a little underhard (my perception, not proven), but I also didn’t expect because of that, that we’d see a big improvement. As little different as these may look vs. the earlier, the difference is drastic – from intolerable, to usable and practical, at least from these tests.

How much would you have to grind off? I don’t know. I don’t have any qualms about grinding length off of irons and cutting an entire new bevel, but this is a steel that doesn’t tolerate excess heat, so if you are the type who can’t grind without burning carbon steel, you may just want to wait it out if this is a characteristic of all irons.

I mentioned in the prior post that we like to see almost all of the edge totally undamaged, and in this case, almost all of it is.

Now, I can go set the cap close and wear a “cup” of steel out of the back of the iron by letting shavings ride it and we’ll see if we can find a more copious reef of carbides to look at. The point? Only curiosity.

I think this would make a wonderful kitchen knife, but it is out of my league for shop heat treating for the most part.

Though it’s of no consequence here, the other save on this is that I can safely unload this iron – safely as in all in good conscience, and if it had not improved, I’d be more or less forced to keep it and maybe segment it into two very expensive stainless marking knives. I really didn’t want to do that.

Magnacut – Second Practical Test

The first test was a surprise, but the iron is new, the task was identical, but the planes weren’t the same, and honing was freehand.

A day or two later, cutting bed slats to go on son’s loft bed presented the opportunity to use the same Stanley no. 6 with the Magnacut iron and another plain steel iron – one I made out of 80crv2. This time, the comparison will be a little more than fair.

Edges for both irons were refreshed with secondary bevels at 32 degrees on 1000 grit diamond and then finished slightly steeper (about a degree) on 1 micron diamond on cast iron.

I would normally hand saw wood like this, but to make for a little more to do, I used a cordless circular saw to rip lengths. Without a track guiding the saw, this leaves a much sloppier cut than hand ripping, which we need so that the edges aren’t just planed clear of handsaw marks in three or four swipes.

Cap iron set: same as previous, about .02″.

Wood: 1/2 hard maple, 1/2 poplar (whatever I had to waste on bed slats)

Planing: Alternating the iron every several minutes being mindful to plane at least as much maple with 80crv2 both in actual work as well as time planed.

I made the 80crv2 iron when trying various steels for plane irons. It is marked “80CRV2 A-T” (thermal cycles), which means that it received a low nonmagnetic heat and then was stuffed in vermiculite to cool slowly, and then before hardening, I gave it a series of below-quench-heat (barely critical or subcritical) heats and then one quick high heat well past the furnace target but no soak or hold and quenched and tempered. If it was tempered hard, it would also have an “H” on it, but it doesn’t. So, it’s probably around 61 hardness at a temper – somewhere around 375-400F.

In general, you can think of 80crv2 as something the average white-collar buyer wouldn’t distinguish from O-1, but it is a steel that wears similarly long, but has better toughness. It requires a faster quench to get good results, but it’s also less expensive. It’s more highly regarded in the knife world because it will tolerate more abuse than O-1.

You can also think of it as 1084 with just enough alloying added to make it better than 1084. 1084 is very warpy, needs a very fast quench to hit its highest hardness potential, and will experience very fast grain growth giving newbies little error between growing grain and underheating and ending up with tough but too-soft steel.

For this test, I was careful to avoid any contaminants or dirt, and careful not to be careless with the planes while planing. Maple is relatively hard on edges, but I would say it’s also not totally out of the league of cherry. Whatever occurs in maple will just occur less frequently or slower in cherry. Poplar is a patsy and I’m sure it didn’t add anything here, but I needed a few more boards.

First, the Magnacut Pictures

Note, I didn’t take pictures of initial edges. It becomes too much in terms of things to look at. The sharpening process and initial edges look the same as the magnacut in the first test. All pictures are again, the backs of the irons at the edge. There’s a second motivation here – I think i like 80crv2 better all around than O1, but I’m not sure, and in the back of my head is whether or not its additional toughness may be a detriment. I haven’t used any of these mule irons too much other than just to compare. I expected that a steeper honing guide edge would perhaps help Magnacut and different wood and a different task may help eliminate issues that are one-time in nature. E.g., if there was something in the face of the cherry that I wasn’t aware of or who knows what else.

Magnacut – 150x – edge wear on an undamaged section. The sections
“coming unglued” are wear. They don’t wipe off. Undamaged lengths weren’t uncommon, but they weren’t close to uninterrupted, either, unfortunately.

Magnacut – 150x – edge wear and typical minor deflection. This is no big deal and will probably be removed with regular honing. If all of it looked like this, it’s possible that additional planing would round the edge and the damage would stop.

Magnacut – 150x – more typical damaged sections. Damage of this size (at the bottom) leaves visible lines and you’re unlikely to hone the damage out with a normal maintenance honing.

Magnacut – 150x – worst damage. Within 10 minutes of planing, the planed edges were loaded with lines, but one was prominent. I knew I’d find something like this. There was no “big knot” or anything that caused this, so I don’ know if it started somewhere and propagated or occurred all at one time. You will spend a couple of minutes on a coarse stone to remove this and be back to the grinder with much less honing. Too, the surface that’s left isn’t acceptable for anything.

Magnacut – 300x – a relatively undamaged section viewing at high magnification in search of carbides. If you look very closely, you can see a few tiny whitish dots. those are carbides. I may plane an edge of clean wood later with this and 80crv2 with the cap set close to see if we can get a better pattern. The damage at the edge here isn’t fabulous, but it doesn’t really threaten much or leave topographical lines on work. Keep in mind, this picture is a hair under 1 hundredth of an inch of edge length.

Second, the 80crv2 Pictures

80crv2 – 150x – typical edge length. There is only one spot of damage on the entire length, so there’s no need to show several sections of undamaged length. See the next picture for the only damage that occurred.

80crv2 – 150x – the only observed damage at the edge. This should be removed or close to it in a typical honing section, but this iron has more edge life left and some of it would be worn off of the iron’s length if no more occurs.

80crv2 – 300x – close look for the carbides. Hard to find here but you can find small light colored dots here and there. the diagonal lines may be careless sharpening on my part, or they could just be oil that didn’t get fully wiped off. Simple steels are somewhat tolerant to

The take-away from this is that at the very least, I will grind off the bevel of the Magnacut iron and reestablish an edge that comes from steel further into the iron. That may help.

If it doesn’t, then the solution to get the edge to last is to start adding buffing or additional total angle. Where that would start to help is something I’m not sure of. At 33 degrees or so in this case, it’s about as steep as I’d want to go for a target for daily use and increasing the initial edge angle shortens potential edge life, regardless of the side of the bevel it’s on. It may improve actual edge life, but I’m not going to set up a bunch of “not actual work” tests to try to figure all of this out. I have the need for some cases made of cherry in the next couple of months and if I don’t get to them sooner than that, I will get an idea of the reground edge in that work then.

It should be uncommon to find high-cost tools with overheated initial bevels, but one never knows.

On the second little sub-topic of whether or not 80crv2 is better or as good as O-1 for my own personal use, in knives, it definitely is (takes twice as much energy to break at 62 hardness). I’m not sure in planes, but would also say that what little damage shows up here is inconsequential.

Magnacut – First Practical Test

This will be a long post, so I will post in less conversational and more kind of fractious text to try to make up for it. In 2019, I tested a large number of plane irons that were purchased, borrowed, and in one case, made by me. The tests involved smoothing wood only on edges to keep the cuts even and fair, and the process was very controlled. In the end, highly alloyed irons (CPM M4 and PM V11) separated themselves from the group, and I declared V11 more or less superior in the tests. Against CPM M4, it is the case that you can actually by V11 (probably carpenter XHP) in a commercial iron for a reasonable price. Everything about V11 in the test was wonderful except that it didn’t grind/hone quite as nice as plain steels. But it returned edge life to make up for it.

This seemed a little odd, but tests are tests and I recorded everything. It seemed odd, because years before, I tested a Custom 5 1/2 from Veritas – with V11 – against my own beech try plane sizing plane bodies from rough. The aspects of the beech plane other than the iron made it better for the work and I could do more actual planing volume before resharpening.

I was so pleased with the smoothing test, though, that I used the V11 iron and made a bunch of XHP irons for jointer, panel plane type work and smoothing. In work where the wood wasn’t already flat, like jointing rough wood edges, V11/XHP fell flat, nicked more easily and took longer to hone or grind. What worked well in the test didn’t turn out to work well in real life woodworking. Unless you are only smoothing wood, which I guess some people do, and then maybe it will work out for you. Continuous cuts in wood are the minority for me.

Lesson learned. I made knives with the rest of the sheet of XHP that I’d purchased and sold the V11 irons in the middle of all of this, anyway.

That’s important as background for why this test is just real work and not a controlled setup where you can measure everything and ensure everything is fair.

The Wood and Planes

Wood: Rough cherry sized for loft bed ladder sides. Same board ripped in half. The two subject planes and irons each clean up and flatten one half. No other planes.

Irons: Magnacut and a house O1 tapered iron hardened and tempered to about 61/62.

Planes: For Magnacut, a very clean and flattened T20 Stanley #6. For the O1 iron, a heavy cocobolo coffin smoother that I made years ago, larger than a typical coffin smoother, and heavier. 2 1/4″ wide. The plane isn’t new, but the iron is new. One I made this year and have used little.

Cap iron set: about 2 hundredths from the edge. Not a fine smooth set, but more like a try plane set.

Bevel conditions: Magnacut – factory bevel ground a little shallower than as arrived after initial planing, so second bevel. The O1 iron is also likely first bevel, possibly second.

Sharpening: freehand second steeper bevel set by india stone and then finished on an oilstone with diamond powder followed by 1 micron diamonds and a strop. This isn’t needed with O1, but diamond finish is a good idea with anything that has vanadium greater than trivial amounts. No physical difference in sharpening method or observed edge.

Planing: same shaving thickness for both planes based on observation.

Acquisition of the irons: purchased the Magnacut. Made the O1 iron.

(I think it’s important to note that the iron was purchased at random, I did no contact the seller and have on bias about how it will perform either way other than the hope that it would offer a “V11-ish-but-less-nicking” type experience based on micrograph pictures and toughness data )

Pictures Backs of Irons after Planing

Pictures at 150x have a height of .019″. 300x pictures, half that.

First, the Magnacut iron pictures. See the descriptions under each.

Magnacut - 1 micron freshly sharpened edge. Focus on edge uniformity and less on the wide polished flat area.

Magnacut – 150x – 1 micron diamond edge finish. Focus on the edge when looking at pictures and not the abraded flat area. This is an edge about 2 to 3 times finer than an 8k waterstone.

Magnacut – 150x – undamaged length of edge after planing. Note, the edge has become a little bit more round with wear and probably some shortening of the iron length.

Magnacut – 150x – typical smaller denting along much of the edge.

Magnacut 150x – largest deflection damage

Magnacut 300x – typical edge areas with small deflections but also looking for carbide size. No large carbides visible, but wear may not have been enough to expose them. Smoothing with a close cap iron makes it easier to find carbides. No seeing any at all does help confirm that the production steel is fine like the micrographs of earlier batches show. The smudgy smooth look is wear.

All in all, it planed pleasantly, but the nicking did leave lines on the work. The large nick shown left a relatively wide very visible nick. It was at the corner of the iron, or within about 3/8ths of the corner.

Total time planing was less than 10 minutes with both planes used here. The damage is a surprise, along with relatively common back and forth between smooth edge sections and areas of small nicking. If the O1 pictures show much better, a more careful test will be needed with two irons in the same plane honed using a guide and an angle setter to ensure fairness.

The damage that’s shown is the type that leads to an iron feeling dull and refusing to cut as easily before much wear has occurred. The same as I observed jointing edges with V11 and using a jointer on jack-planed board faces. Without a direct test, I couldn’t say which of the two (V11 vs. Magnacut) performs better.

Second – O1 Iron Pictures

I did not take as many O1 pictures as I wasn’t yet sure I’d post anything of this test without confirming the results in a follow-up test. There was also no edge damage anywhere on the O1 iron, which lessens the need to show “typical” and “worst” damage on the edge.

The second reason this wasn’t a pre-meditated test, but more like middle of the process idea, is that coffin smoothers – even heavy ones – will beat up your elbows if you try to do too much non-smoothing work with them. My elbows were already well-used for the day, and they were feeling the punches from the coffin smoother. Moving to the 6 (normally would be wooden try plane) was a way to lessen the pounding.

At any rate, here are the two pictures:

O-1 Plane Iron – 150x – Typical Edge Wear. Note there is no damage anywhere on the edge, but you can see that the wear is greater in the same task. The O-1 iron did a little bit more planing due to some twist on its side of the board, but not enough to explain the greater wear by itself.

O-1 Plane Iron – 300x – Searching for carbides again. The light colored dots that you can barely see are probably carbides. Confirmation again that it’s easier to find them when wearing a pronounced shoot groove on the back of the iron when the cap iron is set closer to the edge. Note the wear smudge, but edge uniformity remains excellent.

Again, no damage pictures to show, so the story for O-1 is short.

The surprising results call for: 1) Picking an iron to test against Magnacut in the same plane, 2) using a honing guide to make sure the results are as fair as possible.

These pictures show what I believe was happening when V11 suddenly didn’t perform as well on my bench, too, unexpectedly showing nicks and leaving lines on work and ultimately being more trouble to use than O1. Steels like O-1 and 80crv2 don’t have much wear resistance, but the difference in honing off 3-4 thousandths of Magnacut vs. just doing a routine edge freshen for O-1 is significant. When removing the damage above in subsequent honing with a guide, a brisk session on a 400 grit diamond stone and extra attention on the 1000 side still needed a second go to completely remove everything. Failing to complete that just means you’re starting with an already damaged edge.

Failing to remove uniform wear down to the very last bit without edge damage still results in a finished surface coming off of the plane.

So much for the short text idea.

Planes and Chisels – Is There a Need for Super Steels?

This article is really about the first two new plane iron steel options I’ve seen in a while, viewed both in the context of older plane irons as well as vs. Lee Valley’s V11, which was long ago outed on Sawmill Creek. XHP and V11 are used interchangeably here. The two new options are CPM 10V (sounds like V11, but much different composition) and CPM Magnacut. The former, like XHP, isn’t a new steel. The latter is. But to my knowledge, 10V hasn’t been offered as a production plane iron in the US previously. Now, on to the story….

Somewhere in the early 2010s, Lee Valley introduced their V11 plane irons. Based on XRF (analysis) of the composition of those irons, they are either CTS-XHP or something very close. XRF analysis still doesn’t provide carbon content, but the rest of the alloying was on the mark.

What is XHP? It’s a high-carbide-content and relatively high carbon powder metal steel that’s almost stainless. The carbides are generally carbon and chromium, without what is now more typical in popular steels – harder smaller carbides like vanadium and niobium.

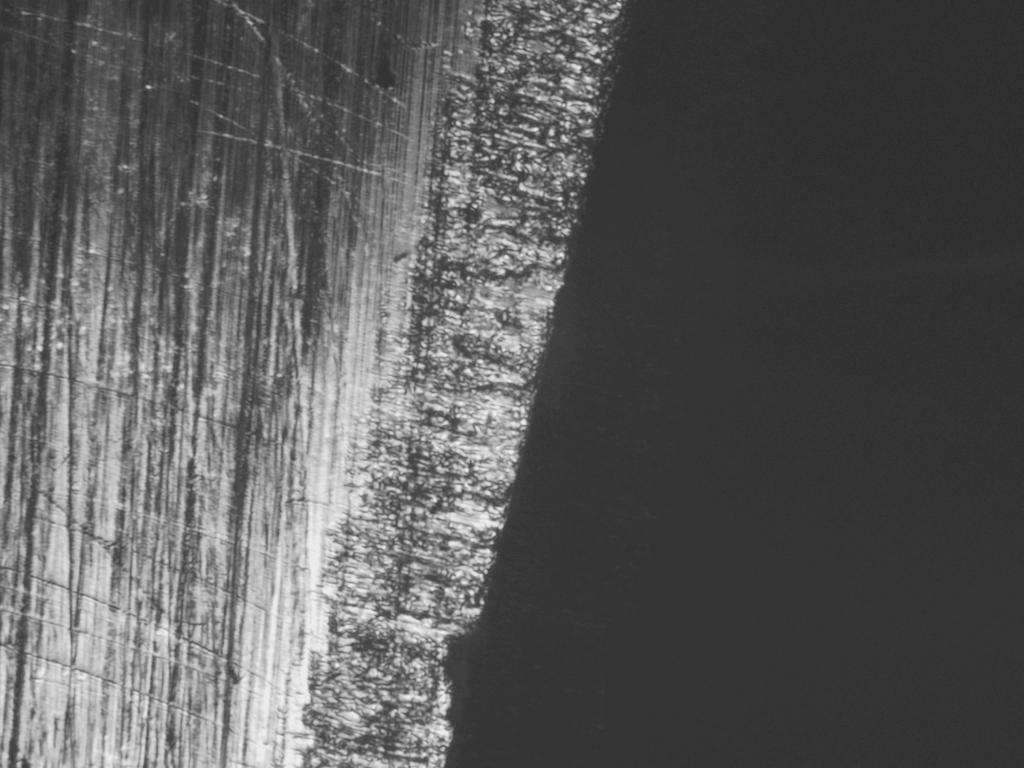
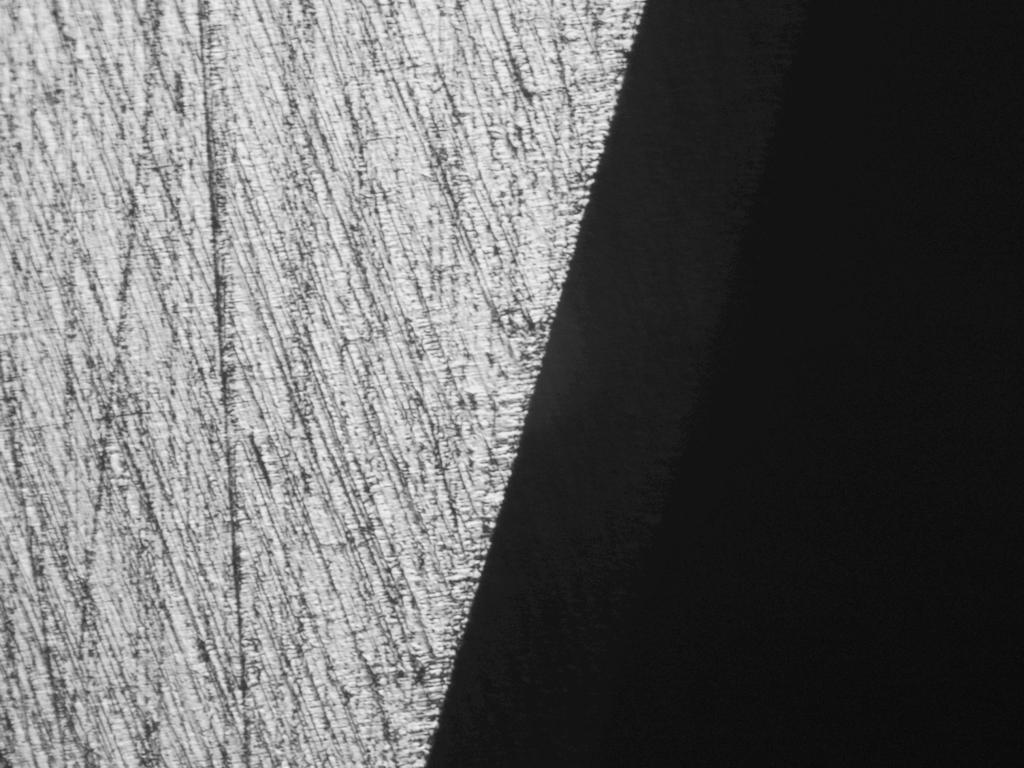
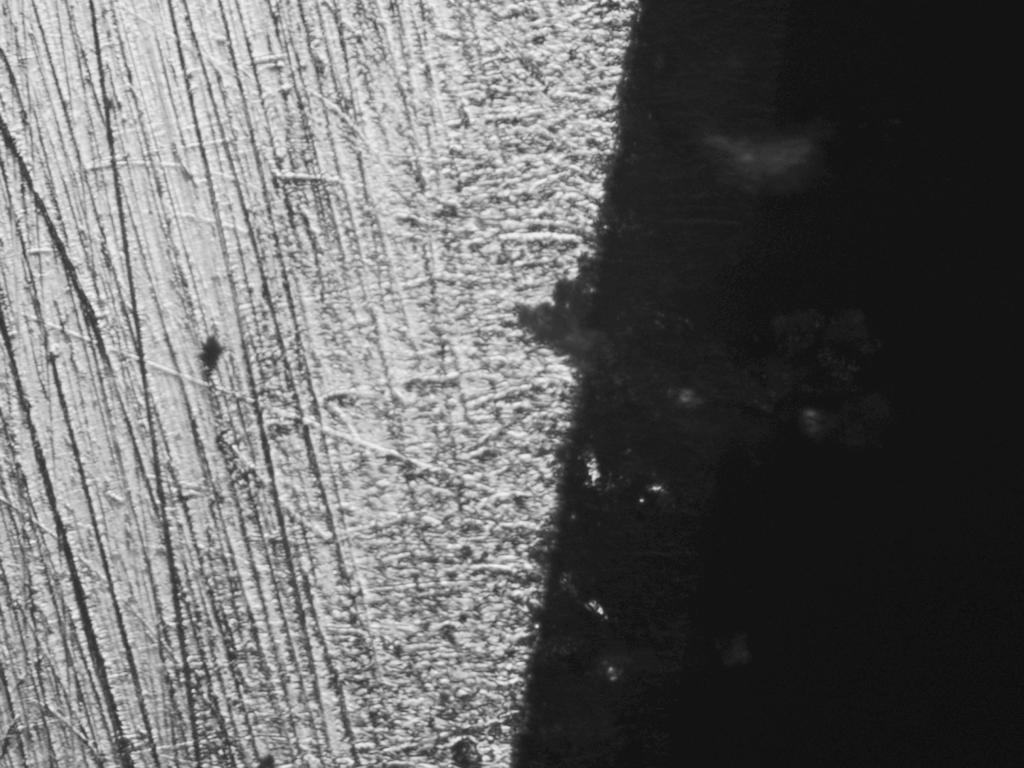
What XHP has is wear resistance. In spades. You can experience this by planing an edge with one of these irons and then planing an edge with O1 or A2 or whatever else you’d like, carefully preparing each iron the same way. You’ll find that V11 will plane about twice as far as a good O1 iron.

What I’ve found since doing the same thing is that there’s not much regular work where I can get that interval to hold up, but it should last longer. It will take about twice as long to grind and twice the effort to remove a similar amount of metal on a sharpening stone, too, but the abrasion resistance is double so the fact that it won’t hone as fast *when you’re abrading it* shouldn’t be a surprise.

V11 Came and Went and Little Else Followed

The rumor being passed around when V11 arrived was that “Lee Valley developed a new steel”. This is extremely unlikely given what they mentioned their costs were. It seems more likely that they tried various steels that already exist, and based on how they typically operate – sending tools to users for feedback before full production – probably solicited feedback.

It’s my opinion so far that if you really feel the need to dip your toes in something that wears longer than older steel, the inexpensive Chinese high speed steel irons and V11 are the only reasonable irons that return what they say they will. It’s possible that there is a powder D2 iron out there somewhere that could also be included in that, but if you buy a conventional D2 steel iron, you’ll find that it has large carbides that are poorly distributed and they will be big enough to fail even in sharpening and then the iron will be notchy or gritty and leave lines on work.

Before these irons, Academy Saw Works made M2 irons that were good ,and Stanley Hobart did, too. The former were too expensive for them to make economic sense woodworking if that’s important, and the latter probably are only easy to find in Australia and maybe no longer easy. None of these were ever widely sold, though. There were also other small batches made in the US with CPM steels – 3V and M4 at least.

In my opinion, Lee Valley was concerned that someone may make an iron with the same steel if they had just called the alloy what it is. I don’t think this is likely, but at the time, who knows. Why wouldn’t it be likely? XHP isn’t really widely available and when it is, it’s very expensive. The option when steel isn’t available is to order a melt of your own, but the average small maker isn’t going to do this either. I don’t know what Lee Valley does, but I would imagine that they do enough volume to order or trigger a melt being done for their order. The rest of us, you can get CTS-XHP at retail from a retailer that specializes in carpenter products (I don’t recall the name, but if you search for XHP bar stock, you’ll find it – I only remember the background is red at the site), but you’ll find the bar stock itself will be $25 or so per iron that you make. This is *a lot* of money compared to other conventional steels.

So, the fanfare came and went, and the market got little more educated, it seems. One of LVs fans suggested at one point that I should “leave the steel to the experts”, which I thought was humorous. A few more educated individuals called out the idea that the composition of a steel being secret was nonsense in a world where it’s touted in knives, and XRF tests are often done publicly to line out retailers who sell things that are too good to be true.

I was pleased enough with a test planing clean wood that I made myself a set of XHP irons, tested one against V11 and found it was comparable. And then, I started back to regular woodworking and found that once the wood wasn’t already clean wood, I couldn’t get the same interval, and the chipping and other things that can occur in regular work took longer to hone, and I eventually just went back to plain steels. I also sold off the three V11 irons that I’d gotten in the past – no bueno for me. For a beginner who has a prescription honing method and will never progress, maybe that’s different. I still have my XHP irons, but they’re not in any other planes.

From time to time, I’d see custom made irons sold on ebay but consider the cost mentioned above, then the cost to get a small batch heat treated and ground and what will you find? irons for about $100. We’re not the knife community, and LV charges about $10 more for V11. They’re not lining their pockets – in my opinion, they have been the only reasonable option if you’re not going to learn to sharpen faster and find out why plain steel irons are all that really ever sold in volume. And most woodworkers are going to imagine woodworking more than they do it, so this is probably most of the market.

So, from my point of view, that’s where we are. Lie Nielsen is still using A2, which I would assume is for their convenience because it moves little in heat treatment. They may tell you otherwise, and so too may other retailers. A2 does cost a little more in bar stock form than O1, but we have become so lacking in skill as a society that heat treatment services are cutting back what they will heat treat with several posting notice that they will no longer heat treat O1 steel. Lie Nielsen did mention that their heat treatment service or perhaps a separate service informed them, too, no more O1.

So, What’s the Point?

Two things – First, I’ve found over time that the steel in the iron doesn’t matter that much if it’s not defective. Your ability to use a plane properly will dictate how much you get done, and on the chisel side of things, V11 isn’t that great in my opinion. What it has is hardness, which often allows beginners to get an easier sharp edge, and hardness does help a chisel in a side by side test. However, when I did a chisel test making an article about the Unicorn method, i didn’t find V11 to perform better or as well as some other lower cost options. This isn’t a surprise – abrasion resistance is a cutting or planing boon, but not so much for chisels. If you imagine yourself paring a chisel until the edge is round, it’ll never happen.

Second, over time, I’ve realized that most of the people who talk a lot about hand tools use them relatively little. They become indignant if you suggest that, but it is certainly the case that if you don’t do much work rough to finish with hand tools, you’ll have an unreliable opinion about what hand tools are actually capable of. I would refer to this as some woodworking, but a lot more imagining woodworking. Imagining woodworking leads to things like focusing on backlash, scanning tool reviews in fine woodworking and buying what’s recommended. Woodworking is finding something acceptable and learning to use it well, focusing on learning incremental little bits that make “well” better and better.

An example of woodworking vs. imagining it and what the result is is using a plane with a cap iron. Few people do it, but it’s at the core of getting a volume of wood planed between sharpenings. A common stanley iron used with a cap iron will do several multiples of the volume of work that a V11 iron will do without using the cap iron. Something I also found when I believed the converse early on – even a wooden plane with an iron that wears less long than O1 will outwork a metal plane *with the cap iron set*. That doesn’t seem like it should be, but it is the case.

Another example would be use of chisels – a good worker can use any decent chisel and figure out how to set up the chisel so that the edge doesn’t fail. This is rarely discussed online. I’d call this the magic of experience. Sometimes we don’t even know what’s causing the improvement, but it occurs just with experience. Sometimes the changes are conscious.

Long story short, if there is a mention about how revolutionary harder or more abrasion resistant irons are, I generally assume that the person making the statement hasn’t done much hand work, or if they have, it’s been a narrow bit of work done after shoveling wood through power tools, with significant sanding always being the final go after the plane finishes. If that wasn’t the case, we’d see a lot more posts asking how to stop iron nicking.

So, is there really any need for someone to work their way through lists of steels that aren’t designed for woodworking and see if any are “better”. I think V11 offers a fair bargain in some cases (effort to grind and sharpen is in proportion to more plain steels as long as work doesn’t nick the edge). Higher hardness PM D2 would do the same, at least as well. So would high quality M2, which could be done inexpensively and just isn’t. I think the answer is no – but someone could, anyway, for curiosity and also because while few will admit they’re just practicing escapism with hand tools, most are.

And just recently, I noticed there are now at least two available small batch options – CPM Magnacut and CPM 10V

Magnacut is a small particle / small carbide stainless, and 10V is a higher carbide volume steel that’s “kind of” similar to V11 except that the carbide volume is mostly vanadium carbides and not chromium. Magnacut is vanadium and niobium.

What does that mean? Both of the steels above have smaller harder carbides than V11. One technically wears longer (10V) and one doesn’t (magnacut).

Magnacut can achieve about the same hardness as V11, is far more stainless, and is tougher with finer particles. Going deep into the properties probably isn’t worthwhile here, but it would appear that Magnacut will have an edge life about 90% of V11/XHP in abrasion tests – only time will tell if it handles rougher work better than V11.

10V can technically reach edge life intervals of 40-45% longer than V11. This is bonkers long. It is also going to be tolerant to heavy handed grinding as the tempering range is above 1000F. You can brown or blue the edge of it.

This isn’t true for V11 and Magnacut, which will both hone and grind with more heat than more plain steels, but they won’t tolerate more heat.

The Magnacut irons are made by Lake Erie Toolworks, and the 10V irons appear to be a test run by a toolmaker in Chicago. As of this writing, the former are about $90 with tax and shipping, a little more for wider irons, and the 10V irons are $50 – but only available in 2″ size.

I have bought one of each (not given, not offered to test, nothing like that – I just bought them full price. Anyone reviewing tools to make a video or get free stuff – no bueno). I think either has potential merits, just like V11. based on some initial planing and sharpening with each, I don’t think they’ll be great for rough to finish work, but people like me aren’t the market for these irons, so I’ll address how well they work from the context of someone who would also buy V11 and feel like it makes a big difference.

Where to get Information on the steels

Larrin Thomas has the most accurate “usable” information I’ve seen anywhere. Larrin isn’t a woodworker, and I haven’t convinced any knife makers or other folks that maybe there’s something different about edge properties in woodworking tools, but the information on the site is generalized, so it won’t matter.

It’s semi-technical. That’s what you need if you want to actually learn anything. If you want a one paragraph narrative that uses word like “super fine grain” or “really tough”, without explaining those things, you can read woodworkers or watch youtube channels who really are only there to sell you things.

For information about XHP, 10V and Magnacut, see the following:

Knife Steel Nerds on XHP

Knife Steel Nerds on Magnacut

Knife Steel Nerds on 10V

Lastly – 10V is not new, and it’s widely used for dies and other industrial purposes where high wear is needed. Magnacut is new – it’s something Larrin developed and if you want to read further, you’ll find that it’s more or less a Stainless version of CPM 4V – that’s loosely put. 4V would probably be a good option for woodworking, but while magnacut and 10V bar stock is expensive, 4V is hardly any less expensive itself.

XHP has been around for a long time. You can ignore Larrin’s distaste for its carbide size – knife steel fanatics are obsessed with toughness, but there are other properties that are ahead of it to a reasonable point for woodworking. We don’t put tools in tree stumps and then see how much energy it takes to bend them over and break them.

Oh, and if you’re wondering about XHP/V11 being “almost stainless”, for woodworking purposes, it’s stainless. Even for reasonable kitchen use, it would be – I’ve made knives out of it, too, and while it can take very light staining in regular use from certain foods, I’ve left it unwashed in a drawer to find no rust later.