The Infamous Cap Iron Video- it’s Worthless for Setting a Hand Plane

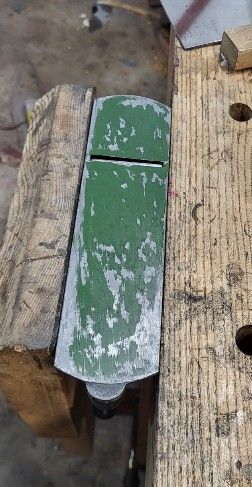
The cap iron video from Kato and Kawai was never intended to provide instructions or a basis for setting a cap iron. How do we know? K&K actually flatly said that. So if you’re telling everyone “it’s just science” that you should use a flat 80 degree bevel angle because you just watched the video and now you know enough to be a doctor of planing, hold your horses and get some actual experience.


So, this whole cap iron thing has made rounds in two different places lately. One of the things that annoys me is it’s brought back up and Nicholson described how you should set up the edge of a cap iron 200+ years ago. It should be rounded. I found out about Nicholson, I don’t know when – probably five years after writing the cap iron article. When I wrote the cap iron article, I was working wood entirely by hand. the only reason I’m doing less of it right now is because of the metalworking.

If you go back and read my article, there are two flaws in it. One is Ellis (the editor) left some tearout in the picture and I am horribly disagreeable – I didn’t like it. I also had become recently aware that being disagreeable and stubborn wasn’t infrequent like I thought maybe it was. Ellis thought the picture was interesting because it showed one of his first few attempts on quartered mahogany, and that removing a lot of tearout from something that couldn’t be planed before was valuable or just as valuable. I didn’t really agree that it was valuable enough compared to showing no tearout, but feeling like I had to get over being disagreeable, I let it go. I’ve heard about the tearout in that picture a lot – but usually from people who pride themselves on opinions without accomplishments.

The second thing I let go was the article at the end saying that it was based on information from the Kato and Kawai video. It wasn’t. I figured out how to use the cap iron on my own as a swan song before quitting woodworking. It worked so I didn’t quit. Bill Tindall sent me a message (email) when I started posting with elation about the world soon changing for hand tool woodworkers. One plane under your bench if all you do is smooth – to replace the myriad of suggestions. Bag the idea of buying infill if you’re an everyman. It’s a waste of money to buy lots of stuff but more importantly (money wasn’t a problem for me), it’s a big waste of time and it also has a little bit of the “i’m a fraud” feel to it if touting that you know 14 ways to slowly get rid of tearout when one works better than all of them 99% of the time. Bill’s message was that they he and Steve Elliot were digging up info from the K and the other K in Kato and Kawai. I think, Bill will remember every detail, maybe they were conversing with only one person. At any rate, there were a bunch of documents and the videos. He sent me a link to the videos before they were public because no permission had been gotten yet in terms of sharing them.

When I described what I did on the public forum, with elation, and as much “best thing ever” excitement as I could, I thought for sure three or four people would try it, see that the Jesus Christ of metal plane parts was right under our nose and we would be saved. Instead, most of the responses were “that doesn’t work, Chris Schwarz says so” or “of all of the people I’ve met or made planes for, only one person other than Warren ever said they use it”. I have no idea who that second person was, by the way.

I either didn’t remember or later forgot the article (on woodcentral) said that it was based on the video. This is an important piece of horseshit for two reasons. The video leads you down the wrong path when setting up a cap iron on a hand plane. You’ll watch it and assume you want to have a plane with an 80 degree flat wall facing the oncoming shaving and have it twice as far away as you would otherwise.

I tried it, it worked like shit compared to a rounded edge. Why I rounded the edges, I don’t recall exactly but it just seemed to make sense. Making sense isn’t worth much, though. It proved to be better in actual use with a shallower flat bevel being an option – pretty sure I wrote 50 degrees if you couldn’t be bothered with curvature. 50 degrees is “fine” like food with decent flavor and a bad texture is “oh well, it’s fine”. That kind of food is a hell of a lot better than an empty stomach, but it’s a missed opportunity. A 50 degree flat bevel will do most things, but it will struggle a little in finer shavings in the worst of woods.

I saw the video as maybe a way to hit people up with some moving pictures and then smack them upside the monitor with a bunch of info about what actually works well in hand tools. But I wanted to avoid the idea that you need to measure things and that you could just take something from the video and have everyone doing it. the “80 degree” setting was subpar and increased the chance that you’d either have the plane stop you in your tracks or leave a fuzzy surface. What’s the point of ramming the shaving so hard back into the wood that it’s compressed and the planed surface isn’t smooth. There isn’t really one. Quickly upon finding a tolerable resistance level planing, you’d then find the thing was too far away and not preventing tearout. The rounded profile suffers the ills of neither the shallow or steep single bevel.

I found it by experimentation, Nicholson documented it long before. It’s too stark to avoid noticing unless you’re only taking tiny thing shavings. If that’s all you’re doing, your advice is no good for anyone doing more. The same is true about general plane design, setup and use if you’re only smoothing and fitting joints. You will never know as much about planing as you would if you did five hundred board feet entirely by hand. Same with sawing and so on. You learn things whether it seems like you wouldn’t or not. What is is. What you imagine is common sense may not be what is.

So, the Video Does What?

The video was apparently a segment to show at a conference in the USA, and according to Bill, the professors stated that it’s not intended to be a guide for setting anything, and Bill mentioned further that the stuff shown in the video didn’t even make the final documentation. The documentation was involved in edge wear profiles and planing kilometers of wood with a planing machine trying out different steels. They found, drum roll, that highly alloyed steels lasted longer, but the wear profiles (going from memory here) also show belly and lack of clearance that the machine can power through that none of us would ever come close to doing. I think Bill was interested in finding a secret to longer edge life and the chipbreaker video was a side show that he provided because I brought it up on a forum. I don’t know if he would’ve worked hard to get permission to show it without the discussion, I think he would have but how it would’ve been presented, I don’t know.

I remember Bill saying there was a separate paper discussing setting up the cap iron with students, or I thought it was maybe students (one of “the K’s” students in Japan). Doing some digging this morning, it was students. The separate paper for hand plane setting is brief, doesn’t explain much and has some comments that are not relevant for western planes. It does not give parameters for set distance or angles, it just says you can’t set the chipbreaker by eye and you need to judge the shaving and perhaps even measure it.

Well, you actually can’t see the end of the iron in a good dai, and if you’re looking in from the bottom, you have a very poor view because you’re relying on seeing depth. So their advice makes sense in Japanese planes. On a western plane with screw together parts that go in, of course you can learn to set it by eye – you can ignore K&Ks suggestion that you can’t. That’s what I was suggesting early on – learn what looks right and then just set it. It took me a week with no instruction to get this. I was planing a fair amount, maybe several hours worth of just planing that week, but it was still just a week.

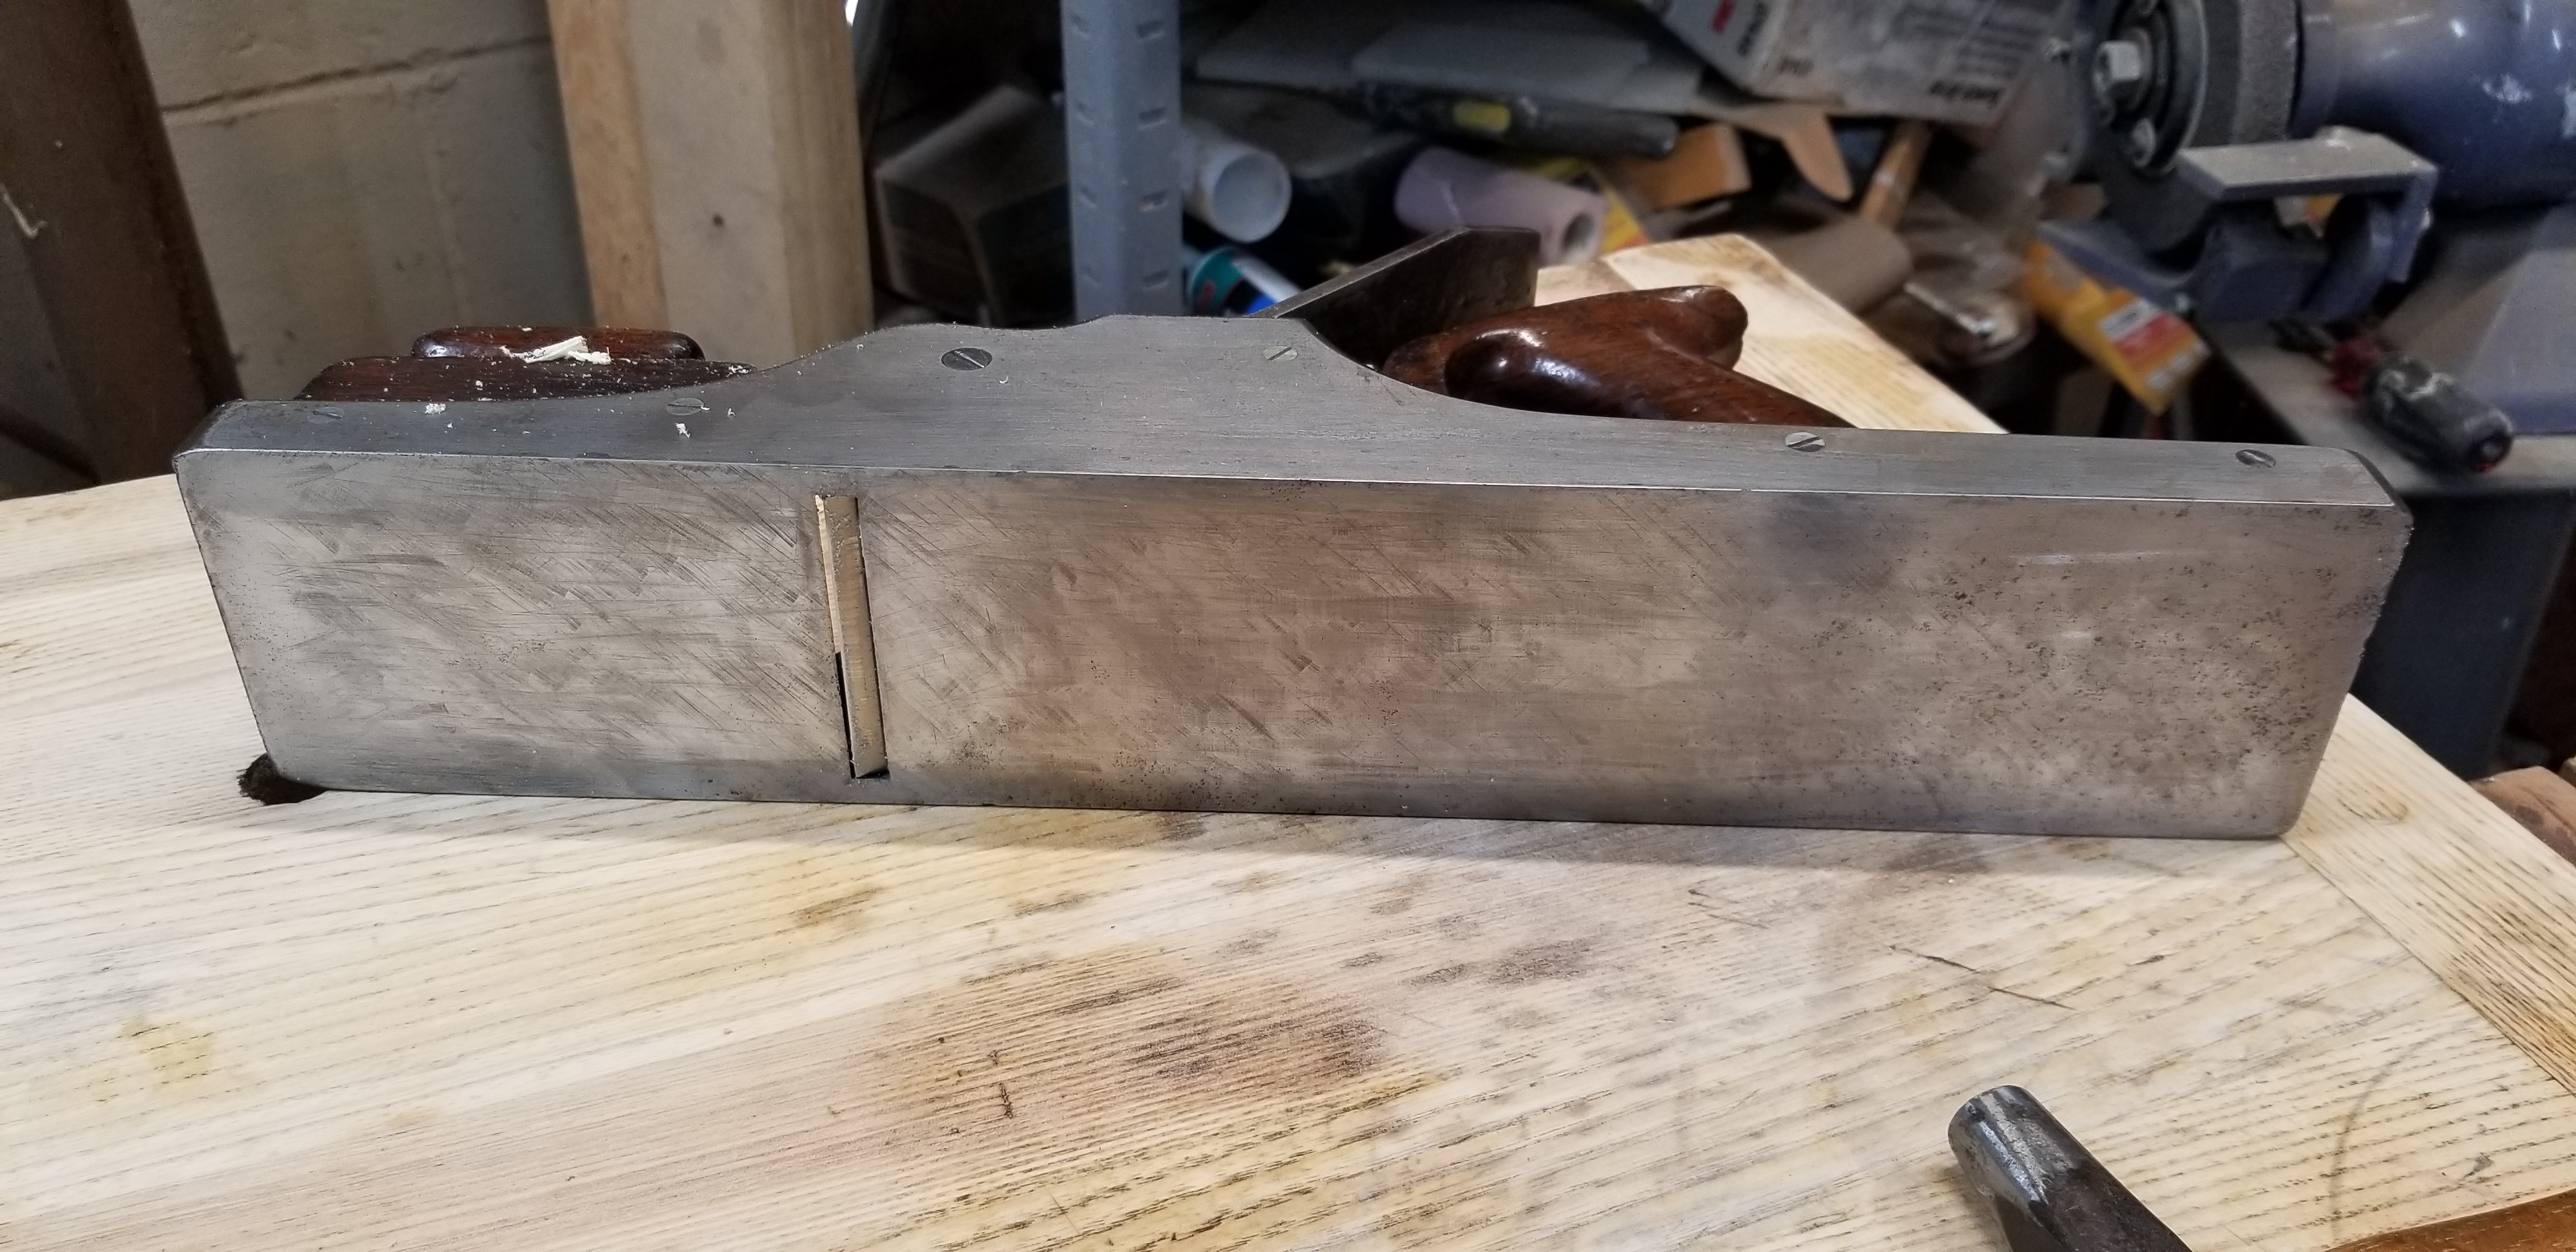
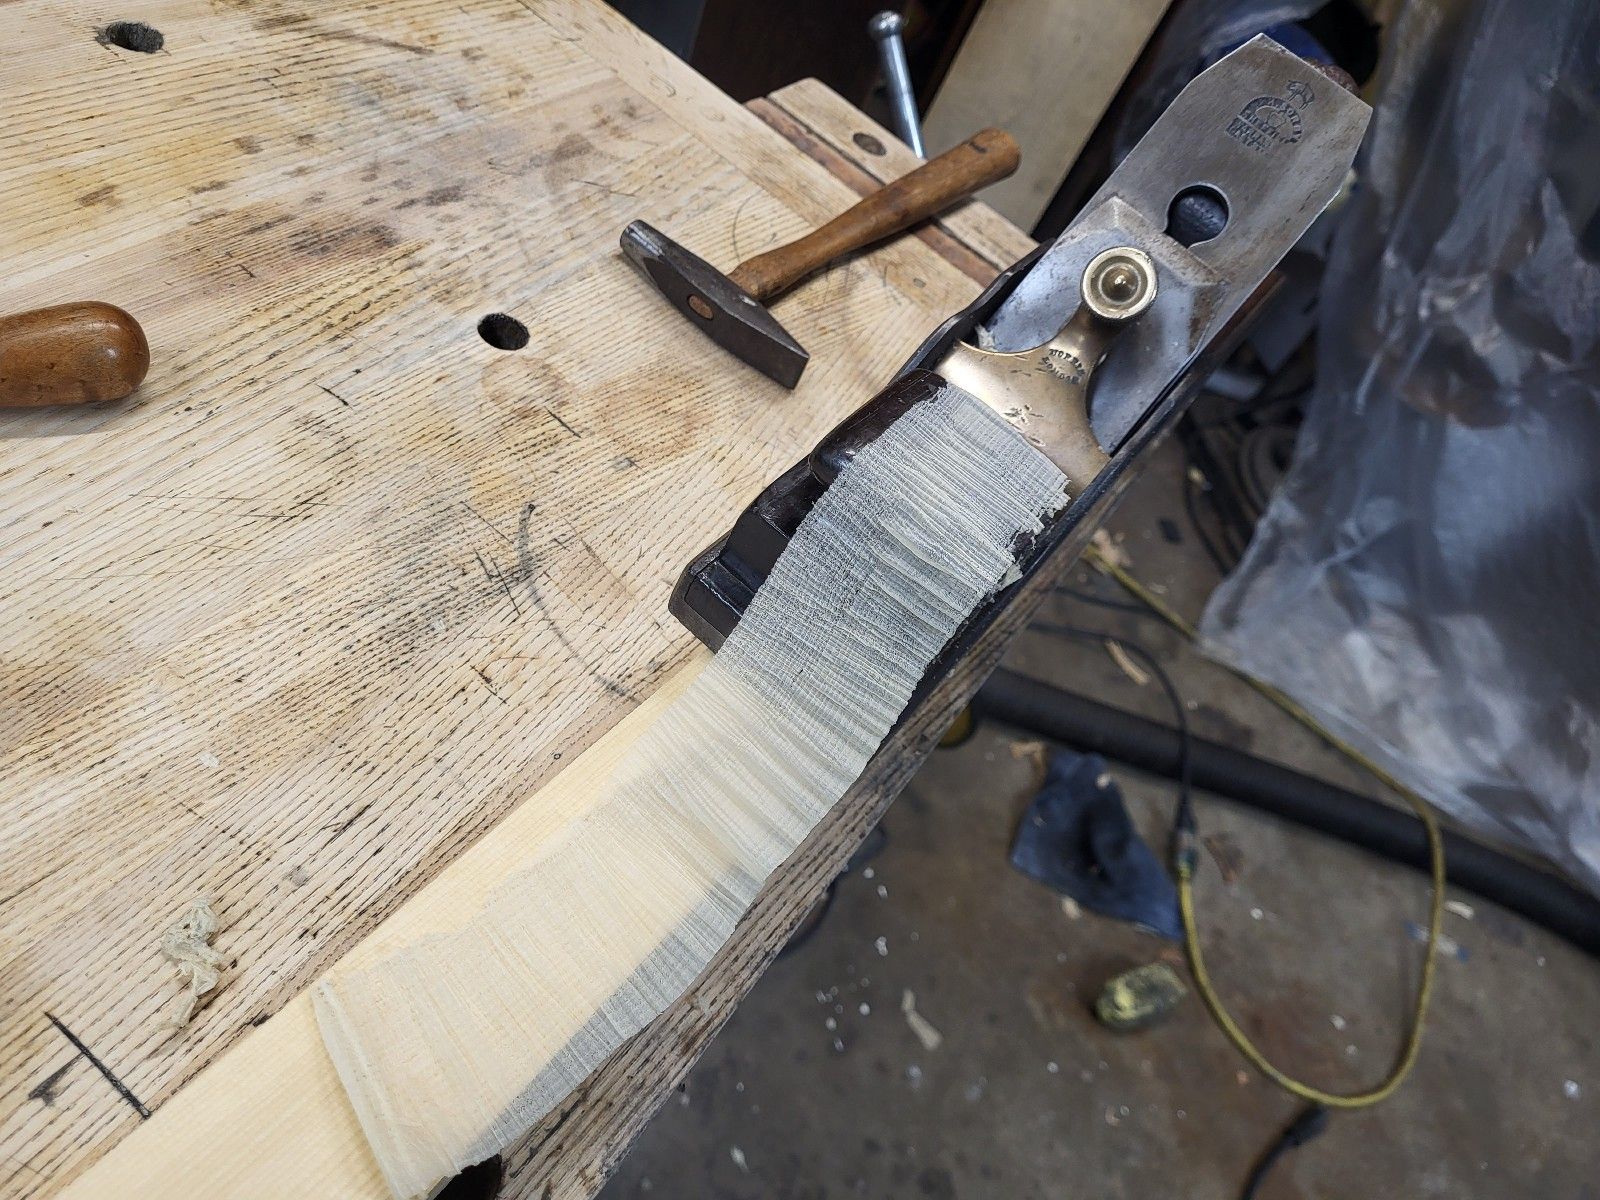
I think all you need to do is look to see if a shaving is worked if you’re not sure. if it’s starting to straighten out, there is influence and you won’t have a disaster. Noticed in that picture with curly hard maple, the heavy shaving is flattened in areas – there is a feel that planing has when the chipbreaker is engaged.

That’s all the K&K short hand tool article said, though, set it by watching the shaving and Bill was a little unhappy with it. I think like most folks would want, he wanted instructions that were clear? I could ask him -but I’ll go with the guess. I think he doesn’t care. He uses the chipbreaker now quite a bit on furniture work – especially cleaning up junctions and such – and sets it by eye.

The video gets passed around and this part is important – the very guys who put it together said it was not intended to be used as advice for setting or doing anything.

If you’re working by hand, believe what you get for outcomes and what comes from your own hands and nerves and discernment. It’s not that hard.

I didn’t think I found something new when figuring the chipbreaker out, I thought I found something old and at the time, I was definitely pissed that the Chris Schwarz’s of the world wanted to be a source of information but couldn’t figure it out. Using the chipbreaker should be taught at the same time someone is taught about basic sharpening and the adjustment features on a plane.

Oh, and why wasn’t the student paper that big of a deal in Japan? I don’t think anyone does much planing with planes in japan on things like day to day work on building beams and doesn’t set a chipbreaker. Why didn’t we notice it? well, if you don’t know what the chipbreaker is doing, it’s easy to not notice shaving shooting up out of a plane instead of over the iron and back. And a second reason for it is if you get on youtube or the internet and you want to see Japanese woodworkers planing actual work – and not someone teaching students or appealing to tourists, you need to find things that are listed in Japanese. Google’s functionality in youtube still does a terrible job of finding someone planing a beam in what looks like a legitimate workplace.

If you look at this video or this video , notice the shaving come straight out of the plane even though they’re not that thick. Why? I would guess because planing a beam like these without a chipbreaker is a very bad gamble.

This is actually what I thought I’d find out with the chipbreaker – a way to go completely to Japanese tools, especially on smoothing. It just didn’t work out that way.

Updated Thoughts on Scraping Planes – There’s no Practical Gain

If you’re reading this, you may have seen the Youtube video that was superbly done by someone in England. That being a very clear description of scraping cast iron.

So, I scraped 7 planes. Two infills and five Stanley planes. It may have been 8. I planned to scrape 1, but 8 just happened.

I had two Starrett straight edges, and now three. My 24 inch straight edge is a walk about for the shop and it has seen a lot of wear. There’s really no abuse outright, but it’s a $30 (square edge) and the corners are what you try to use if light does not go under the flat edge. And with a blunt square edge, it’s easy to get something flat enough that no light shows. Those edges take wear and it gets a little difficult to tell if you’ve addressed it cleanly with fine files and other tricks to clean it up. One of the easy things to do is check a surface with two parts of the straight edge. Scraping afforded the ability to get things flat within a fraction of a thousandth of an inch and start to see these differences.

So, I went out looking and found a starrett #386, thinking it was a #385 at less than half price, but it’s actually a lighter version for drafting. Fortunately, that’s not bad. But I got it for about 85% of going rate for a new one vs. 40% of the cost of a #385 (both being bevel edge). They have the same straightness guarantee, and I kind of like the lighter weight. It’ll be useful in the shop.

So, having gotten off track already – what’s the fourth? A 4 foot #385 that I bought new a while ago that never gets away from a carpeted area – it’s a reference until or unless something spoils that, but it’s also pretty heavy. And they have become off the wall expensive, so keeping it as a reference is fine.

Back to the planes. it’s very easy to scrape a plane to the point that a 0.0012″ feeler doesn’t have a chance. I found the bias I expected – that the toe and heel on my planes were above the mouth – and I’d also grown accustomed to liking that. It affords some control that makes planing a straight edge just in the process of planing off roughness routine – no extra staps.

A Dead Flat Ground Plane is Not Better Than Properly Lapped

What is properly lapped? Figure on something like a stanley 6, you can just get a .0012 or .0015″ feeler under the toe and heel using a good straight edge. This is a small number, but it provides a very practical benefit. When you use a tool room granite surface, this level of error looks enormous, but it also doesn’t take that long to scrape out, which is where the 1 became probably 8.

Can I tell any difference in use? I have to be honest, I liked the planes a little bit better before scraping, except for one or two that I was lazy on and didn’t finish the lapping job. For years on the forums, we have heard that you can’t do anything practical to a plane that compares to a surface grinder. Since I have quality straight edges and feelers, I could quantify what kind of error I was creating (intentionally) when lapping, but you may recall if you’ve read any of my conquests that I would also file the center out of a plane draw filing if it was that far out or already convex.

A person with a file, knowledge of planing, and a good straight edge will give you a plane that will suit you better than someone with a surface grinder. A person who doesn’t have that knowledge could lap your plane into a banana.

The idea that you can’t address cast iron or steel, even significant amounts, by hand, is bullshit. I get tired of reading the sentiment from people who don’t have experience with both types of tools – one properly lapped and one surface ground or 10 of each, or whatever. It’s usually someone with knowledge of something other than woodworking, be it manufacturing and testing things (like a lab engineer) or machining. I never see a legitimate long term hand tool user ever muse about machining being something that’s needed.

Rather than only scraping, as i’m getting close to a scraped surface being flat, I’ve followed each repetition with some focus on some light lapping of the tail of the plane being scraped. It’s a tiny amount of insurance that the tail end isn’t dead flat or even a miniscule amount low, but even just that little bit makes the outcome better than flat to the reference surface. Flat to the reference surface end to end is practically lightfast on the starrett straight edge, even leaned, edge to edge and corner to corner. An example group of pictures follows with a Norris No 13 panel plane.

Those pictures just show an iron that’s quickly sharpened fine india, hard ark (not the most expensive kind, slightly more coarse) and a quick buff strop. The wood is yellow cedar, though it doesn’t really matter what it is. A lower angle plane would be better, but this is just a quick thing for feel of what the plane is doing as the tail end comes to the wood. You can’t feel it, but I can tell there’s no magic here that will result in better function. The last picture is an attempt at showing a reflection on the planed surface. Of course you’d expect this, but the improvement in cell phone cameras really makes these pictures disappointing. The reflection is glare and the camera really won’t tolerate it, even in manual mode – it’s just blurred.

Interesting things I found

My lapping did leave the planes I lapped slightly bandanaed, but less than my finest feeler in most cases. That was filing and lapping most of the time recently, because it makes it so easy to prevent more banana effect, and the file is *really aggressive and fast*.

But, I also found that I had slight convexity across the width of planes and my lapping made the “error” slightly on the diagonal as the reference plate showed. I say that partially in jest, because it was an error only in the sense of being able to measure something other than straight and true. In reality, it was a nicer plane to use, and all of the absurdly thing shavings I’ve shown were with those hand lapped planes. The scraped planes don’t really do anything better, and the loss of the ability to ensure the far end of a board doesn’t fall off just by pressure variation in a through stroke is a legitimate minus.

So, You Shouldn’t Scrape?

I wouldn’t say that. But I would say if you have a good setup to lap, or file and lap if you have a plane that’s convex, there’s nothing really to gain.

You can see in the plane sole that I didn’t take my time and scrape very deliberately, so some of the scraping marks are deeper than others and there’s no perfect pattern left. Some of this is lack of neatness, and some is that I did work over the sole with 220 grit paper on a block and a lap, so the deeper marks remain and the others are more faint.

I’m glad to have tried it, and it’s an easy way to make sure that what you have (even if you lap the tail and nose off a little) is very dead flat to start.

I spent about an hour each on these planes in total – some less, some more. To do a perfect cosmetic job would probably require using carbide (I used high speed steel) or really careful use of the HSS, which can burr and then leave deep scratches for a ham and egger like me.

This points back to sending a plane off to a machinist. if you’d like to do that, you can. I think it’s a huge waste of money, and I’d never send this particular plane off to a machinist, but to get dead flat and the same feel as this vs. lapping, i’d be disappointed shelling out money to have that. And I’m being prissy saying the next part, but I think modern surface grinding looks really cheesy on a vintage plane. It definitely looks even more cheesy on cheap imported planes that have really really deep surface grinding marks.

Making Amber Varnish – Part 2

Part 1 of amber varnish making left off with 600F+ degree resin that wasn’t really doing much yet. This is unique to Amber, and probably some bits of other copal. In most cases, you’re going to see something that’s completely melted long long before this.

As the time is passing and the temperature is slowly creeping up, the thermocouple passes 700F. This is probably dicey territory and important to not get here fast and blow past this level. Reality is the varnish will turn into black char if you do, anyway, but it could catch on fire and that’s bad. Potentially bad for a maker, too, as in getting burned.

I backed the heat off a little bit and stood by to make sure that was happening. The thermocouple is in the middle of the pot and close to the bottom to make sure I’m seeing the hottest temperature I can track. The resin sitting on top of the pile is certainly not this hot. At this point, it’s time to just let it go and see if it will melt.

And it does.

I’d prefer to never see 700F or above, but one has to experiment to find the point where you don’t have to go further and a couple of hours at 50F less and no progress is no good.

The resin look like it’s totally melted here, but it’s really more of a very viscous liquid and somewhat foamy. You can make other varnishes and allow the resin to settle, and maybe that’s possible with Amber, but I haven’t seen it. I have zero interest in seeing the resin start to solidify. You can see in the photo that the bottom temp is down a little bit and it’s back to letting it go for a while and looking and *just a little* getting a tiny whiff of it to make sure it doesn’t smell different – like burning. you can see a brownish hue to this. you can also see efforts at amber online where the resin is black – it’s burned in that case. Who knows? I’d rather not fully melt all of the resin and run with what i can than smoke the varnish and have something that’s no good.

The time between getting to 500F or so and then ending up here in the next picture where I’m satisfied things aren’t going to go much further without chancing burning the whole batch is probably about 2 hours. At this point, I’m stirring the resin every 15 or 20 minutes to make sure none of it is sitting in an unexpected cool spot.

What’s not shown in the pictures is that the oil is sitting in the pot around 560F, just hanging out there. In a lower temperature resin, it can be cooled some if desired, but in Amber, I just want to get resin and oil linked as fast as possible and everything liquid. This is from experience with copals – get a good varnish first, worry about trying to get something perfect some other time.

So, I back the temp of the Amber down to about 650F and pour in a little bit of oil and stir. I’m testing the waters to make sure nothing really strange or dangerous happens, and then I gradually introduce some more, and then just introduce the request quickly once I know it’s safe. And stir.

Holtzappfel talks about getting resin going, adding hot oil and “boiling” the mix. I don’t know what that means. it’s a little lively and I don’t want to make it any hotter. At this point, it’s 600+F and just holding it there forever is going to darken it, so I definitely don’t want to shoot the temperature higher.

You can see the lid of the pot – the dots on it are prior varnishes, tested to see if they are varnish. Just about every old book and every reference online talks about putting a drop on glass. I don’t bother with that – by this point, one lid is cool and I dribble a drop.

Three things can happen here: 1) the resin and oil aren’t linked, the drop is not clear and the feel is greasy, 2) the resin and oil are clear, linked, but don’t have much string, and 3) the long cook has left the components really ready and the varnish drop is clear and very sticky and strong in terms of stringing, almost like a glue.

If #3 is the thing, another quick stir for good luck and it’s time to get the varnish that’s made at this point off of the heat before the string gets too long and the varnish is a gel. Gel is no good – it’s a pain to handle, and my experience with the gelled stuff is it’s partially “spent”, as in when it dries, it doesn’t get as hard as wanted.

This stuff is pretty thick from the start, and the drop looks like this:

It’s a lot darker than the other varnishes on the lid because most of them are rosin or lighter copal varnishes. You can’t really tell, but the drop here is clear – it has no oily base, and it’s quite thick. The strings made by touching it are kind of fat and pull out to a long length that quickly looks like spider web.

It’s a candidate to come off of the heat right away to avoid ruin, and I do that by taking it off of the heat entirely and turning off the burner.

I’d love to let this get down to a really cool safe temperature before adding turpentine, but the first time was allowing the varnish to drop in temperature, it started to get thick enough that I wasn’t going to chance it.

I’m not going to tell you what temperature the turpentine goes in. It is much less than 600F – turpentine autoignites by various sources between 450F and 500F. Google says turpentine boils around 300F. From my experience, when it boils, it gasses off pretty quickly, so if you have to add it above 300F, there is a handy side effect that it will boil and somewhat self mix, but a less than handy side effect that it will also escape in some sizable fraction and you’ll have to add more.

This is one of the reasons why I use turpentine that’s $50-$60 a gallon rather than $40 a quart or more.

We have varnish now, that needs to cool to a temperature that won’t break a canning jar before being strained. I prefer the jar to metal cans just so I can see what’s in it. Jars are also a dollar each, roughly. Empty metal cans, definitely not.

Expected somewhere around a quart with no loss, but we knew there would be loss. Amber would lose some of its mass in the run to just losing trash we don’t want to keep, and I ended up with about 2 ounces of unmelted amber, as well as the gooey mess of stuff that’s around it – maybe another ounce, and quite a bit of turpentine escaped. As far as the rosin goes, who knows. it definitely did not leave a uniform layer of melted rosin early on – maybe it disappears from the run temp.

Because there is a bunch of unfinished junk left in the bottom of the pot, when I pour it, I pour it through a dollar store sieve, into a funnel that’s lined either with a paint strainer or stainless screen that I found on the internet, with the idea there being if the stainless screen gets clogged, I can possibly burn out whatever is in it. Pouring this directly into a paint strainer is a no go – the trash and leftover stuff just plugs the screen and then the paper strainer seam will give way and it’ll just all go into the jar.

Once this cools, I take it inside and add turpentine in to mostly top it off. I generously labeled this as 2 parts amber to 3 parts oil, but it’s probably more like 2 to 4, respectively. Since this is batch 2 of the amber, I figure in the future if the desire is to get something really stupid hard, the solution is not chasing perfection – just start with more resin.

In reality, this varnish is still very hard despite being a little longer in oil, it’s super tough and you can’t begin to touch it with a fingernail.

It should be put aside according to holtzappfel (and probably everyone) and allowed to settle. Holtzappfel describes a month as a minimum and the longer it ages, the better.

Why do I keep referring to Holtzappfel so much when there are much more extensive tests? Because it’s relatively low information compared to a lot of stuff like the German American book that’s public domain digitally, and I can apply it more easily and refer to it. The focus in it is cabinetmaker’s varnish, carriage varnishes, Japanning and spirit varnishes (shellac and other varnishes that are basically resin or other ingredients dissolved in a solvent). There are certain things described such as photograph spirit varnishes with Sandarac, and other things of the like, as well as kind of complicated little french polish recipes, but I think if they were great, we’d still be talking about them. Sandarac spirit varnish probably is excellent for photos – it’s out of the scope here, though.

The last thing I do, almost always on the first day, is take some piece of wood and dab varnish on it. It doesn’t have to be anything nice, but I want to see that with sunlight or UV light, it will harden relatively quickly, and if water resistance is desirable, I will make sure the test piece is flat and after requisite time (an hour or so in direct sunlight for a thin film, or five or six times that exposed to UV light from UV bulbs), just pour water out on the varnished test piece and let it dry. This will occur over some fraction of a day. If the varnish is good, you can observe that the water has dried or is shrinking and see no visual change or feel in the wet area, or the area the water has escaped.

In this case, I just took a piece of chakte viga that’s waiting to be made into a handle later and slathered some on. There is no drier in this varnish, so without light, it would take a very long time for it to dry. Varnish can also be baked to a quick and very good cure, but on wood, not that practical here – most test drops that I’ve done end up spreading out in the bake and they get darker, anyway.

Darker on the left is the varnished cylinder, and on the right is just raw wood. 
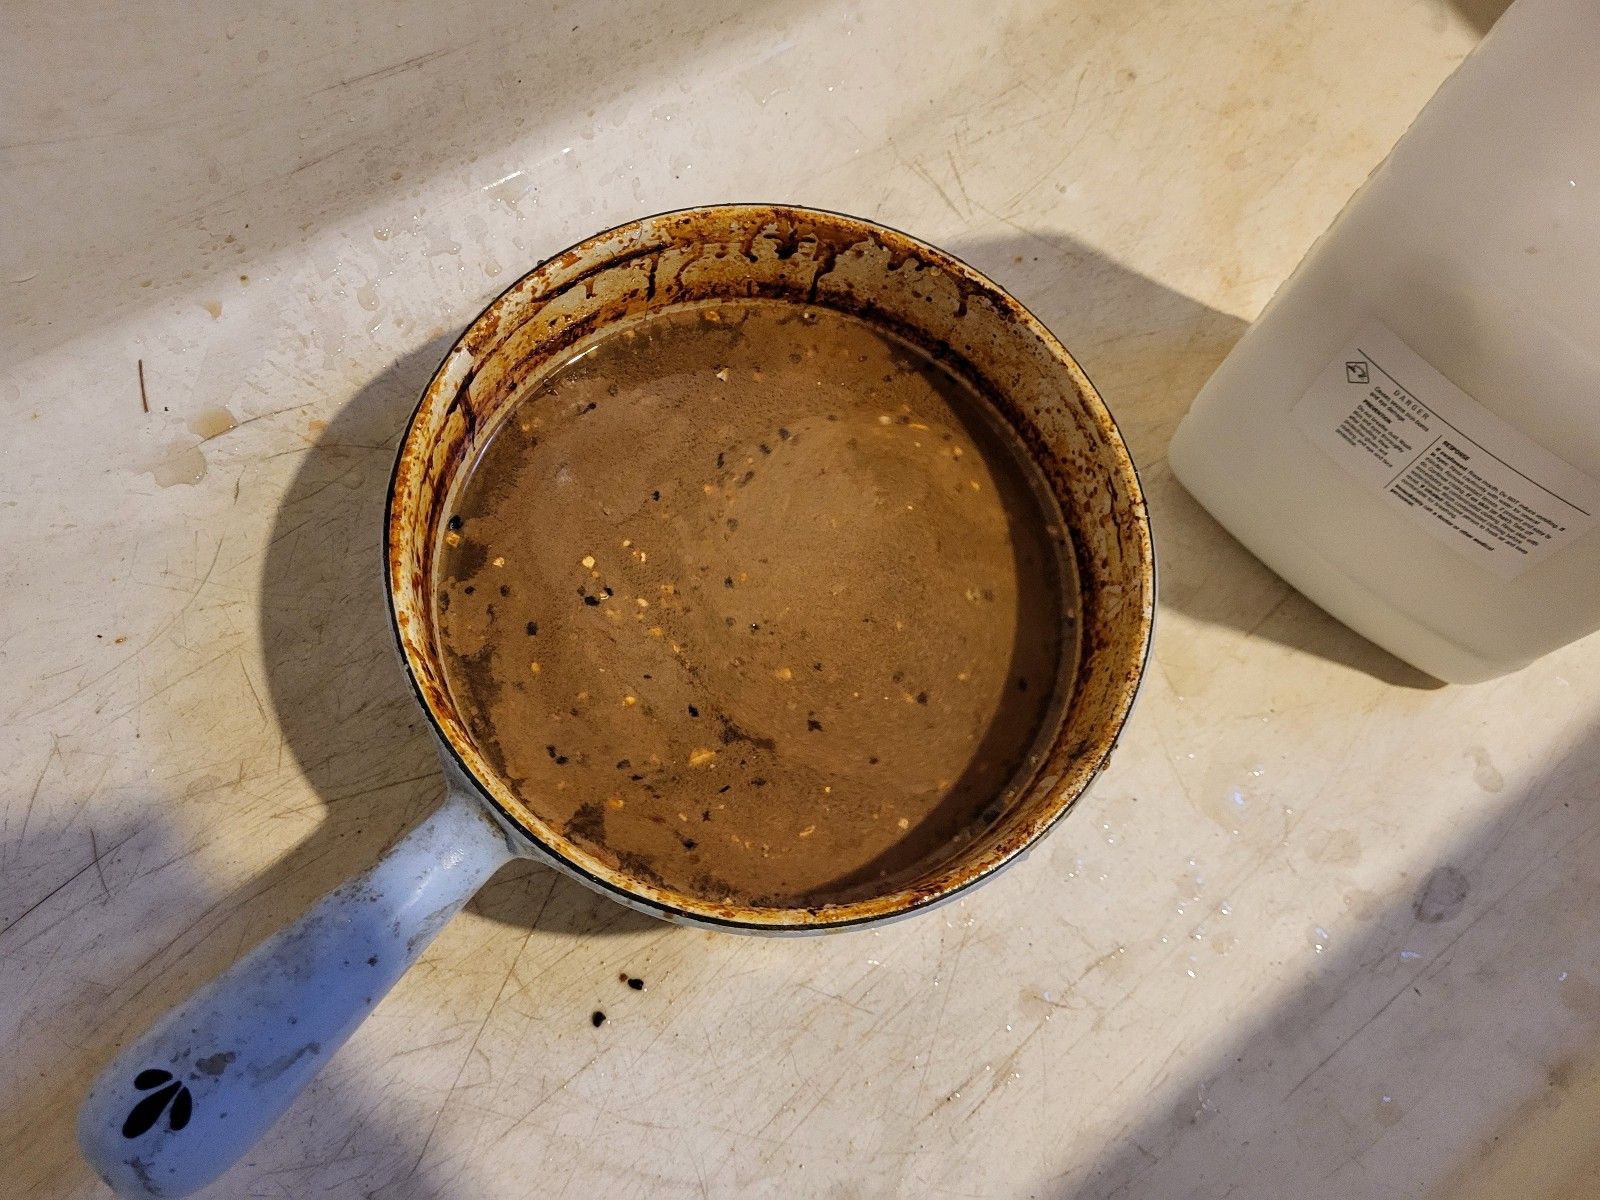
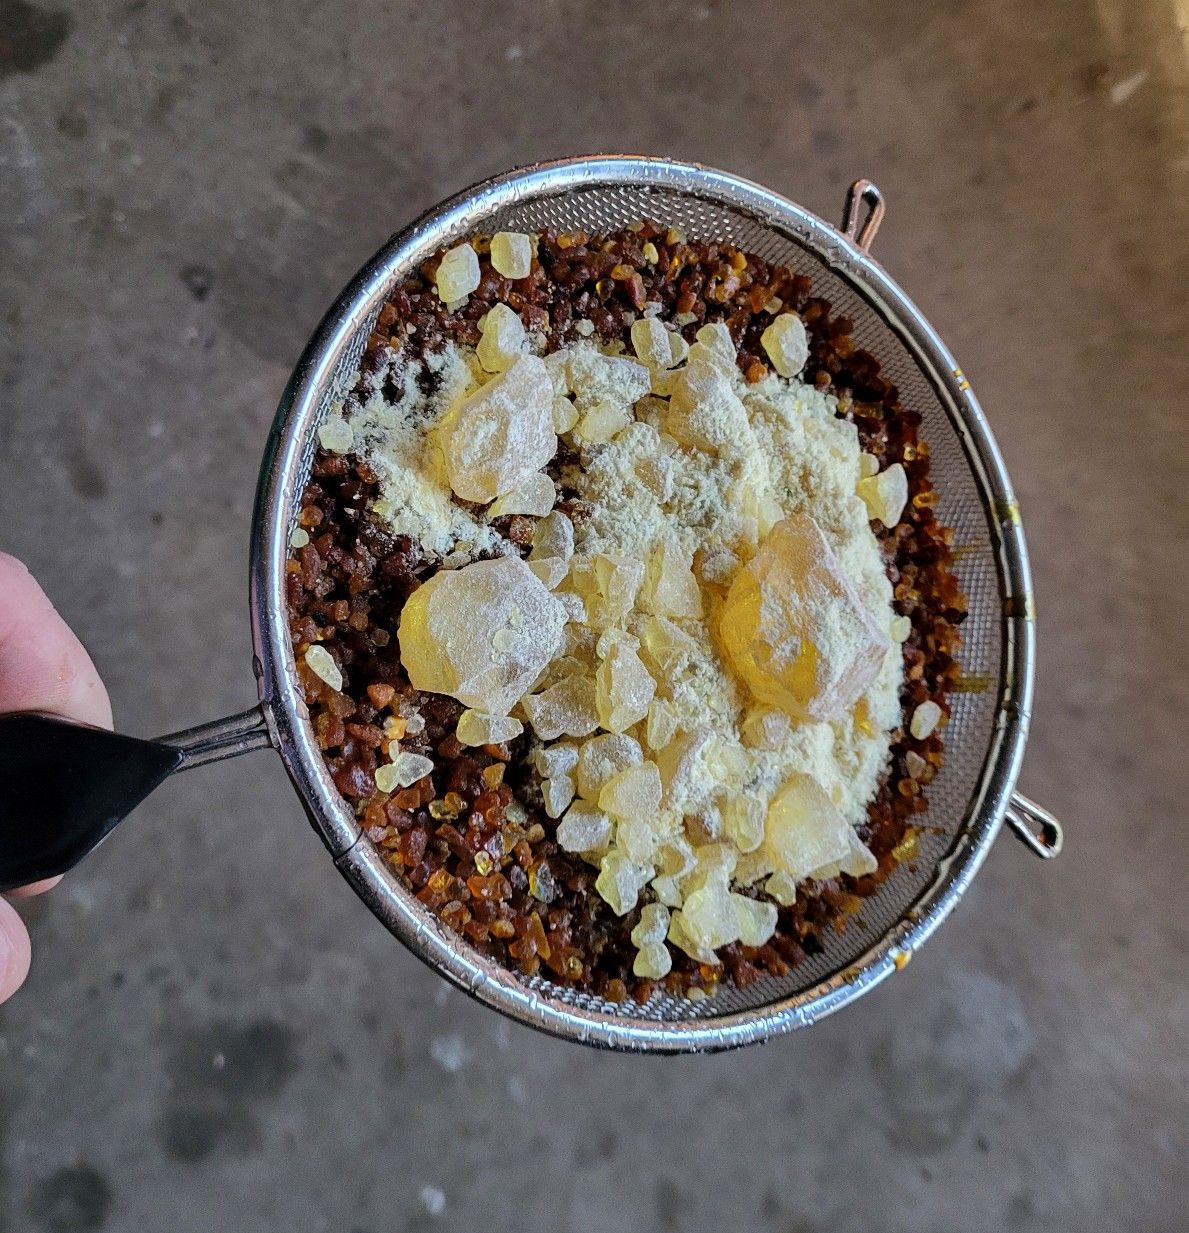
George Wilson tells me there’s all kinds of results you can get from Amber depending on the resin, and that he’s seen resin that has kind of an ugly grayish hue. The only place I’ve ever bought it is Wood Finishing Enterprises, and the result is the reddish brown color here. the little grains are all different colors. If you like sorting socks, you could actually separate them all and color match them. I’m satisfied with the mixed result. On dark woods like rosewood, you can’t see the reddish and on orangey red woods, I think the color is a strong enhancement of the base wood, and it’s in the varnish – not some faff-around experiment with dyes or stains. That’s a nice thing.

I’ve not had any luck with any of these varnishes being particularly good brushed without drier, and when I put them on chisel handles, even wiping, I want them to be dry in a day. To avoid bricking the whole batch, I only pour off about 2-4 ounces at a time and add 1-2% japan drier (nothing special, just hardware store stuff) estimated based on the total oil and resin. The old books talk about adding driers in the cook, and maybe the effect is better, but I’ll just mix it in to the poured-off amounts as I’ve seen no detriment to it, and it would be a shame to see this gel within any period of time in the jar.

With 2% drier, i’ve generally had good enough luck to be able to brush a coat of varnish on something once a day. That may sound stupid, but I’ve had trouble getting the coats to mate – even with drier, I think the varnish is still open for a little while, but it’s also hard enough to sand or wetsand. Another benefit of making the varnishes that are very tolerant of water – they wetsand well, and it’s easy to wipe off most of the unwanted stuff rather than having it rolling around in the next coat of varnish or contaminating the bursh. Cheap pine varnishes absorb the water quickly and the swarf and surface become a gooey bunch of pilling and nastiness.

You have to do a little math if you cook varnish, or I should say arithmetic and maybe some algebra here and there. The easiest thing for me in terms of getting the japan drier right is just using a measured syringe. you can use a lot less than 1 to 2 percent and still have some effect, but it goes back to the day thing above. I’m not afraid of the dryer and I want to be able to handle or recoat whatever is varnished the next day. Nothing is permanent – that’s just my preference right now. Having cooked amber twice, copal maybe 8 times and 22 or so total batches of varnish, there’s not much going on but just initial observation and a pleasant surprise of reasonable success.

Making Amber Varnish – Part 1

In the last week, I’ve made five batches of varnish. I’m not sure how that happens, but the first four were quicker much lower temperature resins, so personal time involvement was only about one hour.

Last year, I made Amber varnish. I made it for two reasons. First, I’d had success with a resin (Madagascar copal) that I think most people will find difficult. Especially because it looks innocent – the resin is nice and clean without what looks like 6 digit years old bits of junk in it. The temperatures that I had to bring the resin to were surprising, and it seemed like a good jumping off point after that to do Amber. Amber’s melting points are a very wide range, but at the top end, some of the resin doesn’t melt until it’s over 725F. This is not particularly safe, and when I made the amber varnish last year, some remained unmelted in the pot.

It bothered me at the time that there weren’t any youtube videos running amber the way I wanted to run it, but there was a violin maker’s demonstration of it that resulted in a varnish for violins, but at a huge cost of pollution to the neighborhood and a whole lot of the resin was just cooked off leaving a small fraction of the original amount behind.

I was so happy that I got a good serviceable varnish from my effort that I thought it might be nice to make a video of the process and put it on youtube, but you can’t control who watches your videos on youtube, and the temperatures worked with Amber are seriously close to autoignition (resin meets air, resin catches on fire, etc). I don’t know what happens when the whole glom gets enough energy to ignite, but there are stories in older texts talking about how unsafe it was in an era where safety was 97th. I just don’t feel like putting it on youtube is a good idea because someone is going to get hurt, possibly worse, and possibly burning down property. The audience here is a lot more limited and…

….I am putting this up more for public record and would generally recommend you don’t think about doing it…unless you have already done it before or you have somehow worked your way up through making successful batches with madagascar copal, and I would suggest that’s in the same category if you are thinking you want to make varnish. You do things like making varnish and throwing half gallon jugs of gasoline in burn barrels at your own risk and I assume none of it. Nothing I’m writing here should be considered a how-to, rather a recorded record of a batch.

Too, what goaded me on with this is reading about Amber and having several conversations with George Wilson (who has also made Amber varnish – George can do anything, it seems) who mentioned that getting Amber past its first run results in a resin that’s really pleasant and cooperative. That statement is a bit of shell game – that “first” run, or melting and cooking of the resin before combining it with something or putting it aside as basically ready to use is difficult to complete without either catching it on fire or just turning it into something that’s burned ash.

I’m also goaded on because none of the older texts mention thermocouples and a lot of the discussion on the internet (violin makers and others) don’t talk about using thermocouples, but of course, I have k-type stainless thermocouples for tempering steel, and I have kawool on hand, which is handy for the cheap pots that I use with really high temperature resins.

But don’t do it. There will be one or five nutballs who cruise through google and might find this as a reference who have burned a few batches, and maybe they’ll be able to take parts of this and find something helpful. I’m less of a fan of the idea that someone will copy it not just for the danger, but because I’m guessing a little with the whole varnish cooking thing and doing what works. I wouldn’t dream of attempting this without knowing temperatures.

Should I say it about 14 times – never do anything inside with varnish that resembles cooking. The fumes that come off of running resins or even just heating linseed oil are disgusting, and from a chemist who seems to have a pretty low tolerance for chemical scare tactics, seriously unhealthy. When someone who dismisses some cobalt in japan driers as being overblown tells you that varnish fumes should seriously not be breathed, that means don’t breathe them. When George Wilson tells you that he made a mushroom cloud at one point in the past, that means you absolutely cannot consider making varnish anywhere that a mushroom cloud would do more than maybe get you in some trouble with the neighbors. There is enormous energy in the oil and resin, and if it is belched over the pot sides and is on fire, nothing good is going to happen.

Lastly, I generally make varnishes in the way they’re described in Holtappfel and I was the oil the way Joe R. said was an easy way to do it on a conversation Steve V. posted – just with water washes (three in my case). First, on the Holtzappfel varnish (I removed one named resin so this isn’t a perfect quote) “Amber and Copal are usually dissolved by fusing the gum and adding linseed oil heated nearly to the boiling point and then amalgamated by stirring”, and then at some point (a dangerous point, i’m sure) turpentine is added. Against some wise advice from people who know more than me, I have continued to run the oil and resins not and mix with the oil nearing 600F and the resins not at all cooled. So far, I have not had a varnish that didn’t turn out by doing this, and it’s not safe from a safety standpoint, but it’s safe in that you quickly get the oil and resin to link together and then you can decide what you want to do after that, as in, if you want to cook more.

Part of my point in relaying all of that is if you have read a lot about varnish and ask me questions, I probably won’t have a clue. If you use proper terms from the really old texts, I’ll have no idea what you’re talking about, and if you ask me about processes other than making both parts hot (separately) and then mixing them together, I won’t know that, either.

The Resin and Materials

Amber is for sale a lot of places, unlike some of the less common resins. But it handily comes from many of the suppliers in these little BB sized chips.

These are clean looking compared to some resins that have all kinds of not-varnish stuff on or in them, all the way down to tree bark and bugs. But you never know, so I wash them even though I think they don’t need it. A water wash would probably be enough but a light bit of lye sort of soaps the outside of the resins, and then you can rinse the whole thing until the outside isn’t slick. Color me stupid, but I imagine getting a fresh outside layer on the resin doesn’t hurt.

You can see how dirty the water is. I strained it through a dollar store strainer after this (dollar store items are good for varnish making – the mess left behind some things is easier thrown away)

One of the challenges with the really high temperature resins is getting heat into the resin in the pot without just burning the surface. This isn’t a problem with stuff that melts at 400 degrees, but it is with stuff that melts at 675 degrees F.

To get the bottom layer of amber going, I’ve laid 2 oz of pine rosin on what is 10 oz of amber. There are recipes in some of my books that go further and combine high temp resins with rosin 50/50, but I’ve mentioned before and it remains true – i’m not much of a reader and mixing the two for now seems like “laying up”. I want some of the good stuff to try out and examine.

The rosin is almost like a thermal paste and as the temps get to the point that amber is melting, I don’t think the rosin is much more than a burned off layer. It doesn’t seem to be there in the bottom of the pot for long. At least you get to see my dollar store strainer. It’ll be used later when transferring the finished varnish into a jar.

To get this setup in a pot, I just flip the strainer over and the resin goes on the bottom. It probably doesn’t matter where it goes, though – it melts so easily it’ll end up on the bottom like oil.

I’ll bet there were ways to get amber hot (preheating it in oil or partially in oil or solvents or something), and later in nearly sealed vessels. Not an option for me.

At the same time, I weigh out 10-11 oz of washed linseed oil in a separate pot.

the proportions here are intended to come up a little short of a quart jar. 10 ounces baltic amber, 2 ounces rosin, 10-11 ounces linseed oil, 11 turpentine, though you’ll see later that a lot of the turpentine doesn’t survive the cook and more needs to be added later.

I got into the habit a while ago of making varnishes in about equal parts oil and resin, though some of the resin is cooked off, and both times I’ve made amber, probably 10-20% fails to melt and I don’t chase perfection at the risk of burning away or charcoaling the whole batch.

if you read around the internet, there are some surprising quotes about how much resin is burned off. Sometimes as much as 80%. There’s a reason, I don’t know what it is. I try to keep as much as I can and not cook it longer after it seems to be uniform and unchanging. More on that later.

There’s a bunch of stuff to carry – I pour turpentine into the jar that I’ll be using for the final varnish, and everything including the k-type thermocouple and reader goes into the box. K-types can go far hotter than we’re going, but a lot of the cooking thermcouples end around 570F and we’re going past that.

I’ve got an aluminum funnel, and not seen is a finer screen for inside of it as well as the dollar store sieve to be used as a large-trash sieve before the fine screen when pouring the hot varnish in the jar.

This stuff is all filthy and the pots are sometimes sticky around the edges- it’s just easier to put it in a box.

My cooking area is a fire pit. I walked outside and it’s windy. It may sound dumb, but if it’s windy, the pots will be affected temp wise, and this isn’t the time to have a cold side on a pot. So I use the same stuff I use to insulate the forge – kaowool, and wrap it around the resin pot sides and affix it with stainless “picture hanging” wire. Kaowool is a great insulator and it will withstand stupid temperatures. Whether it’s resin or something else melted on forge kawool – you can always just light the stuff on fire and burn out whatever is in it and the kawool will remain. You have to get into cutting torch ranges to do much to it quickly.

This is my setup. The dots on the lids are from testing drops of prior batches. If I run out of space, as inexpensive as the Farberware pots are, or whatever they are, used, I’ll just pitch them and get new. In reading early on, Holtzappfel or another book (can’t remember) suggested enameled cast iron pots are the top of the top for varnish making. They were talking about purpose made pots, and not cookware, but figure the same will be true. I have three that I bought used, and just haven’t used them consistently for anything other than heating oil. If you clean things, you may want to consider them – they are definitely better and more uniformly in temps along the sides.

I don’t remember reading anywhere to use kawool, but proposed it to someone else and they beat me to it. I also don’t remember reading much about using a thermocouple, but on easier varnishes, I adopted it for ease after testing a non contact thermometer vs. the thermocouple. Non contact types seem to be confused by pot sides, reflection in the oils and resins and smokes, and I wouldn’t trust them – especially for this. Reading 200 degrees cooler than actual could lead to skin grafts.

I am familiar with my electric burners. 10 oz of oil on 3.5 on the right side will eventually get to about 575F, and high temperature resins need almost all the left burner will provide. This cheapie goes from a couple of warming dots to 1-5 and then “max”. 5 will cook this resin terminally at about 650-700F. Another burner that I bought will not reach these temps – you can hear its thermal cutoff shutting it off. It stops around 550, which does nothing for us. No advice other than buy until you get what you need. Assume the burner will be destroyed and thrown away at some point, because it will. If something catches on fire on this one and it damages it, then I’ll get another.

I’m doing most of the heating here with the lids on – they are not air tight, but they are fully seated. There’s water in the oil. even with the lid closed, it will eventually steam out. I didn’t fully dry the resin here, but same effect, and just as with cooking, it will hit the lid and condense and dribble back down for a while. when checking to see progress and without the temp being too high, I leave the lid off for a minute or two to let as much out as possible. To have the resin hot and liquid and dribble water off of the lid into it could be disastrous. Even tiny rain drops will cause little tiny bits of hot resin to shoot out and they will burn you even if they are the size of a grain of sand.

After some time working the way up temp-wise, we’re here. How long? I don’t know. i don’t dawdle the cook up to temperature, but it’s also not on “max” because it’s too easy to burn the outside of the resin and start a process of just smoking and turning the whole batch into carbon. This is a feel thing and it’s easier learned with more cooperative stuff.

Once Amber starts to run, it smells hellish. Like burned tires and dead animals. I chose a windy sunny day because the smoke would not linger and I keep the lid on both for purposes of maintaining heat and to be a better neighbor. On a windless day, one will make enemies in a hurry.

I’m not attendant while this is heating up – I know the setup pretty well and know what will get the resin to 500F or so, so this is at the second check. the oil is not getting up to break temperature (just below 600F) at this point because the run will take a while and I just don’t care to smell it or try to push it that far in prep. The way I make varnish in terms of how thick the varnish ends up is to get the two parts prepared and combine them, and then after that, choose how long to cook. It can be done other ways, but this is easiest for me.

You can see that the pot bottom is at 615F and the resin is not in any hurry to melt. I put the lid on at this point and walk away for a while. You cannot hurry here and fall into the trap of wanting to blast the amber resin with heat – it will just create a char layer on the bottom and you’ll be lucky if you don’t ruin the whole batch. I’m treating it like an exploratory activity, slowly climbing until there is some resin appearing around the sides. I’m paying little attention to the oil at this point, but I know it’s safe to take the lid off now.

in the rare case that it rains as a surprise – because this will take several hours – I lay plywood over the top.

As the temperature increases, I remove the lid tilting the far side up and wear long sleeves and gloves.

At this point, it’s a waiting game -the resin is testing patience and begging to be smoked into a batch of worthless char. All in, the resin isn’t horribly expensive – it’s about $50 a pound, but that and the time involved is enough to discourage ruining it for no good reason.

There is a strong breeze from behind on the day of this cook, so I don’t wear a half face respirator. Usually it is mandatory – the amount of smoke and stink at this point is pretty mild, but it’s also carried away on the wind. It’s not to be breathed.

The Myth of the Forged Iron

I’m still scraping planes lately, dragging my feet on my chisels, and making some plane irons where necessary for scraped planes. I guess not getting the chisels done is an attention deficit thing. When work is busy and there is deadline pressure, I tend to want to explore things because exploring and getting better quickly at something is engaging to my mind.

That said, I read things fairly often about steel. People talk about it a lot. Often it’s about preferences and then explanations. I feel like from experimenting, there are a lot of things that result in properties I like, but I don’t always know why they do. It’s more important that I can get a result than it is that I can explain it. Why? Because trying to explain the why instead of the what, or put differently, feeling an obligation to explain things when you know the what and have never tested that your “why” is true leads to a lot of false information.

There’s a discussion going on on SMC at this point that’s got several nuggets in it. One is attributing ability to plane certain woods to an alloy when the attribute making the difference is hardness. I’ve mentioned before that O1 and V11 both have similar toughness levels and both have a similar working hardness range. Toughness is an impact test – how much energy comes out when breaking things. In my experience, O1 has a third attribute that’s generally better – edge stability. Stability is a nuanced term used for knives that basically implies the ability to hold a fine edge. Not just any edge that will go through an abrasive laden machine sharpness testing card, but the kind of property that makes small chipping less likely in one steel vs. the next. At any rate, LV tempers their O1 soft, and XHP/V11 is tempered sometimes (at least in the irons and a single chisel that I had) at the upper range. Figure these are 59/60 respectively and 63. You probably would not recognize O1 as being the same steel if you used two irons, one at 60 hardness and the other at 63, and didn’t know what alloy they are.

That aside, all plane irons are forged

Clifton was the last maker of planes that I can remember advertising that irons were forged. I don’t know what they were doing, but I’m sure someone does. I suspect they were drawing steel to length mostly. I don’t see an advantage to doing this and there’s a non-zero chance that the results could be worse than using rolled material and an established process.

Things happen with steel when you’re forging. The grain direction is altered, but grain is also enlarged, and you have to grind, normalize and do whatever else needs to be done after that. But normalizing will be important because the distribution of carbides is not always ideal after forging. Maybe it never is, but at least sometimes it’s not. Why? Carbides can form at grain boundaries creating a layer rather than being neatly spherical or tubular sitting at grain boundaries, but not separating them.

I don’t know what happens industrially, but Clifton’s forged irons were well liked. I think the stamp was actually their biggest differentiator, but so was the price here. The last I saw them at highland, the price of an iron was about double that of any others.

Normalizing steel re-establishes grain. Annealing after normalizing or doing something else to adjust the structure before quenching changes more things – from the state (martensite, pearlite, etc) before subsequent steps, and you can refine grain smaller and adjust the shape of carbides (types of annealing can do that).

Rolling is Forging

If you buy rolled flat stock, the steel has already been elongated and widened by rolling. Rolling is a type of forging and if the steel is not spheroidized, it probably comes with carbides that are more tubular. It definitely has the benefit of continuous grain in steel, and grain is important in terms of edge orientation. Even though grain is established by normalizing, for reasons I don’t know, there is a bias for toughness based on rolling direction.

Nobody here has ever used a cast plane iron, or one that isn’t forged. Even PM products are rolled into bars. Forging at one point was important before modern rolling or die forming (rod) or drawing out because steel that’s as cast won’t have the same toughness or orientation. if you go back far enough to steel like wootz, it was necessary to get layers of toughness alternating with layers of carbides.

Brent Beach had an interesting page on edge life, but what it left behind was also comparative pictures of edges that provide other information. For example, the Clifton iron pictures are here:

https://brentbeach.ca/Sharpen/Cliftontest.html

The edge performed fine. If you want to see ugly results, you can go to the main page and look at the Shepherd irons. I had one of those from a plane kit and mine as equally horrible with surprise failures aplenty out of nowhere. Even looking back now, I have no clue how they made irons of such low quality unless they were really bargain hunting stock.

Back to the comparison – Steve Knight offered O1 irons that were cryogenically treated. I know that instantly brings some folks to suggest there’s no reason to do that because it’s for A2 or other highly alloyed steels. Larrin Thomas (Knife steel nerds) also addressed this well in discussion of various cold treatments. Cryogenic treatment mostly trades some toughness for additional hardness, and it’s true that it’s beneficial to A2 because the toughness is coming from retained austenite (something we don’t want too much of it) and liquid nitrogen converts that to martensite (something we want a lot of). If steel has enough toughness, we usually will like something that’s gotten cold treatment more than something that hasn’t.

Steve’s O1 iron pictures are here:

https://brentbeach.ca/Sharpen/Knighttest.html

Notice the fineness of the edge. The footage planed isn’t the same so it’s hard to make the call for sure that steve’s iron would also have planed longer than the Clifton iron – I’d bet on worse than even odds that it would’ve planed somewhat longer, though.

Steve said at the time “I don’t know what cryo does, but it makes it better” when anyone at the time insisted that it was only for A2. you may recall those days, when we generally didn’t talk about anything but “vintage steel, chrome vanadium, O1 and A2”. Ahh…the same days where folks insisted that chrome vanadium steel was gummy and cheap and less fine and full of stuff that’s not in “good old plain carbon steel”. What most of it was lacking was a good quality melt and roll and, especially, enough carbon to get into the low to mid 60s. It’s less alloyed than O1, though, not more.

Back to Steve’s irons – why were they better than Clifton’s in this test. Finer and probably long wearing? Because they are – the combination of the rolled material and then the process applied before heat treatment and then the cryo made for a better iron.

I had a couple of these irons, but no longer have any, or I’d give you an idea of their hardness. They were bonkers hard without being chippy. They were just good.

I have forged irons from rod (stanley replacement irons) and they are fine. I think the forging got more stuff in solution in my case and the result is the irons are a bit hard and hard tempered, but not faulty. Hard tempered meaning they are bitey and drop their wire edge quickly. Day to day, are they any better than the first good irons I made with starrett steel just by heating to nonmagnetic, a little further past that and then quenching and tempering? i don’t think so. They’re a little different, but I can’t say that perception of properties is more than a slight difference in hardness.

The quality of the stock and then the quality of the process applied after shaping is really what makes a difference. Just as terminal hardness and not alloying is almost always what makes a difference in perception about what can work in really hard woods and what can’t.

Scraping Planes

Just a one-off sideshow that seemed interesting. For framing the discussion narrower than generalized, I’ve typically flattened any plane that I use to be close to a starrett straight edge, but with a combination of files and sandpaper. The usual is to file most of the bulk away, confer the results with the lap, check with the straight edge and then try to have the tail and the front tip of the plane slightly higher than the rest of the sole. I’ve seen comments that this makes the plane the same as a plane only as long as the flattest part, but that’s a false assumption based on the idea that the wood is already perfectly flat, among other things.

At any rate, the starrett edge and feelers allows quickly getting to very close to flat. Within LN’s specs if you’re doing your job. that may lead to question, which is how to file the center of a convex plane a little hollow, because if you’ve done planes that are banana, it’s hard to make a convex plane flat. One that is contacting a surface on the outside perimeter is much easier.

The answer to that is either using a flexible file, or a bastard file and turning the edge up a little bit to use the curved area at the edge of a file. I don’t mean like perpendicular to a plane, but lay the file flat, and rotate it the tiniest bit and then draw file down the center of the plane with the curvature. It will hog material off spectacularly.

At any rate, the results scraping two planes quickly – that had already been flattened before, are this:

Notice, the bottoms aren’t neatly done like you’d see on machine ways, they’re scraped off using an anderson brothers scraper with a steel (not carbide) insert.

Rather than going into things at length, the video does a great job of describing what to do. I already have a 12×18 reference granite plate from eons ago. MSG or whatever the lower cost machinist supply place used to be offered those big near 100 pound plates for about $70 shipped, and I bought one for applying abrasive paper and never really did use it for much

I’ve cleaned this off completely since, but it sits on a bench that’s used to sharpen stuff and support a machinists vise. Realistically while making tools, I use the IM313 which has been stuffed to the far left in the photo and the rest of the surface just turns into a junk pile.

Generally, we have vises, and I have a leg vise, so if you watch the video above, there’s no need to create a special holding box. And I don’t have prussian blue, so I made marking fluid or whatever it’s called using a thin oil and 0.5 micron green chrome, which took about 2 minutes and didn’t cost anything. If you don’t have stuff to do that, buying the right thing is a better idea.

The fellow in the video mentions carbide, but the scraper that I bought doesn’t have it. I found pretty quickly that a 150 grit belt and a stiff swipe across the belt sander refreshes it. I don’t need carbide on the plane on the right above (Stanley), but the plane on the left is a Marples plane that, frankly, continues my belief that really nobody else made planes as well as Stanley did. This marples plane is older, the casting is bonkers hard and it was twisted. To top it off, it has the pain in the ass overlook of having a lever cap lip that’s too fat to fit in a cap iron screw, so when you’re working with it, you always need to have a screwdriver laying around to take the iron and cap iron apart. The second plane is hard enough that it was a bit of a pain with the steel insert scraper.

At the outset of this, I marked one of the smoothers that I lapped. I’d expect to see contact in the center of the plane and not at the ends because they’re a tiny fraction above. Left to right, you will generally see some convexity, but it’s OK when you lap a plane as long as it’s not enough to affect iron exposure. If it becomes that big of a problem, it’s back to the file trick mentioned above to hollow the plane a little and lap it out.

What I made is far more pigment dense than prussian blue, so it looks thicker than it is. The dimension of the green stuff is probably a small fraction of a thousandth of an inch, but I did work it thinner than this. it’s doing its job accurately here, though. Flat around the mouth and front to back and falling away a little at the sides.

This plane has no performance issues and was just lapped as I recall. It’s not my daily #4, but as mentioned, I don’t keep anything that’s not a jack plane laying around unlapped or untested.

Scrape the green:

not a great picture, but as you go along, you get to the point that the whole surface ends up looking much more broken than this.

After each step, I followed the video above and stoned the sole with a washita fingerstone.

That removed any burrs and abraded just a little off the tops so you could see that the stone was reaching something in every small area. As the video mentions, even little burrs could affect where the next mark shows up.

Most of the markings were not as bold as the second picture above either, I’d probably just reloaded the stone surface a little bit.

When everything is done, the sole looks like this:

There is a neat and pretty way to do this, and I didn’t do it because it’s not the point here. The scraping should be done in directions that don’t match so as to not create a bias or rows, but even that isn’t that important for woodworking. while getting the hang of the steel insert, I could tell that damage to the edge of it that occurred going across something on the plane sole would then create a burr that made more marks. And the shiny little squiggles are due to some piece of grit that I picked up on the washita stone.

But…the whole sole at the end of this is now light-tight to a starrett straight edge. I looked at the result and though it was pleasing to look at.

It took less than an hour to do the initial lapping and the scraping here. I think the lapping is time well spent. Scraping here is a skill I’d like to have if it’s not too time consuming, and in some cases, it’s less mentally taxing than it is dealing with a glass lap and trying to figure out what is right if the lap and the straight edge don’t seem to be in agreement.

Does it make a difference in performance? In this plane, when planing, i couldn’t tell any. It’s a smoother and faults were already removed. Lapping a smoother properly is absolutely worth the effort, and even if it’s twice as much work again to scrape the plane and get to this point, it’s hard to regret that. It’s far worse to work with a plane in a longer term that’s missing efficiency from faults on the sole.

I have enough reference surface length to scrape a #6 and will do one and see how that turns out. neater work and decorative flaking is very interesting looking, but i think doing this neatly vs. getting woodworking flat is many orders of magnitude above just this simple work.

Crack Addict

OK, before anyone thinks the title is drug-related, it’s about cracks appearing in forged tools – especially when pushing things.

It’s been a while since I’ve posted. I have traversed reddit and other forums for a little bit in the interim and I guess when I stop and think, it’s still a waste of time. It’s tempting to try to offer suggestions and then when I think about what caused me to consider the UK forum a waste of time – it was one particular interested person who asked me for information at great lengths, and I thought about it afterward – what’s the chance they’ll ever actually follow through after all failure factors are considered. Probably less than 5%. Never heard from them again, but that’s expected.

That break also gave me some time to realize if the purpose is to post things that are helpful, after this, it should be shorter blog posts and just puttering around in the background and making this more of a webpage and less of a blog. I don’t intend to market the page and have no long term goals other than just laying things out in blog posts. The ability to blog and use widgets is something I don’t want to pay for – that is, those widgets making organizing old posts more easily, and they’d still be too long and rambling. So pack that away.

I’ve made a gaggle of W1 steel chisels and I just find it’s good. I find 26c3 is great. I want great, but 26c3 is not available in rods to fully forge a chisel – it’s available in flats. Analouges like 125cr1 definitely are not as clean when you snap samples and at first, I thought “hmm…..” because it’s easy to assume a high cost steel and a lower cost version chemically similar is a matter of one retailer or maker just hitting their “mark”, so to speak. I would be the mark in that case.

However, some further looking finds that there are things like VAR steel and other remelting. VAR means vacuum arc remelting. As I understand it, the bits that are not fully dissolved uniformly (dissoluted?) end up going through a second controlled environment melt and the result is a sample of steel that actually hardens a little easier and also shows up as cleaner under the scope. Does that matter in a chisel? I don’t know the answer to that yet. But it absolutely can be seen.

26c3, by the way, is remelted, though it’s not vacuum arc – it’s the other type and I don’t remember the names. My interest in terminology and quality doesn’t go to the “if it were a category on jeopardy” level or “look smart among your friends”, but more related to what should I buy? I don’t have the time for romantic escapades into spouting the right words for everything and knowing all of the proper names (and having the t-shirts like a cool youtuber would).

WTF does this have to do with anything?

Well, W1 makes a good chisel. I want a better chisel than can be bought, and not just in shape. I think I can make a chisel that will appeal to someone with experience in terms of shape, proportions and feel. The bar in the market is low to keep manufacturing costs down.

But the combination of sharpenability and stability in the edge in heavy use should also be better. W1 doesn’t seem to be a match for 26c3. It’s almost there and maybe an insane heat treatment process would get it there. My post-forging process is already about 7 heats, sometimes 8. This sounds worse than it is, by the way. With an induction forge, these heats are probably about 2 minutes total time per chisel actually being heated, and then rest time – but if you’re doing more than one chisel, say 3, there is enough rest time to work almost continuously from one chisel to the next.

So what are the round bar options vs. giving up and going back to flat stock? O1, W1 and 52100.

52100 is not my favorite for plane irons, but I know in chisels I also don’t like it if it’s not high hardness. 62+. Below that, it’s too tough and the edge will deflect a little before breaking off – something I don’t care for and good older chisels also don’t do. If you push it, though, you can see high hardness (stronger edge, but less tolerance to bending) and less toughness.

I think W1 is lacking in toughness. It’s not difficult to get it to high hardness.

52100 hardens a little easier, but less easy than O1 by a long shot. However, this interferes with my favorite quench – brine. Brine is a bit harsh on it, and if there is anything going on in the steel that might propagate cracking, brine is going to bring it out. However, I cannot get over the feel that brine leaves in a steel – it’s a very dry excellent feel for a chisel vs. a bendy foldy whatever you may get from elsewhere, and parts of the chisels going into the quench.

And that’s the problem. it results in things like this.

a spectacular crack right along the top of the bevel. No others looked as brilliant as this one.

A more subtle crack, this one is in W1, actually, but similar to what normally shows up in 52100

Figuring these things out with less shop time than normal prevents me from having any smart-alecky things to post.

Starting with less pretty 52100 from Jantz and the finding a cleaner type actually improved hardenability of the steel, but adds a level of skill needed then to avoid doing things in forging that will leave seeds for cracking that wouldn’t occur in a slow quench, and then taking some care during quenching to emphasize max hardness on the business end of the chisel and relax things just a little toward the shoulder and the tang.

Giving up on the characteristics of bring quenching in chisels just isn’t going to happen. Not only does it make the chisel more crisp, it also doesn’t stink up my shop with smoke.

I think this is a problem solvable with skill and experimenting and have hardened three more chisels after cracking 2 of 5 initially made with 52100.

Oh…I forgot, there is also A2 and D2 rod, but I’ll quit making chisels before I’d ever begin to consider those.

I’ve made another 3 after seeing this cracking and adjusted a little, we’ll see how it goes – they are hardened but need to be finished. Which doesn’t sound like much, but water hardened chisels are just a wedge out of the quench and need to be finished to flatness and size, top curvature and side bevels ground in. All of that is done with a chisel that’s already fully hard.

I’d be plenty happy with a 1 in 10 failure rate in terms of cracking if the 52100 efforts yield a measurably better chisel that’s approaching 26c3 flat stock chisels.

Brine and Forged in Fire – They Say Bad Idea

If you’ve watched Forged in Fire you “know” nothing should ever be quenched in water because all forging oils are specially engineered for your goodness and so on. There are a couple of things at play. For plane irons, which are thinner and wide and flat, I wouldn’t use brine. I haven’t tried yet, either. The thin arrangement of plane iron cools to the center quickly. On water hardening steels, it’s not quite so automatic. You’re chasing getting the steel cool and if there is a center that’s cooling slower, as the outside cools, the heat travels from the center into the outer layer slowing what the outer layer is doing.

Knives are more like plane irons, but longer. if there is a thick spine to deal with, it’s usually not at the edge and under hardening of the spine and full hardness for the last 1/2 of bevel is probably a nice compromise. On top of that, the forging that’s going on is violent and often inaccurate on the show. Questionable forging followed by brine in a knife would be a good way to “go home”, as they say on the show.

If a bench chisel is 5.25″ below the bolster, we’re really hoping for 2″ or more of the chisel that’s uniform high hardness. To me, that’s everything being within a point in that territory. We also appreciate a balance of hardness (strength) more than toughness, at least relative to that same balance in knives.

It’d be dandy if they actually provided the post-temper hardness of the results on forged in fire, but they don’t. It would be interesting to see, but for anyone actually making things, you’d also want to see a snapped sample of the final item (the show has to keep them, anyway – go ahead and break them so we can learn) so that we aren’t oohs and ahs about a high hardness sample that has grain like beech sand.

I’ve talked to plenty of other folks who have said the same as I relayed with W1 – W1 likes brine. the light cracking I have in a pair of W1 chisels is from really continuing to forge after the steel has almost entirely lost color. You just shouldn’t do that. 52100 is like that same principle, except the lower range that you have to stop forging is higher -it cannot be allowed to cool to any shade of red and still be taking hammer blows. Most information I see suggests not shaping the steel at all below 1650, and the upper range shouldn’t be above 2200F.

Does it make a difference to work in a narrower range? I don’t think so. going back to the heat timely is probably a lot like sharpening woodworking tools. It feels like you’re getting more done if you don’t stop at the first sign of declining performance in a plane, but you’re really not.

A Slow Rumble, FWW Sold, Slow End of Year

I finally started putting videos on Rumble. I think I already watched the four other videos on the site that aren’t tinfoil hat stuff, but it’ll serve it’s purpose. I’ve only uploaded one video so far but will slowly get others uploaded. I use an adblocker, but I think Rumble, you upload videos and unless they are family only, there are ads. I expect to make a quarter this year (like $0.25!!). I also hope people use an adblocker watching my videos.

FWW

When I first started woodworking, the only cheap magazine was Woodcraft’s magazine. It may have been called Woodcraft Magazine or something. It wasn’t worth the cheap price.

The guy who got me into woodworking had Fine Woodworking from way back and probably still subscribes. If the brand did anything, they created a dedicated subscribership starting in the doldrums of the 70s where apparently hand tool woodworking was mostly dead prior. I’ve heard it all from folks who talk about how great it was when you tell them you don’t take it on any other magazine because of what it is now.

I think what it was probably has to be held in context. You can find things like Nicholson’s mechanic’s exercises on archive.org and download them. Nothing in the magazines is close, unless you are just trying to figure out what to buy, or you like the periodic day the magazine shows up. I subscribed to Pop. wood and Fine Woodworking for a time, but the excitement of the magazine showing up is gone when you’ve leafed through it in 10 minutes and found little of interest. And then you look through it later when you’re not in a hurry and find out that you weren’t wrong.

And then you look closer, and you start checking up on the writers. Are they really shop owners who are just doing a few articles to try to make ends meet or promote their real work? And is their real work something you want to take in style-wise? Probably not for both. So, if you’re looking for sort of group-ism type stuff or light reading, it’s OK. it wasn’t for me, and when the topic came up recently that FWW sold and there’s a lot of hand wringing about it, I’m surprised that most of the magazines still exist. The series of transactions probably hasn’t improved the whole group of magazines, but without one interested party, maybe they’d have been run into the ground.

If I said something about the articles I read that I apply every day now, I’d be lying. If I said something about the finishing book that I read that I apply when finishing things, I’d be lying. They are a retrenchment medium, something people who have always subscribed stay subscribed to, and transient everything else, or perhaps like a family reunion for some to read – to see the in memoriam articles about a long famous teacher-maker, or the 47th article about a crosscut sled and articles using the terms like “a real workhorse” , a “game changer” or “turning everything you knew on its head”. Or whatever else you see that must be in some formulaic magazine writer’s text book.

We are what we make in terms of woodworking, or usually toolmaking for me. And getting more than your toes wet will take seeking information elsewhere.

I don’t hope the magazines go away, it’s a matter of indifference. Want to get the basics of French polish? Nicholson or Holtzappfel, it’s right there. Legitimate information on sharpening? Same. It isn’t overwrought information, but it’s precise and accurate. You may not be able to get a turkish stone, but you can look up what it is, and the fact that the articles don’t have some brand that you can buy will prevent you from coming back five years later after dumping $500 on Nanawa Choseras saying “they’re all cracking and the seller says it’s my fault”.

I think we’ll see most of the magazines disappear from print soon. The guy who got me into woodworking is 70, and the demographic of the subscribership probably doesn’t look that great. the authorship seems to have changed from people like Phil Lowe who did make things, and plenty even in the older ones who weren’t accomplished, to folks who have taken on writing in magazines with little experience. Even I had an article published, but in full disclosure, someone else distilled it from the Unicorn article, because clipping information out of something that’s free to put it behind a paywall in less substantive form doesn’t make any sense.

The few years I was reading magazines, also in fairness, I wasn’t really ready to get into the hobby very far. Little thought about what to make came into my mind, and maybe the magazines would provide ideas. Little thought on how to make things came into my mind, and so I had a big bandsaw, a tablesaw with a caster base and a 50″ fence, and little output.

I do feel a little bad for the regular occasion when you see someone who has carefully saved and preserved 45 years’ worth of fine woodworking magazines only to find out that almost nobody wants them. The magazines may not have more than a dollar an issue value now, and perhaps to someone who also won’t have them for long, but the lesson about assuming something will be valuable and taking consuming your time preserving that something, that’s a valuable lesson.

Year-End Slowness – This Picture is Already out Date

I don’t technically have work today, and I’m off the rest of the year. I’ll work in the mornings because there is stuff that can’t be on my plate after January 1 when work is busy for several months. It’s reality in salaried work. I can think of 10 ways I could’ve gotten it all done during the year, but didn’t. At least most of it – some is last minute due to other folks. Growing kids and that has equated to a lot of short time in the shop and getting little done. It’s going to sound like more than it is.

This picture is a little old. All but three of the chisels are completely finished, one of the eight still needs hardening and that and the two not ground need their bevels. I’ve made two extra due to superficial cracks on two of the chisels in this picture. Use of the cam hammer allows one to work very sectionally and keep going for perfect a little too long. Use of a hammer swinging will send you back to the forge a little early every time – which probably explains why i never saw cracks there. If you’re swinging a hammer, you lose interest in trying to move steel at all if it’s not at a temperature where it moves well.

I’ll handle a few of these the next few days.

My son also is setting up an HO train layout, which really amounts to me doing more of it. At first, we were going to make one out of 2×4 sheets of plywood that could be folded, but gave up on it, which meant building legs for the roughly 4×6 layout table, and then assembling things.

And I made three knives.

So in the scheme of not being in the shop much the last couple of months, I remember my beginnings where I felt like I was in the shop more than I was and sometimes built nothing over a period of months other than a stroll to the shop now and again to experiment with a plane or just do something else pointless.

Retirement isn’t for at least another 10 years – which creates the dilemma. I want to learn now what I hope to put into play at 58 or 60, for fear that whatever energy is lacking now through the course of a day vs. age 25, probably the same amount again will be gone by 60. We’ll see. you can plan for things in life but assuming they’re a certainty is just a good way to become discontented.

Slow Progress

I often make a comment that I’m going to make or build something, and that I won’t have much time, and then beg borrow or steal time from just about everything around me. Never abandoning kids’ events or anything but popping my head up upstairs to find if the kids have finished their evening routine. If not and I’m not working late, I sneak to the shop.

I mentioned about two weeks ago that I was going to build a set of chisels for myself. The shop is sort of rearranged to have most of the metalworking junk in one corner now and I hung a furniture blanket. Those are flammable, by the way! So anywhere hot tools could touch them, I’m hanging a welding blanket. Fortunately, the moving blankets aren’t nitrocellulose guitar pick flammable, and my shop now has several buckets of water in the area, a garden hose and a fire extinguisher right on the other side of the shop door.

I want a set of 8 bench chisels. They’re this far:

Actually, they’re a bit further along- this picture is from a few days ago. All but the thin chisel have the bolsters ground and are heat treated. Scope creep brings three parers into the equation, something I don’t need, and doing these all at once lets me see some differences that I wouldn’t have noticed. For example, the 7/8 and 1″ chisels wanted to come up a little short on hardness. They’re in the range of 61/62 after hardening, so far from being unusable. the full hardness length is a little shorter in them, probably 1 1/2 inches, which most people would never get through – one would have to build a very joinery heavy group of about 100 hand made pieces to get there, or maybe 200 or 400.

I have to think about what I’m intending to do – sell the odd set in the future at a legitimate full price to a target market. I think I posted that already.

The quirk with the wider chisels hardening a little less comes to mind because I could see the center of the chisels staying orange in the brine longer. This first part of the hardening – the first two seconds or so, is critical. Then there’s another part to complete in about two minutes. It’s not a question of making a useable chisel, but rather one of ego, I guess. Can I get full hardness to be identical within less than a point across the range, and to the same length on a chisel. if the chisels are made more thinly than these just below the shoulder, the answer is an easy yes.

For the longer term, I haven’t made too much of a decision yet. Earlier firmer chisels were fairly thin with Nicholson describing what I prefer, anyway in older texts – a relatively flat stretch of chisel with only slight curvature and then increasing past the midpoint up to the shoulder of the tool. This curvature is obviously missing from tools made now, and somewhat uncommon even on tools in the late 1800s.

But slow progress it is – still better than using the “too busy” excuse and not going into the shop at all. That’s a disease of inertia that people get into once they think they have their shop built out, making it seem like a monumental task to get in the shop and do anything at all, whereas at least doing something makes keeping things going pretty effortless. I started with the inertia just like a lot of people do – it’s part not knowing what you want to make and part work demand and whatever else, and also a big part of everything seeming difficult with icing on the cake sometimes being the realization that all you worked on for a full Saturday morning is crap and has to be binned or burned.

I still have a hole in the door transitioning from garage shop to basement from those days. the door is a skinned entry door and not solid and guess what will go through the outer veneer – rigid shop vac parts if you throw them hard enough.

I expect, and hope that through the end of the year, I’ll get three knives made and about 15 chisels. That’s about a month and a half’s worth of spare time stuff starting from the last post, and it seems like not enough. There are lots of underlying reasons, but some of them are work related and I’ve got some decisions to make in life. If one of those being viable was making tools full time, I’d already be doing it. Unfortunately, as a primary earner, that’s probably far off.

A Set for Me

I don’t really take orders, though comfort level with things being marketable is high enough now that I’d sell chisels if I had time to make them. Past selling of knives to people has created some small backlog to finish a few knives for people who want them as gifts for relatives – not from a crafty sense, but because relatives of the recipients have gotten hands on some stainless knives – which are thin, and more like finer Japanese knives but even thinner at the bevel yet. Knives are not difficult to make, at least not the way I’m making them.

In the time making chisels, I’ve never kept anything but the rejects. The rejects are pretty good, but it could be something cosmetic, or in the case of a set of early heller file chisels, when chisels were ground to clean metal, a set of chisels I kept resulted in tangs that were only about 0.2″ thick – I kept those and they work fine.

Everything else in 26c3 or whatever else has gone out of the door except for the rejects.

I plan to make a set of chisels in eighths out of W1. W1 isn’t my first choice for chisels, but no clean higher carbon steel is available in rounds here and switching to brine to quench W1 has really brought the hardness both up, and more even than trying to use a fast oil. The rumor is that brine will crack everything. I’ve cracked tools quenching in plain water, but I think even though brine is even faster than water, the quench is even and water is turbulent and a poor choice other than for waterfalls of large items that cool too slow to crack.

These are the first two tapered and hardened blanks from the set. they now need finish grinding. At this point, I will probably hardness test everything because it takes no more than a minute to do and data is always useful, as is confirming an individual chisel is good. The top curvature on my chisels generally offers the ability to test a chisel and then grind the diamond cone mark out later.

The turn with W1 is an interesting one. Parks 50 is the fastest oil I know of, and it just struggles to get any part of the chisels more than an inch up to full hardness. Variance can be two points and the need to move the tool in the quench results in warp. Lots of other things can create a warp issue beyond that, but I have those ironed out.

These chisels both test 68.5 hardness out of the quench, and 63-63.5 after tempering at 400F twice. This is off of the charts for W1, but we’re not limited to those charts – the lack of a prescribed soak and brine make for a nice combination – preventing too much carbon in solution (brittle) but finishing the job in the quench efficiently, which results in better edge stability. the obvious issue you can see is that there is a layer of brine induced corrosion. I do two quenches in brine during the process, one in the middle and then one at the end. normal grinding and finishing should get rid of all of this, though.

So far, I have not cracked or significantly warped a single item quenched in brine. So much for the oft made suggestion that you have to quench in as slow of a media as will get the job done.

When I finish this set, I’ll post it. Between the knives and other things I said I’d make, it’ll probably be more than a week or two.