This will be a long post, so I will post in less conversational and more kind of fractious text to try to make up for it. In 2019, I tested a large number of plane irons that were purchased, borrowed, and in one case, made by me. The tests involved smoothing wood only on edges to keep the cuts even and fair, and the process was very controlled. In the end, highly alloyed irons (CPM M4 and PM V11) separated themselves from the group, and I declared V11 more or less superior in the tests. Against CPM M4, it is the case that you can actually by V11 (probably carpenter XHP) in a commercial iron for a reasonable price. Everything about V11 in the test was wonderful except that it didn’t grind/hone quite as nice as plain steels. But it returned edge life to make up for it.
This seemed a little odd, but tests are tests and I recorded everything. It seemed odd, because years before, I tested a Custom 5 1/2 from Veritas – with V11 – against my own beech try plane sizing plane bodies from rough. The aspects of the beech plane other than the iron made it better for the work and I could do more actual planing volume before resharpening.
I was so pleased with the smoothing test, though, that I used the V11 iron and made a bunch of XHP irons for jointer, panel plane type work and smoothing. In work where the wood wasn’t already flat, like jointing rough wood edges, V11/XHP fell flat, nicked more easily and took longer to hone or grind. What worked well in the test didn’t turn out to work well in real life woodworking. Unless you are only smoothing wood, which I guess some people do, and then maybe it will work out for you. Continuous cuts in wood are the minority for me.
Lesson learned. I made knives with the rest of the sheet of XHP that I’d purchased and sold the V11 irons in the middle of all of this, anyway.
That’s important as background for why this test is just real work and not a controlled setup where you can measure everything and ensure everything is fair.
The Wood and Planes
Wood: Rough cherry sized for loft bed ladder sides. Same board ripped in half. The two subject planes and irons each clean up and flatten one half. No other planes.
Irons: Magnacut and a house O1 tapered iron hardened and tempered to about 61/62.
Planes: For Magnacut, a very clean and flattened T20 Stanley #6. For the O1 iron, a heavy cocobolo coffin smoother that I made years ago, larger than a typical coffin smoother, and heavier. 2 1/4″ wide. The plane isn’t new, but the iron is new. One I made this year and have used little.
Cap iron set: about 2 hundredths from the edge. Not a fine smooth set, but more like a try plane set.
Bevel conditions: Magnacut – factory bevel ground a little shallower than as arrived after initial planing, so second bevel. The O1 iron is also likely first bevel, possibly second.
Sharpening: freehand second steeper bevel set by india stone and then finished on an oilstone with diamond powder followed by 1 micron diamonds and a strop. This isn’t needed with O1, but diamond finish is a good idea with anything that has vanadium greater than trivial amounts. No physical difference in sharpening method or observed edge.
Planing: same shaving thickness for both planes based on observation.
Acquisition of the irons: purchased the Magnacut. Made the O1 iron.
(I think it’s important to note that the iron was purchased at random, I did no contact the seller and have on bias about how it will perform either way other than the hope that it would offer a “V11-ish-but-less-nicking” type experience based on micrograph pictures and toughness data )
Pictures – Backs of Irons after Planing
Pictures at 150x have a height of .019″. 300x pictures, half that.
First, the Magnacut iron pictures. See the descriptions under each.
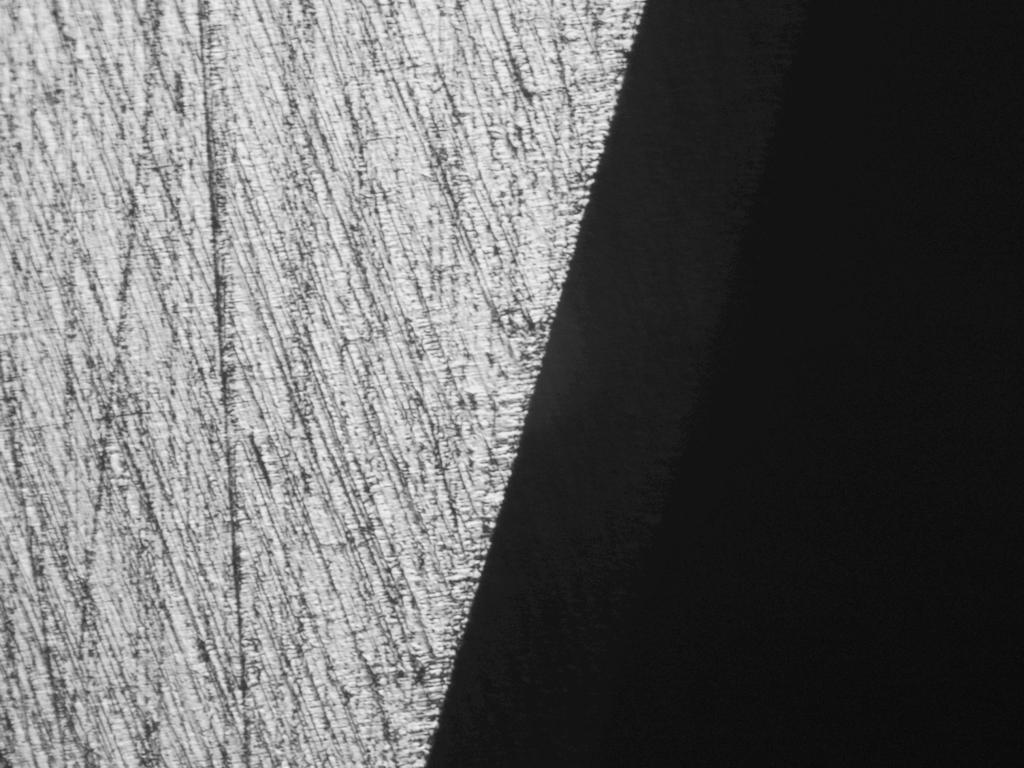
Magnacut – 150x – 1 micron diamond edge finish. Focus on the edge when looking at pictures and not the abraded flat area. This is an edge about 2 to 3 times finer than an 8k waterstone.

Magnacut – 150x – undamaged length of edge after planing. Note, the edge has become a little bit more round with wear and probably some shortening of the iron length.
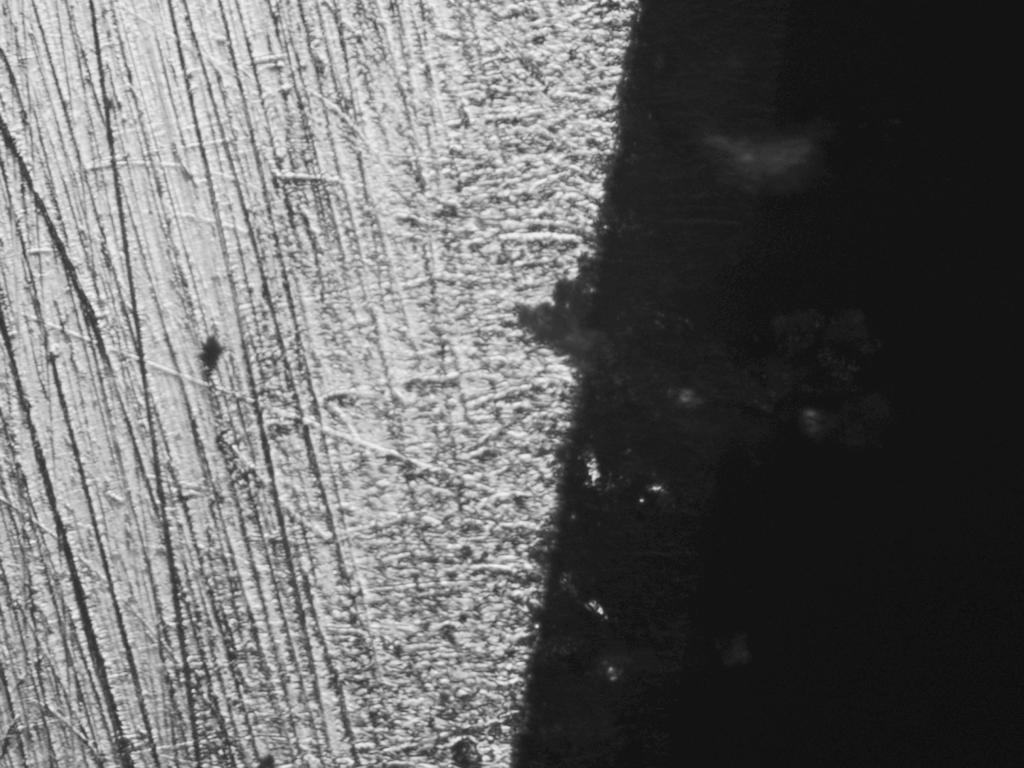
Magnacut – 150x – typical smaller denting along much of the edge.

Magnacut 150x – largest deflection damage

Magnacut 300x – typical edge areas with small deflections but also looking for carbide size. No large carbides visible, but wear may not have been enough to expose them. Smoothing with a close cap iron makes it easier to find carbides. No seeing any at all does help confirm that the production steel is fine like the micrographs of earlier batches show. The smudgy smooth look is wear.
All in all, it planed pleasantly, but the nicking did leave lines on the work. The large nick shown left a relatively wide very visible nick. It was at the corner of the iron, or within about 3/8ths of the corner.
Total time planing was less than 10 minutes with both planes used here. The damage is a surprise, along with relatively common back and forth between smooth edge sections and areas of small nicking. If the O1 pictures show much better, a more careful test will be needed with two irons in the same plane honed using a guide and an angle setter to ensure fairness.
The damage that’s shown is the type that leads to an iron feeling dull and refusing to cut as easily before much wear has occurred. The same as I observed jointing edges with V11 and using a jointer on jack-planed board faces. Without a direct test, I couldn’t say which of the two (V11 vs. Magnacut) performs better.
Second – O1 Iron Pictures
I did not take as many O1 pictures as I wasn’t yet sure I’d post anything of this test without confirming the results in a follow-up test. There was also no edge damage anywhere on the O1 iron, which lessens the need to show “typical” and “worst” damage on the edge.
The second reason this wasn’t a pre-meditated test, but more like middle of the process idea, is that coffin smoothers – even heavy ones – will beat up your elbows if you try to do too much non-smoothing work with them. My elbows were already well-used for the day, and they were feeling the punches from the coffin smoother. Moving to the 6 (normally would be wooden try plane) was a way to lessen the pounding.
At any rate, here are the two pictures:

O-1 Plane Iron – 150x – Typical Edge Wear. Note there is no damage anywhere on the edge, but you can see that the wear is greater in the same task. The O-1 iron did a little bit more planing due to some twist on its side of the board, but not enough to explain the greater wear by itself.

O-1 Plane Iron – 300x – Searching for carbides again. The light colored dots that you can barely see are probably carbides. Confirmation again that it’s easier to find them when wearing a pronounced shoot groove on the back of the iron when the cap iron is set closer to the edge. Note the wear smudge, but edge uniformity remains excellent.
Again, no damage pictures to show, so the story for O-1 is short.
The surprising results call for: 1) Picking an iron to test against Magnacut in the same plane, 2) using a honing guide to make sure the results are as fair as possible.
These pictures show what I believe was happening when V11 suddenly didn’t perform as well on my bench, too, unexpectedly showing nicks and leaving lines on work and ultimately being more trouble to use than O1. Steels like O-1 and 80crv2 don’t have much wear resistance, but the difference in honing off 3-4 thousandths of Magnacut vs. just doing a routine edge freshen for O-1 is significant. When removing the damage above in subsequent honing with a guide, a brisk session on a 400 grit diamond stone and extra attention on the 1000 side still needed a second go to completely remove everything. Failing to complete that just means you’re starting with an already damaged edge.
Failing to remove uniform wear down to the very last bit without edge damage still results in a finished surface coming off of the plane.
So much for the short text idea.

One thought on “Magnacut – First Practical Test”