Except I wasn’t working on a “real life project” while doing it. This is also a poo-poo of hard maple for hand tool work, which I think most people will come to if they try to work from rough to finish by hand with it.
I’ve mentioned woods that cause edge destruction. I don’t think anything other than silica is usually responsible for this. I find it in rosewood, cocobolo, etc, and for a regular tool edge, you can usually figure which will destroy edges not by hardness or some other easy boast, but by the fact that there will be visible silica. In rosewood, it shows up in pores – just look close. It looks like little white balls.

Note the white dots. Silica. They’re loose and you can brush them out or vacuum them out, but as soon as you plane through the pores, the next set of pores presents a new set.
You can see them in some soft woods like mahogany and limba, and they just do what you would guess in those. They make a plane dull quickly, but in soft woods, the planing seems nice and easy and suddenly the plane is dull.
Except, in maple, I don’t see anything like this. I see gray or brown spots that just look like minor discoloration and destroy edges as bad or worse than these little white balls do.
This stuff ruins tests
You can plane a few hundred feet and see nothing of these, and then find a discolored area that’s a couple of hundredths deep and gone. Before you get through it, though, it will prevent planing and it doesn’t have to damage much of the edge width to stop planing. A few small areas creates blunt damage that you can feel, and of course, you can feel the ridges on wood.
I was patterning carbides in the 10V test iron by literally just setting the cap iron close and planing wood to wear the matrix of steel away leaving carbides proud. And as I’ve seen this in maple before, I have planed probably a few thousand feet of shavings in “real work” as well as trying to get carbide patterns. No gray stuff. But it showed up here. Because they look innocent, I always think “i’ll bet this one will be all color and no edge destruction”. I think I’ve been wrong every time. Here’s what it did to 10V, magnified at 150x.
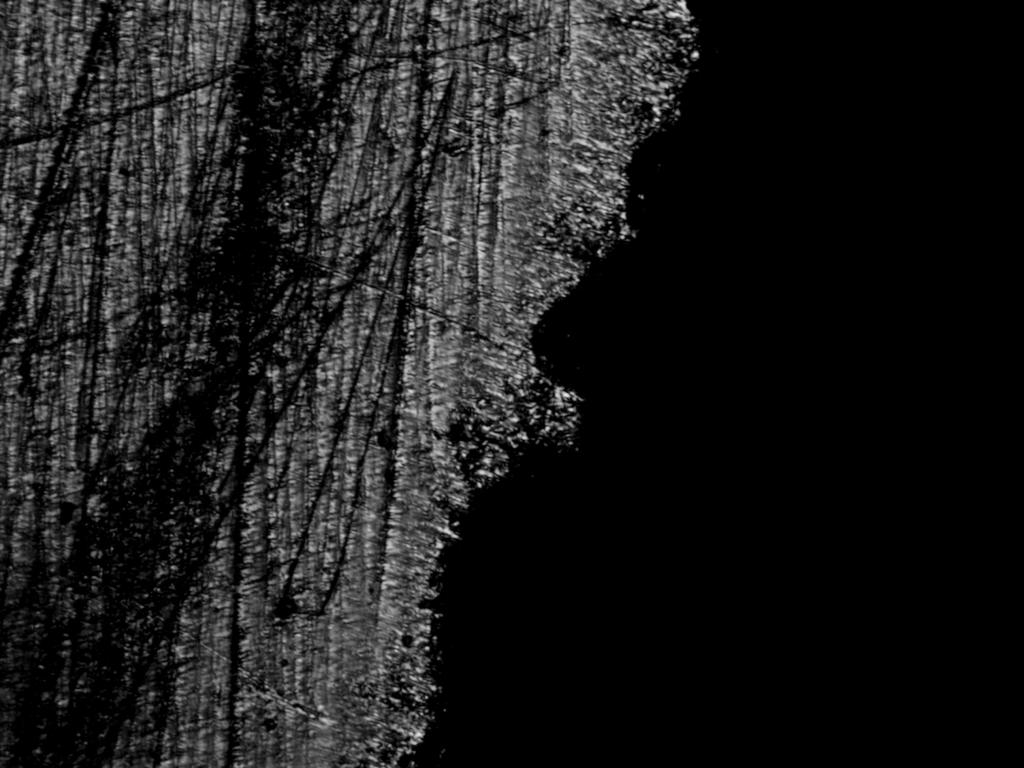

Ouch. About 1/8th of an inch of the edge length looked like that. It stops the plane from being able to enter a cut not just due to the dents, but because there is a 3d component to this. The edge is pushed back but also with deflections coming off of it going up and down. You can hit it on a hone quickly and remove the deflections and plane a little bit, but not for long.
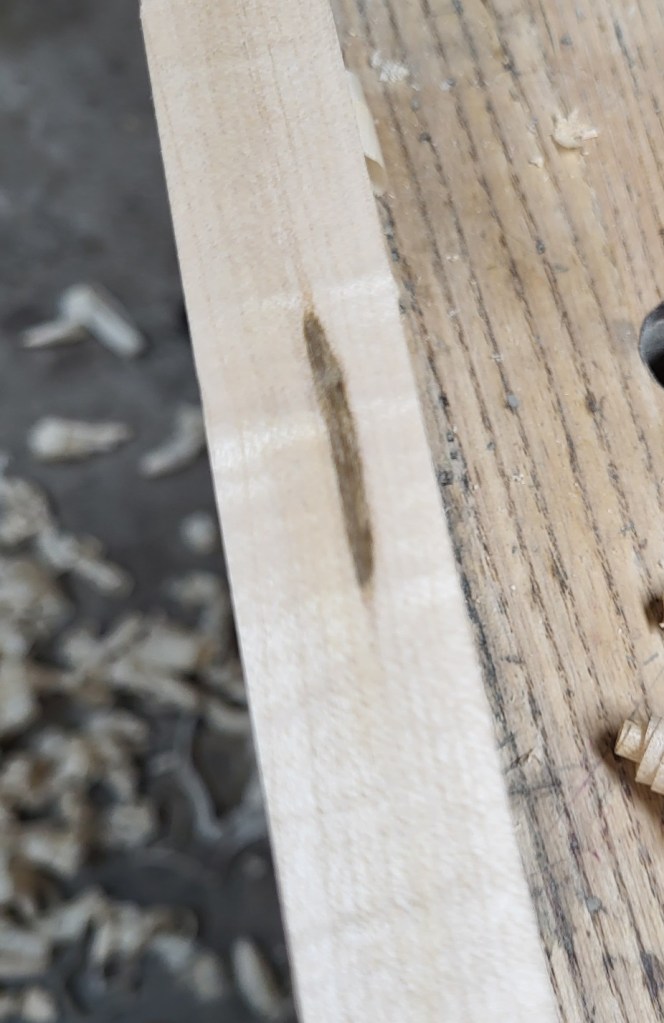
The next two pictures show close up what these deposits look like both on the wood and in a shaving. Looks innocent.

When I first found these weird spots testing a bunch of plane irons 3 years ago, of course, I used the occasion to plane every iron through the spot to make sure all of them got destroyed the same way. They did. All with a 35 degree total final bevel. The harder the iron, the better it fared, but none planed long. Perhaps 8 or 10 strokes and the work stops, and you have 5 or 6 thousandths of iron length to remove before you really know for sure it’s gone. And that is *a lot*.
So, what do you do when you encounter these? you may have wood that destroys edges like this from time to time and have no clue what’s going on. If you were planing across a board with a little brown or gray spot smaller than this one, fun ceases quickly. You may not believe that the little spot that shows nothing shiny or gritty is doing it and start blaming things on a defective iron. If you sharpen without actually being able to look at the edge, I can almost guarantee you’ll leave damage in and then blame that on the iron a second time.
And then go shopping for supersteel. Except that will probably make your life worse, because it just gets harder and harder to get the damage out.
The old texts and some gurus talk about “planing teak and woods like teak” by increasing the angle 10 degrees. I wonder if some of them have planed teak. You can certainly increase the angle and at some point it will probably plane OK but be intolerably steep.
The answer in this case is to buff the bevel side and maybe the back a little bit. If you buff enough, you’ll have trouble planing at all. If you buff too little, you’ll still find some damage, but a moderate amount of buffing will make it so that you can plane all the way through the damage, deal with the strange feel (a freshly sharpened iron that doesn’t dig in quite as easily) and move on. The level of damage that’s in the edge will probably be removed in one or two normal sharpening cycles, or only 1 or 2 thousandths deep, and if you get it dead right, there won’t really be any.
If you find wood like this and it’s not really pretty, then it’s wood to avoid with hand tools. Cut it with power tools and sand it. Maple is worth it for guitars, and you wouldn’t tolerate the discoloration in the first place in higher cost wood, so it won’t be encountered. Rosewood, mahogany, limba…obviously worth it sometimes, too.
Just don’t kid yourself that spending a lot of money on another iron will fix the issue.
I ended up buffing a 26c3 (razor steel, similar to white or good file steel) iron that’s very sweet but not very long wearing. It was fine planing through the gray area, at least with the concession of loss of clearance and increasing the shaving thickness a little bit. The resulting damage was about 1/4th as deep as the pictures above or less, and the deflection was minimal. The nice thing about steels like 26c3 is the buffer can polish them reasonably quickly.
10V, I haven’t experimented that much yet, but would expect you’d have to buff it for a *long* time.

This is really interesting. I remember you taking about the spots even you encountered them 3 yrs ago, but this picture makes it really clear. I’ve definitely seen those before, thanks for the tip on hope to deal with them.
LikeLike