(Really Close Up) Adventures in W2 Steel – Part 1

(Take me to the summary version instead)

I’ve described some excruciating details of 1084 and 1095 and 80crv2. The last makes a superb experienced user’s plane iron, and actually good for anyone, but I get the whole market thing about wanting to plane 22 times as many feet before sharpening. It’s in conflict with understanding efficient planing. 80crv2 was an attempt to fix issues with 1084 and 1095. But after making W2 chisels last week (substantially better as chisels than 80crv2), I got the urge to make plane irons.

Why? the old laminated water hardening irons set the lower limit on footage planed, which sounds like a problem. They’re about 75% of the life of O1, sometimes slightly more. But they have excellent edge stability and the frequent sharpening and low abrasion resistance means sharpening stays ahead of nicking, which they seem to do less of in the first place. You get in a rhythm with such a thing and nothing breaks it.

O1 and 80crv2 stand out to me as good plane iron choices. I like a certain things in chisels (as a toolmaker, but you would come to appreciate those things if you do a lot of chiseling and are past beginner stage). W2 has those things. 26c3 has those plus some, and 80crv2 is pushing it to be good at them. However the bias toward apex strength (hardness) isn’t really needed with plane irons. We will be wearing the tip of a plane iron, no way around it, and other geometric options solve things that trouble irons – silica, dirt, minerals in wood, etc.

So, liking the feel of 1095 but annoyed by inconsistency with it and sometimes defects in the bar stock, W2 offers the one thing that 1095 was also missing – a trace of vanadium to pin grain size. You can chase the heat level up just a little before quenching and get excellent hardness without any visible (magnified) grain size change. It’s not scientific proof, but thus far, I have not seen any decline in quality in use if there is no visual increase in grain size in a snapped sample.

By not scientific proof, I mean that perhaps there is some loss of toughness that occurs before grain grows, but if there is, it hasn’t affected woodworking.

So, knowing that W2 probably won’t last that long planing, I still wanted to experiment with it to see if it’s the 1095 that I wish 1095 would be, and with characteristics like vintage laminated irons. I don’t fully know the answer to that, but i did get a strip of .094″ stock and have made two irons with it in the last couple of days. And I’ve had a chance to run them through the plane iron routine.

The Routine

I have a routine when making a new plane iron. Part of it involves snapping samples as mentioned, and then moving on to making an iron. I prefer to heat before quench as high as I can, though that’s really in a very limited range – it shouldn’t be taken to mean that i’m eating a sandwich and watching steel turn yellow. It’s a matter of seconds and change in color.

After hardening, you can check steel with a file, but you have to know what you’ll get. For example, M2 high speed steel will be harder in some tempering ranges than it was before it was tempered. AEB-L will not be as hard as something like W2, but it may temper to a result that’s just as hard despite that.

In this case, anything plain steel – like W2 – we want to see “bull hard”, as my grandfather would say. I rarely do this file test on plain steel, but W2 in this case actually has hardenability alloying further reduced from that in 1095 and 1084 to allow it to be manipulated when differentially hardening. You have to be quick. So, i did check it with a file and confirmed that in thin things like chisels (earlier) and plane irons, it’s an instant file destroyer when untempered.

I double tempered the steel at 380F, hoping this would result in hardness around 62, but hoping for a free lunch (a point or two harder would be fantastic, but more realistically, would probably be a sign of grain growth).

After visual confirmation that nothing took tempering colors beyond what’s expected, I’ll finish the steel (remove the scale), and then profile the top of the iron, flatten the back, and then grind the bevel and hone. This should all be quick – the wildcard is the back. if the iron warps almost none, the back flattening and polishing is two minutes. If it warps a lot, this may be ten. I’m experimenting with 10″ diamond rotary laps to see how long they last. I’m wiling to spend a dollar of consumables without a second thought on each tool or iron if that removes dealing with a hand lap to do this. The hand lap is messy, hard on the hands and high pressure and low speed can actually lead to burning the iron accidentally.

After setup and honing, I like to plane a couple of hundred feet with an iron with the cap iron set close, assess edge stability and then get a picture of the edge to see visually how even the wear is and get a look at the carbide patterning. That allows comparing carbide distribution and size with published micrographs. I should not have something that doesn’t match. An SEM at this point would be dandy – that’s sarcasm. They’re not impossible to find used, but a good visual scope is fine here.

If you’re thinking about making five irons, you don’t need to do any of this. You can make your irons, sharpen and use them and over time, you shouldn’t have a thought that you’d rather use a commercial iron. If that’s true, you did well.

A Time Out – My Process in QuenchingDeference to Flatness Hardness at the Same time

Steels like this that need an extreme hurry on the quench have a reputation for warping because…they warp. I used to use oil. Then, I realized that faster steels need a fast oil (parks 50), and eventually found that the result is better if the low end after most of the heat is soaked out is finished with water. The result is better meaning the steel is noticeably harder. Water itself is a no go unless water hardening steel is laminated or thick. Not the case here – you’ll find the cracks instantly, or later when you are preparing the iron.

And then I read and learned that finishing in the freezer will improve a little more, but there’s still the warping thing. And I made quench plates out of aluminum bar that I have around and filled a stainless paint can with propylene glycol (think something used in cosmetics, but it won’t freeze at my freezer’s max effort -30 to -40F, usually right in the middle).

The quench sequence goes like this – you may find something like this useful even if you take part of it.

Step 1 – bring the steel to black as quickly as possible after the heat – in parks 50. Parks 50 is fabulous – it feels like any other oil, but it will draw heat out of steel quickly even when it’s not preheated, and even when it’s in a cold garage. Depending on the microstructure of the steel, it may be a point better than heated vegetable oil, or it could be 5 better. I go a little past black, but not below about 500F or a little more. The objective is to prevent pearlite formation, which is what you do intentionally when annealing in ash – try to get a mostly pearlite structure.

Step 2 – two quench plates. Place the iron between them and stand on it for five seconds to try to constrain the initial movement efforts.

Step 3 – quickly get the iron in water to get most of the rest of the heat out ( you can throw the iron in the freezer right after this – make sure you’ve gotten the heat out of everything, not just the part you’re quenching, as heat in the remainder of an iron or chisel will work its way back toward the end and it won’t draw temper, but it will prevent conversion of the “soft bits” in the steel to stuff that will be hard and tempered back. This is at a level like micro clay, not like sand, but it’s still occurring on a very small scale). This is seconds, but if water is your stopping point before the freezer, you can just drop the items in the water a couple at a time and leave them there. The colder the water, the better.

Step 4 – for me, is to use the propylene glycol so that I can get as cold as possible faster, and then when a pair or quad or whatever I’m quenching is done, I’ll take the metal bits and put them in the freezer.

This all sounds idiotic and tedious. For each quenched tool, the time from getting out of the heat to getting into the bucket of P-G is less than 30 seconds. I’m in a hurry on water hardening steel – it makes a difference. The whole thing is a bunch of compromises, I’ll describe them briefly. The colder the end of the quench, the harder the steel. But just racing to it with no control (as in, leaving out the plates) will result in a lot of warping. So the first part of this is fast – in parks 50. I don’t have to worry about the oil heating due to small batches and because if the oil gets a little warm, it doesn’t make a difference – steel doesn’t finish in it, just start.

I’m chasing every bit of hardness I can get without growing grain and without tolerating warp. The only thing I can think of to chase a little further is the liquid nitrogen, and if I were lucky enough to live next to welding/gas supply, I’d just keep it on hand all the time. It would replace P-G in this case.

The plates don’t eliminate movement, but they lessen it a lot when used properly, and there may be some concession to hardness, but if there is, it’s small. The water prevents whatever is coming out of the oil and plates from heating up the final P-G paint can.

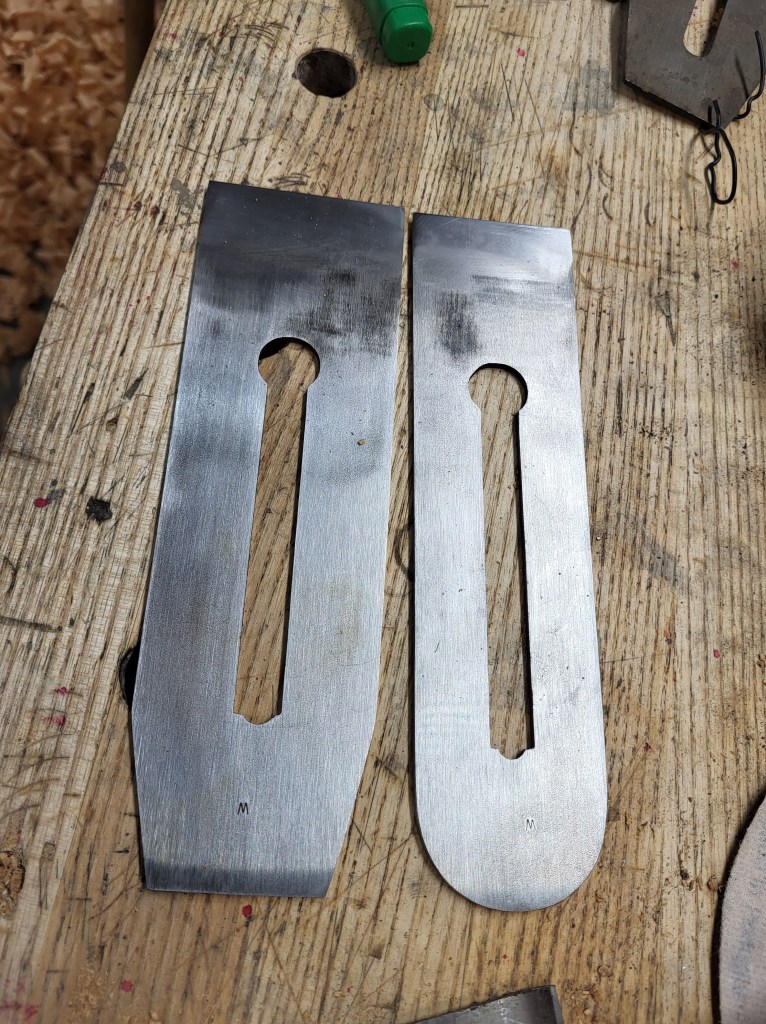
Since this has gone long already, just describing getting something in good shape to test, I’ll post the close up results for W2 in a separate blog post within a day or two. Until then, I can at least show a picture of the two irons. I used to not mark anything, but I’ve realized over time that putting it off until later makes things difficult! I use no other steels with a W, so stamping a W on the top of these irons is good enough for now. I’ll find my number stamps later – finding a source of 1% W1 is always possible in the future.

O1 Steel for Woodworking

I often toss around the trade names for alloys (can’t keep track of the brands that try to hide – if you recall yesterday’s discussion of W2, there are something like 30 trade brands for the same thing).

But what I don’t have is my thoughts on steels that I have experience with, so you can reference them if you’re the rare person who comes across this blog and want to know basic characteristics.

I think it may be a good idea to put a summary of characteristics for each, and some description. There are descriptions of steels all over the place, but they are not commonly described in a woodworking context, and when they are, often by ad copy and lacking accuracy or tangible meaning.

Characteristics of O1

(characteristics are not for high speed turning or drilling)

Reasonable Hardness Range: 59-64c. Sweet Spot: 62c

Toughness: At the lower end of suitable (but still suitable – only a problem if heat treatment is poor).

Edge Fineness: Very good (fine carbides in the 1-2 micron range, evenly dispersed)

Edge Stability/Keenness While Dulling: Good – stable edge fineness for anything but fine razors. Retains good sweetness while dulling during planing (smoothly picks up shavings and retains uniform edge until sharpening is needed to remove wear)

Wear Resistance: Good. We’ll use 62 hardness O1 as the bar going forward as no skilled woodworker would be dissatisfied with edge life at that hardness, though amateurs may perceive they should be. That’s a different problem.

Elimination of Defects in Routine Sharpening: Good with good heat treatment. A skilled user is unlikely to need to “stop and grind nicks” before an edge is dull.

Brief History

O1 is a relatively modern (for steel) follow-on to water hardening steel. It’s more hardenable, meaning that it has more additives that are required to harden steel (manganese, and chromium notably) with chromium doing something positive in small amounts with iron carbides according to Larrin Thomas. The composition of the steel in general will be provided at the end of this article. My thoughts are generally that you can feel the alloying in O1 if you get used to water hardening steel. it’s “slick” feeling on stones at same hardness, but not nearly so much as something like A2.

The through hardening (= the entire cross section of a tool being hard through and through rather than just in a surface layer) and relatively easy machining makes it ideal for some die making and machine shops, so I think we will not see it disappear from woodworking use, but it certainly wasn’t developed for woodworking. Actually, I’m not aware of any steel that was ever developed for woodworking – we’re a small market and we use what’s available.

Increasing Manganese for hardenability wasn’t really an original idea. In the 1800s, an early type of air hardening high speed steel was discovered or developed (Mushet steel – you can look it up). As far as I know, Mushet relied on a lot of manganese (double or more that found in O1, ten times or more vs. some fast quench water hardening steel). Too much and steel is brittle – the fact that we’re not using Mushet steel probably has to do with brittleness or cracking because it’s possible for steel to be so easily hardenable that in open air, it would cool too fast to be stable.

What happens in general for us (this always depends on what you’re comparing O1 to), the alloying improves wear resistance (increased hand plane life vs. water hardening) over very plain water hardening steels. The overall effect of the additives leads to strangely uniform small carbides given the amount of alloying, too. In terms of the reduced toughness, there is still enough for woodworking. That’s important – the world of all purpose knives and boutique knife makers where a lot of robust steel discussion occurs…..very fascinated with toughness. People return knives they break. We typically don’t break tools made of O1 because we’re not prying in tree stumps to make a youtube bugout camping video. What we like is strength and stability of the very tip of an edge that’s in the wood severing fibers, and O1 is relatively good for both of those.

Commercial Availability in Woodworking Tools

O1 is relatively common in boutique tools. some variation of it may be in older tools, but most European tools that don’t mention the type of steel or mention Chrome Vanadium are generally not O1. If a manufacturer uses the alloy, they usually mention it as use probably was uncommon in thinner cross sections (plane irons) until the last several decades.

Iles makes good chisels in O1 that seem like they’re right in the sweet spot, though I’ve had a set of boxwood handle chisels that were a bit soft. LV offers an array of irons that are a bit underhard to be as good as they could be in my opinion, and Hock tools offers tools that are on the other end of the usable range. There can be reasons for both of these – but it’s my opinion that a typical user would prefer something done between the two.

For Hobby Toolmakers

Not a great steel for forging, but there’s little that a hobby toolmaker should be done that involves any of that. Leave that to people making reproduction lock sets and starring on cheesy TV shows. Bar stock from good retailers or known mills (Starrett as a brand, Precision Steel (brand), Bohler (mill), etc – ever so slightly different in composition but all good).

Stability in hardening is middle of the road but far more stable than the most unruly of water hardening steels, and just generally heating to nonmagnetic and then some past that (quickly, like seconds, not minutes) results in good tools that will match commercial offerings.

No special oils required to quench due to the additives. And easy to grind, drill, file, shape with only moderate air hardening if heated to red heat while working.

Typical Composition:

Carbon: At retail, usually 0.9%-0.95%

Manganese: 1.2% (you’ll find out that vs. plain steels, this is a lot)

Chromium : 0.5%

Tungsten: 0.5%

Silicon: 0.3%

Vanadium: Up to 0.3% (but in US retailer offerings, usually not included).

These are what I’ve seen from easy-to-find retail sources, and not necessarily a full industrial spec (range may be wider).

Sites like Knifesteelnerds.com have more information on the history, and the owner (Larrin, a “real” expert metallurgist) will perhaps have something more specific in terms of historical spec vs. current. Interestingly, steels as they were offered originally often have changed over time depending on the conversation. For example, if there is a precursor to O1 or a whole series of oil hardening steels, what remains now may not be what was initially popular due to improvements or changes for other reasons.

You can also find generalized specs at steel suppliers.

If you want to machine O1 quickly, finding it in spheroidized condition (if listed) is a good idea. If you just want to grind and heat and quench bar stock, getting the steel in annealed condition should be better. Steel that’s spheroidized can be intentionally cooled very slowly so the carbides have “balled” to be larger and further apart. However, Starrett is spheroidized and before I knew that, I heated and quenched it in soy oil and the results were good. You can do better once you know a little bit more, but I’m not sure any woodworking tool user would notice.

Final Thoughtit’s the Reliable Fairway Wood off of the Tee, Especially if You are a Maker

In the hardness sweet spot for me really the middle of the range, and 61.5-62 is about where I end up with a 400F temper, it’s like a reliable golf shot that scores well. Everyone always wants something for nothing, but O1 is a steel that gives you a fair something for something. And much of what’s in current woodworking tools gives you a little less than that fair “something for something”.

There’s nothing that O1 is really lacking in practical planing or chiseling, so it becomes the bar I judge other steels by. If I mention O1, like in the post about experimenting with W2 to make a large chisel, that there’s something I want a little more of vs. O1, it’s hard to describe if you’re not used to small improvements. Those mentions aren’t because I think O1 is something I couldn’t live with, but for example, if another steel may find its sweet spot in chisels a point harder with less alloying, I find that nice. Not differentiating for day to day woodworkers, though.

If anything, I think if you find you like Hock’s irons (but you may find that they nick easily before they’ve worn a little bit) or you want O1 from Lee Valley, but you find edge life short, it’s worth asking LV (who now has purchased Hock) why the irons aren’t offered at a target of 62 or 61/63, whatever is practical. In actual practical planing, i’ve found better life than when harder or softer, and chisels are far superior at 62 vs the low end of the practical range.

A Quick Note about Hard to Find Steels

I don’t know that too many people will make it through my prior discussion about W2. I could sum it up a lot shorter, like “it’s a lot like older steels because it is a current melt/roll of older steels with little alloying, and it results in a suitably hard plain steel chisel that will deal with hardwoods and not tie you up on sharpening stones”.

That’s true.

But wrapped in that whole discussion is that I am a subset. If you are going to hand make things with metal and really strive to do the heat treatment well – like furnace matching well or even see if you can poke past at least the commercially offered tools in a similar alloy, you run into what’s available.

W2 is available from one source that I’ve found at retail. Zknives lists at least 45 or so branded mill products that you could get if you wanted to order it. What’s the minimum size for a melt? no clue. I’ll bet something is being used industrially in great amounts – we just aren’t allowed to tap that supply like a maple tree and get what we want.

And when it comes down to things ideal for quick heat treatment in a forge (and markedly better than something like 1084), that just means what could be available and what is are different.

In this case, LN lost heat treatment of O1. Hock mentioned that he lost his local source. I noticed more than one discussion of heat treaters pulling up the ladder on O1 steels and removing them from their list of what they’ll heat treat.

The only reason that I can get W2 is not for woodworking tools, but because not very hardenable (only gets full hardness with a very fast quench), which allows manipulating the appearance/transition on decorative knives.

Whatever the case is, I’m glad W2 is currently available. It’d be just dandy if the increasing hobby knife market draws more of these oldies back off of the “could get if ordering a melt” list to “stocked by retailer” list.

W2 Steel Chisels – Surprisingly Good – and Surprisingly Hard

It’s early February. Those two characters (W2) probably make people think of doing taxes. And the steel is probably very little known.

But I followed up the first pair of chisels for little boys with acromegaly trying W2. Why? 80crv2 is OK. It’s missing something hardness-wise, which results in a chisel that’s maybe sweeter on the stones, but I prefer something with some hardness and bite.

There are all kinds of options to try next, but I do not have a heavy blacksmithing setup, so getting a giant ball bearing or a piece of round stock 3″ wide and 3″ long and drawing it out is no bueno.

You’ve probably heard of O1, which I could get. O1 makes a decent chisel, but I’m looking for more than decent. It also lacks toughness (resistance to breaking -not chipping, but breaking from prying). I don’t think the toughness is a big deal as I’ve never broken anything in O1, but I want a notch up.

Day to day chisel making, for me at least, is 1.25% carbon 26c3. It’s unusual for chisels, but it makes a superb chisel. 80crv2 emphasizes toughness and, and there is probably a little bit more improvement in the hardness department, but if the window is that narrow to get it, I’ll leave it to plane irons. It makes a nice fine grained plane iron.

W2 – By Composition

W2 is, by composition, similar to a 1095 spec (0.9-1% carbon for the only retail source), but with the addition of vanadium, and in the case of what’s available, maybe even less hardenable (needing an even faster and more warp-risky quench).

It is low hardenability (needs a very fast quench to get high hardness), with small amounts of manganese and chromium added. And there are a few other alloying elements (a trace of tungsten, silicon, …). The vanadium is important to me. I can make a good chisel out of 1095 now. I couldn’t early on. It also suffers from toughness problems, but more importantly, I haven’t always seen uniformity in broken cross sections in 1095 – and those are the result of quality problems.

If you read the internet for a while, you’ll probably see a history of steels in the last 200 years that goes like (and this is curated for boutiquers – not a complete professional history).

Cast steel

Followed by W1 steel (not W2, but more on that in a second)

Followed by O1 steel

Followed by A2 (boutiquey), and Chrome Vanadium – a very generic term often derided, but the CV steels go anywhere from paint can opener quality alloys to razor and hard drill rod). And in this, is apparently, 80crv2 used commonly according to Larrin Thomas. We just don’t know who uses it. Probably European makers.

The W-steel groups and mild steel and pure iron (instead of wrought) weld electrically. Presumably, their presence came about due to industrial need.

O-1 is more simple – increasing hardenability makes it so that the steel is more stable and can be cooled more slowly and still get full hardness. This is a big deal to a manufacturer, and it’s important for a machine shop making one-off dies or parts. Oh – and also importantly, if you need a reasonably good die, it can harden in much thicker cross sections than cast steel and W1.

O1 is a good steel, and wonderfully easy to execute – and this discussion is keeping me from talking about W2 -but there’s a little something missing from it for me, both in irons and chisels. We are talking about the narrowest of things. I could make all of my tools out of O1 and work wood and never lack for something to use and make nice things efficiently. I think the same isn’t true for everything out there. For example, if I were actually going to do a large volume of work by hand only, I’d have no tolerance for Lee Valley’s V11 chisels. They work, of course, but their abrasion resistance is out of place on chisels and the edge doesn’t hold up as well as cheaper steels at same hardness.

That itself may sound odd to folks who have had O1 and V11 from Lee Valley – because LV specs O1 pretty soft and it doesn’t hold up well in apex critical things – like chiseling. That’s a choice on LV’s part – I could only speculate as to why – whether that’s a product of manufacturing ease dealing with O1 or if it’s a preference to have something that sharpens really easy at the cost of performance.

Oh – and that dimensional stability thing. O1 was seen as very stable compared to water hardening steels. But A2 and other air hardening steels as a follow-on are more stable yet, and O1 is fast becoming panned by commercial heat treatment services. Rob Lee mentioned the same thing to me (publicly on a forum) – that he likes O1 – but with his business hat on, he likes V11. When I quench XHP (which is V11 by Xray analysis results), it just stays straight. I get it.

So in the history of what we see used in boutique tools, stability wins. And 1095, 26c3 and now confirmed -W2 – are far from being stable in heat treat. They will warp if you don’t do everything right, and the faster you chase the quench and lower the temperature tail at speed, the more the warp. We can learn to deal with that – both in improving technique and in follow-up grinding.

So that brings us to W2 (vs. the W1 you’ll see mentioned everywhere). The original specs of these water hardening steels are very wide. That probably has to do with patents. 0.7% carbon to 1.5% carbon with ranges for other alloying elements. While the classification is wide, you may love a 0.9% carbon version and not 0.7% or especially 1.5%. I don’t order W1 steel because it’s not often found with a mill origin or certificate of actual composition.

But W2 is sold by New Jersey Steel Baron with batch certificates and a much tighter spec. So without being able to get my favorite (26c3) in 3/8″ bar stock, it’s just the thing to try. Carbon appears to be about 0.91-0.97%, manganese is half of what you might expect, and there’s a small amount of chromium to help hardenability and probably to keep some of the carbon in carbides and not in the matrix of the steel – too much carbon in solution and not in carbides leads to toughness problems. This is what is occurring in 1095 and O1.

And the steel is from Buderus and not “mill not named”. Good.

It sounds like…..

…..a plain steel that will require focusing on a simple but well executed heat treatment, an eye toward limiting warp, and rewarding chasing the steel from hot to cold as cold as possible and as fast as possible. And it’s not expensive, which is nice, but not that big of a deal for a hobbyist.

Could it be the steel that makes tools that feel like “old tools”? O1 doesn’t feel like old tools, nor does 80crv2, and I’ll admit, if 26c3 is landing at 64 hardness with a full double temper, it’s a bit hard compared to older tools. And the potential to use it up to 66 hardness after tempering – it will stifle sharpening stones.

Reading about W2 finds me landing at blade forums. That’s the site that I got banned from for talking about forge heat treating and being insistent that for simple steels, there’s no drawback. Interestingly, what I asked initially was if there is a “1095 with vanadium”. The answer there was no and my answer as to why (having the vanadium to pin grain size small and drive temperature past furnace soak temps just prior to quench to chase hardness), that’s what started trouble. “you can’t do that!!”. 26c3s results bettering furnace results (by a lot) and O1 matching wasn’t enough proof and nobody could seem to mention that W2 is available. So finding discussion of it there after the fact is humorous.

The discussion is littered with comments of not getting it hard enough, which isn’t a surprise – live by the furance, die by the furnace. Chase it slightly hotter than needed for a matter of only a few seconds and then quench as fast as possible and guess what -that concern went away. It’s bonkers hard. Right on the heels of 26c3 before tempering.

A brand new file will not touch it, not even the slightest anything on the sharpest corner. After a double temper at 375F, it still has a bit of a hard tempered attitude – just what we want in chisels. it’s a bit stifling for an india stone and skates on oilstones. That sounds like it’s too hard, but it allows use of the india stone to do minor work (grind for anything else), and an oilstone will polish and leave a blinding edge.

How the Chisels Turned Out

A review of what I want. A chisel that will not roll, but will not chip easily. 26c3 does this. A chisel with high hardness as that’s needed for holding a reasonably fine apex. 26c3 does this, of course. 80crv2 fell short in both of these a little. And excellent burr performance if possible – as in, a burr is raised on the middle stone and disappears on the fine stone without creating a nuisance after finish honing as softer steel might.

The hardness ended up higher than I anticipated so at this point, other than experimenting with some samples later and snapping to examine grain (more for longer-term consideration to use in both chisels and plane irons), the one thing that will expose large grain is chiseling something really hard. Like near water density wood across the grain.

26c3 handles this. 80crv2 rolls quickly.

W2 handled it just fine.

one 80crv2 chisel on the left – two in W2 at the right

The back sides. The left and right chisels are done and working. the one in the middle, I’m keeping along with the left. I’ll mail out the other one in the next two days. Chisel 2 is probably not prepared yet in this picture, but back flattening and setup was done after. Both w2 chisels are better than either 80crv2 chisel by a lot – which is a good thing. That was the objective.

These chisels are good enough that I’m not going to make two more in 125cr1, which NJSB listed just recently as an alternative to 26c3.

When I mention all of these alloys, I know it’s dizzying – without describing them and the characteristics, the discussion lacks resolution. But the details probably make for the need to ….make notes. I can’t really help that. Anyone who has worked through these discussions of steel will be long past “1095 is for saws, O1, A2 and V11 are for chisels”.

We’re not really looking for light and airy at this point – we’re looking for results, differentiation and learning. As one of my college professors said (in a challenging class, where it always seemed like he kept us confused and thinking hard) “learning hurts”. I have one goal when making chisels that stands out to me with everything else secondary. Can the chisel that I just made match anything vintage that I’ve seen and better anything current outside of japan. The answer for 80crv2 was no. So far for W2, the answer is yes. Finding that is what I want.

How do I Test?

I test chisels right off of the first grind. That’s two-pronged. First, it should be the worst part of the first several inches of chisel length, and second, if I can’t make that part workable, then from the making standpoint, I need to revise what I’m doing. It may be true that commercial chisels or irons can be lacking for some length, but that’s preventable.

If they are better a little further in, that’s fine – but I want the first grind and sharpen to have ideal characteristics.

I test in order:

  • By feel of the grind – if a chisel is soft, I will be able to tell finish grinding. This is unfortunate because it lets the air out of the balloon a little early. By soft, I don’t mean it’s 53 hardness instead of 63, I mean if it’s 60 and I’m hoping for 63, you can feel a pretty significant difference in how the chisel feels while grinding, and of course, some difference in the speed. Softer leads to more of a bite from ceramic belts, and harder more of a skate.
  • By feel of honing. For plain steels, a little bit of skating and not much steel removal on a fine india, hardness is high (62+, perhaps 63+). Skating on oilstones mostly aside from honing peaky scratches, also same hardness. Anything less, and it’s a matter of how much. Once the burr is established, in this high hardness range, it will generally come off of a plain steel on mid-fine oilstone and what is raised further will not be large. Softer can make a decent chisel, but it’s not my objective.
  • Buffing off the burr – the amount of “stripe” made at the very apex is highly dependent on hardness. Subjectively 59/60 hardness will buff twice as fast as 63/64.

And then tests in wood:

  • Paring hardwood (picture below). i try to pick something that is hard enough to be differentiable. Not pine or poplar.
  • Malleting a volume of harder cherry or hard maple. Cherry isn’t as hard as maple, but what damages an edge on one malleting seems to work on the other. Put differently, if I mallet a volume of wood and see any sizable defects, I’ll find it in either one. Zero defects in an edge is acceptable. It takes a fine microscope (not a 40x loupe, but something more like 150x optical to really differentiate and fine if there is nicking and how much. Sharpening removes a thousandth – anything more is a hassle if it’s avoidable. That is, a long interval of heavy use should be addressed by routine sharpening. A mediocre chisel won’t meet that standard unless it’s made pretty blunt).
  • Paring wood again after malleting is also fine – the surface should remain line free.
  • If that is passed, I have some older rosewood that is more than 90% of the density of water. It will destroy the edge of a mediocre chisel malleting across the grain. If a chisel is really good (a properly made japanese chisel, or one made out of very good quality files -properly – or 26c3, or the best of vintage chisels), it will tolerate some amount of malleting with a regular (not steepened) edge and take no more damage than the depth of regular sharpening.

How important are these tests? For you, maybe no big deal. For me as a maker, or some kind of critical comparisons of what you’re doing – furniture, fly rods or whatever – they are what will make you better. If you don’t have the fire for that, you’re destined to end up talking about making things on forums and not making much.