I need to mark the tag. Having the plane in hand will offer the chance to make sure the tab engages.
I need to either count teeth, which I stupidly did before, or be smarter and take the marks from the teeth on the original iron and transfer them – tape on in this picture, pencil over the tap and then transferred to the rebated tab that’s not yet attached to the replacement iron. 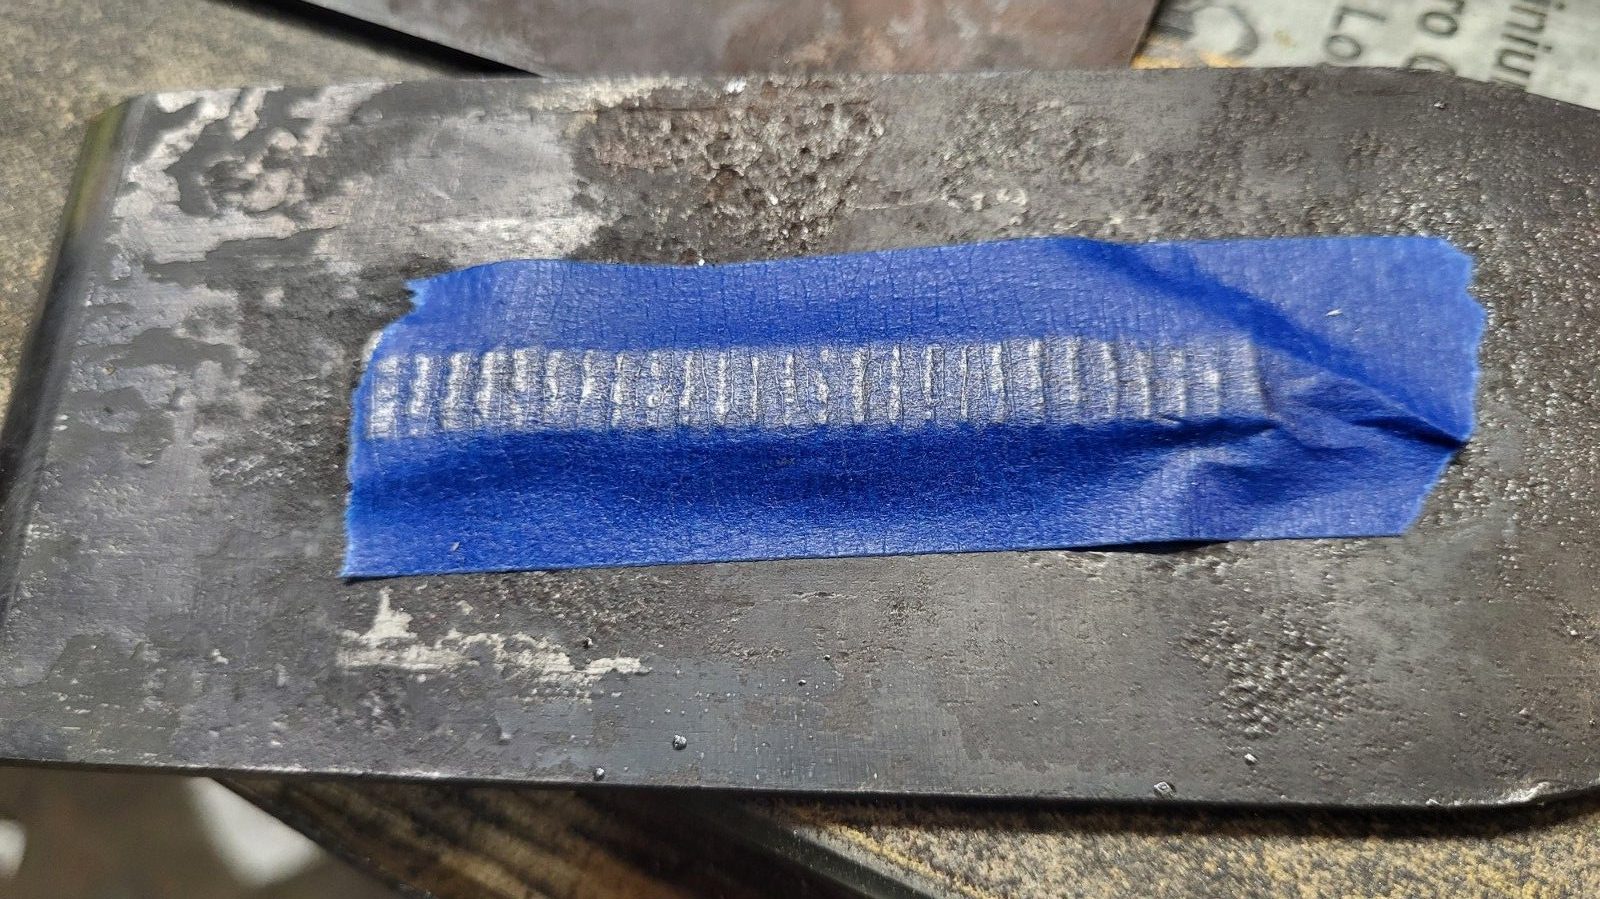
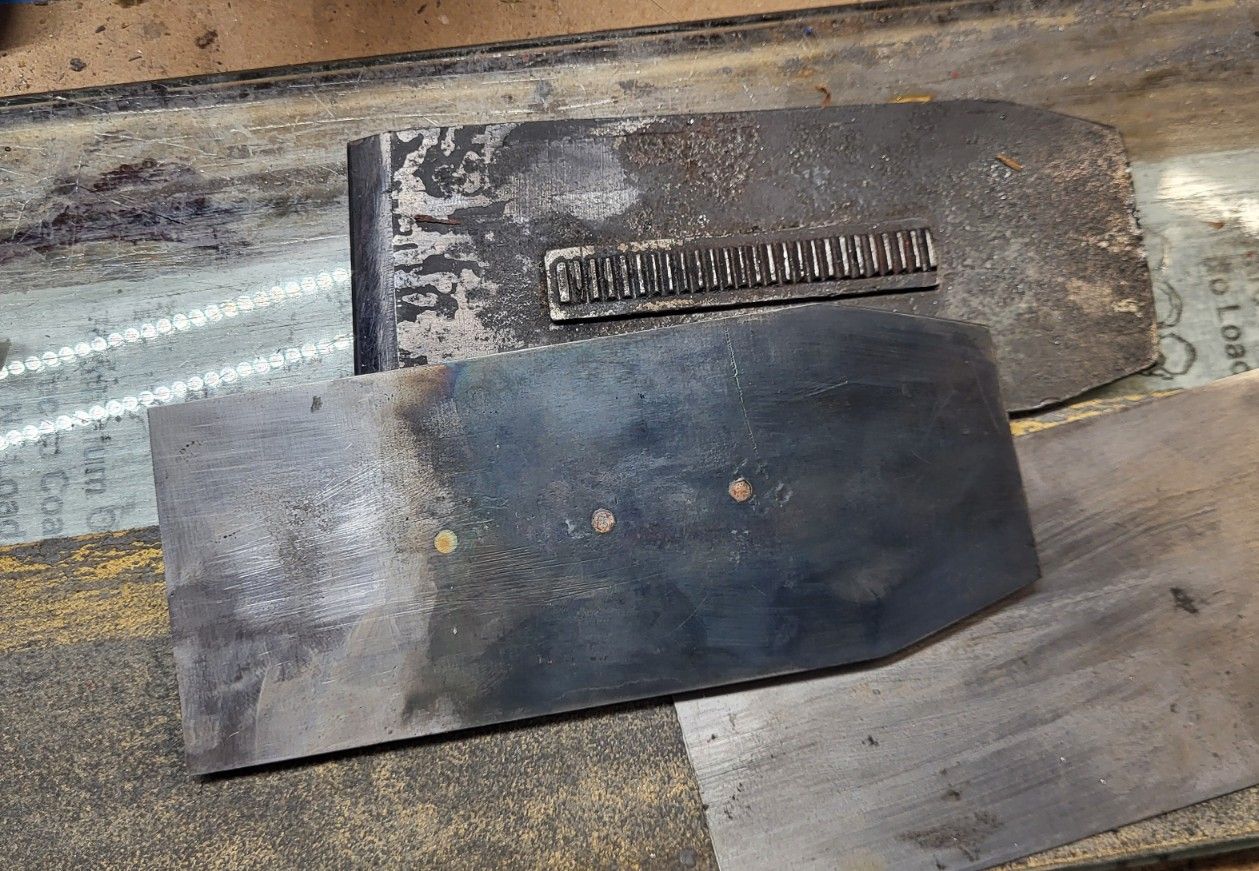
If you look in the original post, the tab on the iron is crooked – but you can see it above here, too – it’s not perfectly parallel to the iron length. The replacement tab is still on the CA block, which allows for easier work starting the initial teeth and hoping to minimize any file marks on the final iron, still left a few file marks on the iron after installing the tab and correcting the teeth.
At this point, I removed that tab from its wooden block and marked center on the iron and CA glued it on and drilled through the iron just going through the holes that already existed on the tab, knocked the tab back off then and removed all of the dried ca glue and then peened the tab in place with brazing rod. I wanted the rod to be narrow diameter so that some of the tooth is still steel and won’t be bent or folded by the matching teeth on the plane’s adjuster.
And noticed that mine, too is crooked – I guess it moved a little while I was placing it and then made that issue permanent by drilling. Oh well. A little late to fix it without unnecessary trouble – a check of the plane shows that it’ll still be fine with the adjuster, just like the original. The plane’s adjuster has a lot of lateral room seemingly to allow just for such an issue. Smart. The initial teeth with the tab peened to the iron look like this:
Woof – those teeth are pretty ugly. The bronze adds an interesting challenge if you work by feel – it feels like grease when you’re filing it and it hides that you’re filing steel at the same time, you can’t feel it. I’ll do what anyone with self respect would do, fix the teeth a little and blue the whole iron so you can’t see them very well.
At this point, the iron is close to being done, and is it flat enough? It should be. I did check the iron before peening the tab on – it’s ever so slightly hollow along its length, which is just what I wanted. If it was convex at all, rather than lapping it flat, I’d belt grind a tiny hollow in it. like several thousandths, but something that will show up as visual confirmation everywhere on the iron. it’s probably a lot flatter than the original. I ground the top corners off, and cleaned things up a little but not like a brand new surface ground iron – I don’t want it to look like CNC in an old plane. that looks stupid and it would be doubly dumb to waste time going over this iron to hide that it’s hand made.
A couple of the teeth could still be evened better to improve the uniform look. but we’ll see how it works, first. I did nothing else after this but apply some carnauba wax so that it if it rusts, it won’t do it on my watch.
I do wish I hadn’t been in a rush through some of the parts – the holes not in line, the wonky teeth and the tab going on somewhat diagonal. But it’ll be fine and none of that stuff will show up when the iron is in the plane. From start to finish, it took about 2 1/2 hours to make this iron. It’s not exactly simple, and with limited tooling, I had to figure out what I’d do to rebate the tab and so on, so the first one always is a little ugly and takes a while. It would still never be a one hour project without having a production setup that would take enormous amounts of time to create. That obviously wouldn’t make sense, and posting this in an online forum would probably draw some retired machinists who would tell you how they’d do it. See if they can set something up in 2 1/2 hours including heat treatment. And do it for free.

Heck, I won’t complain! It looks good.
I need to figure something better than the replacement cap plate that came with the plane. I have a 0.070″ steel plate, I think it’s 1080, that I was planning to use for thin plane irons. I can take a stab at making the screw cap. That’s within the realm of my skills.
LikeLike
I’ll give you something thicker. I’d use 1084 or 1080 or something, but see if you can discern proportions from the original. I think you’ll want to harden the chipbreaker to spring temper and leave it thicker than the original at the top so that you don’t need a fixture to accommodate the threading for a screw.
LikeLike
I was thinking 0.070″ is plenty thick. I’ll compare with the smaller screw caps I have.
LikeLiked by 1 person