That would be part fore, part Jack, and part try. The reality is, I don’t need the plane, but I need what it offers to build the plane, which is just the same kind of three dimensional satisfaction that you can’t get by reading about things or having to sort out real problems. That’s the draw of the shop for me.
There are some ulterior motives. I wanted to make the iron and cap iron and see if I can make them to a standard that ward would. Jury is out on that. And also, i’ve always just loved running a jack and try plane through wood, but once in a while, a full sized try plane can be a little much. So this tweener plane really has the most potential use as a smaller try plane. if it fails at that, it’ll just be set less aggressive than my usual jack and used in its place.
The reality is this role is also undertaken well by a stanley 6. But it would take a long time for me to figure out how to make a Stanley 6 and it probably wouldn’t be that great. 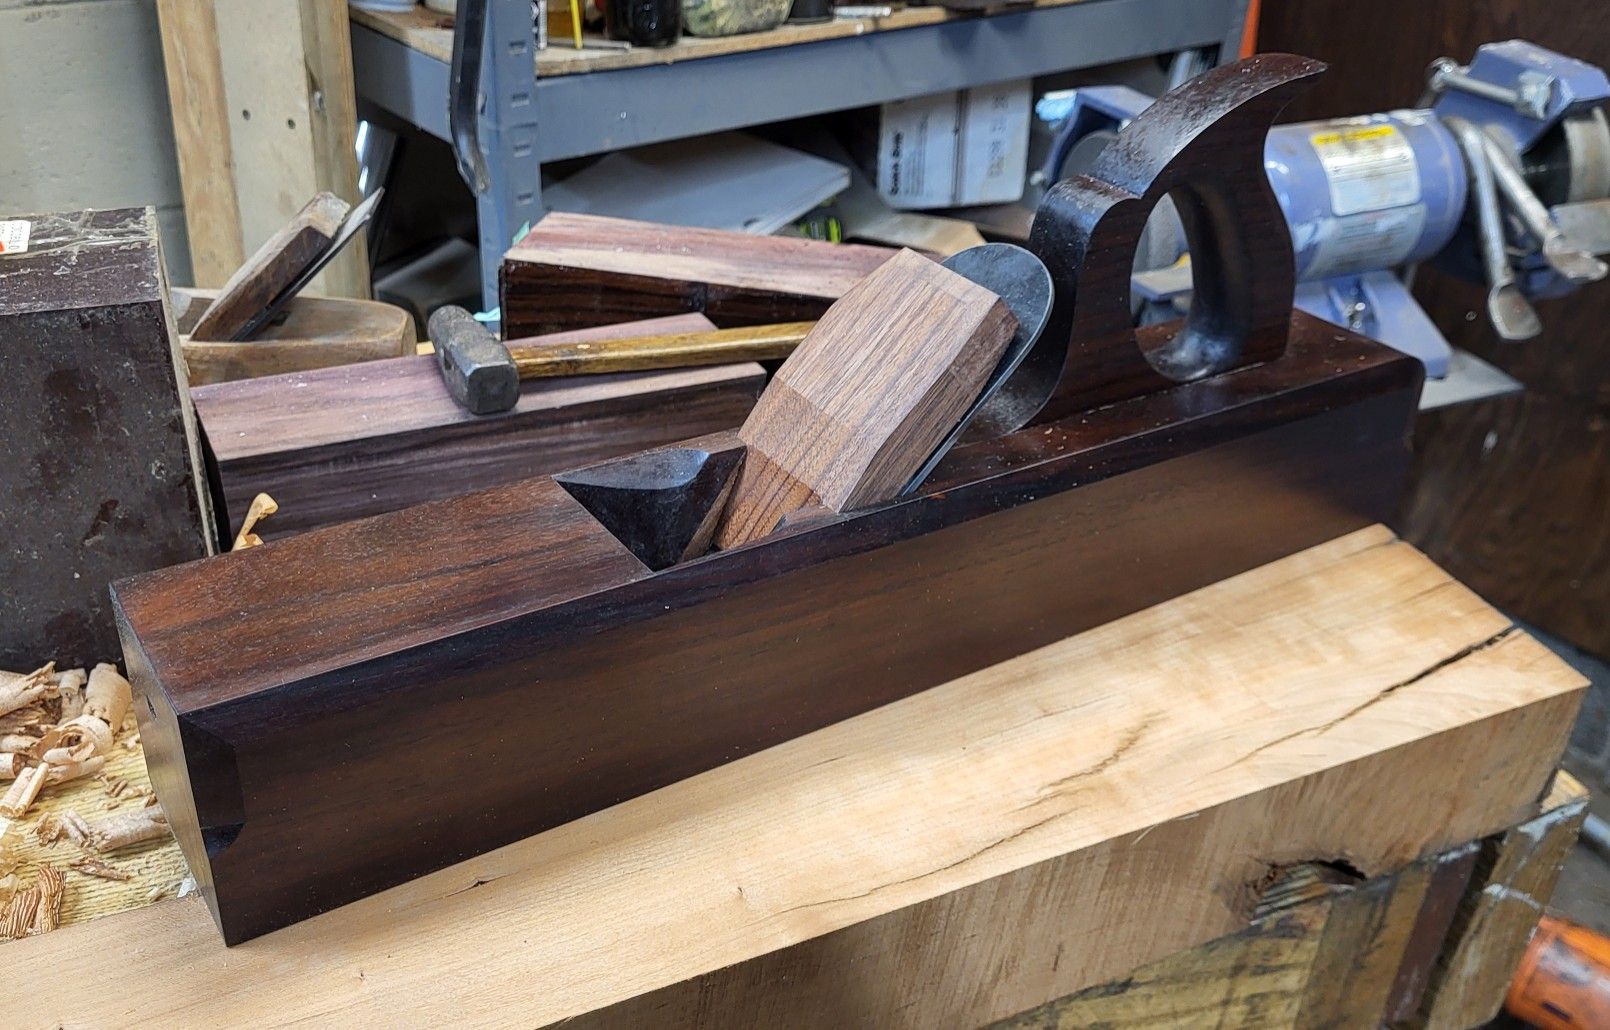
This is what it looked like originally. I like what walnut does as a wedge – it’s protective of the abutments but also far better at confirming to little differences in the abutments themselves or the top of the cap iron. I really don’t have any interest in putting the iron and cap iron together and then belt grinding the top so that the spring in the cap is straight along the top. It’s not needed, but with a rosewood wedge – as I found out – there isn’t enough give in the wedge and fingers and along with fiddling with grip, I was afraid I’d get stiff at some point and split an abutment.
The look of the wedge is a bad match, though, and it’s not aesthetically very good, either. It’s just OK.
So, keeping track, this is the original wedge. I needed to make another one no matter what to address a few feed issues, and then I made another one out of rosewood but never managed to get to profiling the top due to its behavior, so I don’t have a picture.
At the very least, making a new wedge, staining the walnut a little darker with earth pigments. I don’t like coloring wood, but I’m willing to do a cheesy job here for a specific reason. Walnut gets lighter with age and sun exposure. 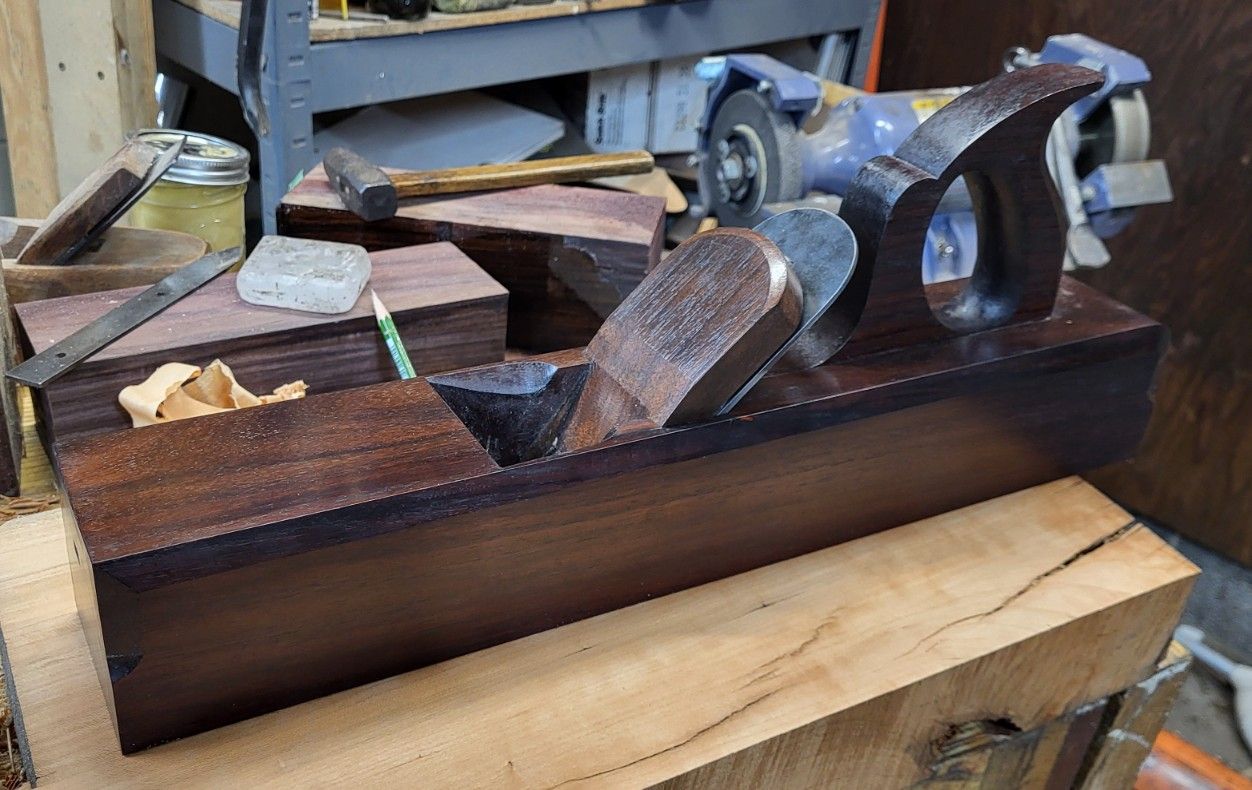
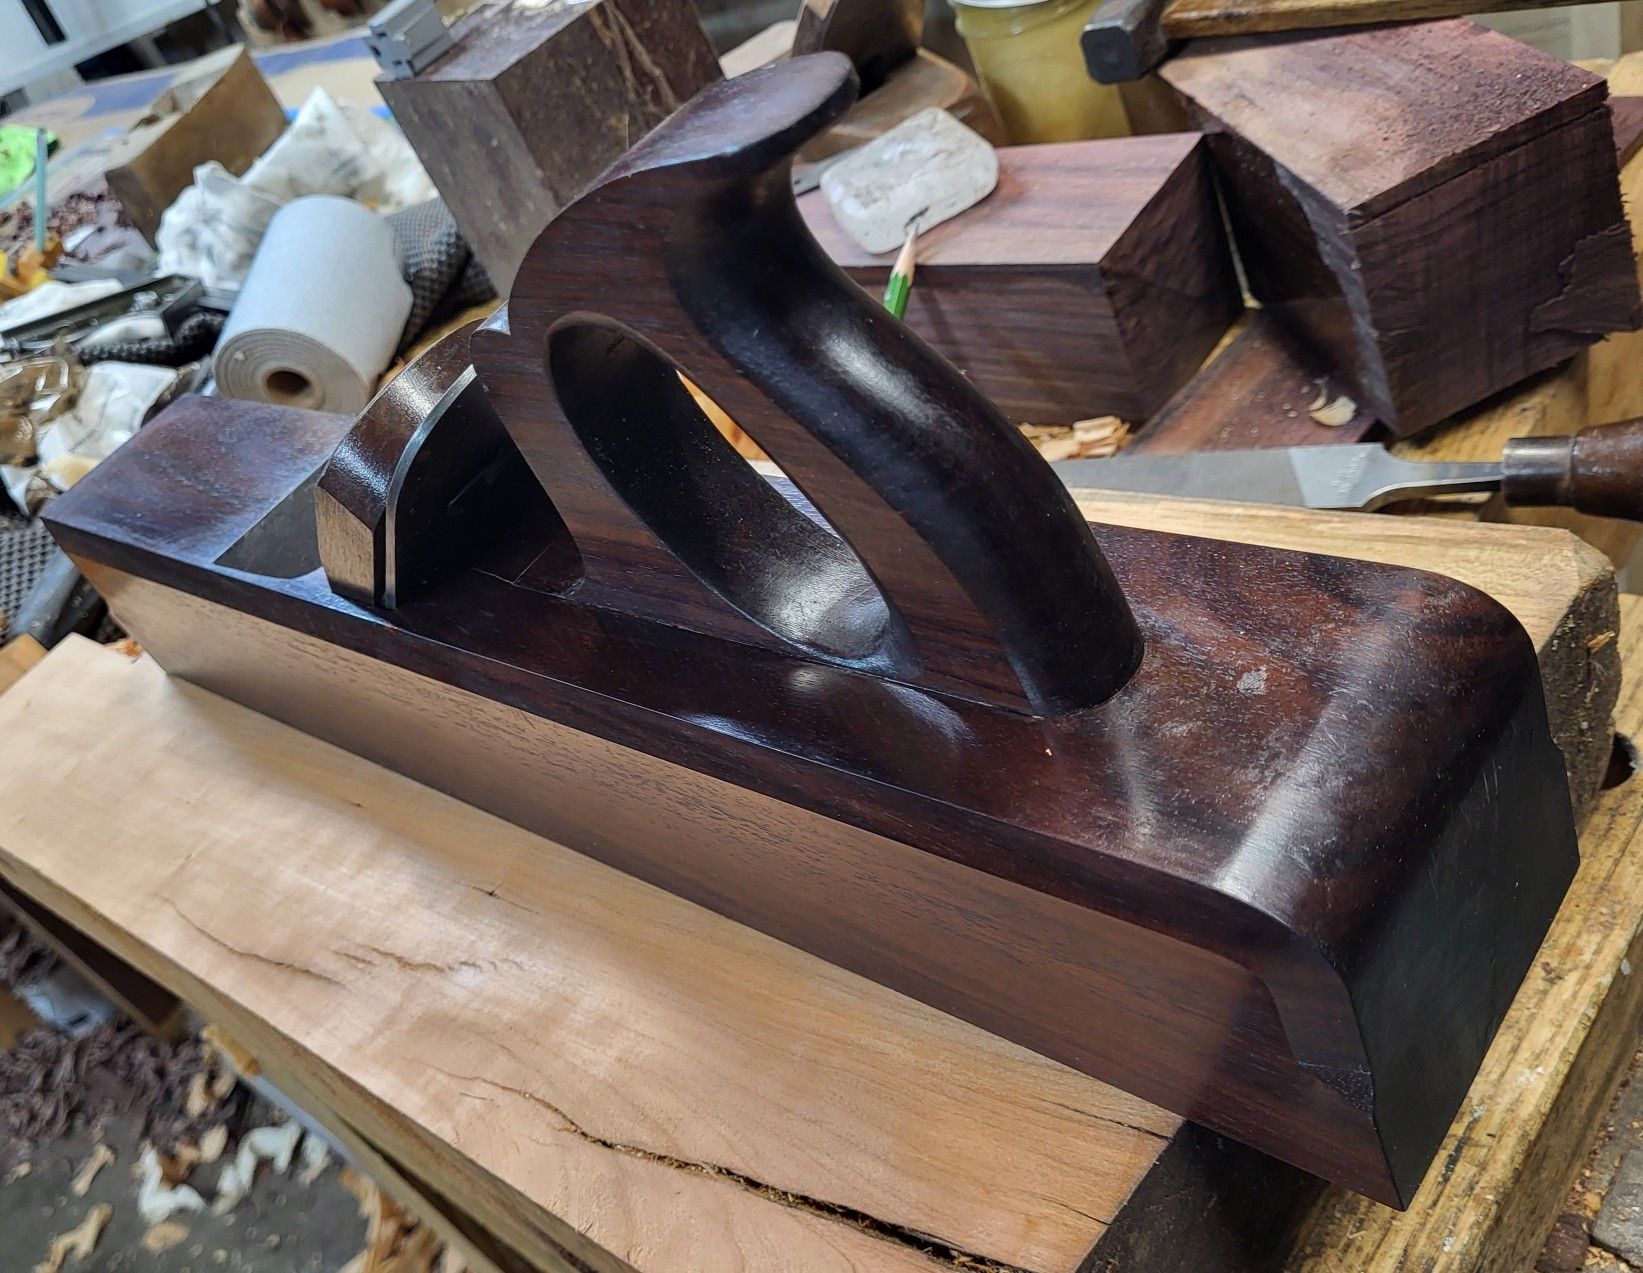
Notice the iron. somewhere I lost track of how close it was to the handle due to either a layout error or something logical in terms of what I was marking off of. that leads to jumping to conclusions, but now that I’ve had the chance to refit, refine the feeding so it doesn’t clog for any reason or even hold the shavings in the mortise temporarily, I realize that the iron is clear if the handle front (just barely) and it has no impact here, so there’s nothing to fix.
I’ll sludge up the pores in the wedge with french polish and it’ll stand out even less.
Making something is a process of making little mistakes and avoiding big ones, and then even if you make big ones, seeing if you can live with them or learn from them.
The handle position and gouge cut at the end of the chamfer stick out to me. I used a gouge that wasn’t what I normally use and had to correct it and widen and flatten the cut. I made the others kind of bland and boring just so they’d match. I’d rather see it or someone else see it and say “i don’t prefer that look – a smaller gouge cut and steeper with a bigger step looks better” than why don’t they look relatively similar?
This is a rare case where that’s all I have to say. It was really nice to conquer making a tapered iron and a hardened cap iron and the tapered iron also has the very classic back curvature in it, so there’s nearly nothing to bedding. It was over in a couple of minutes and the bias points are stark – there’s no contact with the bed other than at the bottom at the top.
The whole thing is already getting cruddy from handling and touching things up, and that’s a point where I like tools to be. Near perfect starting shape and trying to preserve that is a huge burden. Not a fan.
The billets are in the background, because I think it might be nice to make a matching style coffin plane.
