What’s the sweetest sound in the world?

When the power is out courtesy of a storm, and your neighbor’s generator starts to sputter from running out of fuel, and they’re not home to refill it.

I left work a little early yesterday just so I wouldn’t be walking through town as a somewhat nasty line of storms hit. It came sooner than expected, but I was already in the car. On the way into the neighborhood, before roads were closed and anyone did anything, I stopped at the corner and snapped this picture. If you look closely, you can see that there is a telephone pole down across the road.

The storm was quick, a couple of minutes. You don’t see poles laid over like that every day – and I guess in newer neighborhoods, you don’t see them at all. However, how many could there be. I had idealistic delusions that someone would be resetting the pole in the evening.

But, no – there are 2 more laid over up the road in this same neighborhood – but past this one. I didn’t venture out to get a look at them. And this morning, looking for an update from the power company, one of three here, but the largest…….there are 22,000 individual locations where wires are on the road, a telephone pole is laid over on the road or both. That’s a lot of work, so needless to say here about one day later by the clock’s ticking, the picture looks just like this except for caution tape and no rain.

I would normally make a joke about working by hand and not needing electricity, but I still have work and deadlines like anyone else, so I have been living by a cycling generator, laptop and wireless hotspot and checking food to see if anything has unfrozen in the on and off cycle.

My neighbor is a good guy – genuinely, but he prefers a scorched earth solution with the generator – run it as much as possible. We are downwind from him on postage stamp lots and his generator is at least three times as loud as mine. It sounds like one of those mobile worklights you hear when you drive past jobsites.

It just ran out, and I feel like the off grid standard of living just went up.

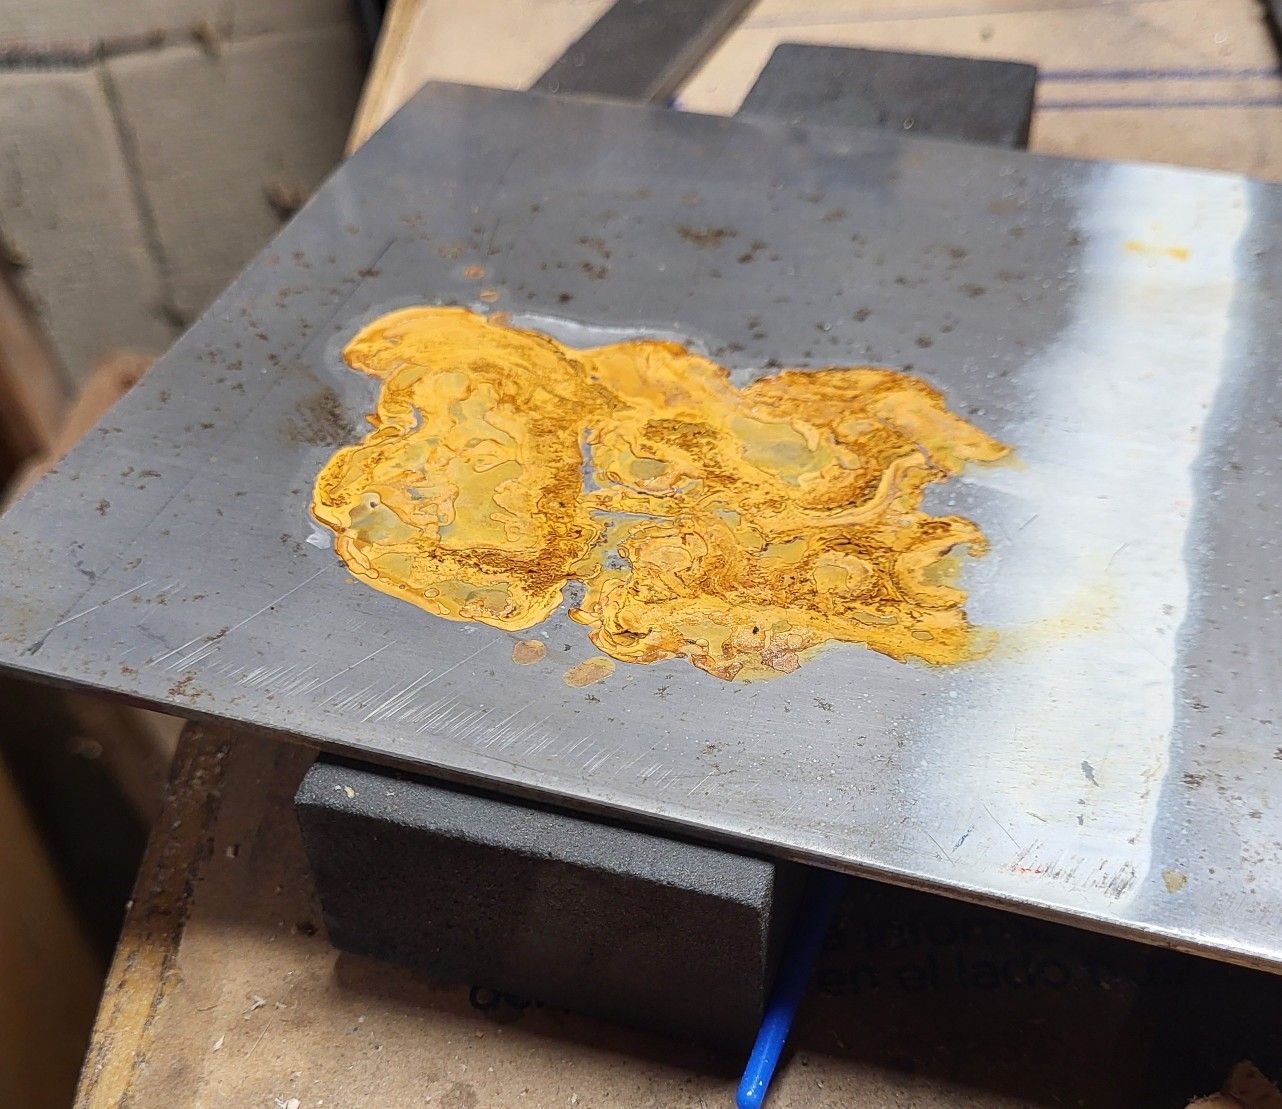
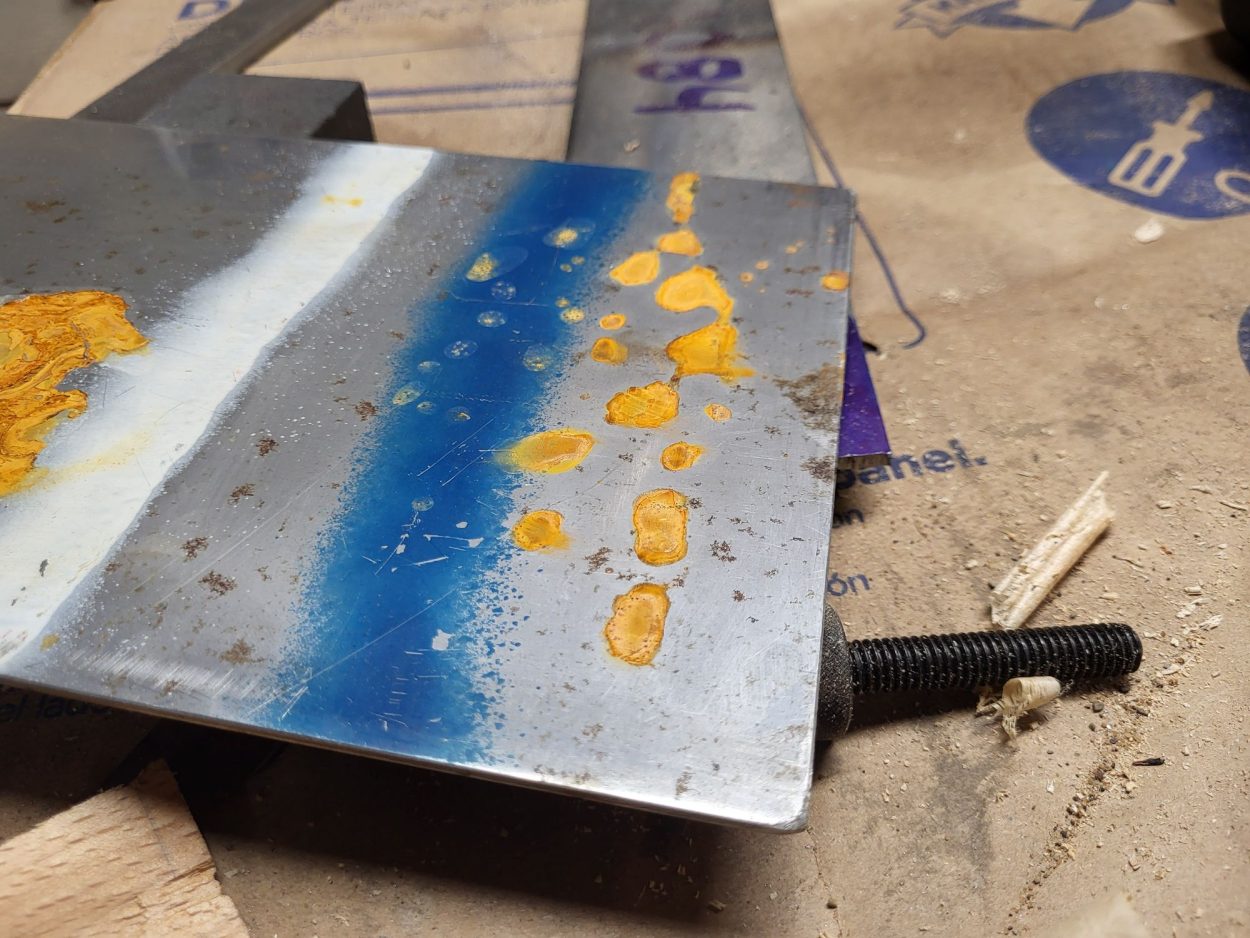
But, anyway….that leaves me with one thing I can do, which is to figure out whether or not my tarted up plane will be tarted up like high class lady of the night, or not as high. In a more serious discussion, it leads to making decisions on finishes on tools.

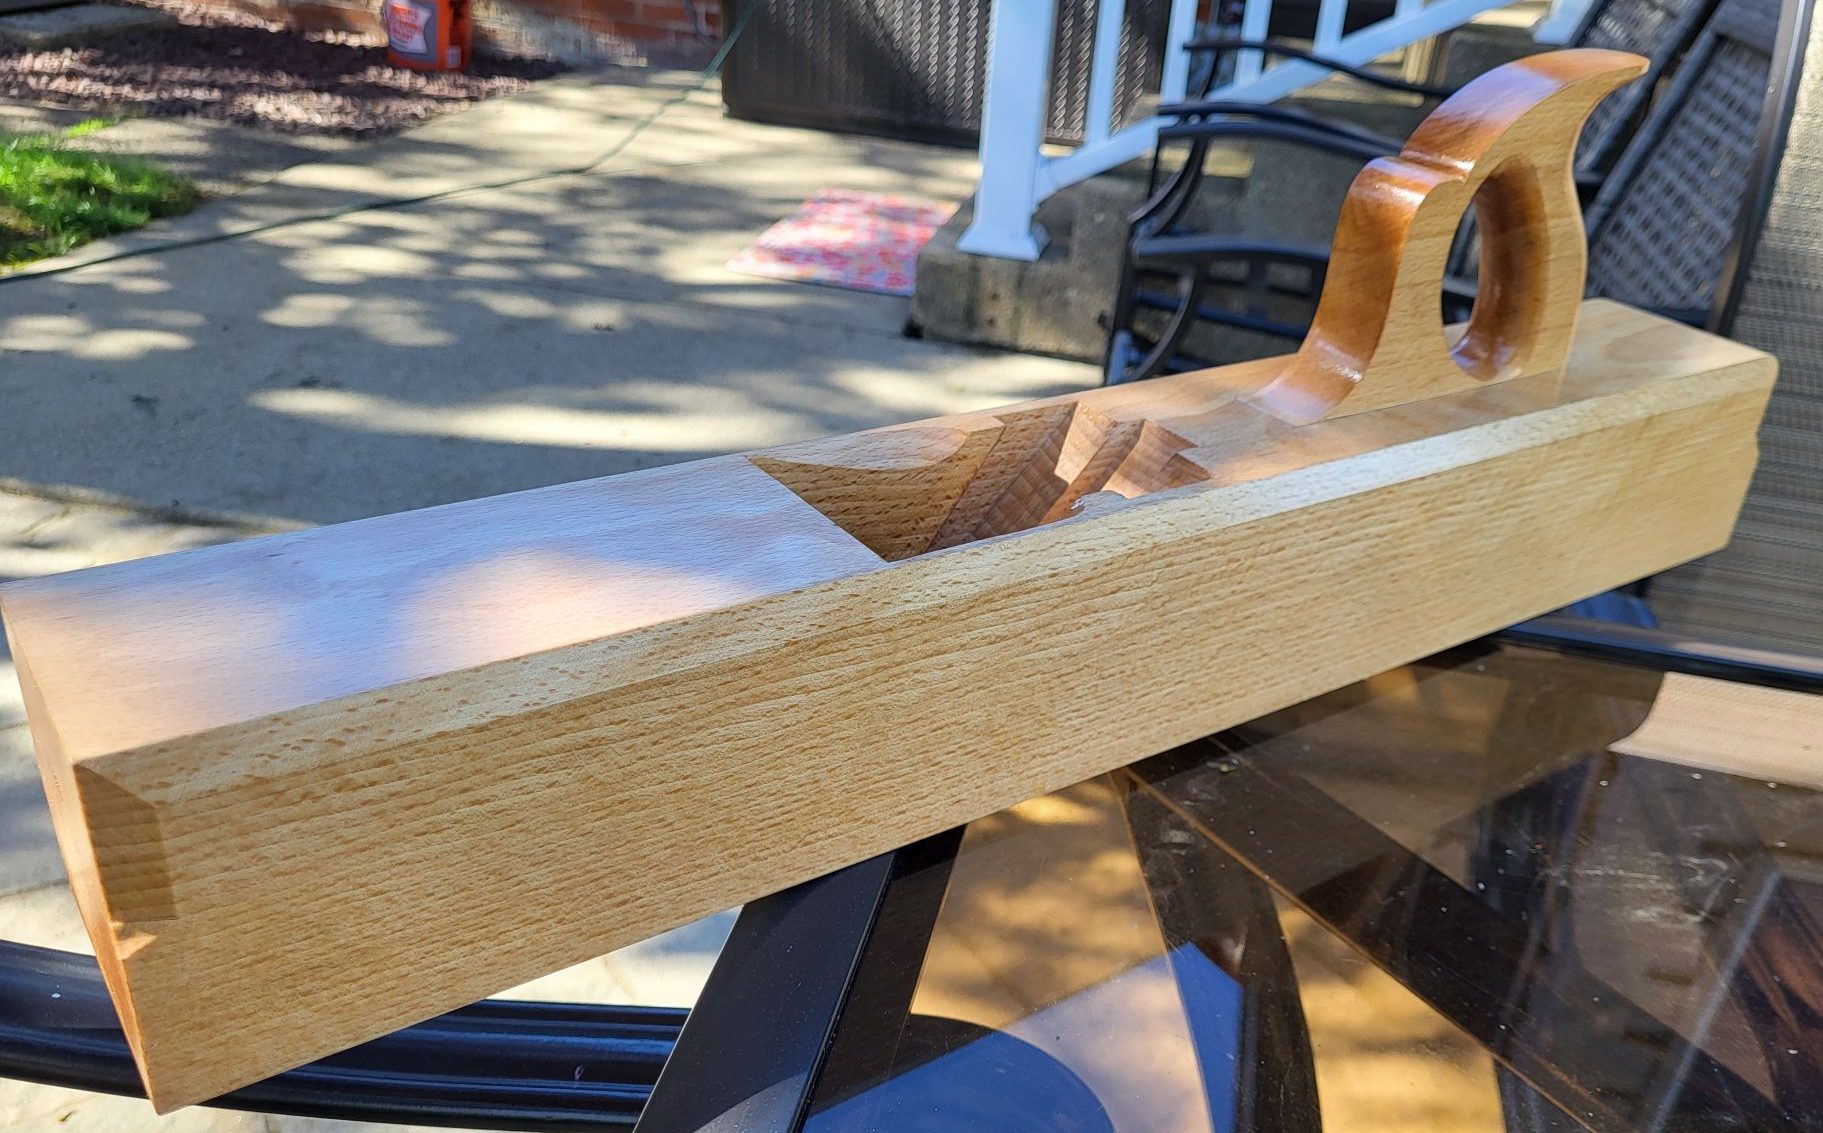
So far, this is all varnish except for tung oil and wax on the underside. If i’m being honest, doing this is a waste of time, and in the past, I’d have done this with shellac and then wax, or oil, shellac and wax, or oil and wax. The key thing here is what am I going to do to touch up the finish? It’ll be shellac or wax or both. This is more out of curiosity of how this will work. But rather than leave this in varnish, it could get a transition coat of shellac and then wax. Why? The varnish has japan drier in it, but it will cure over time. Can I wait that long? Probably not- when it is reasonably firm, I’ll go over it with shellac and mineral oil, and then carnauba wax. The carnauba wax is in turpentine – you really can’t rush turpentine to varnish that’s solved in…..turpentine, or you’ll soften it and then the wax will really look bad.

But you can put a transition of shellac on the plane and the wax solvent seems to cause no issue. and realistically as this starts to take wear or dirt, I want to deal with it using wax, so there’s no great reason to wait. It has a zero chance of remaining undamaged.

I like the tone of the varnish, and the photo probably looks like it’s staged outside, but again, it’s distraction from storm clean up, a break at lunch and then realizing, it’ll be tomorrow morning that I can handle the plane if I don’t put it outside in warmer air with at least indirect UV. Natural light is much more kind to the tone than the garish super bright white LED lighting in my shop. Those lights really do kind of bother me – they are so cold tempered with their color that you can’t get a good sense of what color things will actually be. I’ll bet they have lights like those in morgues and cosmetic research facilities where they test on animals.

All of my earlier planes out of impatience (again!!) were finished with linseed oil and wax. by earlier, I mean like of the era when I made the youtube videos about planes – 2013 to 2015 or so. Long time ago now. Things I didn’t have the patience for back then – really dialing in the bedding of the irons in the planes or adjusting the more human irons than the current surface ground generation of things so that they were really dead nuts, I have patience for now.

But I don’t yet have patience to do the planes in varnish end to end without giving the finish its more permanent look of carnauba. It’ll dull things some, but it’ll make it much easier to touch up filth or scratches or whatever.

Between this plane and the next one, I can think about things that will make the plane more visually interesting the same way a 1968 les paul custom is more interesting than a CNC made flat topped hamer guitar….and not necessarily the way a puffy shirt is different from a flat tshirt.

My neighbor just restarted his generator. He’s a great guy, but I wish he had a smaller gas can or less reliable generator.

How Many is Enough? At least One More…

Not the last plane remaining to include shop made irons, but added to the closed handle rosewood jack, and the rosewood and gombeira smoothers.

Probably mentioned in another post, but I have two try planes of my own make. One was my first try plane, which was the third double iron bench plane I made. It’s OK. The second is a plane that I got lazy on and didn’t cut the mortise quite straight up and down. that one is actually solvable by adjusting the iron and cap iron, but I never did it. I use the first along with a vintage try plane that I like because sometimes I just like to use old stuff. There’s a credibility to the nice old stuff that my wares don’t have because……you can’t buy age, and you can’t buy provenance of a golden era plane that was made and sold in a competitive market of professional users. That’s gone.

What you can do us buy that older plane for less than the cost of materials in mine, so…there’s that.

This plane is euro beech, but the handle is american beech. It’s nicer than my earliest planes, and it has a 65 hardness plain steel iron in it. Those two together are important to me. Strength from hardness imparts edge stability. Plain steel at 65 means hardenable. The fact that it’s a 1.25% carbon steel means it’s still relatively relaxed getting to that hardness at a 400F temper or a few degrees above that.

There are still some things that could be improved in terms of lines. I chicken out on the handle and always leave the top and front strap a little tubbier than they need to be. A shorter handle looks nicer, too, but what if I decide to give the plane away? My hands across the knuckle are only about 3 1/2″ or a little wider. Someone with a 4″ hand across the knuckle could use this plane, but probably struggle on an older Mathieson plane until they realized they don’t need to have all four fingers on the handle.

Haven’t tested it yet, but anticipate no issues. This one is a little more free in the wear, etc, in terms of clearance in hopes that I won’t end up doing any extra work rubbing the shaving hard into the wear in tight quarters. Some of my tighter smoothers and jack planes do give a sense that the angle off of the cap iron into the wear, along with tightness, are so much so that even shavings not straightened by the cap are being straightened by the wear. It looks nice to have a plane that’s really tight like that, but there are limits to practicality.

I may build more planes this year, not sure – but in the background is a desire to make the chamfer a round over on the top, but elegant, change the carved details and make a much more artistic handle that’s not guarded by material bulk.

This is my first euro beech plane. At horizon, euro beech is still what’s available, and realistically, at not less than about $20 a board foot. Is that really a big deal? I guess it isn’t – if the wood is perfect, I’ll pay it. Some of the blanks on the page look less attractive. This one came out of a billet that wasn’t sawn that well, but there was room to resaw it, and the result is very attractive to my eye but for the contrast in how much color changes vs. american (oh, the wedge, too – also american to my recollection). I like the warmer color of the american stuff, but as this plane gets a few more coats of varnish, it will be sort of tarty and it has the wonderful three dimensional effect in that parts that are dark turn light and the converse as you’re walking past it, making it look a little alive.

If you look closely at the right eye in the last picture and the plane itself, you can tell that I corrected the bottom of the eye a little. It just looks better if the bottom of the eye doesn’t look like it flatten out entirely in the longer thin area of the eye.

There is a cap iron under the wedge, of course. You can’t see it and neither can I, but it’s there. Shop made like the rest of it, but for the modified knurled screw that I cannibalized to come up with the screw itself.

Oh, and the little bit of dirt trapped under the varnish on the front side of the handle – jeez. That stuff shows up less on the bare wood but big time after finish is applied. It reminds me of a childhood friend of mine who could not eat anything other than clear jello without creating a rings around the sun type look….food dirt. I saw that as it was occurring with varnishing and admittedly did nothing about it. One of the luxuries of making things for yourself.

No test shavings yet -the handle glue is drying as the plane sits here, and to some extent, so is a tung oil and wax sole. Just under 8 pounds – a nice weight for a fat guy like me if the upper end of possible use includes rosewood. And nice even in cherry, especially cherry of suspicious quality or grading.

Influencers Won’t Protect You from Rust – Part 2

So – the results for everything but the shop made varnish were pretty abysmal. the varnish is an odd choice, and you may be thinking “what about polyurethane” and so on, I’d imagine thinned, that would also work fine. You don’t want a heavy coat on anything and finsihes with adhesion problems will just come off and that’ll be ugly as it’s going to occur over a period of time and be about as attractive as a peeling car hood.

I used varnish because it’s tolerant of a lot of things and will still have good adhesion and toughness. In short, it could actually be practical in this case, even as a base for under wax.

To see how deep the damage is, I put the varnished sample aside – in reality if I were using it, I’d scuff it with steel wool and wipe on again to get rid of the deglossed spots. But for the others, I spent about 15 seconds on each spot with #00 steel wool. Here is how the Ceramic Finish sample fared:

It’s not that bad in the center, but there is dimension and depth to the rust at the edges and steel wool will not remove it. If you have a prized cast iron surface, this is disaster that you won’t just sand out. Fail, all the way around where plain standing water is concerned.

Shellac – expect disaster, and that’s what we find:

The remaining rust with depth is more vivid and the larger damage more uniform. Fail all around.

And the carnauba wax after steel wool:

Apologies on this -the test was a bit of an afterthought and only the darkened areas on the bottom of the right side plate are from the carnauba – I didn’t clean all of the rust off of it around the edges that was there before starting. But surprisingly, most of what is left is discoloration and there is nothing with a three dimensional feel.

Fail chasing perfection, but success – surprisingly – a very practical solution for moderate rust control.

I did nothing further with the varnished sample.

The results of this are fairly important to me, but because I have water in the shop for tool grinding purposes. Once in a while, i run around and dribble a few drops where I didn’t want to and find the result later. I’ll be using Carnauba where oil isn’t durable enough, and varnish where Carnauba may not wear long enough or provide needed protection for a non-work surface.

I do have a problem with vapor/humidity rust on bar stock and am lazy about doing anything because metalwork results in the loss of the mill surface. However, i have once in a while found that the rust missed on stored bar stock goes deep enough that I have to do further grinding or lapping to get that out, and that’s avoidable. I’ll think about maybe coating three pieces of metal to test if seasonal rust is stopped by all three – I’d imagine it may be, and the results might not be interesting in a daily use sense vs. storage or calamity, but still in my mind sticks the whole thought of “the ceramic coatings are sold as a plus step on finishes”, what good are they if you already have a good finish. Nothing that i can tell.

If you like to see water bead, you can actually buy 20-nanometer silica from china and mix it in whatever you’re using. This is probably not how the refractory resin in the ceramic finsihes exists, but the feel and the dazzling water beading effect is the same.

And the Nanosilica there also does not make anything waterproof if it wasn’t already. I just assumed from the top that the actual finish used beyond the whiz bang water beading effect would be much more like a legitimate finish than it is.

When rust is mentioned in comments or on forums or reddit or wherever, or even locally by friends of mine, there’s always disbelief that some basic product that isn’t value added and massaged into a sow’s-ear silk purse is suitable. Boeshield may work, some other urethane finish in a little bottle might work, but I doubt any of these things work as well as the basic components you already have around. if you have your own oil, but think it needs rust inhibitor – test that first. If you still think it does, find out what the rust inhibitor is. Chances are whatever is being marketed at you is 1 unit of value sold for you at 10, 20 or 100 units of cost. No thanks.

Influencers Won’t Protect you from Rust – Part 1

This post will provide you with results based on water sitting on bare high carbon steel until it has evaporated. It is plain tapwater from appalachia, treated with the chemical industry’s finest, and includes some minerals (it’s a little hard). it has also sat for a while, so maybe much of the sterilizing bits are gone.

At any rate, this is a “test of things that shouldn’t” happen in your shop, but could if you’re ever exposed to storing tools where a leak occurs or condensation on ducting drips on tools. Been there done that in my humid shop.

The tested rust protections are:

  • Ceramic finish “with Graphene”
  • Dewaxed Blonde Shellac
  • Carnauba Wax
  • Tung/Rosin Varnish that’s shop made

For anything you’re actually using on a regular basis, mineral oil and wax will never not be enough. However, what triggered this was really aiming to test the hardness of these “ceramic finishes” that cause water to bead. They are quoted in pencil hardnesses, like 9h. I have 9h pencils, but must admit I don’t have a good way of seeing if they are harder than varnish – or maybe I do. It’s not important because based on the results of this test, I never got there. I can’t stand influencers, though, nor can I stand – and it’s just a personal irk – the idea that influencers are providing woodworkers with something so valuable that they can market claims that don’t hold water (or prevent it from touching metal!). It’s my supposition that in nearly all cases, the information provided in non-marketing videos is there to funnel people toward the money making bits and claim that the arrangement arises out of the opposite circumstances. Or in this case, the “technique” videos are the mirrors on a solar oven. The reviews themselves are already veiled advertising – it’s the most convenient way to propose something to you that’s really just directing to purchasing avenues without saying “i’d like to introduce this product that i’ll make money from if you buy it”.

So, the test of these things was simple and the failure of the “ceramic coating” triggered me to try a few others. All that’s done is a glue bottle full of water is squirted onto the steel and allowed to stand without any interference until the water dries. The result for the “ceramic coating” is this:

The coating was applied thinly, but uniformly and then allowed to stand for a day. The result was shocking -this occurs in one day.

Well, then, what about shellac, as I assumed that shellac might be a better barrier than wax, and maybe it is to vapor or humidity, but here’s how shellac did with standing water.

That’s even worse, but what’s curious about it is the water seemed to lay out and perhaps hydrated the finish layer to give such a uniform rusty result. The “nano” finishes do feel like nanosilica additive to the touch and they do cause the water to bead and not lay out like shellac did.

We already know shellac isn’t waterproof – it takes very little time to make something wet and have it soak in.

As bad as shellac fared, I figured maybe “nano ceramic” wasn’t too bad, but it sure wouldn’t help you if you had a drop or condensation that stood on a tablesaw top, and we are well aware that even without that, the wood whisperer’s magic affiliate deal didn’t lead to a stored table saw top that didn’t rust. So regardless, it’s not that great, either.

Carnauba would be the next option – it’s cheap to make a carnauba wax (25% carnauba, 75% aromatic solvent, heat outside, pour in a jar, apply thinly and buff lightly with something like kraft paper).

Still not a good result – but the water beaded and then never seemed to lay out to cover a wide area like it did with shellac. This result does look similar in severity to the Ceramic Finish.

And lastly, since these all worked about as well as a bucket of steam in a bull ring, I applied a very thin “by finger” layer of 1/1 limed tung rosin. This varnish has 2% beeswax in it, though that has settled some. I don’t think the wax will improve it, but may test the same without wax. one to one just means the solids are half varnish and half tung oil. 1% japan dryer exists and I allowed this thin film less than a day to dry in an area that’s 62 degrees F. It’s cured “enough” even though it may fare a little better if it could stand for a week or cure in the sun and so on.

What’s left behind is a little bit of mineral that you can actually see, but it did also degloss the varnish a little. No rust. Post two will go a step further into not just showing the rust in the failures, but how much or how little is removed with a quick scrub of #00 steel wool.

I do have to ask a question at this point that is important, though. The nanosilica finish does cause impressive initial beading. I don’t know about durability but suspect it will stay on a car finish longer than wax, perhaps by a good bit, but there’s practically no chance that one application will last half the life of a car. However, its job on a car is not necessarily to protect the finish from water as the clear coat under it is not harmed by water. In my estimation, it’s more of a way to cover surface scratches and wear with a finish that beads. I have no clue of the beading does anything more than create a result that draws in people who know what a freshly waxed car does with water.

But, as this stuff is being marketed to woodworkers in droves to protect surfaces from water ingress, why in the world would you use it for that? I suspect it’s being sold at you because it’s good for affiliate programs, meaning there’s a huge margin and influencers can extract some of that. It is, in my opinion, antisocial unethical behavior. That makes me Mr. Negative, as there’s no upshot to this post – I’m not selling you anything other than the idea you can take this problem on yourself and not be a lemming. There isn’t enough critical questioning and you’ll find throngs of fanboys if you do it, so if you want to be liked or you’re also thinking of selling things to people, it’s not a good idea to be Mr. Negative. I’m good with it if the motive is something positive, though.

One of my Favorite Garbage Tools So Far

Not the plane, not the float, but the file handle screwdriver.

Have you ever used a narrower screwdriver to find that it’s marking and chewing up a fairly soft chipbreaker screw? What about the case where you buy one of those boutiquey things like LN or LV make (I either have or have had both – still have at least one of them), only to find that some older screw isn’t wide enough or in the case of the LV version, is too large around? Plus, you feel the obligation to keep those things nice…

I like a long handled screwdriver with a wide blade – and you can find them sort of easily, but I will generally have one and then lose it, and do nothing for five years but wonder where it went. In the middle of making the iron and cap iron set for the pictured plane, I thought maybe if I make a dump screwdriver, I’ll have incentive to not lose it. Plus, I can make the handle wooden and just use an offcut of the high carbon steel and hammer out the tip and then grind it after heat treatment. The whole thing should take about 10 minutes as long as lazy fitting of the shaft into the handle is done. In that case, it’s drilling the center out of the file handle and just flooding it with epoxy. If it breaks later, who cares, I’ll make another one. That did all take about 10 minutes and I did it spur of the moment because the pan of sand that I use to stabilize temps in the tempering oven was hot from tempering the iron.

Same steel, same tempering, whatever. The other quirk here is to accommodate the largest number of screws possible, and not break easily, the blade of the screwdriver is very slightly convex, and the tip is fine. If the whole thing was hollow ground, the tip couldn’t be that fine, so the compromise here is even though a convex face screwdriver isn’t what you want in general, when you’re working with a bunch of wide screws and sometimes they are old and the slot appears to have been swaged or chiseled in, convex isn’t so bad.

And, oh yeah, what’s a dump tool?

It doesn’t mean the tool is dumpy, it means it’s made of stuff that was headed for the dump. I made the mistake of referring to a knife I made for someone as a dump knife at one point when they showed a picture of it. The peanut gallery missed the fact that I made it and thought I was insulting the poster and it was more a matter of the poster extolling the virtues of just how much better it sharpened and worked than a two cherries chip carving knife, puzzling over why the steel was so much more friendly and crisp for the user….than it was talking about the wonderfulness of the knife. The result of not thinking about that? “you’re an asshole – just because someone else doesn’t make something perfect, you don’t have to be such an asshole about it”. Yeah, we’ll I made it – it’s a dump knife. It was heat treated with a quick heat and quench, then tempered and the materials were headed to the dump. This is a dump screwdriver. I’d have parted with the handle a little less easy, but in a per-handle purchase of a bunch of file handles off of Ebay, it’s a dollar. The offcut is hard to find a use for.

Back to the Dump Screwdriver

This will perhaps expose my laziness, but I had no intention to do anything but use this as a screwdriver. In a pinch, I’d knocked the corners off and filed the shaft of the screwdriver ahead of time. That means everything on it was slightly convex in general, and then the corners are eased just enough to not make them uncomfortable.

This turns out to be a gold mine for card scrapers. It’s not a matter of whether or not this will dominate the other scraper burnishes that I have, it’s just how much rounding of the corner is needed. I ended up polishing the almost flat faces and then stoning the corners now and buffing them. you can flatten an already-there burr with the width or thickness and then roll the handle ever so slightly to introduce the corner and a burr is had effortlessly.

I am so lazy, existing within a hobby that does have a lot of physical exertion, that something little like this is the nugget of gold that I always look for. you don’t even have to squeeze the scraper tightly on the bevel side, you just rotate the screwdriver shaft a little and introduce the back corner to the edge that’s being turned to a burr (or drawn out) and finding just the right amount of edge aggression to cater to laziness is easy. The screwdriver itself is around 64 hardness, so it’s indifferent about scraper edges, and it’s tough enough that it’s not going to break easily as a screwdriver.

I’m happy to have not made it any nicer than it is, and am now somewhat curious about perhaps making some nice screwdrivers out of round or square stock and maybe making them octagonal and much more carefully filed on the metal parts. They won’t be 125cr1 or 26c3 as long shafted screwdrivers- they’ll be something a little lower carbon for toughness. And if I lose this one, I’ll feel no guilt – the ultimate time spent on this was closer to 20 minutes due to honing the screwdriver shaft and hastily slathering varnish on the handle. I can do that again faster than getting too and from home depot in a busy retail corridor and then doing stupid things like “come on, now the stub screwdriver is $10 instead of $6, and it’s made in China?”.

“Ceramic Finishes” and Why I Can’t Stand Influencers

First, before I show any pictures, I bought a random “graphene” so called ceramic finish off of aliexpress. The bottle that I got is labeled “Adam’s”, which is suspiciously similar to other bottles of the same thing with nothing on the label. So you have to decide reading this if you think I got the real thing and it’s just a private branded version of a $15-$20 finish that you can just order yourself, or if you think this is fake. if you believe that, and you’ve been stained by influencers to tooting your horn about “ceramic coatings”, then all you need is unfinished steel that will rust and you can do the same test.

I suspect this is the same, but have no proof and don’t know who “Adam” is. If “Adam” purchases products from China and resells them, then you get what you get. If “Adam” actually developed something and they are selling it on the side directly, then that’s kind of rude, but not the point here.

What’s in these finishes based on the SDS is a refractory resin, which I read some about. These are resins that are set to cure at normal temperatures, vs those that might need to be baked, and they will handle relatively high temperatures, but relative is doing a lot of work. What I gather is they will tolerate several hundred degrees, but if you’re thinking of refractory bricks or refractory linings in kilns, nothing close to that.

I have gone off several times on forums about people like the Wood Whisperer posting affiliate links to products, coming out and talking about how they didn’t stop rust on a cast iron table in storage (not in the rain, in storage) and that you should buy them anyway. I suspect the second video is just a shot at harvesting more affiliate commissions and that the woodworking hobby has come to this “you should buy this” instead of you should be inspired to make things….that bugs me. George Wilson kind of laid the burden on me that I could make things that look a little nicer. I thought he was wrong, but his view of that accelerated me and really turned what is a burden to a joy – feeling like you could figure things out or make them well, or at least challenge trying to do it. This is missing from the hobby as the algorithms and influencers go – it’s a chance to stay a beginner for 20 years and go to a lot of classes and marketing.

If you love that, fine, but it’s not the message for a maker. The message for a maker is generally you want to make something, you can figure it out, but the core of being a maker (and it’s OK not to be a great one relative to greats! but you can be better vs. you yesterday), is you have to find something you really want to make badly enough to make it well, and then find out what well means. Well usually means function, look and feel of some sort. But looks are important, and feel is important if it can be discerned and function if function is important. These are the joys of making, not trying to buy something that’s sold because the margin is large.

So, I am delighted

…to show you how well a fairly healthy rubbed in coat of ceramic finish does to protect metal from standing water.

OK, so tell me again why you want to put this on other finishes? You can see the dullness here around the finish, and you can tell I scratched off prior rust. This is 26c3 flat stock. How does a “ceramic” finish allow water right through to the metal? And to be frank, this is spectacular rust, but this is a difficult test to pass as it turns out.

Both Carnauba and Shellac tests are now running and the water has not yet evaporated -and they’re already rusty. I’ve had pretty good luck with oils, waxes and shellac from vapor or humidity related rust. So this piece of bar once done here will get stowed near the door where temp and humidity change quickly, and we’ll see if any one of the three Carnauba, Shellac or “Ceramic” areas fares better.

What do I see when putting water on these areas in general? Initially, the “Ceramic” finish does feel like nanosilica (yes, I got a bag of nanosilica to put in other finishes to see if it can do anything alone – short answer, nothing useful), even though it may not be a finish with nanosilica in it the same as I have it loose here. The water beads impressively, but eventually, it breaches that.

We already know that shellac and carnauba are not waterproof. How badly the “ceramic” finish did here is a surprise and it begs the question – why would you use this as a “protective” layer? There are plenty of finishes that are actually waterproof that if you really needed to protect a finish, you could thin them and apply them very thinly and abrade them off – or just wax them later if you don’t want to.

I’ll test one of my varnishes with this, too – but in a really really thin layer. I don’t personally feel like this (varnish) is a great idea for a metal protecting moisture barrier because it isn’t going to be removed easily, but what is “ceramic finish” going to do for your furniture – allow the water through under a sweating glass and then hold it in?

I get what this does for car finishes – you don’t need something waterproof on a car finish and you might really delight in the beading and uniformity of the surface, even though it’s actually slightly dull. Compared to worn and abused car paint, it probably looks very glossy in sunlight.

I didn’t start to coat metal here to set out to embarrass this nonsense about “ceramic” finishes that are supposedly super hard but expressed in pencil lead hardness scale, I wanted to apply it to other finished wood like with shellac on and see just how protective it was and how scratch resistant it was. The first attempt at this deglossed which immediately triggered the desire to see if the degloss was superficial on wood or if it was a significant breach like this.

You can make varnish, and if you don’t want to, the entire coatings industry for furniture and housewares is full of durable finishes that are actually waterproof. if you don’t want them on the surface, you can thin them to death and allow them to soak into wood so they are resident in it rather than on it.

Ask your “friendly” influencers to run this same test, and if they show no rust, then do it yourself, because if they show no rust, they’re probably cheating the test perhaps by putting it on top of a waterproof finish. I’m fairly sure at this point if I apply my own varnish, and put this on top of it, there would be no rust. Except we now know, it’s the varnish doing the work, not the “ceramic finish”.

Gombeira and Rosewood

I think the last time I posted, I was making a coffin smoother. I made it, it looks a little funny because I haven’t built one in a while, so I made another. Planes 1 and 3 are here – the second indian rosewood smoother I still have and will use, but this smoother is Gombeira. About 30% more dense than water in the case of this sample.


All three recent planes have the same kind of iron – a tapered iron made of 1.25% steel referred to as 125cr1. it’s a very clean steel and easy to work with, but not bumped into a class of the remelted steels as far as I know. My limited use of remelted steels suggests they are just a little better for the maker.

I went on a tear pulling old beech sticks out that I have left from when I was making more planes and to my shock, the four from horizon that were euro beech all twisted moderately or bowed a *lot*. I’m glad that they sat here for a while and I didn’t make planes out of them, but I suspect that they were under tension because the wood wasn’t straight and without tension in a tree and they’re moving toward that.

Backing up a second, I’m convinced coffin smoothers were used differently than you’d use a stanley smoother. And it might be more efficient in some ways, but torturous in others. I think the platform allows easier removal of big shavings, but obviously adjustment to a small degree is less convenient and the fact that there is less friction means the plane has to be more in the cut and will not enter a cut as easily or stay in an iffy cut.

Some version of this is the nature of using the double iron – it lets you bolster the shaving thickness, get a lot more done and work a lot more cubic footage of wood with each sharpening cycle. And if you have a marginal iron, you have to focus on this even more and end up learning something useful in all work. This ability is what eliminated the single iron plane. You can’t do it with a single iron and for all but the thinnest smoothing and using perfect wood, a double iron plane will pretty easily outwork a single iron plane at least two to one and without the user feeling like they are having to rush or slash around.

So, back to the wood:

This piece has two issues – one the grain isn’t straight cut center down the length of the billet, and this was expensive wood – something like $15 a board foot, but when it’s good or even just pretty good, I’ll gladly pay it. You can’t make good planes with common wood unless you laminate. No thanks on that.

er…forgot the second issue – the second issue is the billet itself bowed at least 3/8″ through the center. we don’t really like planes that bow a few thousandths, so hopefully it’s over that.

I’ll make myself a plane with it. I much appreciate the look of american beech – it has more of a beeswing look and can be dazzling like quatered sycamore, and euro beech looks nice but it has these little brown egg shaped dots all over it that make it recognizable in ikea laminations, etc. the camera is confused by the lightness and bright white overhead LEDs and the picture is not true color, but that’s the way it goes.

After hand sawing off these wedge shaped bits, the wood ends up like this:

The end of this stick is within only single digit degrees of being perfectly orthogonal – I’ll plane one face of this that would be a sole perfectly flat to a straight edge and then see what it does over the next couple of months as the weather changes. Kind of like you’d do with wood for a guitar neck, except I’d never use this for a guitar neck given its history.

it does have some nice curl along the top, which should look brilliant with a varnish finish.