Large Japanese Saws

Work is busy lately, and stressful due to hard deadlines, so not much posting. Hopefully that will change in a month or two as my amount of making has been pretty minimal and making is one of the few things where I can disappear into another space physically and beyond that. I may post more on here and clean things up, but I could be saying the same thing in three years, just like I always have.

But, on to the topic – a few years ago, i got a dozen Japanese crosscut saws. They’re wonderful – perhaps 300-350mm with resharpenable teeth, partially machine made, it would appear. They are suitable for anything – 8/4 hardwoods, whatever, as long as one doesn’t try to crank on them. They’re not made for that with the tooth hardness where it is, even though the teeth themselves are not the taller thinner type you find on a ryoba. They’re not 60 degrees, but they’re between and crisp and will cut with a long western crosscut saw.

I allowed them to get some minor rust due to where they were stored – oops. These things were the princely sum of $18 for 12, though figure another $30 or $40 to actually get them here to the states.

Then at some point after that, I bought a group of larger saws that I think were about $100. You can’t tell the scale of the crosscut saws above, but they are well beyond the speed and aggression of something like a Z300, and with less set.

The larger saws that I got, I think I’ve realized that maybe i didn’t need them!

At the time, I was hoping to snag a $10 or $20 saw for green wood to use just for fun, but everything I found was about the same for one saw as a dozen of these. the smallest and the largest of the bunch is shown here below the Z 265. From that, you can scale things. The smaller of the two is made to look like maybe it would be suitable for large wood at the bench, but it’s really not. I don’t know what it’s for – construction?

The larger saw is gigantic and the tang goes well further below where the picture ends and is tilted down, presumably for a handle that’s titled forward, but closer to vertical, or perhaps just a handle stuffed on the end of it. I’ll have to look.

The group had a pair of these. it’ll take more than three or four inch limbwood to use the bigger saw here, but I’m determined to figure it out over time. They are all factory made (probably a small factory), but have some hand work on them, and forge welded lap joints which I’ve seen on other high quality saws.

No part of a japanese saw like this has to fight with the handle hitting the wood being cut, so what you see in size is really equivalent to a western saw half again more or double – double is probably a reasonable approximation as you can’t put the tip of a 42 inch log saw into a log 2 or 3 inches in and just push or the saw will bind. These can go nearly to the near side of the cut and then all the way back.

The top saw has 19 inches of tooth line and the bottom has 24 inches, just at the teeth. The numerical values don’t do it justice, but it’s probably in line with a 42 or 48 inch disston one man log saw.

It’s not going to beat someone with a chainsaw, but I’m waiting for an excuse to use it. I suspect that someone with only a few trees on a suburban lot would be able to buck a moderate sized tree over a few days or a week.

I get it that most people would think something like that is stupid. I limbed one of my trees a few years ago and a neighbor offered a chainsaw. I have one already, a good one. Sometimes it’s nice to feel the work, at least for part of the project. I love running a good chainsaw, but there’s not a whole lot of feel going on there, and for the tool doing the work, it really has a way of making you sore later and tired now.

The Big Hand Scraper…

Makes me appreciate the Stanley 80, and much use of the Stanley 80 beyond test shavings makes me appreciate the cap iron even more.

A self-important poster of all things but their own work brought up a video of someone who was perhaps in China or Malaysia peeling off a huge scraper shaving from a reddish rosewood. I’m assuming the wood was air dried and not dry to the same level as we’re used to, unless there’s something about the type of wood that was really amenable. The demonstration wasn’t particularly practical, either, but the shaving was impressive and sometimes figuring out how to do something better for the sake of doing it leads to something useful when you need it. I’ve already been down the road of really manipulating burrs, but I’ve never seen anything wood-wise that would allow a shaving to be peeled off like the one in the video.

The scraper in the video appeared to be thick, which gave me an excuse to do two things: 1) make one of the thick scrapers at a higher spring hardness than typical, to be used just bare handed, and 2) make a replacement blade for my #80, which came with a crappy butter soft blade that’s really more suitable for rolling a big soft burr to remove finishes. The higher hardness reason is simple – if you want a burr to be a little more tidy than it will be on a softer scraper, and easier to get a higher level of fineness, a little more hardness is nice. There’s a limit, though. The harder the burr, the harder it is to move the burr with a burnisher, and it still needs to be movable without breaking off. Courtesy of another discussion about an 80 scraper, I realized that an 80 that I japanned has no good blade, so I made one out of 80crv2, results are below

It works fine, but it could be a little harder and 80crv2 (think 1084 with some chromium and a trace of vanadium) is a tough steel. You’d think for spring steel, you’d want tough (hard to break), but my impression of 0.8% steel saw plates is the teeth don’t have the same strength and they also hold a honed or filed burr too much. Not a fan.

So, I made two more out of 1095 – which I unfortunately do not have in bar stock less thick than 0.1″. That’s a bit much, but this particular steel is the same that I wrote about several years ago – it’s defective. There is some lack of uniformity in it that’s no good for an acute edge, but for a scraper, it shouldn’t be a problem.

I cut two blanks in normal card scraper size and then one for the #80, and heated them in the induction forge and then brine quenched them, and tempered them in the toaster oven on broil. This is the first time I thought to use broil on the toaster oven – if it doesn’t work as desired, then not much is lost. It turns out that broil color temp checks to around 600F. This is a huge win – it means I can just make floats at will now vs. the pain in the ass setup that I had of using orange bars of steel to heat two aluminum quench plates and then getting those sitting level on a float and wrapped in kawool without burning myself somewhere along the way:

Cooked perfect – tasted a little salty from the brine. Of course, it’s 1095, brine quench, there was warping. I took this one out mid process, hammered it to get the little bit of warpage out of it and put it back in. The face cleaned up on it is just filed to make sure post hammering would yield something usable.

Attention deficit break here – the file I’ve been using is the best file I’ve ever seen. It’s a vintage atkins file that someone gave me, or actually I believe there are four. They are so good that I’ve put them aside waiting for a good reason to use them, but I’m just going to use them. I’ve got other atkins files, but something lined up galactically for these particular mill files. The teeth are sharp, superbly strong, fine and I’m guessing that probably around turn of the century before cost cuts, most of the top quality files were like this. The later american nicholsons are not the same. They are also flat enough that if you use them to work the face of a card like this one in the broiler, there won’t be much work on the stones. I’ve not mentioned them because I thought if I could find more on ebay at some point like them, I don’t want anyone else looking for them, but months and months of saved search have gone by and I’ve seen zero of them. I’ll post about them at some point. They are so good that when they dull, I’m going to have to salvage the steel for something else and see if it’s the steel itself, or what.

OK, back to the topic – what hardness did these come out to? 54. I couldn’t have picked a better number than that for this purpose.

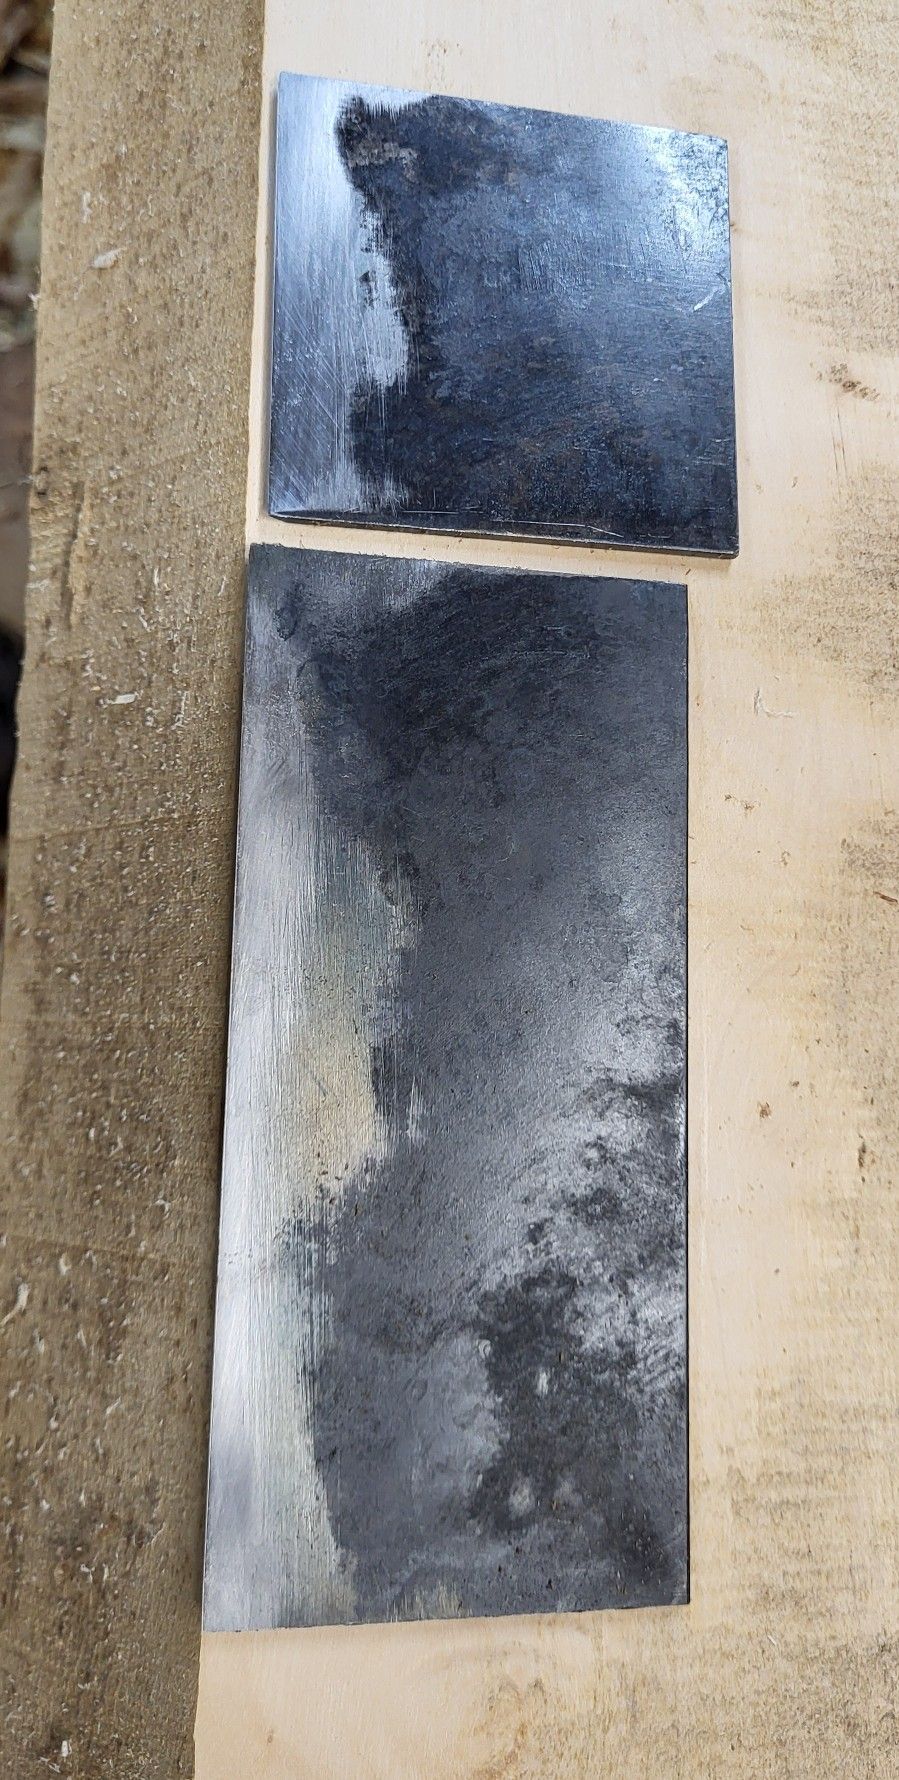
I left the scale on these, just waxed them and assume because there is a little salt, they will glaze with rust slowly even with wax on, and each time they do, I’ll oil and wax them until they don’t. Up close, the scale is very interesting, bordering on colorful:

Total hands on time involved to make each of these is about 20 minutes. And they are about as hard as you’d want them to be but still file hardness to maintain the bevel that goes on them. using them with a square bottom edge isn’t the best way – if you want to draw a burr a little longer than normal, especially on something hard, you want a bevel. These are filed to about 45 degrees, and then honed a little steeper and then the burr is drawn and rolled over.

One other comment here: if you’re looking to get a bright finish off of a scraper, you have to treat the edge before rolling the burr like you want it to do fine surface work. It needs to be clean without raggedness, and it needs to be drawn out cleanly without any dirt or grit or anything on the burnisher or scraper as anything like that at the edge will just deform the burr. So, you get to the point that the bevel is done quickly, but take 20 or 30 seconds to use something very fine (honing compound on wood, a very light buff, etc) to remove the honed burr before you draw and roll the polished burr.

My first attempt wood-wise was chakte viga. No go – it’s not compact enough pore wise and it’s resistant to a burr. It scraped fine – very bright surface.

What I need is some compact turning blanks that are a little green yet, and that’s something I don’t have.

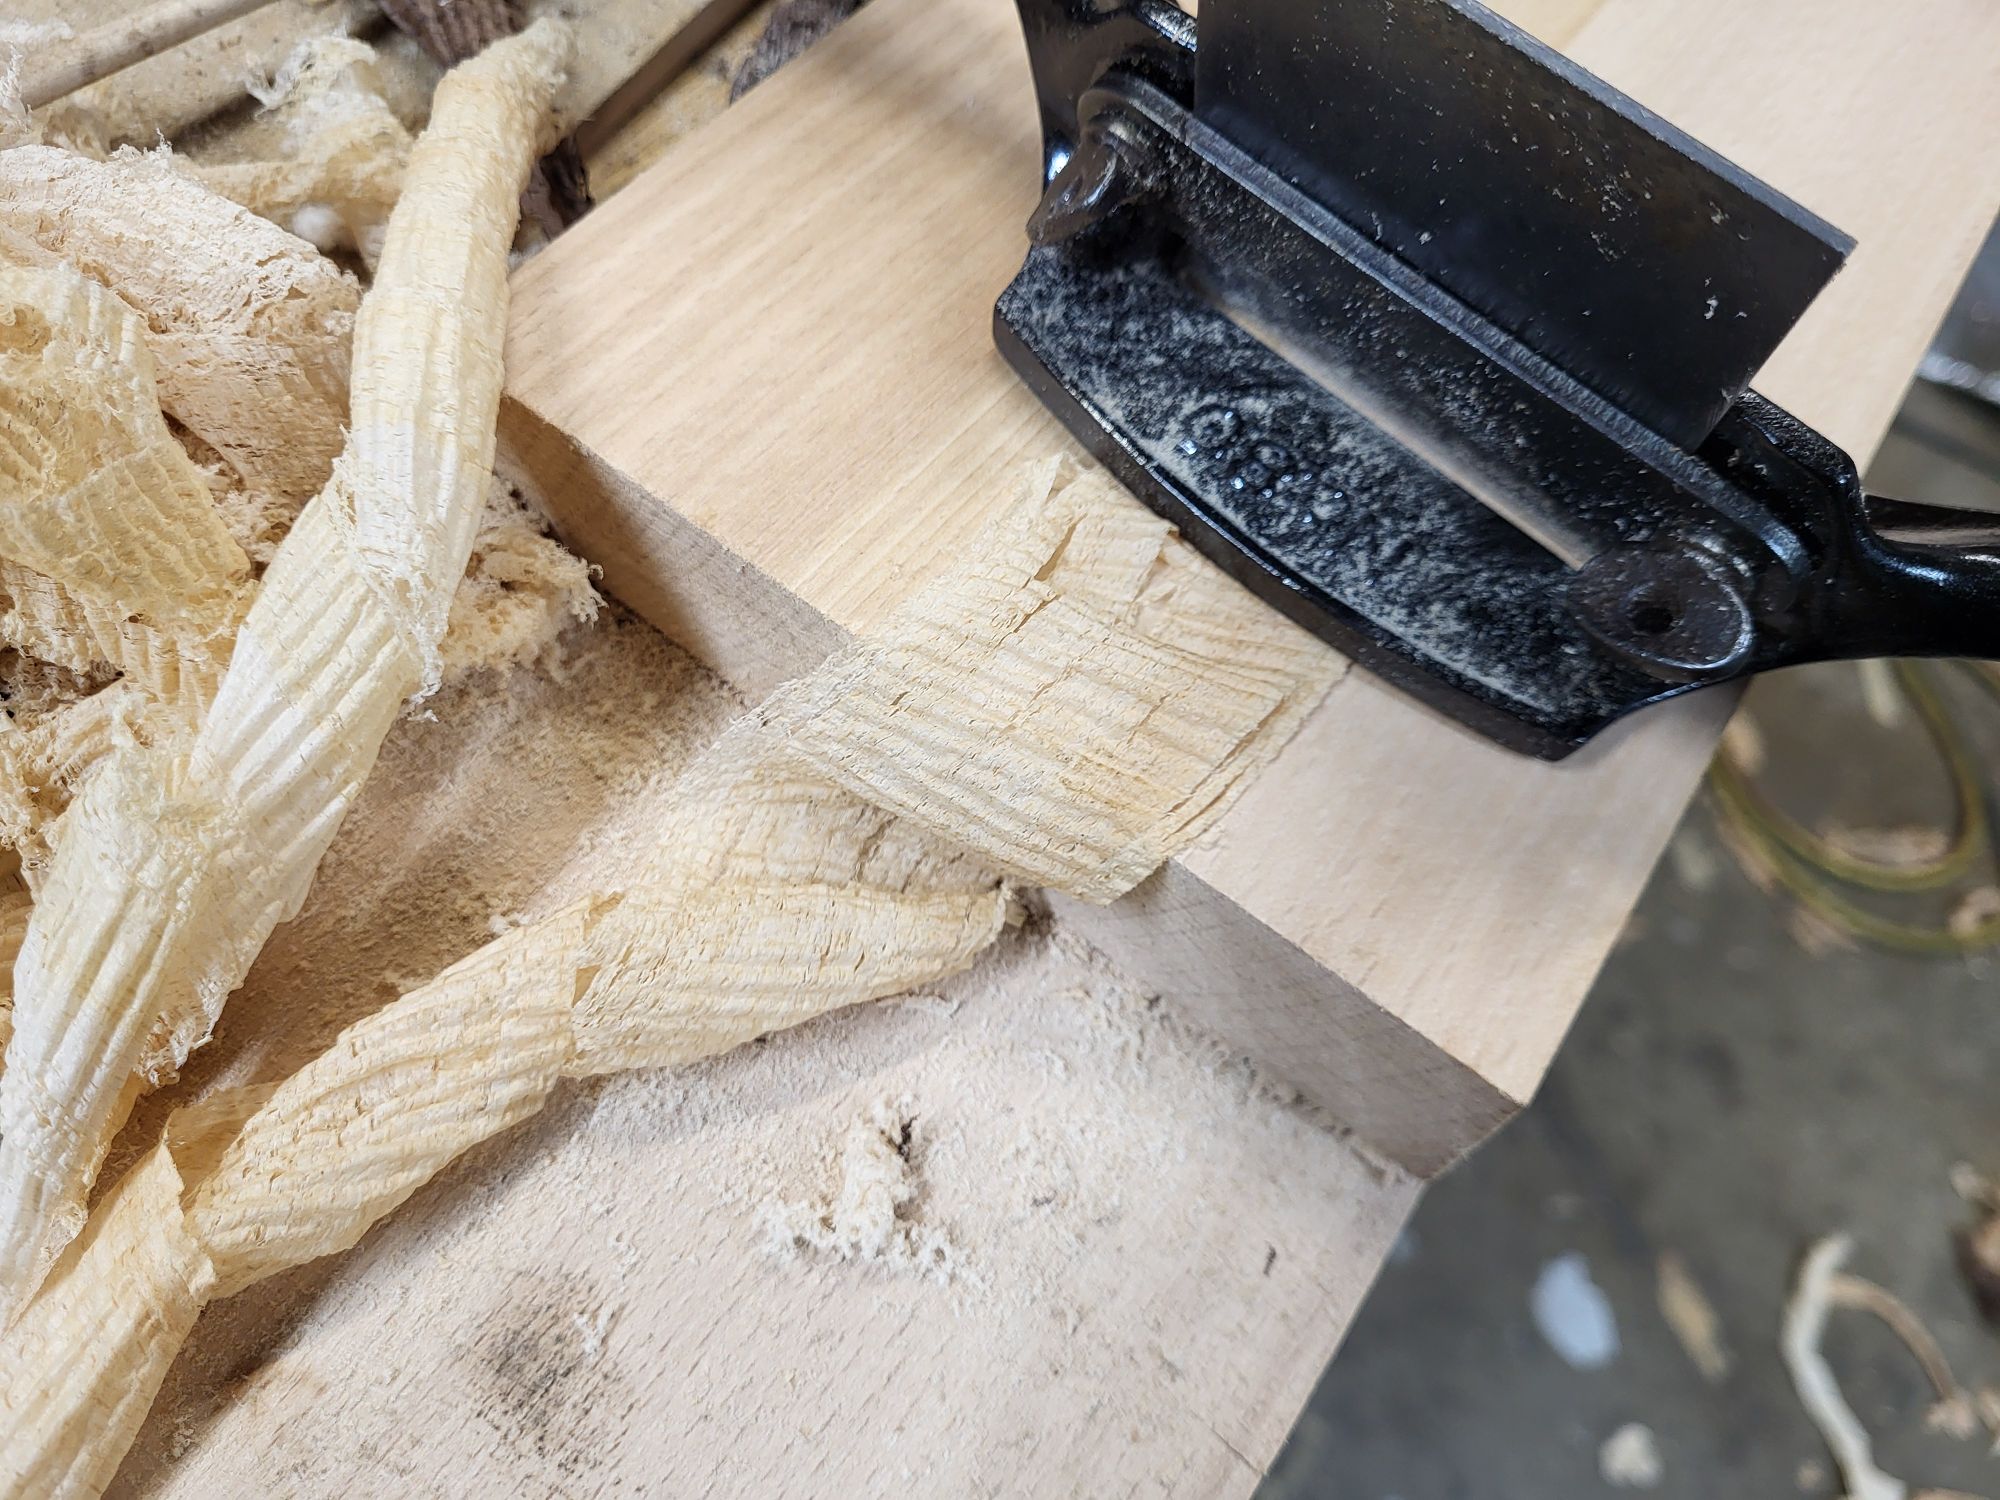
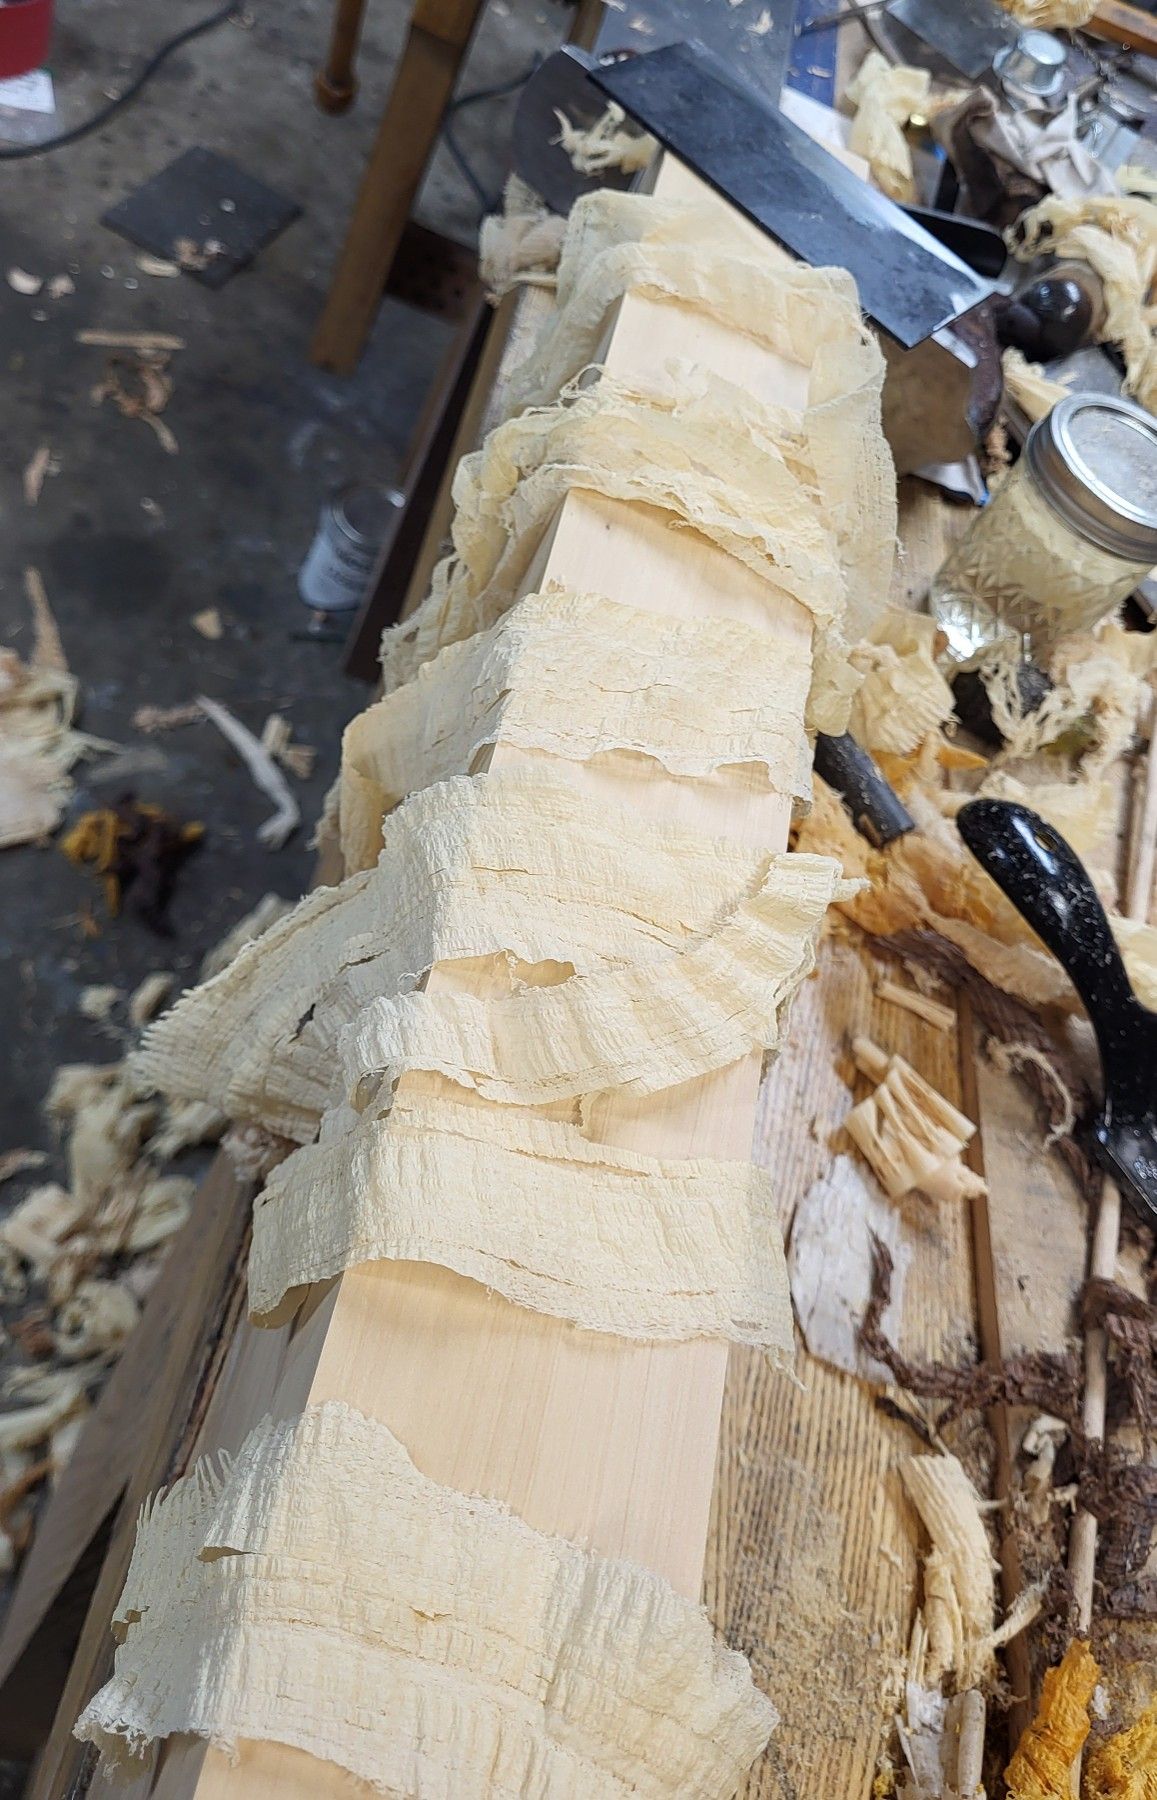
The next thing to try is castelo box, which is compact, still fairly hard (like hickory hard), and I realized at that point, i just don’t have any wood that’s going to make a smooth poreless or nonstringy shaving that’s also going to allow me to take a shaving of a couple of thousandths without the shaving coming out of a shaving plane. But I was able to get these:

And lighter shavings left a plane like surface, so there may be a situation where I find something to do with the hand version here, and the #80 blade is now in the 80, though I did have to file the front end of the mouth leaning forward. The mouth on an 80 is large, but the shaving runs right up into the buckle or strap that holds the iron in place.

Surprisingly, the bed of this older #80 was really sloppy, all the way to having a dot of actual casting sticking up pround in a seemingly random place. If you tightened the front strap down, the blade would high center on the casting flaw and be bent. I have a feeling more of these were used to scrape paint and finish than anything else. Of course, I filed that off and spent about 20 minutes going over the whole tool, lapping the surprisingly bad sole and getting rid of stuff that just made it a pain to use. The sole was recessed toward the mouth, which made it kind of a pain to set to use and get it on and off of the stock here smoothly.

This is the surface off of the scraper with a refined edge. It’s not a match for a double iron as you are refreshing it more often, but when the wood is hard and takes a good polish being scraped, the surface finish is similar. On beech or cherry, no dice – it’s a bit fuzzy and you have to follow it with a card scraper and something else. Why bother, you can just plane those.

One other side benefit came out of this – the thick scraper isn’t really that easy to use in a heavy cut freehand, but when it’s being used continuously, it doesn’t burn your fingers.

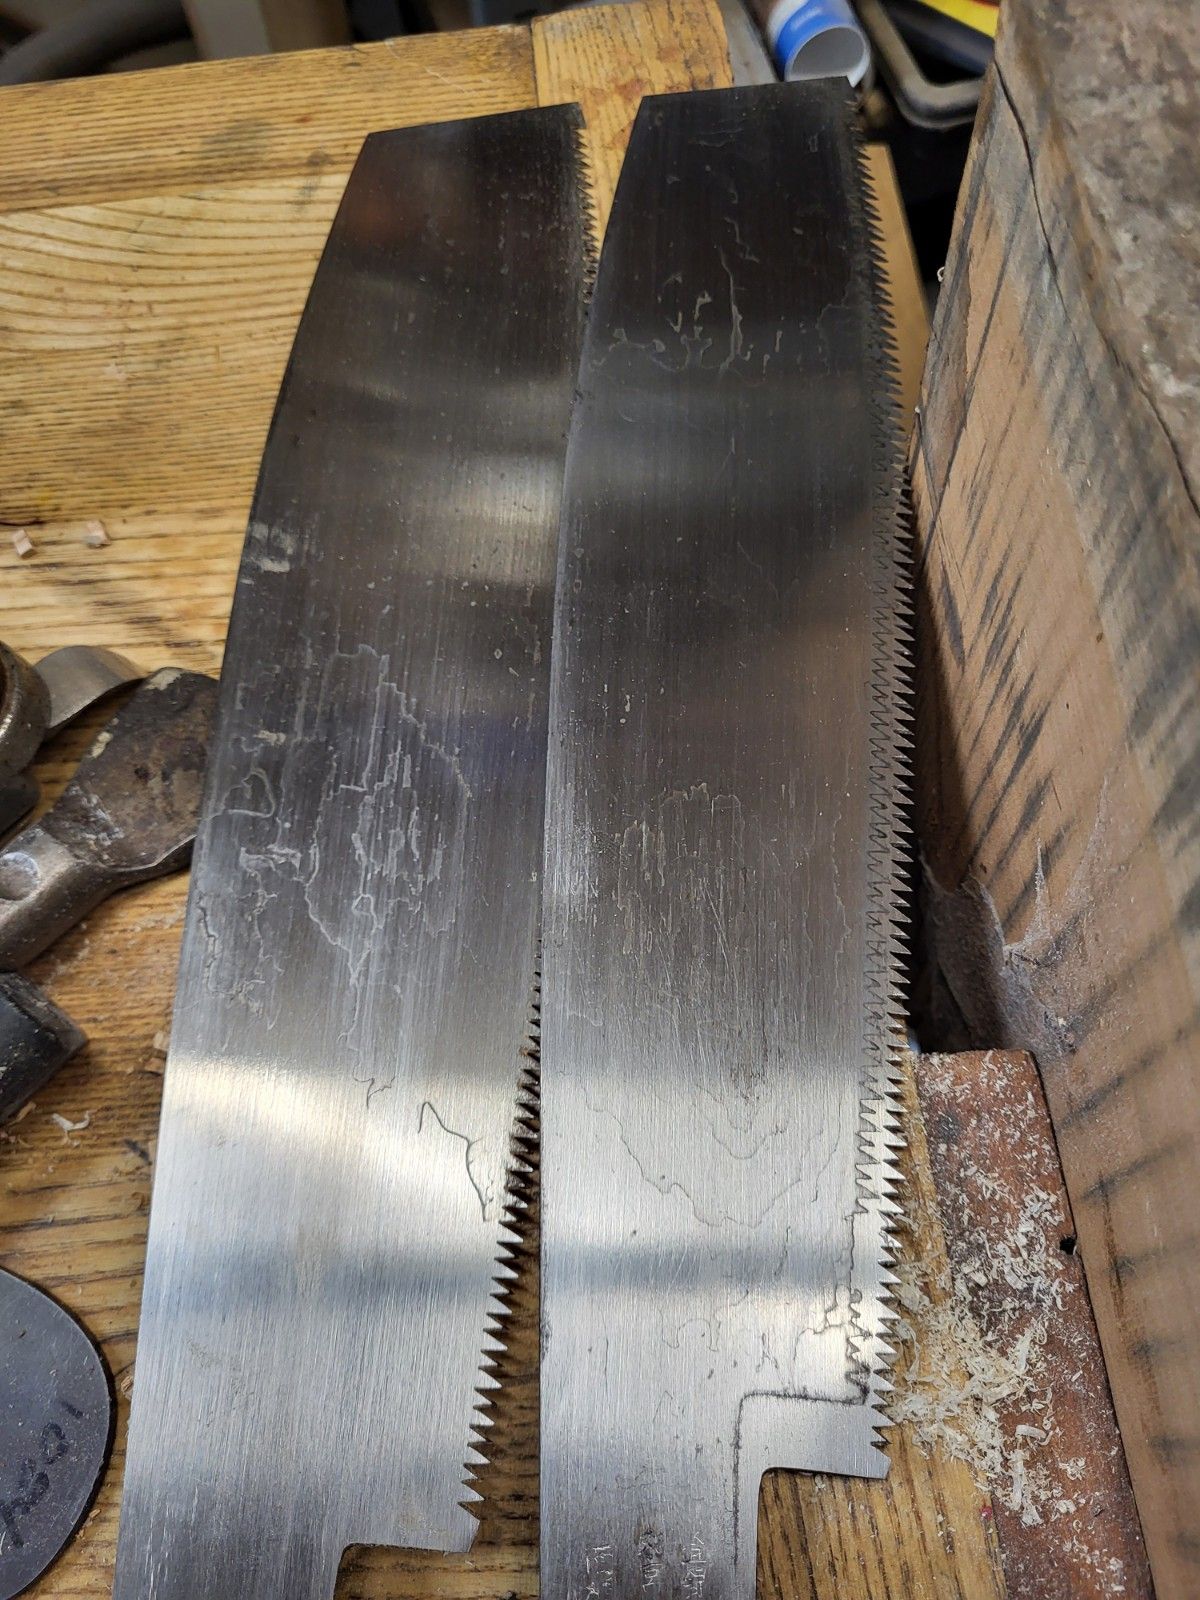
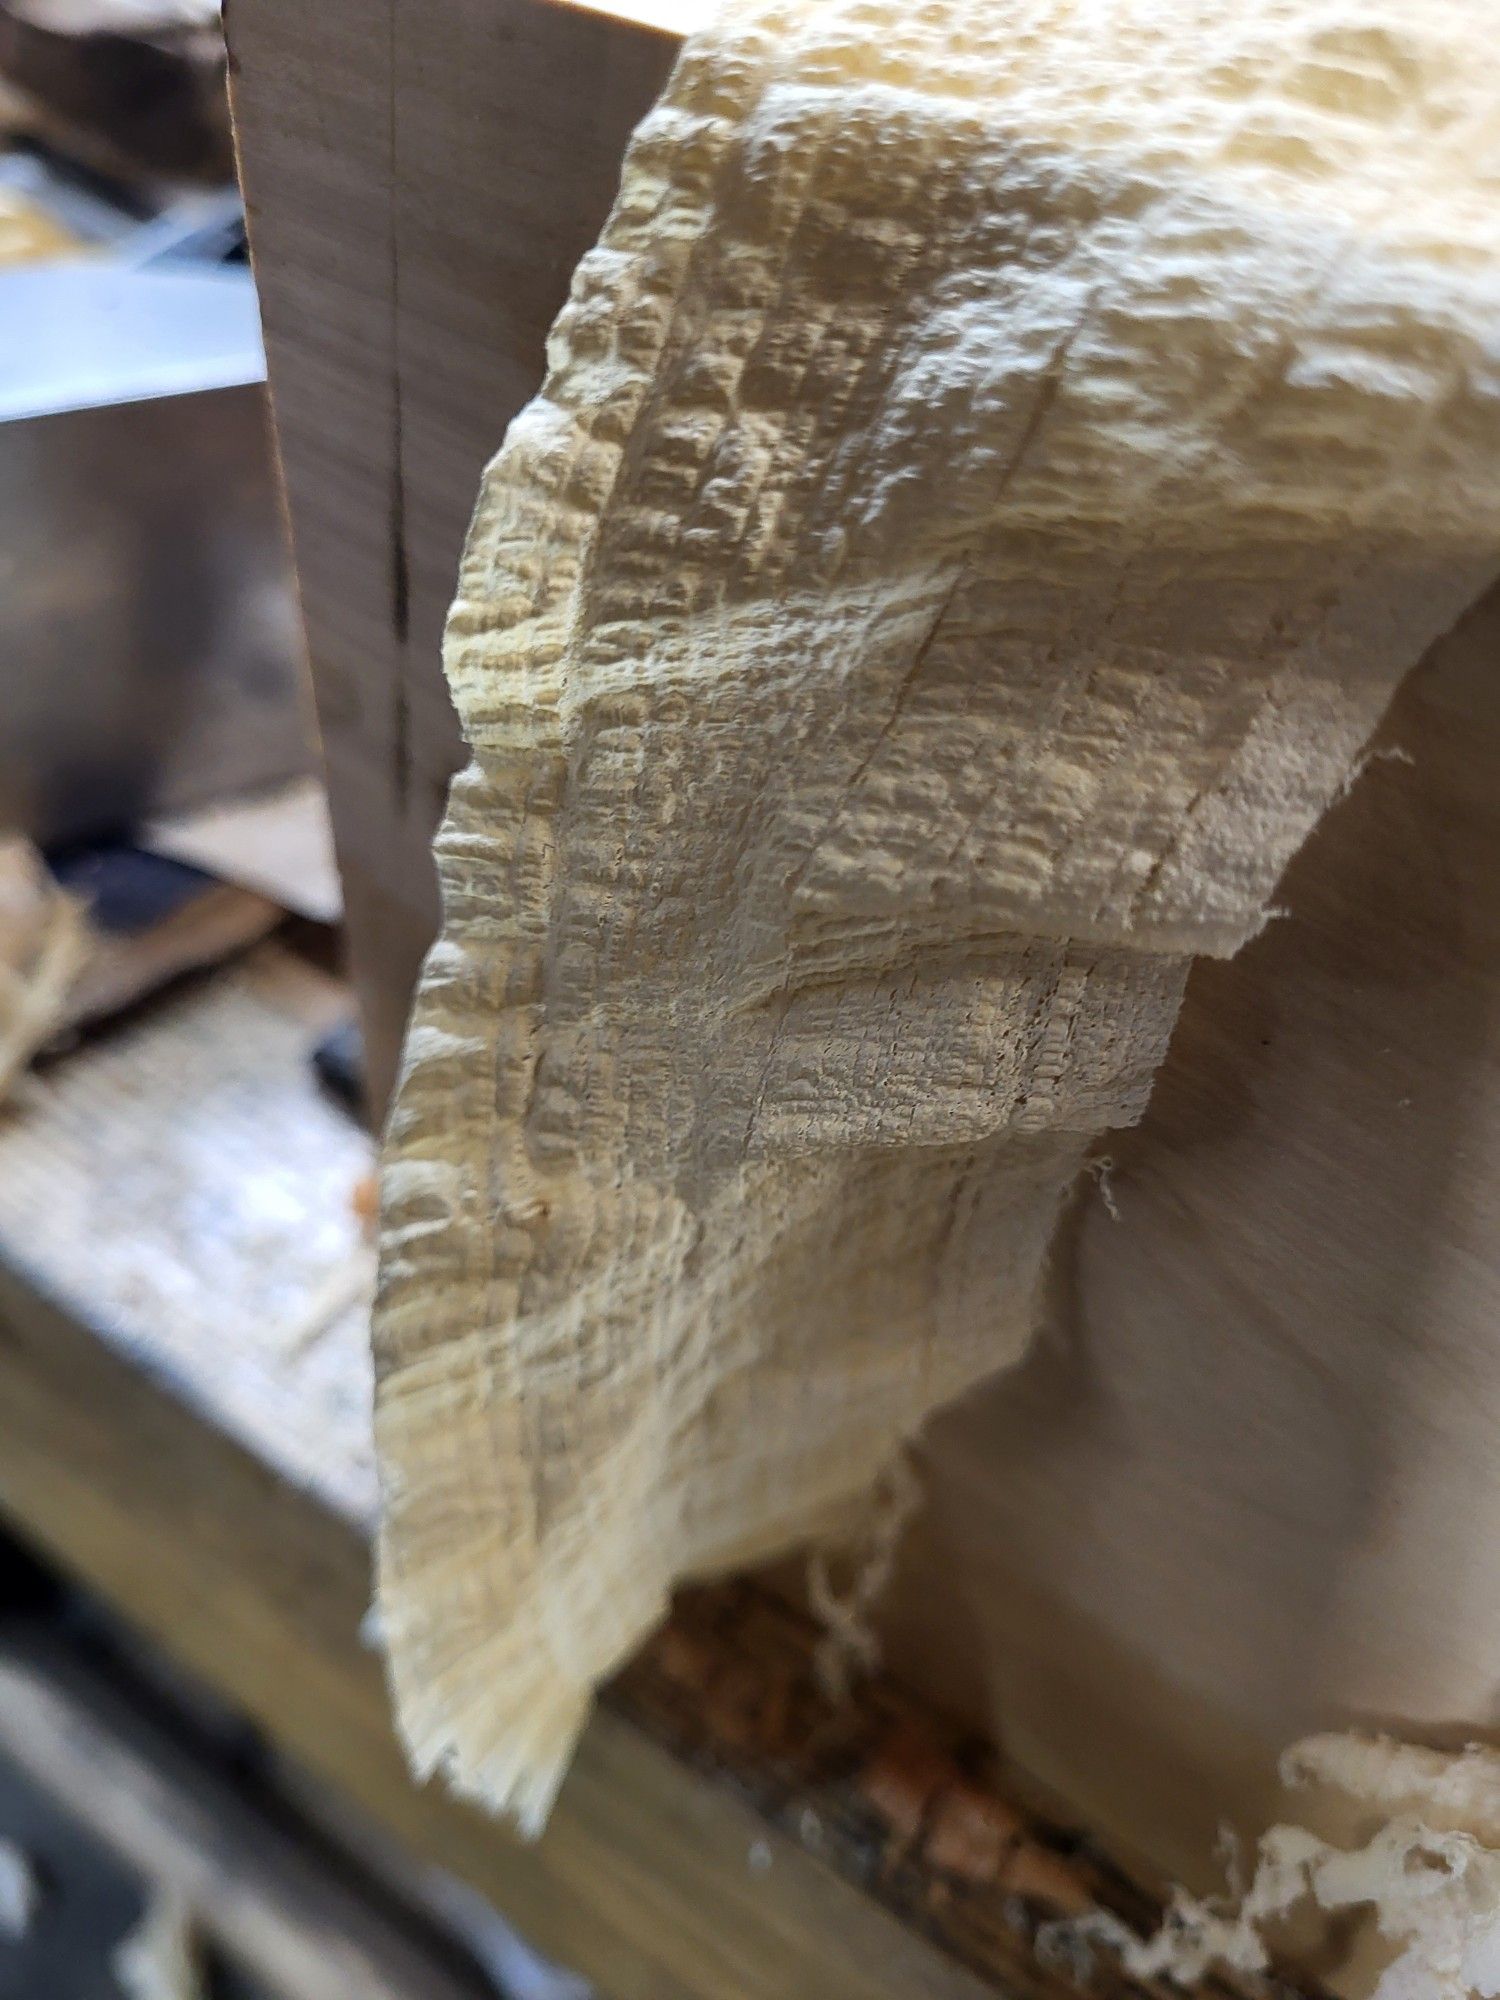
the widest shaving that I got off of this test scraper is this one from apple. Held down by the 80 both to give scale to it (way wider than an 80 could take) and also so that it would lay out flat. The shavings hidden under the hand scraper are from the #80 off of apple. If you have to take a bunch off, the 80 will definitely leave your thumbs and wrists in better shape.

It’s easy to see why the double iron took over on flat surfaces, though. As fun as this was, it wouldn’t be very nice to try to replace fine planing where you can plane, and as you get to woods below maple in hardness, the surface left behind is a bit hairy if it has any thickness.

One Begets Another and Forge Welding

There’s only one game in town at this point for plane blanks as big as I want them, and I have half a dozen or so on hand, but I will likely build planes off and on for the rest of my life when I get the jones. And it may be possible in retirement to actually beg, borrow or steal a main stem from an american beech tree somewhere, but that’s not now.

The recently finished plane is sitting on a billet here because the first long plane I ever made was a jointer. I rarely use it, but I’d maybe like to refresh my planes and maybe cut up the older ones for handle stock. The old jointer is a serviceable plane, but the iron I put in it is just OK and it the style hurts my eyes. We are not talking about priceless goods here – there’s about $60 worth of wood in the old plane and I hate to say it, but it has my mark on it and I will not sell it to anyone else to use or even give it away. I’d rather clean up an old plane for someone else than do that.

So, the blank on the bottom here will get my regular treatment – which is it’ll be a normal plane, but if I think about what I really want in a jointer, I want one with a 2.75″ iron instead of 2 1/2. it’s uncommon to find furniture work that the trying plane here will be deficient in. It works great. The iron will still nick, though, if something causes it to. it’s disappointing that I can’t metallurgically bend reality, but we’ll see over time. It should be usable and it’s a lot easier to be critical when you make the iron and you want it to be perfect vs. a vintage iron where you really want to learn what it needs rather than pick at what the iron needs for set up to be critical. One has you moving volumes of wood and the other, at best, would lead to accurate criticism online. To do the latter when you could be doing the former is stupid.

I just checked the cost to get 11 blanks from horizon and it’s a grand. that’s a lot. Baked in there is what causes me to tap the brakes – freight from 2 hours away is more than 1/3rd of the price. Just like the second to last sentence above, that’s stupid. I can drive to get it at some point and I haven’t bought any in a while. It’s effectively $25 a board foot, which dear, and I haven’t seen it – and these blanks are not all actually straight. They’re quartered but you can’t buy one and assume that it’ll be dead nuts straight with no wander in it. That’s life. I did like the original american beech stock they dried better, but it’s half heart and the euro is all sap. Old planes are all sap. so who knows, the american beech of yesteryear isn’t available and it’s unlikely it ever will be again in the quality horizon provided. i still have a little of it, but it’s stuffed off to the side until or unless I get the urge to make something legit unique, like a cooper’s jointer, perhaps.

On to the forge welding thing:

I don’t forge weld much. Just bolsters usually at this point when I can’t get round stock. I haven’t thought about it much because wrought or mild steel forge welded to high carbon steel isn’t something I want. I don’t want it because at this point, the solid steel chisels I’ve been making are better. They can have the same strength and stiffness in a thinner cross section and 26c3 and 52100 both allow hitting high hardness without making something fragile like D2 steel would be.

So it’s been out of mind. Except I got an email from someone earlier today and looked further. Another issue that I deal with is the limited availability of steels I want to use. I want to make chisels that are not bettered by something. It’s just a thing. When you start to make things, you want to make something usable. In the back of your mind is fantasy that you want it to magically be special, but it isn’t. You’re struggling when you start to make something that will match basic commodity goods and again, if you don’t do the comparison and just regard your mediocre stuff as superb, that’s stupid.

Not wanting to do stupid things does limit you to certain experiments. For example, there are steels that would benefit from a higher pre-quench heat than a mid carbon backing steel would tolerate to get full hardness. So what do you do? If the bit hardness (the cutting edge) is going to be fully hard, the grain will bloat in the backing metal and then what’s the advantage? It may not be able to even match a single solid steel chisel. Too, I’ve learned by experiment unintentionally that even moderate amounts of alloying will make it a lot harder to get a forge weld done. you can often still do it when you can get really high heat and the work area is small, like bolsters on 80crv2 or something, but it’s not something you’d want to do in great big volume hand hammering.

But discussing this with someone who is having someone else make tools still allows pondering and strikes up the chance of perhaps using a mid carbon steel with a plain really high carbon steel. Like 1045 carbon steel rod (0.45% carbon) laminated to 26c3 or hitachi white 1. The latter should be an even better match. Both of these steels need contamination free composition, and a lot of the mid carbon stock has been replaced in the US by steels like 4140 that are much more highly alloyed but through harden in long cross sections. They also have yield strength values twice as high or near vs. 1045 steel, so it’s easy to see why they have become a preference for industrial use. I doubt they would weld easily to a high carbon bit.

There are specialty 1045 products that are nitrided and high sulfur, presumably the sulfur makes machinability easy, but it’s a toxic thing to have forge welded and maybe diffusing into an old file or hitachi white 1. How long does it take for sulfides to form, making steel brittle junk? I don’t know and I don’t really want to learn. Fortunately, digging deep in mcmaster carr’s listing finds 1045 rod made from the US with a sulfur content limit that’s not much higher than white steel, and the same with phosphorus.

I think this is worth trying partly because it’s worth trying for fun, but also because if it’s workable, It may make white 1 chisels viable vs. being a $200 of steel per set novelty. Figure when you are shopping for unobtanium japanese chisels made of white 1 and sold for $2k, you’re probably looking at about $30 of white steel bit the most – maybe less. But when you make solid chisels end to end, the strangely high price of hitachi white starts to bite. I still have to make one solid set of them to squash the nonsense that “it’s laminated to wrought iron because it’s too brittle to use as monosteel”.

And I think I didn’t make it more clear, as I should’ve – 1045 moves much faster under hammer than does 52100 or anything else that I’ve been using in the round. W1 is pretty amenable, but 52100 will definitely build more shoulder and forearm muscle, or in a small power hammer, require more heats. neither of those are quite what I’m looking for in a chisel steel.

If this works, the only drawback is the 1045 steel may end up at 55 hardness while the cutting edge is 65. I don’t think there will be much there to see in terms of lamination line, but at least the chisel body itself will not flex as much and chance breaking at the butt end of the forge weld – exactly how I’ve broken two different laminated chisels in the past. I’ve never broken a solid steel chisel that I can recall.