Blog

Hand Forging Chisels with Integral Bolsters

I’ve made a fair number of chisels. I don’t know how many exactly, but probably about 150. At the outset, I shrunk bolsters onto a tang by heating a bolster, tapering the tang (fatter as you go down the chisel – opposite of historically) and then allowing the bolster to shrink onto the tang. They could move, but hard handle wood and a stout brass ferrule probably would’ve limited that.

It stuck in my head that I wouldn’t be a “real” chisel maker until those bolsters were not able to move. So, over time, I experimented with forge welding a mild steel bolster onto a high carbon steel chisel. Using the same steel would’ve been better in some ways (easier to weld) and less good in others. But being a bit of a chicken, knowing that the weld could fail if it wasn’t great, I’ve always left those bolsters a bit bigger than what you would see on chisels historically. Bigger meaning thickness – more gripping surface on the tang of the chisel. If the weld fails, it usually does immediately if you strike it, so I put the chisels in a mock handle and hammer the end of the handle hard. It’s usually even easier than that, though. The welds are either good or they aren’t.

Here’s where things depart from “how it was done in the past”. Chisels that were actually made by hand often have butt welds on them, and I’m sure industrially made chisels do, too. As in, even where you see that bolster and assume the tang on an all steel chisel goes through the bolster or the bolster was upset or die forged in place, you might rather find the bolster was upset on the end of a blank and the tang is actually butt welded. With wrought iron, this was common, but for purposes of making chisels, I don’t really care too much for laminated types as I’ve had three failures in chisels that I’ve purchased – all three were related to the back of the lamination. And making something like an all steel paring chisel allows for much more control of the chisel’s spring. you should be able to lean into a bench chisel or paring chisel, and with my parers, you could mallet them if you could stand how high your hands would be.

The departing from how it’s done in the past is I want to make chisels out of a single piece of steel, hand forged and ground. To do this, the idea is to get bar stock big enough to form a bolster – remember, I only want hardenable steel – nothing more formable like iron or mild steel – and then forge and grind the remaining steel and file the bolster into place. I have finished one chisel and hammered blanks out for three more. This requires either square stock or round rod, and in the US, the steels that I like to use are sold mostly as flat bar – so my beloved 26c3 is out when making these types.

One finished chisel and another rough blankhammered and ground from W1 rod

Hammering the steel from rod out to this point is no joke, either. I don’t have a power hammer, and at this point hope not to have one. I hope to improve my ability to hammer to draw these chisels out in 10 minutes instead of the half hour it took to do the first one and near that for the second.

The funny thing about the first chisel above is that the bolster – the first one I’ve done that is integrally part of the steel, actually looks like it’s forge welded on as a separate piece. A clue to how it’s formed is in the second blank.

There are plenty of other questions to answer – the most important being whether one can hand hammer round stock as much as is needed here, not allow too much carbon to escape into the atmosphere, and then in the case of a hand maker, normalize and heat treat by hand and eye and get a good performing chisel that won’t be bettered by anything commercially made. I think the answer to that is that it can be done.

The first chisel is handled now and seems to work fine malleting – but after getting carried away grinding the tang above the shoulders, it could use some aesthetic help with the tang to shoulder length being shorter on the next one.

Forged W1 steel chisel with London plane tree handle

The bolster looks a little wonky – but that’s actually due to an attempt to finish grind the bolster to a fine finish with a high speed wheel. Not a great idea. Filing and hand finishing will be fine for the tail end of the process.

Bevels that you see on the chisel don’t change from any prior process – they’re always ground onto the chisel after the chisel is hardened. If they are there when the tool is quenched, you get a banana unless you’re using A2 or some other steel meant for accountants obsessed with eliminating skilled labor.

It shouldn’t be too hard to visualize what goes on from the blank above that’s not finished to the chisel that is finished. It’s a little bit of back and forth. The rough shape is formed, and the better I get at hammer swinging, the closer it will be to final dimensions vs. these early attempts kind of wasting a lot of time and steel and belts and wheels with grinding.

It would certainly be easier to do this rough work with a power hammer, but it’s true at the same time, I don’t want one and my shop is under the house on a slab shared with the basement – it would be undude for the house, and the family, and cheat me out of experience that I need. Thus far even in 4 chisels, it’s apparent to me that I’ll never form these smooth and easy the way Williamsburg can do with two guys and buttery soft wrought iron, but 10 or 15 minutes could be enough to get the initial blank. ready to start grinding. And in case someone thinks 10 or 15 minutes should be what it takes to make a chisel, it’s more like two hours for a hobbyist if you’re really going to do all of this without taking shortcuts or investing in a lot of equipment.

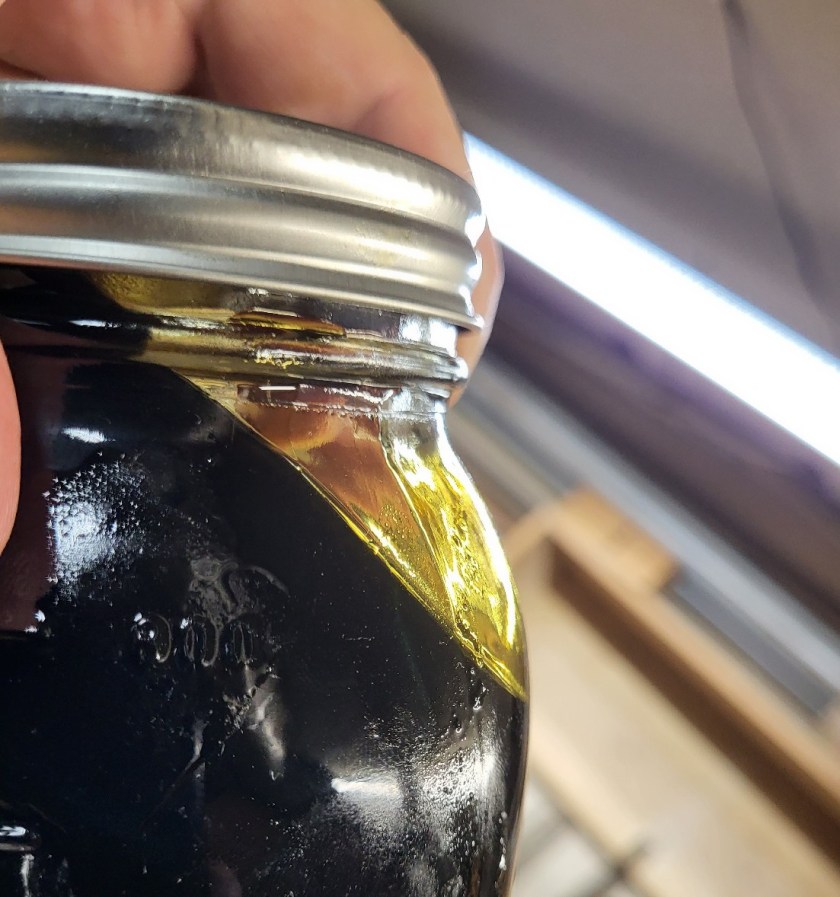
I’ll spare everyone why I think excess carbon is good in a chisel. With W1, after forging, the carbon content is probably down to 0.9% or so, and I’d like more than 1. And fortunately after starting this process making, I’ve found some European DIN 1.2210 steel sold here in the US in round rod (about 1.2% carbon) that may be a suitable substitute for 26c3.

The anvil that I’m using is 125 pounds, though. I can tell moving metal will be a 4 pound hammer or more venture, and it’s a bit much for the anvil. Which creates another problem – where does one find a reasonably priced local 250 pound anvil that’s in good shape? That’s an unknown – what is known is that something like a JHM ductile iron anvil (hardened, though) is a little over 2 grand after paying freight, and a ridgid forged steel anvil is closer to $3k with taxes and freight. Doable, but in principle, something I don’t want to give in to yet.

I Made Amber Varnish

My last post about varnish stuff was a glossary and intro. If some of the discussion in this post don’t make sense, you can find definitions or discussion of the terminology in that post. Pardon the winding length of this post, by the way. Yesterday was an adventure replacing the cold water line in my house and some of the stems off of it – I finished at 1:30AM and am wiped out. But, back to the varnish…

Amber varnish is probably the earliest “super varnish”. One that has good toughness, high hardness, and is suitable for a lot of uses, from furniture to floors to whatever. I’m not sure if it was used for coaches and things of the like as the texts I’ve read are later, and semi-fossil Copal resin varnishes dominated.

Amber’s interest because Copal is described as being lighter in color than amber, but Copal also relieved varnish makers from having to make varnish out of Amber. So what’s behind these two things? Amber has to be heated to a very high temperature to run and be made soluble for linking to a suitable oil (usually linseed). As discussed in the terminology post, the oil and resin are cooked together to make a long polymer chain. The run temperature is high enough that cooking over fire would’ve been dangerous – it’s only a couple of hundred degrees between amber’s autoignition. The other thing about it, and perhaps some is the resin and some is the temperature needed in the cook, is that the resulting varnish is the darkest I’ve made. I feel like I’m new to varnish making and haven’t made much, but by jar count, this is the 16th varnish I’ve made.

Dark varnish isn’t necessarily a bad thing, but if all varnishes are dark, of course rare then would be a light varnish. Copal allowed relatively light hard varnishes if it was cooked quickly to short string and then used as it was.

At this point, I think the changes in semi-fossil Copal availability have made it so that the baltic amber that’s available, and even at a relatively reasonable price, isn’t much harder to cook than Copal, and maybe not any harder than madagascar Copal.

And, yes, amber resin is the same thing you’ll see with bugs suspended in the middle of it, or polished into sort of a relatively soft natural gemstone. The baltic amber that’s sold for varnish making appears to be little pieces that aren’t valuable for anything else. For the purpose of varnish making, this is nice – the resin does not need to be broken down and it doesn’t have tree trash and dirt in it that some Copal types have.

What makes cooking difficult?

The difficult part of basic oil varnish making is getting a good clean resin to start with and then getting it to melt without burning it. With softer resins, this isn’t much of a challenge unless you’re really new. But with something like Amber or the harder Madagascar Copal, I can see thermocouple temperatures of 700F or so and still have unmelted leftovers after filtering the varnish. My setup is sort of gamed so that it’s not easy to get much past 700F. I don’t have any interest in an eruption of sticky burning stuff that you can feel the danger of if so much as a raindrop or two falls in it and spits a tiny bit out.

If that unmelted stuff is something like 2-15% of a run, I just throw it out. While you’re cooking resins, some part of the mass escapes into the atmosphere, even if you keep the lid on the pot, and burning the pot contents probably just would lead to the same amount of usable resin in the end, but it would be smoked. Like dark and it actually stinks.

After reading extensively about how Amber is difficult to run, warnings from authors not to run it, and pictures online of people stirring what looks like charcoal, I kind of expected it would be a failure, but I also kind of expected that my easy “for dummies” setup with some experience would make it doable. And it was.

There is only one thing I didn’t anticipate: the smell of the resin being run was perhaps the worst smell I’ve ever smelled. Running resin stinks – enough that it’s inconsiderate to neighbors as it’s a putrifying kind of smell, not just like a campfire or burning cooking oil. None is pleasant. But amber takes the cake as being the most disgusting I’ve smelled, and it lingers, even outside. Like on the leaves of trees and under the eaves of the house even though my cooking setup is nowhere close to them.

But I’m happy to have run something that is warned against, no fire, it’s not black, and the properties of the varnish itself are nice. it’s basically a 1 part resin to 1.5 oil, and 15% of the resin or so was pine rosin to create a melted layer to help avoid burning things. Older recipes include Copal (probably easier to melt than what’s available now) and pine rosin up to 50% of the resin content as a cheaper alternative.

A picture of the final amber varnish in the large jar, and some poured off and thinned to use in the small jar.

I mentioned above that the old texts mention you can make a lighter but less durable varnish by getting string, which signifies that the oil and resin have combined chemically, and then just stopping. I use the term “quick varnish” for this. Get them hot, put them together, and take them off the heat before they get darker. Since this is already going to be dark, this is a long-string varnish. Long string in my experience is easiest to get by keeping the varnish over heat for some period of time, testing periodically. As string gets longer, you have to pay attention as the varnish can become so well cooked that it becomes a gel, and it’s generally a lost cause at that point.

So, I cooked this as far as I cared to push it and the mildly thinned result in the large jar is almost like corn syrup when it’s poured, and it has unbelievable adhesion, even wet, and is immune to soap and water.

Here’s a look at the side of the large jar tipped just to get an idea of the darkness of the film.

Very dark finish demonstrated by tipping the jar to see a thin layer on the glass.

I have no idea where to use something like this other than intentional dark finishes or on very dark woods. I don’t think there’s any limit to its shelf life, though, so there’s plenty of time to figure it out.

It’s waterproof, like a modern finish, and I test for that by pouring water on a piece and just letting it stand until the water is dry. If the varnish is impervious to water, it won’t let water into the finish, but also, it won’t even degloss. Semi-fossil copal and amber both do this. I’m sure some others do, too, but inexpensive pine rosin varnish definitely does not tolerate much water contact. BTDT leaving a test piece in the rain by accident, discovering the surface swelled and bumpy with water the next morning.

A test piece of beech finished with a thin layer of amber varnish, water has partially dried. A brushed finish would be considerably darker, perhaps tending toward the color of a violin.

So, about 4 hours of effort in this case, but not all of it with me being attendant. Probably about 2 hours of actual involved time, and all that results is a quart of finish. That’s true, but it’s worth noting that the finish is about 70% solids, so it’s more similar to a half gallon of a higher quality urethane. And it’s just a different animal, anyway. There will be no curing in the jar with this, and if sunlight is available, it’s dry to the touch in about an hour or two.

Two other Varnishes for Color Comparison

It’s not impossible to have a lighter varnish with good tolerance of water, but I haven’t made one yet. I think it’s hard to look at the first picture and get a sense of just how dark the varnish actually is, so here are two more pictures for comparison.

Semi-fossil copal short-string quick varnish. Still a good varnish, but gives up durability in theory to keep this lighter color. Note the film color left on the glass as the varnish jar is tipped.

A fast-cook limed pine rosin (lime added to increase hardness and melting temperature) varnish. The film is so light it’s hard to see on the side of the jar. Unfortunately, the durability and hardness of the varnish isn’t that great.

I may return another day and try to improve this post so it’s not just like some short-sleep dude typing at random, but if you’re reading this last sentence – I haven’t done it yet.

And maybe that’s suitable for Varnish. I could make this varnish on a regular basis, but making it was more about making something that’s practically forbidden in some texts and less about doing it regularly. Especially with the smell – bad enough that 10 ounces of it running would’ve easily tinged the nostrils of dozens of neighbors.

The Plague of Influencers and Affiliate Programs

I’m fresh off of a tirade writing about WBW elsewhere and the stupid affiliate programs all over the place leading to Jabronis (my opinion) pretending that they know something or “have a new favorite” only to put up a revenue token link and never just level with audiences and say “listen, I really only put this video up because when you click on this link, I get a temporary window of a day or two where you buy anything from the retailer and I get money from it.”.

And, of course, it’s not just WBW – it’s every other no accomplishment or mediocre accomplishment person showing their new favorite this or that or a supposed “test” result that just allows linking a whole gaggle of affiliate links at once.

What a plague all of that stuff is. Wood Whisperer telling you about his new favorite rust protection? The revenue link corresponds with the company boasting about a 20% affiliate commission, while the presenter tells you “he bought the product” in a lot of cases, which is misleading. My opinion is that it’s intentional – you would probably get far more than 5 additional sales (erasing your cost) by implying that you just chanced upon something and omitting you’re getting a huge affiliate commission.

It’s pretty much nematodes and tardigrades in the world of woodworking, though. Everywhere and permanent. You don’t immediately see it, but the whole system is set up to create separation between you and retailers or manufacturers while implying that the transition person laundering the information is impartial or “a friend”. A friendly person who never manages to tell you their actual incentive, or recommend things from a full menu of choices without bias in their wallet’s favor.

How do you tell? This isn’t the acid test, but I’ll tell you a story and then tell you one of the acid tests. My dad is retired. He doesn’t do much for investing, aside from give someone his money. He leaked to me a few years ago that he was going to talk to a financial advisor. My dad also gets more pension and social security income than he spends by a wide margin (he’s cheap), so the last thing he needs is an annuity. I said “make sure you don’t do something stupid like buy an annuity that you’re being sold just because it’s far more profitable for an advisor than it would be for them to collect a fee and direct you toward index investments”. His response was “I don’t think he’ll try to do that, I already bought two annuities from him”. A-hole alert. You won’t know enough to know my dad’s financial situation, but I do – no independent advisor is acting in my dad’s interest doing that and my dad could be protected by elder law at his age. He insisted that the advisor is very friendly and has a lot of clients and they all like him. Well, his advisor definitely was successful ad curating a group of clients who aren’t investment savvy and judge advice by smile and whether or not there is free stuff like coffee.

I said “the guy is an A-hole and he should be prosecuted if he’s your financial advisor and not a captive insurance agent or someone who you’d clearly know only wants to sell annuities”. My dad was offended, obviously I’m implying he’s been had and he wasn’t aware of commissions or the idea of annuity income when you’re already unable to spend the income you have. I said “OK, here’s your asshole test. If he tries to sell you another annuity, you’ll know he’s an asshole if you don’t already. I’m telling you ahead of time. It’s pretty easy to smile and give someone coffee if you’re bagging a $5k commission for an hour sitdown”.

I had to break through what my dad felt was a good trusted relationship, and suddenly he had to be whatever pilled you would call it where he understood what was going on, and not only did it put a cloud over him for going to the meeting, or potentially, it made him feel stupid, and while he’s not the same kind of “questioning and digging asshole that I am” (a whole different kind of a-hole!!). Nobody likes to hear, either, that they could be protected by elder law prosecution, because that’s code for “you’re senile and dumb” to a lot of people.

My dad was unhappy with me, audibly, and I value my relationship with my dad a lot. He is rock solid and I would trade him for nobody else. Later that night, he called and he’d gotten enough time to get a little removed from knowing that his son can be inconsiderate or impolite when it comes to lining out something that’s a problem with principle, and he said “Well, I just wanted to call and let you know. You’re right. He tried to sell me an annuity. He said it returns 8%, so what’s your son’s problem?”. I had given him a no-authority order tell the advisor to call me and why – tell him I want to have him call me, what I do for a day job, and I want him to explain why a financial advisor or planner would recommend an annuity. I used something from my secret underground and estimated the cost of an annuity for someone his age and found the yield to be around 2% after expenses. The payment was about 8% per year of the single premium for the annuity. Of course, his advisor was an A-hole, and gave him the fake act of “sure, I’m going to call your son and explain it to him”. Of course, the guy never called, and my dad later called him and he said “he changed his mind”.

Would this have really hurt my dad? No, he’d still have more money than he could spend, but it’s an issue on principle. I have no clue if I’ll get an inheritance and don’t plan for it and don’t really care – it’s my dad’s choice, and I explained to him that if he found a worthwhile charity, I’d rather he give 100% of his money to the charity than will me anything while giving half of his money to an advisor who misled him. And my dad proudly announced I wouldn’t have to worry about that because his advisor (late 40s in age) had sold his company and was retiring.

That’s a long story, but if I could influence a few people to bust that kind of crook, it’d be worth it without question.

Back to influencers. How do you tell someone is an A-hole? My definition. They provide you with information about their “favorite thing”, a “test of various products”, “secret tips” or anything else, and what they’re discussing includes some combination of links to amazon with the word “redir” or “token” on it, and possibly direct links to the products they’re talking about with more in the URL when you hover over the link than just the base website of the maker.

You have every right to ask them how much the commission is on what they’re talking about, and why they don’t disclose affiliate program details as part of talking about something. Just saying “i might get a small commission on some things sometimes” isn’t enough. It’s avoiding the subject, and the information should be specific about the video and about what’s provided. Why doesn’t the Wood Whisperer go nuts telling you about all of the various ways he’ll earn affiliate commissions on a video that purports to be a test about various hard wax oils? Simple, because if he did, many would start to think a little longer, and more folks would probably do what I do – request Youtube eliminate suggesting videos from “creators”, one by one, if the videos have revenue token links or sponsorships and the presenter doesn’t make a pretty big deal about what they’re getting from all of that.

You can certainly decide that I’m just a grouchy rotten person who is peeing on campfires, and I think that’s fine. I’m not really that big on telling people what to do, but rather floating some information out there. I can guarantee you when you are the kind of a-hole that I am (operating on principle, even when it just seems really negative sometimes), people will have the same feeling my dad did. “But I liked that guy”.

What got me on this today? I upset someone who was recommending “carbon method” rust preventive because the wood whisperer recommended it. I didn’t know anything about it other than that it makes little sense as a rust preventive and the wood whisperer figured that even though he used it and got rust on his table saw, it would be worth making another video about it and saying he still liked it. Why do I think he made the video? Well, a good starting guess would be the publicly advertised 20% affiliate commission, though we don’t know what WW’s link token really gets him. It could be more, or it could be less. I doubt the latter, but who knows – I’ve seen online retailers get short arms when someone is especially good at referring people to them, and change the terms of an affiliate program. I have a special distaste in this case, because the person who was glowing about the video and passing it along to other people made the very big pronouncement “well, he said he bought it on his own”. Well, here’s a potential scenario for everyone to think about. You are an influencer, you find a product that has a 20% affiliate commission and you buy it hoping that you can get it in a video and then perhaps get a relationship that’s even a little more special than that. Do you think influencers might be more interested in shopping affiliate programs than products? I do. You may disagree.

But I think if you start to observe this pattern, and you’re aware of it, you may start to change your opinions just as my dad now is fully comfortable that his advisor was an A-hole and he’s more comfortable that I’m not calling him dumb for being taken on investment decisions he signed off on.

Today, I learned that WBW tested some new irons and he’s impressed by them. Guess what. There’s an affiliate link to what he’s talking about for at least one of the products. I bought one of the same iron (the 10V iron tested here). I have no idea what to do with it – the alloy seems to have potential but it doesn’t pan out used side by side with simpler steels because of the way the edge is as it wears. Did I pay for it? yes. Did I ever refer anyone to collect something from the site’s affiliate program? Absolutely not. Did I ever do that anywhere on any platform with anything? Absolutely not.

Different person, same site, with an upbeat pleased feeling to be passing the information along from the video. I think they probably aren’t considering why the video was made in the first place. A link to the right for a recommended short let me know that WBW also has a new favorite marking knife. It’s $120 and made out of about $3 of Nitro V steel….he boasted that in 6 months, he hadn’t had to sharpen it. Nitro V steel wears about as long as A2 – it’s pretty easy to keep a pristine edge on a tool if all you need it for is to make a video to collect revenue through an affiliate token. Guess what the description of the video had in it – a reference token to the site to buy the knife. What do the people who are the viewer version of my dad at the advisor’s office get out of the video? A guy they like has a new favorite marking knife that lasts forever compared to other knives (it won’t – there’s no shortage of catra and toughness testing information for the steel alloy – it’s basically a variation of AEB-L steel, itself being very cheap), and since the video shows such a large number of other knives, it implies that this commission-yielding marking knife is unique. I don’t know what the token link sends back to the video creator – maybe in affiliate interest it is. Maybe it’s not that high of a commission and just another day at the office. I don’t think most people stop to think “maybe this is about generating commission revenue in the first place”, or want to learn more about the steel to find out if it’s really long wearing and really expensive, or if it’s just a very expensive marking knife made out of fairly common materials.

I named a couple of “creators” here – it’s awkward. That should not be confused with me saying these are the two worse or that there aren’t 2000 of the same thing. I’d bet you could find your favorite alcohol infused flying bugs to be doing the same thing, and just about everyone else. Left behind are the videos from people like Curtis Buchanan – actually telling you things that will make you want to go to the shop to do more than open a box and then lose interest and go buy something else.

I Tried Reddit

I don’t think I can take it. The forums are for all intents, dead for hand tools. I’ve registered for reddit in the past, but I don’t remember why and the system is a bit foreign to me.

It looks like a site not really for sharing knowledge, but there’s plenty of panic questions from people who screwed something up, and folks who are making things and trying in a veiled way to advertise them. Which is against the TOS. Which is good, because the format is boggling in terms of the number of redirect attempts to get you to look at other topics, and especially ads.

In just a couple of weeks, I’ve seen several posts of people who want to use a plane with a chipbreaker and have no idea.

And the whole “Karma” thing is dopey. It would keep the Charlie Stanfords and other O.G. knots trolls from having their posts displayed, but there’s a catch with it. If someone says Paul Sellers is the GOAT and you say that’s an alternate reality, you’ll get so many downvotes that perhaps your posts won’t show up, and if you’re not really sharing anything except legitimate suggestions, that kind of defeats the point.

Reddit isn’t a forum run by some guy with delusions about personal ideals being better than other woodworking media sites’ personal ideas, it’s a well oiled calculating data mashing enterprise. This setup is on purpose, because it is the best for advertisers both in terms of the mood and for attracting the type of people advertisers want. Advertisers don’t want me, they don’t want half of the people who will read this blog and they certainly don’t want a Warren who likely won’t suggest much of anything made recently.

It’s so different that it’s entertaining, but it’s not going to be entertaining very long for anyone other than folks who just want to show they made something. And for that, it’s probably great.

It’s in some ways like stepping back in time on the forums, aside from the transient impersonal feel of everything on it. That is, the bulk of the group seems to think the Rob Cosmans and the Paul Sellers types are the high end makers, and that they infallible sources of information. Probably because the nature of the place prevents any distillation of information for the better – to an extent even worse than the forums do.

Of course, I love to shove everyone toward using the cap iron, and there are lot of folks there who could use it. But I don’t think anyone reads over 1000 characters of text (that being told to me by a guy who was sort of educating me about the consequences of making a negative post and then responding to people who posted rebuttals to clarify – that’s apparently a good way to just get multiples of all of the pissed off karma bees running your score down, and then you’re supposed to care about that. I think it’s a good acid test. If honest answers prevent you from having posts displayed, then you know what you need to know about the site).

Since paul and the other who knows who – i can’t keep up with all of the shallow youtube video link-revenue experts like the wood whisperer or Rex or whoever else. And yes, I know a lot of people love the wood whisperer, but a recent search on hardwax oils (I had no idea such a finish was so popular, but I guess so were velcro shoes for a while) that all have revenue links or actual direct affiliate links to each product. Or the “carbon method” – barf. You’re not the customer viewing those videos, your the product.

And reddit dovetails with that. I don’t think anyone is going to read anything about the chipbreaker when they ask how to deal with tearout. Even though you can show a picture like this – a mexico made stanley (and not a particularly good one) working through something that will tear out.

But, anyway…weird – it’s like some people showing fine italian food, but commentary getting offended if anyone says they’re not thrilled about online classes on how to make Ragu.

It does seem like it’s a shame that you can’t get the long-time accomplished hobbyists and pros on a site in a focused discussion anywhere, where useful information could fall out and be stored. But that ship has sailed – the strong makers for the most part abandoned the forums, and there’s no reason to worry about “what could be” when it’s already proven to be “what won’t become”.

Basic Principles and Terminology of Natural-Resin Varnish

I mentioned I’m not going to talk about how to make varnish other than to say that you can go out to youtube and read about it, along with old texts. The texts written around the turn of the century or a little earlier are still accurate for us, sans the quantities where things are in proportion to 100 pounds of resin or 100 gallons of finished product or some other such large numbers. Some of the resins are $6 a pound in quantity, and some are $70 even in quantity if they are uncommon (semi-fossil copal). But I want to define some things because you may want to go figure this out, and I want to talk about varnish and if I use terms without defining them, you’re not going to follow what I’m saying because it’ll seem like jargon. However, some of the terms apply to all finishes and since I want to talk about varnish anyway, this post is a limited intro to terms used with varnish making.

By the way, when we make varnish, it could be a very small amount up to probably some fraction of a gallon. I typically try to make a quart that in better varnishes will be two when it’s properly thinned. A quart of varnish that’s 70% solids is a *lot* of finish. The large quantities in older books would not only be a logistical and budgetary issue, but also probably not legal to make in a lot of jurisdictions because of VOC rules. That sounds like a weird restriction for a hobbyist, but varnish cooking was an industry, so the rules were written for it as well as manufacturing other coatings.

Defining the Basic Process of Making an Oil Varnish

An oil varnish, like what you’d think of as being on a boat, woodwork or a violin is made from a resin (usually from a tree), an oil (usually linseed, but sometimes walnut or tung) and a thinner (usually real turpentine, but many solvents will work and commercial varnishes are typically made with cheap hydrocarbon solvents – good fresh smelling turpentine is $62 a gallon at the very cheapest, and some is much more than that.

The process of making varnish is typically several steps, but it’s not like a recipe for brownies.

Step 1 – prepare the resins and oils. Preparation is focused mostly on cleaning things off of the resin or out of the oil that complicate step 2.

Step 2 – cook (“run”) the resins and cook (to “break”) or cook and oxygenate the oil. This step prepares both parts so that they will bond together in step 3.

Step 3 – introduce the finished products from step 2 to each other, cook them together until they bond with each other, and then perhaps longer if searching for certain properties, and at the tail end of the process, introduce enough turpentine to make the varnish suitable to be poured later.

Steve Voigt is doing an enormous amount of work on this subject, and he’s got lots of information on his blog that’s much more precise about actual cooking and details on the steps, and I’d direct you to him as he’s done a lot more of it than I have.

He also has an excellent recent video trio on making copal varnish, which is probably the most desirable varnish for woodworkers, and would’ve been on instruments, in my opinion, if adherence to tradition were less important than results.

There’s enough there for you to do what he shows, though semi-fossil copal is expensive and it’s not a beginner’s first step. It’s also potentially dangerous to make varnish, and if you introduce open flame like a propane burner or a fire, you risk very serious injury. You may hear rumors of bad burns from candy making with sugar at 350F, and so on. Varnish resins often run around 600F or higher, and the oil can be in the same range for preparation – there is no doubt that in larger quantities, people have died making varnish, and anyone who does a lot of it has some scars. Lucky for me, I’ve had two little half-bb sized spots of hot resin spit out on my arm, but even that was enough for blisters and two little purple scars on my forearm. Just keep danger in mind, skin graft type burns aren’t out of the question.

Terminology for Oil

Washing – literally shaking oil in water, vinegar and water, water and salt or all types of things. Washing oil is a matter of separating things in the oil (like antioxidants) that will prevent bonding of the components in longer polymer chains to themselves, or in bonding resins and oils in a later step to make longer polymer chains.

Breaking – cooking or perhaps some other treatment I’m not aware of (chemical?) to separate parts of the oil from each other and destroy unwanted proteins.

Blown – oil that’s been introduced to oxygen while preparing it – like blowing air through the oil while heating. Obviously, drying oils dry with exposure to air. Treating the oil with air can initiate the drying process, but this isn’t like epoxy or two part finishes – raw linseed oil can be blown or manipulated and then the treatment stopped and the oil will just dry faster later, but it won’t finish drying on its own.

Terminology for Resin

Rosin – this is cooked pine tree resin. Pine rosin quickly cooked into a varnish isn’t particularly good, but violin makers used a lot of pine rosin based stuff. It can be aged or oxidized or treated to make it better. But it’s the same rosin you think of with baseball pitchers or as a block for violin bows.

Fossilized – resins that have been around so long they have fully transitioned to being a fossil. Amber is the only one that I can think of.

Semi-Fossilized – resins that are between sort of “new” and fossilized. Could be hundreds to millions of years old depending on the type. India and Copal resins are of this type. Some Copals are debatable. There is a stark difference between the aged resins and the type that have just fallen on the ground recently. The former makes a harder and better varnish. The latter is far less expensive and I haven’t seen a good reason to use it, but new or unaged resins are popular for incense or “spirit” varnishes (like shellac – just dissolve the resin in a solvent and have an evaporative finish).

Congo/Madagascar – the two semi-fossil Copals that can be purchased and used. Both make a hard varnish that is essentially waterproof and that won’t soften appreciably when exposed to hot temperatures. Madagascar is apparently much younger, but it’s a *very* hard resin.

Run or Ran/Has been Run – resins that have been cooked to get undesirable stuff out of them so that they will bond chemically with oil when cooked together. Running resin can stink so bad, depending on the type, that a rendering plant manager would’ve called the police about the smell. Amber is by far the worst thing I’ve smelled thus far, the fumes are really unhealthy in the first place and shouldn’t be breathed, but the smell will make you wish you had only stuffed your nose with cat poop.

Terms for Cooked Varnish

String – after oil and resin have combined in a cook and have become a “block co-polymer”, the polymer chains will link together allowing the varnish to stretch out in strings if you touch a cooling drop of it and pull your finger away.

Clear – when cooking, if you haven’t gotten oil and resin to bond together and drop a drop of the hot mix on bright metal, it will be cloudy looking as it cools. Once it’s clear, you’re either at string or working toward it.

Pill a property of varnish such that the oil and resin are thick and not oily, too think to string, and can be rolled into a little pill. Asphaltum in a cooked varnish strings easily and will get to the point that it pills.

Gelling- I’m guessing a little at this, but I’ve had two varnishes gel. I believe this happens when the cook does something to introduce so much air or heat to varnish that it’s partially cured and will no longer flow.

Quick and Light or Cheap Short String– I’m coining this, but it’s described in old texts as an inferior varnish. It’s gotten by mixing components at high heat, getting a string quickly and then removing varnish from the heat rather than cooking it to a better quality. Reasons for this generally have to do with cooking a shorter length of time so that the varnish remains light colored.

Strong String or Long String – it’s not yet clear to me what level of string was typical in the old days. Perhaps a foot or longer. Longer string varnishes mean the varnished produced has longer polymer chains, will be tougher, and probably will be harder. This property also makes the varnishes of the same components feel sticky (very hard to get off of hands without a solvent) and much thicker at the same thinned level.

Long oil or Short Oil – you can vary the amount of oil in a varnish in proportion to the resin. The more oil (long), the more flexible the varnish, but softer and slower drying. The “shorter” or less oil, the faster the varnish will dry, the harder it will be in general, and also, if pushing limits, it will be hard and easy to crack. 1 part resin and 1 part oil would be neither long nor short. Some of the old recipes specify very little oil for cheap furniture varnishes to get a hard bright polish.

I think that should cover enough that I can blog about the varnish that I’ve been making and you can read older sources if you want and there will be overlap so that varnish-related posts don’t just lead to . ………. o O (?????).

Grubby Grubbing

A friend mentioned to me a few weeks ago that his sister has a tool she absolutely loves. It was a Wilkinson Sword weed grubber. This brand is seen in the US in razor blades, and probably has been for other cutting tools in the past, but the garden tools aren’t that widely found as far as I can tell.

Here is a stainless version of the tool. Call me lazy, I’ll push a plane and saw for several hours in the shop, but I don’t like getting on my knees to garden and would put this thing on the end of a long handle. Gardening on knees and leaning over literally will give me a migraine. I don’t know if being unable to tolerate that kind of thing is lucky or unlucky.

But, it’s not for me. There’s also a carbon steel version of this thing and it’s probably all of about $15 US equivalent. I couldn’t find it on alibaba but other similarly priced tools from WS can be found there for about $2 each. The trick is you need to be willing to buy 20 of them. This is the nature of what we buy in the US. In lumber terms, we often hear something like “it’s 10 cents on the dollar at the stump” or at the mill.

Here’s the problem with the tool – the whole $1-$2 item branded and shipped and retailed is just the way things are now. That’s not so much the issue as consumers ultimately dictate what we get. The problem is that it looks like it’s blanked (many inexpensive plane irons are, too, and double edge razor blades definitely are), and that favors using a thin piece of steel and then stamping or manipulating the blank. My friend says his sister loves this tool, but it breaks at the handle.

He asked if I could make something similar – who knows. I hammer shape flat stuff, but it was worth a try.

I decided I’d use CruForge V and heat treat it a little under so that it’s still fileable. You do this with simple steels by heating them to nonmagnetic and no more and not getting too brisk in the quench. They get some stiffness and strength after temper, but can be filed, and you’re not gambling with tempering embrittlement like you would be doing if you just temper to 500F or so. Embrittlement occurs when it takes less energy to break something at a lower level of hardness than it does higher. It’s pointless territory. I also have no need for CruForgeV as I likely bought it some Tuesday lunch at work grasping for straws regarding a 1% steel with some vanadium, but not too much. Great in this case would be 0.3%, but it has 0.75%. I didn’t believe it could possibly lead to stray vanadium carbides of any size, but it actually does. They’re sparse and not that small – I really don’t know what the point of the steel was and maybe I’d need a power hammer to figure it out. Needless to say, it’s no longer made and you can still get old stock from retailers years later.

Translation – no big deal if someone breaks it and I have to find something a little tougher. it is tougher than something like O1 or 1095, though, and especially vs. something like a PM steel of any significant carbide volume. All of those types are intolerant of bending and prying.

Well, here’s what I came up with.

It’s 1/4 bar stock heated, flattened on the business end, hammered to the S shape and then hammered and ground at the tang.

Rather than trying to seat the handle by friction on a tool that gets pushed and pulled, and will perhaps live outside, I just epoxied it in with a very healthy amount of epoxy, and the bolster is glued on, and then also bound by the epoxy spillover. If it comes out, it can just be reglued.

I would guess CruForgeV steel is water hardening and underheating it plus just dropping it in the quench rather than moving it means it’s not fully hardened, and beyond that, it’s less hard in the middle. That should give it some forgiveness. Who knows how this would be handled industrially. I don’t.

Now, here’s my point about this tool – it could be made like this in China for $3, I would bet. Maybe the handle would just be something ashy looking with a cheap varnish dip, but that’s functional. It cost me probably $15 in materials to make it, so if it doesn’t outlast the original for some reason other than the tang, it’s just a fun project.

The handle is london plane tree, and it’s varnished with copal, and the business end of the tool is Japanned. If I won’t spring for stainless, it is probably good form to at least protect the steel and wood from rust until it’s confirmed that it’ll be used often enough to keep the rust abraded off on a regular basis.

The varnish isn’t neat, it’s just padded on and little bits of paper towel and other nonlevel stuff is left – there’d be no virtue to a slick-handled garden tool, even though it’s much more fun to really tart handles up.

The japanning is a full varnish, cooked and linked together like a true varnish so that it can’t settle in the jar, and all that it needs is either a long long time of air exposure to dry, or more smartly, the cure catalyzed by being baked. Which is what I did. Plane tree is sort of a boring wood – it’s one of the Acer woods (like hard maple) or it’s half of that and some kind of hybrid. It’s like a weird feeling hard maple, but the varnish did a great job of bringing out figure when there’s not too much there. Something natural resin varnishes do a little better than shellac or hydrocarbon or synthetic polymer finishes.

Like many favors – i hope once this thing is gone, I never hear about it again. That’ll be good enough – it will mean someone is happy enough with it and didn’t break it. It should be difficult to break it in the first place, but I’ve got no clue what people do in gardens. There are always rocks and roots in dirt, and not having the right tool in hand to deal with such things really doesn’t stop most folks and it never really stopped me.

The point of this thing as it is, I gather, is to go straight in, grab the stem of the plant below the dirt and tear it up or pull it out…..something I’d much rather do standing.

It’s all part of making. I’m just a tinkering amateur, not a pro by any means. it’s still much more stimulating to think about how to make something like this and experience it than it is to incessantly read various catalogues and try to be an expert on what can be bought.

Preventing Rust

I have to admit that part of this post is motivated by animus toward the “friendly” presenters who recommend obnoxiously expensive “nano” rust preventive measures toward the “friends” that they are making videos for. Let’s be honest, at least if you are cynical like me, they are making videos *at* people, not for them. You can skip the rest of the discussion that follows other than perhaps canceling the idea that maybe I just don’t have a very damp shop – and go down to the next header if you’d like. My discussion of humidity and circumstances follow because I’ve fielded at least half a dozen comments that “your methods wouldn’t work here”. Unless you’re getting a mist of salt water in the air, that’s not the case.

There is nothing difficult, expensive or time consuming about preventing rust on tools in the shop, and probably also not for metal surfaces on stationary tools. I used to have stationary tools – a jointer, a bandsaw and a table saw, and once in a great while early on, they would get a dot of rust. Let’s get something I guess set and clarified from the start – my shop is extremely humid in the summer. It is halfway below ground and it is not heated or cooled beyond whatever it gets from the ground and the surrounding house. Typical dewpoints in PA where I live are mid 60s to mid 70s, and on the hottest of days, my shop will reach 80 degrees. I *really like* this setup because whether it’s 95F outside or 0F outside, my shop will be in a narrower range -about 30-80F. You can work by hand in that range. But it does result in high shop humidity. At the moment, my shop is 86% humidity according to the digital hygrometer. I often hear people claim that they live somewhere hot and it’s 95 degrees and close to 100% humidity. Actually putting the dewpoint and temperature in a calculator should dispel that nonsense. RH is an interesting figure – when it gets really hot, it’s not common for it to be at or above 60% (95 with a 75 degree dewpoint is typical in the south – that’s an RH of about 53%). Really high relative humidity generally occurs when you take high dewpoint air and stuff it in an environment where the temperature quite so high. It’s 86% humidity in my shop because the shop is partially underground.

At any rate, like many, i started with a set of power tools and then mostly premium hand tools, and I ground the layer of patina right off of a lot of other tools. I spent a *lot* of time doing stuff like rubbing rust off of clean fresh cast and wringing my hands. It was a complete waste.

Here is My Recipe for Rust Prevention

  • First, the lowest level of effort – Oilstones (wipe with high quality mineral oil if you insist on waterstones). I moved to oilstones a few years ago for a simple reason. They are faster to use. They don’t cut faster, but they’re faster to use and include much less screwing around. Once I did that, chisels and plane irons ceased rusting. period. If you are using oilstones, you can get the bulk of the honing oil off of tools such that it won’t mark tools easily, but it will take a lot of effort to remove every single little bit of oil protecting a tool surface. This is a good thing. You wipe oil off of the tool, it doesn’t mark wood, but you still have a layer of protection.
  • Second, I use wax – on anything that I don’t want to constantly coat with oil. Paraffin on plane soles sort of covers those, and a Johnson Wax (RIP!) can or Briwax or whatever else for stuff you want dry, and then a 50/50 mix of beeswax and hydrotreated mineral oil makes a spreadable non-drying wax. Hydrotreated mineral oil is the stuff sold for all kinds of things – including as a honing oil. Could be bovine/equine supply, commercial kitchen cutting machinery, sewing machines, whatever it may be. These two types of waxes make a very persistent coating that will tolerate anything other than water laying on tools due to your absent mindedness. This is something you should avoid in the first place.
  • For the worst, Light cut blonde or super blonde shellac – for anything that you find rust on, anyway, a very light cut of shellac – like 1 pound, can be wiped on. Just rub it into the surface of the metal – if you already have wax or oil on cast or steel, it won’t care – it’ll stick to the metal and then itself and if anything, push the oil to the top (exactly what happens in a french polish). The result should be almost invisible, and if you ever want to take it off, rub with an alcohol soaked rag, and it’s gone. If you put any shellac on metal and still have rust, something is amiss.

Wax your saws when you use them when they get in a bind. If you have new saws that you’re not sure about timing on use, use a light coat of paste wax – just wipe it on and wipe it off. You’re not finishing furniture.

One more comment about the oil and the comment “hydrotreated”. Hydrotreated mineral oils for cutting equipment, or if thicker, hydrotreated mineral gear oils, have had volatiles refined out of them. They will be clear unless someone colors them, they’ll have no odor (unlike some stinky honing oils) and if you put them in a container exposed to air, they won’t change over time, at least not in your lifetime. The princely sum for a hydrotreated commercial kitchen supply oil is all of about $18 for a gallon. If you get stuck shipping something, you might end up buying food grade mineral oil from amazon or somewhere else for about $10 more.

If you see a mineral oil by the gallon and you’re not sure – if it’s clear and for food use, it’s probably hydrotreated. You can google the SDS and confirm.

Too, the lack of volatile contaminants in hydrotreated oil doesn’t just keep it from stinking. It keeps it from drying, and means there will be no extra film like you might get from WD40 or something of that sort.

And that gallon of oil will find uses in a whole bunch of different things. French polishing, the oil and wax beeswax mix mentioned above, in an oilstone bath, and so on. It will take a very long time to use it. Of the things mentioned above, it’s the only extra purchase that I made to actually deal with rust, and my first gallon is almost used over 15 years, due to several things (like changing oil in an IM-313 oil bath) – but if just used for rust preventives, you’ll never use it all. That puts you $15 out of pocket. I’ll keep my gripe about commercial paste waxes to myself other than to mention that when I started, a pound can of Johnson’s was $5.95 and had a little bit of carnauba in it. The carnauba went away, then Johnson’s went away, and we’re left with paraffin wax-only garbage in a lot of cases for three times the price. Waxes that have 5 or 6% carnauba like blue label mowhawk wax fall into the category of a product that has almost no manufacturing cost, but those appear to retail now for $30+ tax or more.

If you have full fast changes in temperature

….and a dirt floor in your shop or something of the like, what I’ve mentioned above will still work. If you find that you have something persistent that still causes problems, then the problem tools can reside in a box that shifts temperature less quickly. Temperature swings in my shop are moderated by being part of the way underground, but my tools have all been handled so much with oily hands from sharpening, or waxed in use, that there really isn’t anything that rusts unless I see water laying on whatever it may be out of laziness and just let it go. Since water is handy for grinding with a power belt grinder, it happens.

You shouldn’t be subject to people who want to market nonsense to you, but they’ll always be the most persistent. I’ve got cans of dry lube, bike chain lube, mutton tallow, and who knows what else – all in the original attempt to keep things lubricated. I can’t vouch for the tallow -the beeswax mix obsoleted it, but it could probably be made into a soap.

I really despise videos and other parroting of such about nano or graphene rust control or whatever the next flavor of the moment may be. My opinion is that all of that stuff is intended to give you the perception of value by a bunch of cliquey talk. One of the relatively famous guru youtubers made a pitch for it in the past ($70 for one ounce of the coating, without even getting into the nonsense “pre cleaning spray” and slippery after coating), and found rust on a saw that was put into storage. Using the discussion of the rust to come back and pitch it again. The video comes with the obligatory “sponsored video” upper left hand corner tag. It’s up to you to guess whether or not the second video was made because “it just worked so well”, or because there’s an underlying agreement that required more than one video.

It’s too bad this stuff isn’t called out a little bit more loudly. If the video maker would’ve applied 15 cents worth of thin cut super blonde shellac and returned later with an alcohol soaked rag to remove it, there would be no rust.

Nicholson on Cutting a Rebate

If Lloyds had odds on cutting rebates, what Nicholson says here would be high odds for anyone who has cut a hundred feet or more of rebates and worked by hand, and very low for people who buy boutique tools or use a table saw most of the time.

Why? Cutting rebates is best done with a moving fillister plane, and a wooden one at that – not a Stanley 78 and not a Veritas Skew Rebate or whatever else. Everything other than a wooden moving fillister is slow at this and the perception of metal accuracy is misplaced. The moving fillister works accurately, but not generally to finish accuracy – it’s set to cut and the rebate is finished with a separate rabbet plane – the skew kind that you’d find with no other fixtures at a flea market for about $10. There’s a reason they’re everywhere. From experience, you will get to this pair on your own, along with a marking gauge and anyone describing setting a metal plane “precisely” without marking the joint instead and doing the fine work with a second plane will seem a bit dippy.

So, let’s get on to what Nicholson says. Page 139.

Nicholson mentions the wood needs to be tried on two sides – those would be the ones that you’re cutting the rebate into. The first discussion is rebates less wide than the plane, which you will find yourself doing, anyway.

The discussion immediately goes to setting the plane short of the final width of a rebate and the depth stop foot short of the final depth. If you’re thinking this sounds like more steps and it will take longer because you can find an “accurate boutique plane that can be set perfectly”, you’ll find that not to be true as all of the speed of the moving fillister is lost in this process and the short front foot and issues of your own technique will never be as accurate as finishing to a gauge line.

Which gets to the next point – the joint should be gauged (marked) both in width and depth. Do this first so that you can easily set your plane off of the marking. Again, if you are thinking this sounds like an extra step, if you’re cutting many rebates, you’ll gauge them all at once. it gives you a perfect indication end to end on the stock you’re rebating and when the lines are gone, you’re done. You set the mark, don’t get lulled into believing that the feet and fence on a plane will do it for you – you’ll have no clue where you are and if you’re over a mark – how will you check, with a dial caliper? No thanks.

Nicholson goes on to mention setting the moving fillister relatively rank and equal depth across the plane. The rest of this paragraph is my words: Do this by eye sighting down the sole and also use the ability to do this as your indication for honing bias when you freehand hone the iron, which is how you should sharpen a moving fillister iron – if the iron doesn’t want to project evenly, you’re going to both have a strange out of square bottom, but also a plane that favors cutting toward the heavy side. Each time you hone, you’ll inspect this and it’s very easy to prevent. if you hone with honing guides and fixtures, you’ll drive yourself crazy here. Most fillister planes are steeper than common pitch, so if you’re pretty gross at freehand honing, you’ve got plenty of clearance and this is a good place to learn.

The rank set part is important – you are not taking smoother shavings, you are taking something between jack and try plane shavings, tending more toward jack if the wood allows. Set the rankness based on what the wood tolerates. you have but one mission, remove most of the wood inside of the gauge lines and don’t break out any wood past them.

Nicholson goes on then to describe a great deal of something simple – where your hands go. your front hand goes on the side of the plane with the thumb over the top, and your back hand pushes. Your job is to keep the plane in the cut evenly – the fact that the shavings are rank will allow you to get done pretty quickly, and it’ll also stretch out the volume of rebate cutting substantially vs. taking thin shavings. Sharpness is always important, but you’re going beyond fine shaving cutting here and you need to go back to the stones only when the plane tells you to.

Job number one for you at this point is to keep the plane relatively vertical – just look at it vs. your marks if you need to, especially at the far end of the board once you cut. Efficiency here leads to pleasure, and that means accurate work, not hurried, but in rhythm. You must use the front hand to keep the plane against the work – if you don’t, you’ll cut pyramid side like things into the wall of the rebate and leave yourself a chore with the rabbet plane. If the wood is good, the shavings will be thick enough to look broken.

Nicholson’s nod toward efficiency then goes into planing sectionally on the board and not walking the length of the board with one shaving after another. I think if the plane is rank set, if you’re an amateur, it probably won’t be that big of a deal. The more the wood dictates backing off of shaving thickness (if it’s poor grain orientation) the more you get out of planing sectionally and then moving.

Finish by taking a few through shavings as you work just shy of the marks. personally, if the wood is planing really nicely, you can probably plane right to the marks for all but the finest of work, but pay attention. The long through shavings will lead to the plane communicating all kinds of things to you – high spots, terrible wood, whatever. Use your judgement to make sure you’re not feeling any remaining high spots or skips.

Nicholson then goes on to say what I guess I jumped the gun on – you need to be able to feel vertical, and hold the plane vertical and keep the cut close. This isn’t a burden or tedious – it is the same sense of feel you will develop everywhere, it’s not as if it’s a skill that’s attributed to a moving fillister in isolation. Just don’t lose track of being close to vertical. Nicholson then says to use a skew rabbet plane (the kind open on both sides and with no fence) finely set to plane to the final mark.

You will be shocked how much faster this process is than trying to use one metal plane or one anything to cut the whole rebate right to the mark. You remove material, then you finish to the mark. It’s not the same idea as “use the plane like you would a rebate router bit”. I think the insane discussions about set screws and this or that on boutique metal planes (which have enormous friction in the cut, too – it’s really unpleasant) comes out of the idea that you can turn a fillister into a routerman’s dream. Poo.

What about the nicker?

Note there’s little discussion about the nicker and its relation to the side of the plane and projection of the iron from or equal set to the side. That’s because the role of the nicker is to establish a crisp edge across the grain. For long grain cutting, this kind of thing isn’t that critical and the nicker can be set up out of the way, pointing back to having a finely set skew rebate.

This pair instead of one is so dominant for another reason – it eliminates the idea that you need to have fillister planes that go in two directions. You don’t. The rebate plane (not the fillister) makes the finish cut – you just use it in whatever direction the wood prefers.

Wide Rebates

I have my doubts that many people do this by hand, but it’s worth noting.

If the rebate is wider than the moving fillister plane will allow, you will gauge the width of the rebate and plow a groove shy of the gauge line. A good plow plane has a depth stop, so the same rules apply – do the coarse work and leave the fine work to the mark until later.

Then, you use your moving fillister plane to cut some of the rebate on the side toward you, leaving a column of waste in the middle that you can remove any number of ways. A firmer chisel is fine, as would be planes if you have the means to use them. If the waste is relatively wide, you can groove several plowed grooves, chisel and then pare or rebate what’s left and work to the mark.

The text goes on to mention that if the groove is really wide, but a sash fillister can be used to cut from the opposite side of the board to finish with width, then that is also fine. For the uninitiated, a sash fillister is a plane that cuts the rebate to the width of the waste (it cuts on the far side away from you gauging off of the side toward you, much the way a router fence attached to a base establishes the width of the uncut wood, not the width into the cut).

If the rebate is very large, you can plow both sides of it leaving a solid bit of waste in the middle.

And while it’s not mentioned here, if there rebate gets so large the planes won’t work to depth or plowing becomes unruly even with a wide plow plane blade, you’ll be sawing the waste out so that you have less work to do. Same care is needed – cut short of the marks, discard the “stick” that you end up with, and then finish planing to the mark with something finer. You can do this sawing with a carpenter rip saw easily and safely if you proceed with the start of the cut slowly.

“Best” Copal Varnish

A break from the Nicholson talk. I’ve been trying varnish making beyond my first attempt 5 years ago. That varnish was just a pine/dammar resin combination to be used on a guitar. It was OK, but it lacked hardness which is a problem when used on a guitar. Simply put, with a long time inside a gig bag, the guitar took some imprinting from the bag liner.

At some point, I think varnish making is going to do rounds on the boutique scene, though I don’t know how many people will do it. It needs to be done outside, it’s somewhat unhealthful and potentially very dangerous if you do stupid things.

But what is it in general? With natural resin oil varnish making, it’s preparing (flax/linseed) oil and resin, cleaning the oil, if needed, to make it dry faster and then cooking both separately and then combining them. The oil and resin in a successful attempt bond together and you get something that has different properties than the parts.

Varnish is just a term people use. Almost everything that’s left on the market that’s a varnish is alkyd or modified tung oil with a bunch of solvents in. With new VOC rules, this gets less and less predictable as to healthfulness, and they’re stinky and generally designed for boats or something, anyway.

But even among natural resins, the variance is great. The pine and dammar resins are generally softer and make a varnish that isn’t that durable. At the far other end is amber -which you’ve probably seen sold to tourists in chunks where a bug is magically suspended in the middle. Amber is typically resin that has existed for a long time and is a fossil (or is it a semi-fossil?…whatever, it’s not something that dripped out of a tree ten years ago). Amber is hard, and can be tricky to make into a varnish because the point where it melts for the initial cook is at or sometimes above the temperature that it would burn.

What’s Copal then?

Copal is a group of resins, but fossil or Congo or Zanzibar copal is resins that are semi fossilized and also melt at a very high temperature – could be anything from 450-650F, and some that I’ve “run” (heated to cook out undesirable stuff before used) leaves bits behind that don’t melt at 650F.

But (semi-)fossil copal, unlike pine and dammar resin (and many others), makes a finish that’s much harder, and to my findings, indifferent to water in any reasonable period of time. It was stylish for a pretty long period of time up to the early 1900s because it makes a good varnish, frees the varnish makers from catching their varnish and themselves on fire with amber, and can be a lighter color. Some of us like finishes with a tone, but there was a time when harder darker resins left people grasping for what compromise to make to varnish light colored woods or to make pigmented varnishes of light colors. This is pretty easy to follow if you’ve ever used something light colored or mixed it and had it react and become dark. The best copal resin is lighter in color and if the process is gamed, can probably leave a very durable but relatively light colored varnish.

So, rather than paying my dues properly working all the way up, on my 6th batch of varnish (several others being just variations of one type), i just decided to do fossil copal – went great. And then I decided to do a second batch with some pieces of resin in the container that I got that looked dirtier, and I “smoked” that batch a bit. Smoked meaning that I wasn’t able to find the point where some of the resin would melt before it was just burned. Fortunately, most of the burned stuff seems to have fallen out as sediment and the varnish is still good, but the brief struggle with expensive resins wasn’t that pleasant.

I’m not encouraging anyone to make varnishes and take it lightly. Imagine you are dealing with a 650F resin or a 550-600F linseed oil that could (but shouldn’t) catch fire or splash, and the former is sticky, so aside from noxious high temperature cook fumes, you have the chance of getting serious burns. Or as George Wilson put it to me when he was trying to cook a type that’s somewhat reactive, and ignited it “creating a mushroom cloud” in your back yard.

However, if you’re really serious, this is something accessible and while it’s not that cheap to do in terms of the materials, the equipment to do it is pretty much used pots and pans dedicated to the use and a two-burner electric hot plate.

This is my setup – that’s it. Later, the varnish is strained when it cools, but on the left is a pot with oil in it. On the right is (not very instructive), copal from the second cruddy run trying to get hot enough to melt and cook out the impurities.

Here is what the better pieces of copal look like:

Probably about 20% of what I get in a bottle – and if you want to find this, all you have to do is search “Congo copal” on google. There’s only one supplier that I know of. Anyway, probably 20% of the congo copal is bright like this and then it varies after that with some of it having some clarity but dark coloring in it. In the old days when it was more plentiful, the various bits were most likely sorted to save all of the lighter bits for the highest paying customers.

The high temperature cook darkens it a little bit – but there is no way to avoid the high temperature cook with the harder resins, so it’s part of the process. Beyond that, once the oil and resin combine, the varnish is made better by extending the cook somewhat, which will further darken it.

Other than for maple (which I don’t care for too much other than for guitar necks or tops – color will be desirable there), I prefer some tone in finishes, and the tone matches the wood. The darker the wood, the darker the finish when choosing shellac. I’ve made too little varnish to have well formed thoughts.

But here is where copal varnish ends up:

This picture is the varnish after cook in the jar, and the jar has been leaned to the side so you can get a sense for the color.

This is what it ends up looking like on beech:

The line on this plane blank divides the better batch from the one that got burned/smoked a bit. This is just two very light padded coats, and the dark corner at the top can be ignored- the wood was dirty, and I scraped it while it was damp (picture of why below) – you’d not have that situation on a regular piece.

I had two test pieces drying in the sun get rained on, and to my surprise, even with a sheer finish, there is no evidence of water having been on the varnish – even though it’s only just initially dried and will continue to dry further over time.

note, the varnished part sheds rain. The bare wood below it definitely does not!

This is the same blank before padding the less desirable batch on the short end. The whole thing got left in the rain and other than some varnish that I may have had on my thumb (see the dry spot?), the wood otherwise just soaked in the rain. The thin coat of copal varnish was indifferent, and didn’t so much as degloss or blush at all.

To see how long this would last, I took another test piece later and put more water than this on that test sample and allowed the water to sit on the varnish until it had evaporated. Again, no evidence left.

Which brings me to the point of making varnish. I love shellac, but shellac isn’t durable in some situations where there’s a lot of hand contact or contact with water. I also can’t think of any cured finish that I’ve used outside of soft spar urethane (gross looking and too soft for a guitar – feels like a plastic case) that has this kind of water resistance. Not even some of the solvent urethanes or various common spray finishes used on commercial furniture.

Making a varnish for use gives the same option to have a warmer tone like shellac, but to have excellent long-term durability. And the resin and the finished varnish have unlimited life on the shelf. There are no driers in these varnishes, though they could be added if something needs to be hard in a day. Otherwise, UV light or longer term exposure to oxygen will cure the finish without any dryers. Making the varnish without eliminates the constant battle you hear people talk about with skinned over commercial varnishes.

Where can you Read About Varnish Making?

There’s a ton of talk on violin boards about making varnishes, but the varnish made for violins isn’t of great use for furniture or cabinets. You can find older texts in the public domain on archive.org or google books or just by searching google. Holtzapffel Turning and Mechanical Manipulation and another text called “German American Varnish Making” come to mind. These describe a relatively commercial process, but there are recipes in the books and enough to start to understand how interesting and broad this trade once was.

I’m not ever going to describe the trials and tribulations in great detail – if it’s something you want to do, you’re better off reading older texts. Just know that the descriptions of using jacketed vessels or open fires or cooking 10-100 gallons at a time are all not going to apply. You’ll be trying this in stainless, cast iron or enameled cast iron pots – the last being the best.

And once again, if you live in an apartment or don’t have somewhere to cook this away from your house and in an area where you can tolerate fire and really stinky smoke, don’t even think about it.

One more thing (Columbo reference)

It’s not cheap – the solvent of choice to add during the cook and thin later is true pine turpentine. There is diamond G in the US or a good quality of pine turpentine that can be gotten on ebay from Portugal a little cheaper. You can make varnish with less good materials – that would be your choice. I wouldn’t bother.

To make the copal batches cost a little bit more than waterlox gloss would cost in quarts when you compare the actual solids content from one to the next. I figure the brown quart jar in the picture cost about $65-$70, but the varnish is also about 65% solids or more, so a quart will go a very long way compared to most commercial finishes. In the case of guitars, it would be enough to finis several high quality guitars, and suddenly, the cost doesn’t seem so high in that context. Could very well be enough in one quart to seal a whole set of kitchen cabinets and pad on a sheer (but very durable) top coat just with one quart, too.

Other resins are much cheaper and can make suitable varnishes, though unfortunately, my initial impression is that the fossil copals really do live up to the glowing comments in older texts about durability and ability to take a high polish.

Nicholson on Planing Straight Edges

Page 134 bottom of the above link.

Nicholson splits what most people will think of as edge jointing. There are two types, with the latter probably being assumed to be the standard method – striking a board’s edge or using the term “shooting”, which people now often think of as planing end grain.

However, this entry is the first – we’ll visit the second later as I think it’s not practiced that often for typical edge jointing these days unless the edges are thin. Which does lead into one condition for today’s entry – it’s not for very thin boards, which you would trouble to plane or feel squareness on if they were in a vise.

This type of planing is similar to what we refer to now as match planing, where two boards are planed at once in a vise, and the result is checked against itself. When done properly, you start with a rough edge and then plane the edge until the joint is matched and can be glued as a rub joint or with very little clamping pressure. Much different than the more common idea of every joint being sprung. I don’t think in the days of accurate hand work, there was a need for significant edge spring, but I haven’t read all of this text yet, either, so I could be proven wrong.

The Process

The text is short, so you can read it really without referring to what I say and follow it easily.

Take two boards, install them in the vise and knock off any high bits. This is done by eye, and my comment to you is that the sole of the plane will also tell you a lot if you allow it to. If your plane is running straight across an edge, it will have a feel. If the wood is peaking just a bit and you run a plane over it, even if it’s a very small amount, you’ll feel the effect – the slight loss of security and support. Nicholson refers to starting and working sectionally with a jack plane vs. walking the length of a board, and this is definitely true. No need to plane a long edge through if there are one or two small peaks in it to start, or uneven roughness to remove.

Step two, still with your jack plane, is to plane through a couple of strokes. There is something perhaps assumed here, and that is that you have at least one jack that’s not drastically rank, and if I had a suggestion on two planes to set up – it would be two jacks. One set rank and one set much less so, but just a bit more radius than the try plane. I typically use one and rely on the try plane more as the ability to remove material with the jack is nice courtesy of getting standard rough lumber that’s not going to be cut by a sawyer catering to hand toolers.

At any rate, you follow the jack work by walking through the board’s length (added comment from me – attempting to feel and remain square. A matched joint will line up with some lack of squareness due to offsetting errors, but it’s bad policy to do anything but attempt squareness and learn to develop the skill of feeling square, too). You do this second walk through with the try plane, and the text mentions again that if the edges are long, finishing with a jointer is good policy. That’s true, though in cabinet or bench type work, it may not be too common that you have to resort to a plane longer than 22-24″ long.

If you plane through and the boards aren’t a good match, you must continue on until they are. If you have a good feel for your planes, you will come to expect there isn’t much of an issue with matching, just support the front of the plane entering the cut, make sure the cut entrance is clean and then support the back of the plane as the front is going off of the opposite end. With a flat or slightly convex sole, this will create a straight edge and you should expect you won’t have open gapped ends when you lay one board back on top of the other.

Also implicit in this advice is that the soles of your planes are flat and not concave. The method will not work with plane soles even a bit concave, and though I haven’t read it, one would expect that the precision required for basic hand planing and rub joints assumes that you are caring for the tools and not dealing with substandard sole shapes.

Lastly, Nicholson refers to the fact that you must have a clean shaving end to end and left to right covering the entire territory that you’re planing. Though it’s often said on the forums that there’s no information in plane shavings, nobody with any competence would believe that. Shavings that are not continuous suggest that you are either dealing with tearout or planing areas unevenly because perhaps some part of your edge is low. From experience, having not read this passage before the last couple of days, if you match plane panel edges often, you’ll well know this already – it’s pointless to check a joint if the shavings aren’t continuous.

This work is also territory for the cap iron, and it’s not automatically territory for tissue thin shavings. If the try plane or jack plane provide a joint that will be rub joint quality without tissue shavings, take that gift and move on.

Too, this type of match joint may require some facing of boards if they are uneven and will not clamp together, but if you have pretty good quality rough wood that is also flat, you can do this work on an edge without addressing the faces. It’ll be necessary at some point to joint edges, and with this process, you will be doing the rough work and getting a top quality edge joint at the same time with no doubling of efforts or checking.

The only thing you need to do other than checking for gaps – and check both sides of the joint – is lay one board atop the other and check them with a straight edge to make sure that the faces are relatively flat with no tension on the joint.

We often clamp things, and at this point when match planing joints, I will often lay glue on the joint, rub and then put clamps on before taking anything out of the vise. The whole thing leads to joints you won’t match with power tools only, and from rough to the joint, you are talking a matter of a couple of minutes and not a lot of fiddling, as well as not much use of measuring tools to check square or flat, etc. The wood tells you everything you need to know.