How Flat is a Type 20 #8?

First off, I don’t really do much following of type studies, but have taken a shine over the years to later stanley planes. Up to a point at least. Once there is a gap between the frog and the casting, I’m out.

At this point, I already have two 8s – a wartime Record that’s OK, but Record seemed to have a lot of problems shaping lever caps properly to fit over the cap irons, or making them the right length so they were over the hump and not pushing on it from the back (which also allows shavings to get through).

The other 8 is an earlier stanley that’s a typical ebay story. The plane was sold as in good shape, but it’s got a stripped thread for a frog screw that’s solved by a non-original screw, the bottom was nowhere close to flat -and I don’t mean like a little inaccurate – it’s a banana to the point that no sane person would flatten more than an amount of the sole needed. And, the “original” handle stuck on the plane doesn’t fit and can’t be tightened. Fortunately, I didn’t pay much for that – got it at the end of a regular auction.

I don’t use an 8 much – it’s generally a match plane. I plan to get rid of the other two 8s one way or another, but since I’ve taken a shine to type 20s (that are generally blue – but I guess not 8s?) I’d put in the back of my head if I eventually found one in good shape, I’d buy it and dump the others.

I have not yet found a type 20 plane that either has a lot of wear, or that has a serious issue with sole flatness. The smoothers are close to flat, and the 6 and 7 that I have both were hollow in the sole about 1-2 thousandths. Most of the hollow is from the tips front and back – I would guess the machining is done with a heavy hand and flexing of the casting leaves the toe and heel a little low. It’s too bad it doesn’t go the other way.

The tale of this plane is a bit interesting. It came with some other stuff, but what’s usable of that stuff to me is a standard spokeshave without adjuster (I only have LN types, and they are lacking if you are removing wood rather than cleaning up – the mouth is tight). And also included was a newer 9 1/2. I just got a 9 1/2 recently, but I can dump one or the other.

But the tale is this – a mechanic somewhere probably in NY where the plane came from was hobby woodworking and he’d gotten a smoother, a continental gutter plane and this plane. The smoother was worthy of the garbage can, so it went there – not sure what it was, but it wasn’t even on par with a handyman. As is the case with many, I think the hobby is vexing because the planes were all used until the irons were heavily damaged, and what was in this jointer was mostly dust from using the unintentionally toothed iron.

I found it interesting that among the very common things, the person who never got into the hobby as deep as they could have found a Stanley 8 with a smooth bottom. The iron shows some signs of being ground as 1/2″ of the length or so is gone and the plane itself shows almost no wear. The damaged edge has been sharpened recently, it was just blasted away and full of really large nicks, but the edge is otherwise fresh and was hollow ground.

But what about the flatness?

Getting to the point isn’t my strong suit. I paid $225 plus shipping and tax for the whole group. To me, and maybe not to others, to get a plane with little wear like this, I’m good for $200. 15 years ago, you could find a plane like this for $100, but it’s not 15 years ago.

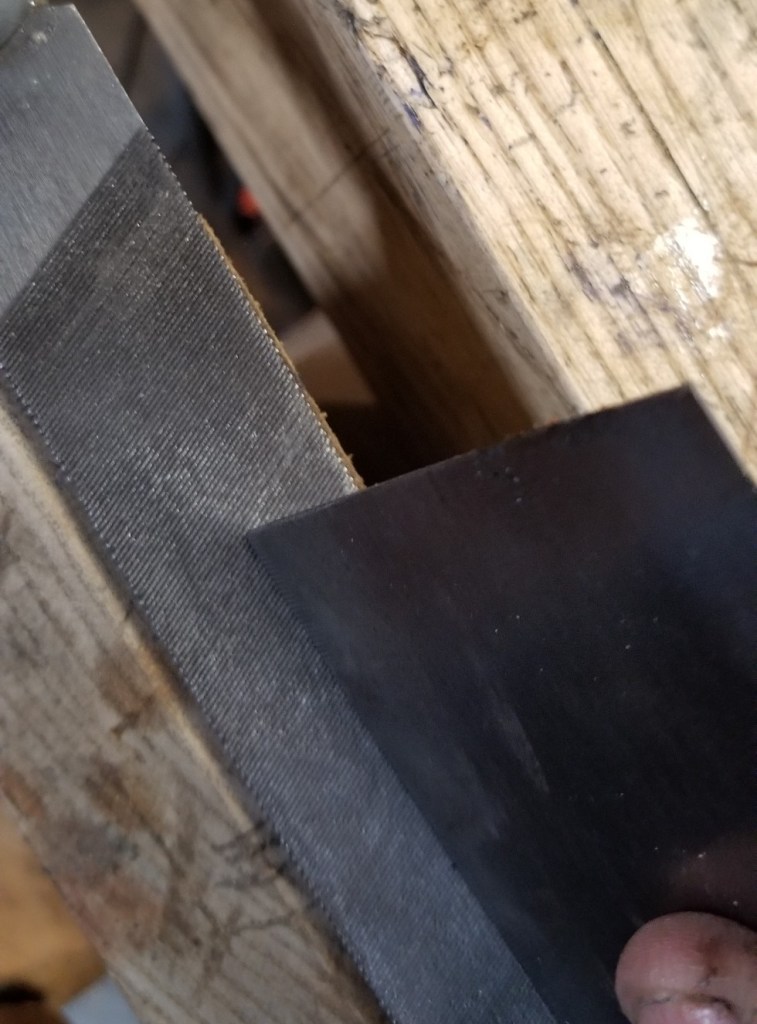
I tipped this thing upside down in the vise and secured it lightly and checked the sole expecting a low toe and heel that won’t be much work to address.

And that’s exactly what I found.

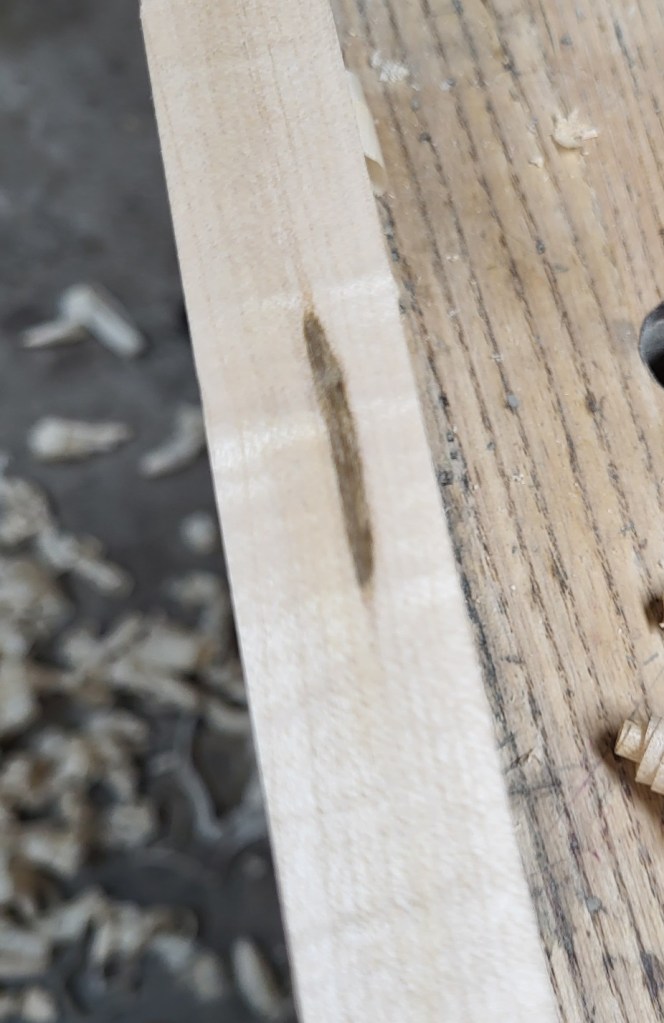
I scribbled on the sole, but the scale of the picture here may make it hard to see. No part of the front allows a .0015″ feeler through. The middle just does allow one through, and then a small section just in front of the heel allows a 2 thousandth feeler just through.

For all of the talk about this or that flatness and how poorly the later Stanley planes were made, I just haven’t seen it. I have seen earlier planes that are out of flat without it looking like wear. I don’t know why.

This one will be quick to address some afternoon when I have an hour to very accurately flatten the sole. The discussion of whether or not the hollowness of this sole between toe and heel even matters won’t satisfy tax preparers and pallet furniture makers who always know more than everyone else about woodworking, but for someone working by hand, it will make a world of difference match planing. if the sole were opposite, flat in the center and toe and heel just off of a board, I’d never bother to touch it unless it had other issues (twist). I’ve not seen serious twist more than about 4 times out of probably 100 planes.

If I’m wrong about the type and it’s not a 20 (8s seem to get less common with later types), good enough

Too, I’ve mentioned it here before – one of my first large plane purchase was a machine gun purchase of both the LN 7 and LN 8. The 7 was straight as an arrow, but had the fault at the time that you couldn’t set the cap iron close to the edge. LN laser cut or punched the hole in the cap iron assuming nobody would want to do it. I ended up selling that disclosing it. The 8, on the other hand, was hollow like this plane. Almost exactly the same amount, and I tried to use it to match plane and joint long ends, and it was difficult to plane something without the ends falling off. People seem to have trouble believing that, but it’s not a matter of mistaking what was going on – it’s a matter of people who don’t believe that could happen overvalue their ability to reason and assert things. Conflicting with reality doesn’t phase them too much.

One Last Thought – What do the Numbers Mean?

I am throwing around thousandths and what matters and what doesn’t from the view of someone who will be using this plane for long edges. I will, of course, make the plane as easy to use as possible.

Given that I’ve had just about everything other than a 24″+ norris jointer, and I’m floating toward a late type Stanley, maybe I should address two questions:

  1. What if you bought this plane off of the internet and you didn’t know anything about flattening planes, what would happen? Well, the answer to that is pretty simple. Not much. You might find it to be a little more difficult to get a laser tight joint at the ends of boards, or that you’d have to take a few shavings on already flat surfaces to get the plane to cut end to end (not great), but otherwise, you could end up with a plane about as accurate from a boutique maker pretty easily. I did from LN, twice out of about 10 planes.
  2. I think the underlying question of “why not just flatten the original LN 8 and use that” could come up as beginners who pick up a new boutique plane will almost certainly think the experience is better. I thought so at first, but when the volume of work increased, I began to prefer older planes. And beyond that, most volume work is better done with a wooden plane if the work allows. In terrible wood and for fine work like matching edges, having an adjuster is a little easier. At any rate, it’s not strictly a weight issue – I just find that the whole stanley package is a little better than the boutique planes when the planes are no longer being used as a half dozen smoothers of different lengths. I also didn’t have the confidence a decade or more ago to just get after the sole of an expensive LN jointer. It was easier to disclose the sole’s shape and sell it – most people don’t care as long as it’s inside LN’s spec. it was uncanny how the #7 in that pair would plane everything easily and accurately, and that little bit of hollowness in the #8 was enough to keep it from coming off of the shelves.

But I do actually like the Stanley planes better, and thus have no boutique planes at this point. I just don’t see a reason to have any, and it’s certainly not a money issue. I migrate to what is easier to use – functional laziness. Now that I have a hammer (can flatten these planes by hand and accurately), the “nail” isn’t a big deal. I don’t care to flatten many more planes as I have better things to do, but to sort of cap off my collection and dump the less common more collectible English planes and go to “plain old cheap later Stanleys”….hopefully that will be a last move.

How to Sharpen Japanese Chisels

This isn’t going to be what you think. I could give you a method to get an aesthetic and a result, but I think you need some background based in reality, and my reality is having bought probably 200 chisels from japan, and viewed thousands or tends of thousands for sale.

Myth vs. Reality

There are two myths that I can think of, and they don’t present themselves often in well used tools. First, the myth that everyone in japan sharpens chisels over a great long period of time with extreme care and with perfect bevels.

They don’t. I have received a single set of used chisels that were actually being used that were perfectly prepared. Someone was carefully using them and the very tips were perhaps ever so slightly rounded. I mean the last couple of thousandths, but the bevels were flat and cosmetically nice, and the backs were flat.

I have never received another single set of chisels that were in use that were in such a condition.

The second myth – that the genuine tools are tempered extremely hard at some level that doesn’t make any sense. By this, I mean that Japanese chisels typically are harder than western chisels. It’s the nature of the steels, white 2 and 1, or other similar surplus carbon steels. Hitachi’s tempering range starts around 325 degrees F, which will result in hardness around 66 with the right choice of steels. Such a chisel will still behave as a hard tempered tool (chippy, etc) in hardwoods. I have seen accounts of people claiming their favorite maker tempers chisels at 100 degrees C. Or the boiling point of fresh water at sea level.

It’s possible that a maker would do that, but it will not result in a good-to-use chisel. It will provide someone who wants to temper their own chisels with a starting point.

To pretend that a chisel that chips easily even in sharpening is somehow a good chisel is nonsense.

When I receive chisels from tool lots in Japan, I always try to find chisels that have been some-used , and sometimes that means getting 20 when you’re looking for 10 of the group, or perhaps in combination with blades.

When a chisel or three is undertempered, it is almost always erratically sharpened or hardly used. Neither is a good thing. A trip to a tempering oven sans handle at about 350 degrees will still result in a very hard chisel (guesstimate, 65 hardness, could be still toward 66) that can suddenly hold its edge in hardwood.

Back to the perfectly prepared set of chisels that I had – what was the key? I don’t know for sure, but they were one of the softest sets of well made chisels I’ve ever found. I would imagine that an experienced user got his or her hands on them and realized how compliant they were on good quality stones and realized they were just the ticket. I have a very developed sense of estimating hardness of plain steels on stones, and would estimate that set of chisels to be about 62 hardness. White steel has nothing in it to resist wear, so a set of chisels with a good soft lamination at that hardness will sharpen with little effort.

If they Weren’t Flat, How were they Sharpened?

Most of the chisels I’ve come across have a little bit of convexity on the primary bevel, sometimes with a primary that wasn’t that neat, and then some steepening near the edge.

Why? Because you can remove the bulk of the bevel that way and then focus the fine sharpening on the tip of the tool and zero in to the tool being durable. that’s my assessment, at least. That method also takes some of the pressure off of a natural stone being able to finish tools quickly. Most tools are factory finished on a very large diameter wheel, even the expensive ones, and you get to establish a flat bevel if you like that.

I would like to show you an array of pictures, but I never thought much other than using the new sets as a place to experiment on expediting setup/prep. so I have hollow ground and then honed out the hollow or flat ground almost every chisel I’ve ever received experimenting with ways to get that nice aesthetic bevel and finish it without getting bogged down in the idea that what’s touching the edge should touch the whole bevel.

Too, the finest stones, even the natural ones, won’t leave a very subtle but crisp defined soft to hard line. Anything other than wrought, and even wrought iron to some extent (usually found on plane irons, but sometimes on chisels) will become bright. it’s nicer to keep the bevel maintained with a fast synthetic stone followed by a relatively fast natural stone (guess what- a slurried washita leaves a divine finish), and then use something exceedingly fine on the tip of a chisel.

So, How Should You Do It? The Sharpening?

First, understand what allows the edge of the tool to be held without chipping. That means you can’t look at a piece of paper, and say “oh, two flat planes meeting at 30 degrees” and expect success. You have to find it. Obviously, I have a bias toward things that round the last several thousandths of an edge because the durability is outrageous and the sharpness is pretty divine, too. but you can use very small bevels – I think a very slow stone and doing this freehand is good. You’ll learn touch and maybe get better results than a jig -not to mention faster.

Notice also that when you read Odate’s book and see other pictures of actual users of chisels, you will find the silicon carbide stone is in the set to deal with damage. If you have a chip and you’re using a 1500 grit stone, there’s no virtue in that. It’s got nothing to do with using the tools.

Don’t deprive yourself of learning what works by experimenting. Get on ebay and find tools that look like they’re reasonably well finished but not prissy. There’s no great difference between the better tools I’ve gotten for $15-$20 per, maybe from time to time with an adjustment to temper, and any of the three Kiyotada chisels that I have and have used. If I’m honest, those chisels are like the three bears. Two are parers – one is too hard tempered and needs to be adjusted – it will not hold up in use, and it’s so hard that it will crumble on a coarse sharpening stone. The second is a little softer than expected, and a more recent mortise chisel is excellent – just in the middle. More recent meaning that Stan C. got it for me as new old stock from a dealer’s back room in Tokyo. An excellent chisel, very subtly finished, but it’s still a chisel, and it will still chip if you pry with it and it will not work for three weeks of continuous use or anything like that.

So, lesson? other than not overheating a chisel, use stones that are efficient and that are fast enough that you will sharpen often enough that you’re not wasting time avoiding sharpening and using dull tools.

Lastly – Who is Telling You How Tools are Prepared in Japan?

A lot of the information told to western buyers is woo. That a routine white steel chisel would be $300 per is woo. That a typical user has some $3k natural stone in a shroud to finish their chisels is woo.

It’s not difficult to get on a proxy link to yahoo auctions in Japan (Buyee, for example) and look at tools that have been used. You’ll be able to find everything from the same kind of “made for westerners” $4k chisel sets to well made used chisels made for experienced workers selling for $150 or a little more. Try to find a set of chisels that are significantly shortened but that retain perfect edges and a perfectly flat bevel. I think most professional users were more pragmatic than that.

Maybe another day, I will make a post showing the process of setting up and sharpening a Japanese chisel. It should be quick and intuitive, not punishing.

Like Colombo used to day – just one more thing. Am I trying to make excuses for myself? No – when I used Japanese chisels (sparingly now that I make my own chisels), I would make them tidy for pleasure. As with many things, it wasn’t a matter of just getting the tools neat. It was making them have aesthetic appeal, but learning to do it really quickly. Below is a picture of a chisel that I had sharpened that was in my “user” set. White 2 chisels with a wrought backing. They, too, were just a touch soft. Guess? 63/64 – supple on natural stones. This chisel was serving a second purpose sometimes – demonstrating the finish left by a finishing stone that I was offloading on etsy.

I really like the way this looks. Even the one single set that I found that was prepared nicely still wasn’t done was well as this. The rest, not remotely close. And people still managed to use them enough to get the handle and the blades shorter than they were when new.

A Real-Life Example of Edge-Abusing Wood and How to Plane Through it

Except I wasn’t working on a “real life project” while doing it. This is also a poo-poo of hard maple for hand tool work, which I think most people will come to if they try to work from rough to finish by hand with it.

I’ve mentioned woods that cause edge destruction. I don’t think anything other than silica is usually responsible for this. I find it in rosewood, cocobolo, etc, and for a regular tool edge, you can usually figure which will destroy edges not by hardness or some other easy boast, but by the fact that there will be visible silica. In rosewood, it shows up in pores – just look close. It looks like little white balls.

Note the white dots. Silica. They’re loose and you can brush them out or vacuum them out, but as soon as you plane through the pores, the next set of pores presents a new set.

You can see them in some soft woods like mahogany and limba, and they just do what you would guess in those. They make a plane dull quickly, but in soft woods, the planing seems nice and easy and suddenly the plane is dull.

Except, in maple, I don’t see anything like this. I see gray or brown spots that just look like minor discoloration and destroy edges as bad or worse than these little white balls do.

This stuff ruins tests

You can plane a few hundred feet and see nothing of these, and then find a discolored area that’s a couple of hundredths deep and gone. Before you get through it, though, it will prevent planing and it doesn’t have to damage much of the edge width to stop planing. A few small areas creates blunt damage that you can feel, and of course, you can feel the ridges on wood.

I was patterning carbides in the 10V test iron by literally just setting the cap iron close and planing wood to wear the matrix of steel away leaving carbides proud. And as I’ve seen this in maple before, I have planed probably a few thousand feet of shavings in “real work” as well as trying to get carbide patterns. No gray stuff. But it showed up here. Because they look innocent, I always think “i’ll bet this one will be all color and no edge destruction”. I think I’ve been wrong every time. Here’s what it did to 10V, magnified at 150x.

Ouch. About 1/8th of an inch of the edge length looked like that. It stops the plane from being able to enter a cut not just due to the dents, but because there is a 3d component to this. The edge is pushed back but also with deflections coming off of it going up and down. You can hit it on a hone quickly and remove the deflections and plane a little bit, but not for long.

The next two pictures show close up what these deposits look like both on the wood and in a shaving. Looks innocent.

When I first found these weird spots testing a bunch of plane irons 3 years ago, of course, I used the occasion to plane every iron through the spot to make sure all of them got destroyed the same way. They did. All with a 35 degree total final bevel. The harder the iron, the better it fared, but none planed long. Perhaps 8 or 10 strokes and the work stops, and you have 5 or 6 thousandths of iron length to remove before you really know for sure it’s gone. And that is *a lot*.

So, what do you do when you encounter these? you may have wood that destroys edges like this from time to time and have no clue what’s going on. If you were planing across a board with a little brown or gray spot smaller than this one, fun ceases quickly. You may not believe that the little spot that shows nothing shiny or gritty is doing it and start blaming things on a defective iron. If you sharpen without actually being able to look at the edge, I can almost guarantee you’ll leave damage in and then blame that on the iron a second time.

And then go shopping for supersteel. Except that will probably make your life worse, because it just gets harder and harder to get the damage out.

The old texts and some gurus talk about “planing teak and woods like teak” by increasing the angle 10 degrees. I wonder if some of them have planed teak. You can certainly increase the angle and at some point it will probably plane OK but be intolerably steep.

The answer in this case is to buff the bevel side and maybe the back a little bit. If you buff enough, you’ll have trouble planing at all. If you buff too little, you’ll still find some damage, but a moderate amount of buffing will make it so that you can plane all the way through the damage, deal with the strange feel (a freshly sharpened iron that doesn’t dig in quite as easily) and move on. The level of damage that’s in the edge will probably be removed in one or two normal sharpening cycles, or only 1 or 2 thousandths deep, and if you get it dead right, there won’t really be any.

If you find wood like this and it’s not really pretty, then it’s wood to avoid with hand tools. Cut it with power tools and sand it. Maple is worth it for guitars, and you wouldn’t tolerate the discoloration in the first place in higher cost wood, so it won’t be encountered. Rosewood, mahogany, limba…obviously worth it sometimes, too.

Just don’t kid yourself that spending a lot of money on another iron will fix the issue.

I ended up buffing a 26c3 (razor steel, similar to white or good file steel) iron that’s very sweet but not very long wearing. It was fine planing through the gray area, at least with the concession of loss of clearance and increasing the shaving thickness a little bit. The resulting damage was about 1/4th as deep as the pictures above or less, and the deflection was minimal. The nice thing about steels like 26c3 is the buffer can polish them reasonably quickly.

10V, I haven’t experimented that much yet, but would expect you’d have to buff it for a *long* time.

Bevel Your Card Scraper Edges – Give Yourself a Break and Forget about 90 degree Edges

This blog is short (for me). I constantly look for easier ways to cut time sharpening but get better results as the combination doesn’t just give you an extra 20 seconds sharpening, but it gives you much less time working wood and a better tactile feel working wood. As in, the results on the wood itself are better and the experience is more pleasant.

It’s no secret that at least some very large fraction of amateur woodworkers struggle with card scrapers. When you read opinions, someone encountering the same struggle creating a consistent burr will hear from everyone who gave up and who doesn’t use a burr at all. This isn’t a good compromise, as there are plenty of cases where you’re doing both finishing and sizing with a scraper.

The typical setup suggested is to joint a scraper edge at 90 degrees and then go through a series of steps to get two burrs.

Forget it. Add a bias to the scraper instead and try freehanding the filing with a bevel of around 20 degrees – something you can do by eye without any jigs, and then hone the bevel of the scraper at a lower angle with an oilstone. Oilstones and saw temper steel are a thing of magic compared to using modern abrasives. So, summarizing this – try freehanding the bevel on a file at 20 degrees of lean and then half of that on the stone. With an oilstone, if your file isn’t dead flat, no big deal. When you freehand the honing on the bevel you’re creating a microbevel of sorts, and you can allow the scraper edge to go over the edge of the stone without tearing it up.

When you file, you’ll see something like this:

Note, the card is leaning over about 20 degrees – it’s not vertical. Joint it until any prior honing is long gone. Do this each time the burr no longer is of good quality or has a short life.

The view from behind then on the stone – a smaller angle. It’s not important exactly what it is, just that it’s between vertical and the angle of lean you used filing the scraper.

Notice the lean on the washita stone – a mdidle oilstone is ideal. 15 seconds on the bevel and the bevel side is complete. don’t forget to do an appreciable amount of work on the face.

Once you’ve done good clean honing on both the face side (put some pressure near the edge and bias the work so it’s done where it counts, and not just the entire flat face of the scraper) and the bevel side, you should have no burr at all, but clean undamaged steel.

Lay the scraper over and draw a good smooth burnisher over the edge (since you used an oilstone, you’ve already got a lubricated edge, and now your burnisher will also have a film of oil on it for when you re-draw the burr. Don’t clean the burnisher unless it gets foreign particles on it.

Drawing the edge on the flat side and working it for half a dozen or a dozen strokes is important – you don’t need to mash it with all of your bodyweight – keep it need and undamaged.

At this point, you can easily turn the burr and you can turn the burr with a stroke 90 degrees to the face of the scraper because you’re already working with a final honed bevel biased about 10 degrees. Everything is in your favor, and now you’ve got a little more room to not overturn the burr.

Don’t create a giant first burr – give yourself room to increase the burr side with subsequent drawing and you should be able to re-roll the burr an appreciable number of times before you have to file again. The fresh burr when you start this should feel perfectly smooth – and it should cut perfectly smoothly.

With the angles biased in your favor, and honing over the edge of an oilstone, you shouldn’t fail to complete steps like most people trying to keep everything square. What you have in two potential long edges on a rectangular scraper should take less than half the prep time of a 90 degree edge, and you’ll probably find the two edges will do more work than four mediocre edges.

after removing any saw marks or unevenness, these shavings are well formed and can be unrolled to a continuous length.

Once you get quick with this, a full re-joint of an edge, honing of the bevel and face sides and burr rolling shouldn’t take more than about a minute and a half. Scrapers don’t hold burrs for 800-1000 feet like a plane does, but count your progress in times that you have to joint edges on an actual project. It probably won’t be many, and the clean burr will improve feel and give you fewer skips or lumpy surfaces leaving you little to sand if you wish to sand.

As you get good at this, you’ll also develop another good habit – your tolerance for a poorly set up edge will be little and since you’re sure you’ll get a good clean burr every time you reset things, there will be no barrier to going back for a minute and a half and starting anew.

The scraper set up like this is near magic in working to a line on curved surfaces and leaving a crisp transition, too (think curves surfaces on instruments or tools meeting flat surfaces – it’s easy to scrape them to a finish, but sanding things like that to a finish without sanding the life and crispness out of them isn’t that great, plus, you still have to do the sanding.

(OK, that wasn’t that short).