How Many is Enough? At least One More…

Not the last plane remaining to include shop made irons, but added to the closed handle rosewood jack, and the rosewood and gombeira smoothers.

Probably mentioned in another post, but I have two try planes of my own make. One was my first try plane, which was the third double iron bench plane I made. It’s OK. The second is a plane that I got lazy on and didn’t cut the mortise quite straight up and down. that one is actually solvable by adjusting the iron and cap iron, but I never did it. I use the first along with a vintage try plane that I like because sometimes I just like to use old stuff. There’s a credibility to the nice old stuff that my wares don’t have because……you can’t buy age, and you can’t buy provenance of a golden era plane that was made and sold in a competitive market of professional users. That’s gone.

What you can do us buy that older plane for less than the cost of materials in mine, so…there’s that.

This plane is euro beech, but the handle is american beech. It’s nicer than my earliest planes, and it has a 65 hardness plain steel iron in it. Those two together are important to me. Strength from hardness imparts edge stability. Plain steel at 65 means hardenable. The fact that it’s a 1.25% carbon steel means it’s still relatively relaxed getting to that hardness at a 400F temper or a few degrees above that.

There are still some things that could be improved in terms of lines. I chicken out on the handle and always leave the top and front strap a little tubbier than they need to be. A shorter handle looks nicer, too, but what if I decide to give the plane away? My hands across the knuckle are only about 3 1/2″ or a little wider. Someone with a 4″ hand across the knuckle could use this plane, but probably struggle on an older Mathieson plane until they realized they don’t need to have all four fingers on the handle.

Haven’t tested it yet, but anticipate no issues. This one is a little more free in the wear, etc, in terms of clearance in hopes that I won’t end up doing any extra work rubbing the shaving hard into the wear in tight quarters. Some of my tighter smoothers and jack planes do give a sense that the angle off of the cap iron into the wear, along with tightness, are so much so that even shavings not straightened by the cap are being straightened by the wear. It looks nice to have a plane that’s really tight like that, but there are limits to practicality.

I may build more planes this year, not sure – but in the background is a desire to make the chamfer a round over on the top, but elegant, change the carved details and make a much more artistic handle that’s not guarded by material bulk.

This is my first euro beech plane. At horizon, euro beech is still what’s available, and realistically, at not less than about $20 a board foot. Is that really a big deal? I guess it isn’t – if the wood is perfect, I’ll pay it. Some of the blanks on the page look less attractive. This one came out of a billet that wasn’t sawn that well, but there was room to resaw it, and the result is very attractive to my eye but for the contrast in how much color changes vs. american (oh, the wedge, too – also american to my recollection). I like the warmer color of the american stuff, but as this plane gets a few more coats of varnish, it will be sort of tarty and it has the wonderful three dimensional effect in that parts that are dark turn light and the converse as you’re walking past it, making it look a little alive.

If you look closely at the right eye in the last picture and the plane itself, you can tell that I corrected the bottom of the eye a little. It just looks better if the bottom of the eye doesn’t look like it flatten out entirely in the longer thin area of the eye.

There is a cap iron under the wedge, of course. You can’t see it and neither can I, but it’s there. Shop made like the rest of it, but for the modified knurled screw that I cannibalized to come up with the screw itself.

Oh, and the little bit of dirt trapped under the varnish on the front side of the handle – jeez. That stuff shows up less on the bare wood but big time after finish is applied. It reminds me of a childhood friend of mine who could not eat anything other than clear jello without creating a rings around the sun type look….food dirt. I saw that as it was occurring with varnishing and admittedly did nothing about it. One of the luxuries of making things for yourself.

No test shavings yet -the handle glue is drying as the plane sits here, and to some extent, so is a tung oil and wax sole. Just under 8 pounds – a nice weight for a fat guy like me if the upper end of possible use includes rosewood. And nice even in cherry, especially cherry of suspicious quality or grading.

Coffins and Stuff – Super Hard Coffins?

While I’m making rosewood planes, well two now – I guess it seems like a good time to make more than one. The one plane I’ve made few of is coffin smoothers. No offense to people who love them, I just cannot find a way to make them as productive as a Stanley four in regular use, just as I can’t find a way to make a metal Stanley jointer or #5 as efficient for jack and trying work as a wooden jack and try plane.

My favorite smoother I’ve made (out of two? maybe I should wait for a larger number) was an experiment to use scrap purpleheart and intentionally make an insert in the plane like you would see on a plane that’s had a plug or block installed when the mouth gets too large. The point of the plug was to control both the mouth size and create some room for the wear in side the plane before redirecting the shaving up and out. It worked great to be able to separate the main wear angle and the plug – from above the plane looked normal, but a wear block inserted in a new plane is a fart in church kind of thing. Good luck convincing someone that they shouldn’t wince or squint at it – it’s associated with clapped out planes.

Of course, the wedge isn’t fitted and shaped yet – I have a little bit of abutment work to do as well as the final fitting and shaping. The wedge be much shorter and rounded at the top to match the iron and cap iron.

Continuing a slow trend- once every 6 years I make a coffin smoother – the eyes got away from me here. Some smoothers have the front escapement tilted forward to make a bigger opening, and the cheeks are not a flat as this is then transitioning into a diagonal relief cut, but rather diagonal from the abutment all the way to the front. Much more room and more open looking, and the eyes can be longer because they won’t start in a weird place. So the eyes ended up getting short and tall as I faffed with them.

The combination makes this a tubby plane and the sides are particularly fat at the back of the eye. I’ve got a bunch of older coffin planes and they seem to have all kinds of shapes – from fat at the eyes to thin at the front and back, to more subtle like this one where the front is tubby, but the back is also tubby. I chose these based on the desire to have a bigger rear and a looser rear hand, but just like the eyes, there are other styles (fat front like this and thinner boat tail style back) that are more stylish .

The iron is 125cr1 and the hardness after a 390F double temper is 66. There is no visible grain growth at magnification, but we are probably pushing the limits of where hardness can be with a tempering temperature that’s not that low. They make this steel all the time, and beyond that, I have plenty left – if it’s hard tempered, I can bump it up to 425F and get hardness to around 64/65, and if that doesn’t work, just make another one.

However, I don’t notice anything unusual when wrapping this iron up and giving it an initial edge. The burr behavior is good – it doesn’t break off early but you can tease most of it off on a hard Arkansas and have little to strop or buff.

The odd nick that you see in the end of the iron is something I just feel like doing on everything going forward – a punch mark where I ground a small bevel on the other side, put the iron in a vise, and then hit it with a steel punch and heavy hammer. Ideally, you’d like less of it to break out than that, but whatever – the difference in time to grind it out and then set the final bevel is about 1 minute ,and not grinding a bevel and then testing a small break preserves the ability to re-do the heat treatment if the grain is bloated. Once the bevel is on with a water-hardening steel, you’re asking for trouble if you try to only take a little of it off and re-do the quench in brine. Terminal trouble – cupped on the face side and convex on the bevel side. No thanks.

I’m disappointed in how this plane looks in pictures given it kind of has the proportions that I like for handling a coffin smoother. I don’t like a cramped thin rear or the ache of a closed hand. I do like the fact that this plane will be a little heavier due to the wood type – we’ll see.

Once again for this one, the wedge is walnut – rosewood on rosewood is just kind of harsh and it doesn’t grip the iron as well. And there’s a chicken feeling, or “pucker factor” – you know what that means if you know what it means. Hardwood wedge on hard plane and burnished wood on the wedge and abutments and wedge to iron contact just leaves you feeling like one or two taps to get everything seated could be followed by a pop as one of the abutments cracks. I’ll color the wedge so it looks similar to the rosewood, and this time pore fill it a little bit so that the remaining look beyond just the color matches rosewood a little better.

No sandpaper yet on this plane but for the bottom! When it gets oil and shellac or varnish and shellac and wax (impatience on my part – if I use a long varnish but then rub shellac into it, I can use a turpentine-solvent wax right away rather than letting the plane sit for a long time to avoid trouble with the turpentine softening varnish a little. I ended up doing the same thing with the recent rosewood jack. It’s kind of a nice combination even though most folks would think putting a less durable finish over a more durable finish doesn’t make sense. On furniture, it probably wouldn’t.

Not sanding anything will mean flaws appear when I apply finish – file marks, little facety things that could’ve been rounded over better. We’ll see.

Metallic Plan Co. Iron Part 3

I need to mark the tag. Having the plane in hand will offer the chance to make sure the tab engages.

I need to either count teeth, which I stupidly did before, or be smarter and take the marks from the teeth on the original iron and transfer them – tape on in this picture, pencil over the tap and then transferred to the rebated tab that’s not yet attached to the replacement iron.

If you look in the original post, the tab on the iron is crooked – but you can see it above here, too – it’s not perfectly parallel to the iron length. The replacement tab is still on the CA block, which allows for easier work starting the initial teeth and hoping to minimize any file marks on the final iron, still left a few file marks on the iron after installing the tab and correcting the teeth.

At this point, I removed that tab from its wooden block and marked center on the iron and CA glued it on and drilled through the iron just going through the holes that already existed on the tab, knocked the tab back off then and removed all of the dried ca glue and then peened the tab in place with brazing rod. I wanted the rod to be narrow diameter so that some of the tooth is still steel and won’t be bent or folded by the matching teeth on the plane’s adjuster.

And noticed that mine, too is crooked – I guess it moved a little while I was placing it and then made that issue permanent by drilling. Oh well. A little late to fix it without unnecessary trouble – a check of the plane shows that it’ll still be fine with the adjuster, just like the original. The plane’s adjuster has a lot of lateral room seemingly to allow just for such an issue. Smart. The initial teeth with the tab peened to the iron look like this:

Woof – those teeth are pretty ugly. The bronze adds an interesting challenge if you work by feel – it feels like grease when you’re filing it and it hides that you’re filing steel at the same time, you can’t feel it. I’ll do what anyone with self respect would do, fix the teeth a little and blue the whole iron so you can’t see them very well.

At this point, the iron is close to being done, and is it flat enough? It should be. I did check the iron before peening the tab on – it’s ever so slightly hollow along its length, which is just what I wanted. If it was convex at all, rather than lapping it flat, I’d belt grind a tiny hollow in it. like several thousandths, but something that will show up as visual confirmation everywhere on the iron. it’s probably a lot flatter than the original. I ground the top corners off, and cleaned things up a little but not like a brand new surface ground iron – I don’t want it to look like CNC in an old plane. that looks stupid and it would be doubly dumb to waste time going over this iron to hide that it’s hand made.

A couple of the teeth could still be evened better to improve the uniform look. but we’ll see how it works, first. I did nothing else after this but apply some carnauba wax so that it if it rusts, it won’t do it on my watch.

I do wish I hadn’t been in a rush through some of the parts – the holes not in line, the wonky teeth and the tab going on somewhat diagonal. But it’ll be fine and none of that stuff will show up when the iron is in the plane. From start to finish, it took about 2 1/2 hours to make this iron. It’s not exactly simple, and with limited tooling, I had to figure out what I’d do to rebate the tab and so on, so the first one always is a little ugly and takes a while. It would still never be a one hour project without having a production setup that would take enormous amounts of time to create. That obviously wouldn’t make sense, and posting this in an online forum would probably draw some retired machinists who would tell you how they’d do it. See if they can set something up in 2 1/2 hours including heat treatment. And do it for free.

Another Mortise Chisel and Complaining

First, the mortise chisel. The big one that I posted made from O1 works better than I could’ve guessed, but I wouldn’t want to make smaller mortise chisels out of O1 and sell them to general population in this jail we call middle age life.

The reason for that is that I think they will break easily by bending. So does D2, and so would V11. A2 is some more tough than O1 as far as bending tests go, so it’s probably not a bad choice for a solid steel chisel. Cryo treating it actually improves the edge stability but reduces the amount of force an A2 chisel will tolerate.

I won’t drive Volkswagen products again in my life, and I won’t buy A2, though. Just two personal rules.

So, it seems reasonable to see if 52100 will harden in a 3/8″ square cross section because at least that and below could be made of a steel that’s known for toughness. Well, it does. 69 out of the quench and 64 after a long double temper at 400F. I think even at that fairly strong tempering schedule, it could probably use a little more, but we’ll see in use. Steel is interesting in that what makes 52100 really tough (able to withstand a lot of lateral force before breaking) is at odds with hardness. Difficulty with it for amateur knife makers is getting the steel into something that can be quenched and will result in high hardness. Larrin Thomas has a nice article on it.

I don’t care for the way it behaves when it’s tough, because the characteristics aren’t what we like in edges, which is for them not to move at all.

But you can “cook it a little harder” hand and eye and get past that. I don’t have a furnace, but it looks like a bit of a nuisance time wise to get flat stock and do what needs to be done.

Larrin’s best result with a fairly technical bunch of stuff is 67.4 hardness with an oil quench and a relatively low furnace cook. That’s actually pretty impressive. With more temp and a faster quench, it’s probably similar to my result. His charts are two points shy of my finish hardness, and elsewhere, you can see that the toughness falls off after a certain point. The actual deal with that is it starts to feel like something else, except at 64, it’s sluggish on sharpening stones, but we can live with that. It’s about as abrasion resistant as O1, but slightly more slick on stones.

So, short story long, this chisel may be ideal for a bench chisel but a little too much of the characteristic toughness is traded for hardness in my heat treatment. Pictures of the chisel, the bolster, a little more square – left it like that just to see how it looks, and you can see that the cross section is slightly relieved (trapezoidal). This is essential for mortises that aren’t shallow.

For an idea on size, here is this chisel with the bigger O1 chisel and an older “pigsticker”.

These are not small. The pigsticker is a little longer in comparison, but being at the back of the photo makes the phone sort suggest something closer is bigger, for the same reason people hold out fish in front of them to get them closer to the camera.

the handle is a touch longer than I’d put on a bench chisel, but it’s nice to have some room to work. Short handles on mortise chisels make no sense to me at all.

If these need to be 62 hardness after temper to be tougher, I have another 50 degrees of tempering room and that would just about do it.

Here’s the Gripe

There was an interesting thread on reddit last week or early this week. Some guy snapped a ray iles D2 mortise chisel in two places. I did what I usually do, which was start pondering answers in type and drowining the people there. I don’t often post on reddit and don’t read it regularly – google brought it to me – but I usually drown everyone in pondering regardless of the venue. I thought those chisels were CPM D2 steel (about as tough as A2), but I think they are just D2 (about 1/3rd as tough as A2). Like V11 would be in a normal sash mortise profile or one like mine above, they’re not resistant to lateral forces breaking the. This is yet again a point where I’ve mentioned that V11 (XHP) makes little sense in chisels, and it’s attribute for Veritas buyers is that LV pushes the hardness up reasonably high. if they made a 62 hardness A2 chisel for mortising, it would be a much better idea.

So, I said something to Steve (or typed it) that I’d not consider making mortise chisels for sale in the future because they’re a pain to make. Only the large one was. This second one was already no more work than a bench chisel. And because they could be made reasonably elsewhere and you’re giving people something that they think they can pull on like a drawbridge lever, because instruction about cutting mortises is pretty poor and so is ad copy.

And then I went and looked at what’s available.

IBC (Cosman pushes them, but maybe others do) makes an ugly straight sided chisel for $145. This is appalling not because it’s $145, but because of what it is for $145. A2 is not expensive, and it’s just a flat sided slab of A2 with a short handle and a screw thingy through the handle. The handle is cherry, I guess because of a metal threaded gadget that goes through it, but it’s short and fat. I think what we see with this and others is the loss of skill and insight. It’s probably harder to create side relief on these chisels. If you’re working freehand, you just create it by eye and then work to width. To get perfectly square would be a pain, but you could get close. But the chisel, as well as the cheap looking flat stock bench chisels for moon price, I don’t get it. They are garden variety A2 in a spec that A2 lands if you heat treat it – there’s no substance there.

I had LN’s chisels. they have no side relief and I couldn’t tolerate it, but they were pretty and well made. Again, though, socket mortise chisels with short handles, I don’t really get it. At the time, they were $60. They’re $115 or something now, which is hard to swallow because they are not ideal for even small cabinet mortises with square sides. Is it the case of something that could be relatively good isn’t because the trapezoidal cross section is harder to machine? I don’t know. The whole bit of the sides being flat to aid in alignment sounds good, but it doesn’t work in practice. Instead, they work like a drill bit that’s wandering and there’s no way to stop it, and they bind tight and someone reading this will at some point break out the side of cabinet parts fighting these chisels out of a binding mortise, especially if the wood isn’t perfect. Not that this is hypothetical – I’ve done it. I like LN. the price doubling is a surprise, but they may be replacing production tooling like LN is. There’s the stick for CNC – it’s expensive and it doesn’t last and wear/replace like more crude but harder to engineer production solutions. Again, some art has been lost. These could be forged and ground probably for less cost.

That leads us to LV’s chisels. They’re infrequently available, the cross section is horribly tall for a cabinet size chisel, they’re made of a steel that has poor toughness (but good abrasion resistance and hardness – just an application mismatch here), and the steel is expensive. It is legitimately expensive, they’re not running a shell game charging more for it. Height of a mortise chisel should correspond to mortise depth. Pigsticker height is a deep mortise production thing, they were not a cabinet chisel. There is at least some side relief on the LV chisels based on the ad copy, but the cross section is a nuisance if you’re making face frames or cabinet doors. They could be 2/3rds as tall made out of A2 and be a better chisel.

I’ve described what I like here in something for, for example, 1 1/2″ long mortises 5/16ths wide and maybe 1 1/4″ or 1 1/2″ deep. If you make furniture or cabinets, you’re going to be making a lot of those, and some smaller and some about like that but longer in length of the mortise. Flat sided firmer type chisels are fairly common and probably met a lot of this need. Sash mortise chisels are often long and have square sides, and most of us aren’t making sash, but for someone with deep pockets, something like what I’ve made above is a pleasure to use. You ride the bevel cutting mortises and at the bottom of the cut, lift the chisel just lightly and rotate it a little bit (“levering it”) to pull break the bottom and sides of the little bit unbroken at the bottom. The lift is needed so that you don’t have the tip completely buried in virgin wood – if you do, you’ll probably find yourself breaking tips off.

This rotation is a combination of elegant and a little bit of force. You don’t want straight sided chisels interfering with the force you’re applying so that you can’t feel what you’re doing. It makes no sense, you can’t maneuver them. And you need some depth to do this rotation relative to the length of the bevel. The taller the chisel cross section, the longer the primary bevel becomes and the rotation point is out of the cut on shallow mortises. It should be obvious to someone designing tools, but maybe it only becomes so when you do get the chance to cut a deep mortise and see why pigstickers are so good at doing that.

It took me about 2 hours to make the mortise chisel above. I could profitably make that as a guy in a garage and it’s better than any of the offerings above. It is alarming that I can say that without guilt or reservation – that I am just working in a garage freehand and the commercial offerings don’t make sense compared to what I’m making with about $15-$20 in materials and consumables.

The one unknown variable is warrantying things. I’d never consider taking returns and I wouldn’t replace chisels broken from abuse, which would garner loud complaints.

And I’m also not in a position where I could just start making chisels in quantity, so this part, at least, is hypothetical.

What would I do if I were buying at this point? I’d get imported mortise chisels that are square ash type and grind them into a trapezoidal shape.

Maybe I missed a chisel being out there with what I showed above. I have some older chisels with those attributes, so it isn’t like I’m inventing anything.

The state of things is awful for the white collar buyer who may actually enjoy cutting mortises by hand, though. It’s wonderful to do after you get through the steep part of the learning curve, but can be made seemingly much harder than it is by tools that are just not designed well for the task.

The Finished Mortise Chisel

Finishing the chisel after the prior pictures was uneventful. As dumb as it sounds, even when you work freehand, you have to come up with routines on how you’ll do something. Which contact wheel, where on the flat belt sander, how to avoid overheating anything.

Yeah, not great pictures with the mess in the background. it’s bigger than it looks, about 13 1/2 or 14″ total. The handle is pretty but the feel of it is forgettable. It’s large and more figured than the picture show – london plane tree again, but indistinguishable to the average person vs. hard maple.

When I tested this chisel after tempering, it’s 61 hardness at the tip and 63 an inch back. I harden with forges and temper usually with a toaster oven. Toaster ovens are wildly accurate on average, but the temperature swings around, so I put chisels and plane irons in an aluminum sandwich. I think this chisel may help me figure something out, though. The plates are stable, but I think the ends might be slightly warmer than the middle, and I’ll drill a second hole in one of the plates to get a measure of the stack temperature on the end vs. the middle. if it’s different, then I’ll need to engineer something slightly different.

The functional difference won’t be anything on a mortise chisel – better this than a paring chisel. Bench chisels don’t experience this because they are short enough that the business end is near the thermocouple. if you have a choice with most steels, full hardness halfway up and tempered a little further beyond that would be lovely.

A theme here probably starts to show. All of my chisels look the same. This one has an extra fat and longer handle, it’s more like a shovel handle in size, but you can’t tell that so easily online because proportion is observable. I have somehow ended up with larger than average arms and forearms and teeny little hands, so my dainty fingers are no help.

I’ll cut a mortise at some point and post the picture at the end of this. It’s nice to have made something different here, but I can already see areas for visual improvement, and that’s kind of annoying. It’s the kind of annoying, though, that makes you do more, not less. So that’s not that bad. I suffered the other kind long enough when first starting out – the one where you don’t know what you want to build, how you want to build it and when you’re done, it looks just OK and you haven’t the slightest clue how you’ll make the next one look better.

Edit: Mortise picture added. I did this first with dry SYP. Which is marshmallow and glass. SYP works like it’s greased when it’s wet. When it’s got some age, the rings are crap, and so is the stuff between them. I’m at a loss for scraps because I’ve got an over-full shop and I decided a while ago if I have scraps that could maybe potentially possibly sort of kind of be useful at some point in the future, I would burn them. I’m not poor enough to hassle myself. And so, here we are, I’ve got nothing but good FAS wood and a gaggle of exotics that I don’t want to cut test mortises in.

And after 15 minutes of looking, I finally found a piece of cherry that I received in a lumber lot , and it’s shockingly worthless and this is the rough size of it!!

I’m sitting here thinking about all of the ways O1 might fail and completely failing to remember that I’m not a hard core chisel prying guy. I don’t think the pigstickers were actually intended to be pulled on like someone pumping a jack lifting three tons, either. the tall cross section is to rotate in the bottom of the cut. The more you get away from that and the more you try to be stronger and faster, the slower you’ll mortise.

And so, I’ll never break this chisel. The first edge *should* be sacrificial, but even it holds up fine before the marks are even out of the back, and with nothing more than setup using an india stone.

Too, the sides of this chisel are sharp and crisp on the bottom. scotchbrite belted the tops to take off their tooth, but leaving the edges alone on the bottom is important. This chisel has a pretty good bit of trapezoidal relief, and the bottoms are sharp and crisp. it works better than I expected, creating a clean mortise without any real effort.

Iv’e got thoughts on cutting mortises, too. I’ll post about them sometime. I despise anything other than cutting mortises by hand with no drilling, no machines, no routers, etc, and I cut them in a way that is probably common but doesn’t resemble much taught now. Some of the methods taught show the instructor has no idea why there is a tall cross section on these chisels in the first place, and the idea that it’s there to make it strong so you can put both feet on the end of the bench and lean back is no way true. Just like the idea that the top curvature on tall mortise chisels (rounding at the top of the bevel) is to protect the ends of the mortise.

I’ll save actually discussing cutting mortises easily point and shoot for another day. If you have a thicker cross section chisel like this and you try it, you’ll think 20 lightbulbs just lit when you see how the chisel works in your own hands.

Revisiting 52100

Forging chisels by drawing out round rod poses a problem.  I can’t use 26c3, and the steels that I can use are 1% carbon or less. They make a decent chisel,  but I’m not trying to come up with a routinely make able decent chisel. I’m trying to come up with something demonstrably better. 26c3 is better than any production chisel and it sharpens easier than hard 01. Yes, I’m mourning the lack of it as well as the inability to get defectless 115crv3.

I don’t care for 52100. It makes for a very tough chisel at 61. People talk about a tough edge, but mean strong. Toughness leads to a persistent foil at the edge of a chisel, and a deflection with a foil is a bung to push through wood.

However, I’ve had luck pushing up the hardness of 52100 to make gravers, and the tables suggest it should be no tougher than 26c3 assuming 52100 is pushed up into the upper ranges. Double tempered gravers were landing around 64 hardness with no sign of grain bloated and the tips would chip off, which sounds bad but it’s better than seeing them bend, because they would bend long before they break from chipping. Or said differently, there’s more potential to resist edge distortion, a higher point of abuse where things finally fail, if they fail due to chipping and not folding. Why didn’t I do this before? Simple – I wasn’t able to get hardness out of the quench high enough to do it, and most other folks never will, either. 52100’s behavior is a bit of an odd duck and the heat treatment routine needs to be just a little different.

Because I’ve learned this just by experimenting – which is like getting something for free – it seems worth reexamining now that I’m comfortable with brine quenching. 64 hardness after a 400f temper should be attainable. More than that is unpublished more or less, but here we are. I am pushing method experiments to see what is possible, not just what’s possible with a furnace schedule and cryo.

This is the above chisel after a long double temper at 400. You can see the chisel between the anvil and cone at the left. 400 in a .9%+ carbon steel is usually an area of sweetness. In case you can’t see the dial, it reads a strong 65 hardness. Further up the chisel where you may be working with it in 2054, it’s still 63.

I’m pleased with this, the chisel is miles better than the 61 hardness 52100 steel chisel I have on my rack, but even though the alloy is pretty plain, it does start to resist some sharpening stones at this hardness.

I have to test it more. And see if bar 26c3 will also easily reach 65 after a brine quench. I’m fairly sure it will. And I think 26c3 will have a dry razor like bite and still be a little better than 52100 – certainly more agreeable on natural stones at the same hardness.

Who knew that making gravers would lead to improving some of the chisels? That’s the free part – I made gravers, they worked, done, right? No, don’t miss opportunities like this and just write things off without proving they won’t work. it would’ve been easy to say, well, you can do that with gravers because they’re little square stubs, but a chisel will break or crack or warp with the same routine.

It’s very nice to finally have a bolster that’s formed from the same piece of steel and have a tang thicker than a quarter inch. I’ve not yet had a forge welded bolster break loose – I don’t think more than 1 in 100 would ever let go, but all one piece of steel is even better.

Amber varnish on the handle again, of course. No metal driers, so uv light is needed unless a cure time of weeks is allowed. No thanks. Curing I’m the sun is fast, but Steve Voigt motivated me to make a black light box and the cure may be a bit slower, but weather matters not and there are no bugs stuck to the handle.

Oh, and I’ve already tested the edge malleting hard maple. It doesn’t chip, so more evaluation is needed. Even at 65, there is persistence to holding a little bit of a burr when sharpening, which is a surprise.

The heat treat process is not complicated and does not require a furnace, though it has become easier to really manipulate the steel with an induction forge vs. propane. If you want to normalize the steel with a heat all the way to the point that there is scale forming and then let it air cool, it’s 20 seconds with an induction forge, and follow up thermal cycles to shrink grain are a fraction of that.

Hand Forging a Chisel from Round Bar 3

OK – there’s been some delay in getting this wrapped up. I finished the chisel, but the chisel is a different chisel. The first two parts are unchanged, but charging forward and trying to find something to make a single piece chisel including integral bolster just happened by chance to run into trying a steel that is defective. The 115crv3 bar that I was using is defective. I relayed my experience to the supplier of the steel and they gave me a refund and canceled a back order that I had out there. Phew. So, I went back to W1 bar, and the last post here is a chisel made from W1.

This process changes none for any steel that I use other than the heat treatment, and I think it’s not worth going into specifics about heat treatment.

The W1 replacement looks the same – but I forgot to take a picture of it flat out of heat treatment. I thought this was the chisel, but this is yet another one after, but pretend it’s the W1 chisel. Flat and wedge shaped in profile as far as thickness goes:

I do almost all of the shaping and finishing work on less than precise grinders because none of it is jigged.

Actually, you can see the three things I use. Any of them could do all of the work. For example, on the left is a simple “bucktool” 4×36 sander. That brand is a low cost direct drive brand that you can find on amazon, but the sanders are not all the same. this one has a steel platen bed with some rigidity and a graphite coating that’s infused into woven cloth. it’s the best graphite platen material I’ve seen in terms of durability.

You need a sort of flat area somewhere on something, and an idler.

Which brings up the two grinders. One is back right. the spindle sander is for electric guitars, so you can ignore it.

Both grinders are identical, and they have the cheap multitool attachments. one is 4×48 and the other is 2×48 with a larger contact wheel. The two separate sets of units are some fraction of the cost of a “good” 2×72 grinder. The multitool attachments are not high quality or precise, but I haven’t broken either of them. So there’s a lukewarm endorsement.

The grinders are the Jet IBG-1, which is only important if you consider the power level important. They’re hogs for an 8″ grinder (11.5 amps and strong), which makes them a good candidate. Unfortunately, Jet has decided to almost double the price of them in the last two years at street level (they were $260 each when I got them, and now $470 seems to be the norm). I’m sure there was a “shortage” vs. just money grabbing. Or maybe they’re in the club George Carlin talks about and we’re not. Whatever the case….

I figured I’d show what I use – I’ve made entire chisels just with the 4×36 belt sander and if I did it here, you wouldn’t see an aesthetic difference. It would requirement to hand file the neck/tang area of the chisel, which I did for a long time. To put that in context – forge welding the bolster was later, so you could profile the tang mostly with the idler, weld on the bolster and then hand file to clean up. The bolster is now there out of forging so I do the rough grinding with the wheel. The wheel is 24 grit. Strangely, despite alumina prices being about the same as they were two years ago, these have also increased 72% in price. and when you do heavy grinding, you will actually see consumption of wheels that you’d never have considered before. One because you’re doing lean in grinding and two, the metal up to the point of the picture above is unhardened.

But that’s the past – we heat treated now, and heat treatment should leave the tang below the bolster semi-hardened so that it can be filed. The tang after the bolster inside the handle is unhardened.

Phew, a lot of background here – but it will feed into the discussion forward. I think you do not want to consider trying to jig anything you don’t need to jig. It’s limiting to do that and then the work is also boring.

On to the Finish Grinding and Bevels

The chisel is generally still wedge shaped and not warpy at this point, but if there is a slight lateral warp, observe it so that you don’t forget about it. Visual warps can be a matter of a couple of thousandths and they’re seconds of work to deal with. I leave chisels ever so slightly wide if the width really matters down to a couple of thousandths and then grind the sides to width after heat treat so that they’re straight with a very slight width taper. it makes for a nicer chisel to use than parallel sides.

At this point, I will grind the top curvature into the chisel. that is, the bottom is flat, the top shoulder is thick and the first several inches of the chisel are thinner, so the natural solution to this is some curvature in the taper as you approach the shoulder. It again makes a better chisel, but it also looks more interesting – a nice combination. On a short radius contact wheel it would seem hard to do this because you can create a lumpy surface. Working in slight diagonals both ways will eliminate most of this and if you see a spot that needs more ground off, of course you just do it by eye until it looks about right.

I don’t have a picture of grinding the bevels, but the biggest reason I got a picture of the idler wheel at the end of the belt on the Jet grinder is that is where I grind the bevels on a chisel.

Linearly. As in, I feed the chisel straight up and down with the length of the chisel in the direction the belt travels, not across the idler wheel’s width. That decreases the contact area and slows the process down.

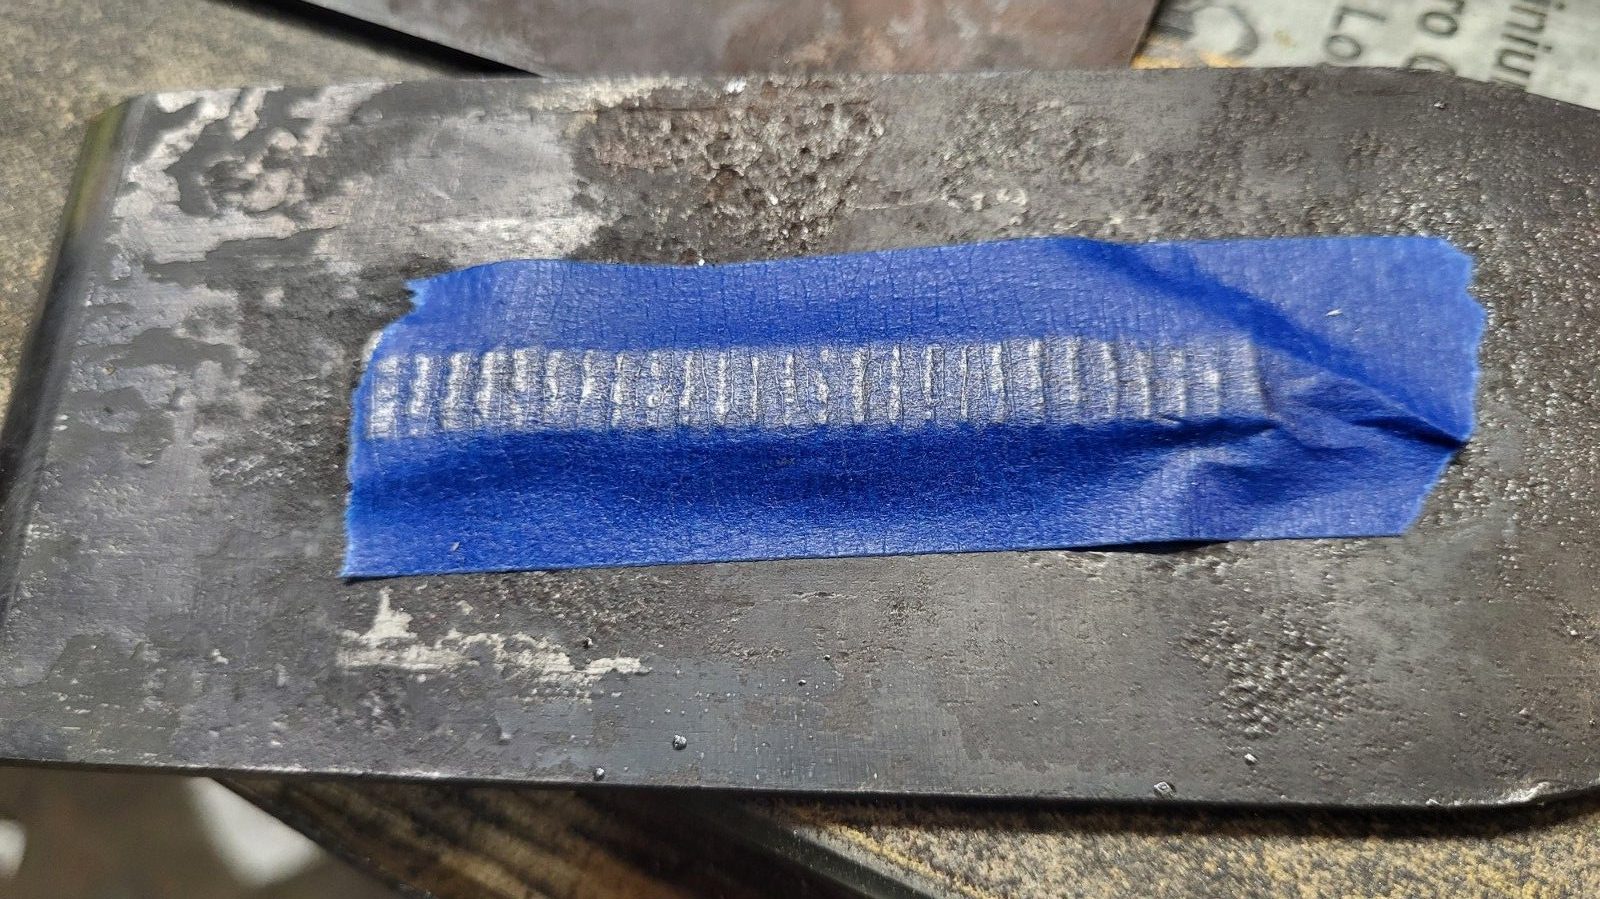
It takes about five minutes to grind both bevels with a coarse belt, and to do it reasonably neatly. If you could do it in 15 seconds per side, it would be hard to do accurately. There is a dip bucket below the idler both to catch swarf and lower the amount of dust in the air. A couple of passes with the contact idler and into the bucket the chisel goes, but it never gets hot enough anywhere that I can’t touch it. This small point of contact on the idler with coarse grit is important – we don’t want to just not exceed 400F, we don’t want to get close to it. Once the bevels are on, heat treat isn’t a reasonable option with a water hardening steel.

Make yourself a routine. Three times up and down the contact wheel, dip in the water, look. I do both sides of the chisel progressively so that I can look down at the bevels, at the sides, and then from the front. There is no jig, so they are even by eye.

Once the bevels are on, I do the same thing with a finer belt, and then into the vise.

The chisel is held by aluminum soft jaws and I work over the ground surfaces with a sanding block with 180 or 220 grit paper until all of the machine marks are gone and any lumpiness. You can adjust lines here a little bit. The perspective makes the bevels look uneven, but they’re not.

This is the actual W1 chisel, of course. I cross file the tang both on the sides and below the bolster and lightly file off anything black on the bolster and then clean it up. The order of all of these things doesn’t matter that much, they just have to get done.

Somewhere on youtube, I have a video of cutting the final bevel on the chisel using a spray bottle and a belt sander. it takes about one or two minutes to fully cut a long shallow cutting bevel after this and do it without heating the edge. you can intermittently grind on a very coarse ceramic belt and dip often and check temperatures with your fingers, but I find a slightly finer belt and a light spray of water just dandy.

You can use a flat belt on glass or a rotary diamond plate or something to finish flattening the back of the chisel – I should mention that I often do that before adding the finished bevels for several reasons, but you’ll figure that out. At the very least, you don’t want to overheat thin edges. I started using 10″ rotary diamond plates to do the final flattening of backs post heat treat because of trouble with a heavy hand on the long sandpaper lap, blistering fingers with heat and at least once, drawing temper by accident. The lap that I use is just a $30 10 inch diamond lap off of aliexpress glued to MDF and fitted to a mandrel for the drill press (low speed, too!! High speed grinding with diamonds is a no no).

After handling the chisel, this is the result:

The handle is oiled at this point, but varnished later. Since this is the first W1 chisel of this type of make, I was hyper to see how it would hold up malleting a couple of cubic inches of maple. It did fine. I think 26c3 is a step better for harder woods, but it’s not available.

Even as I look at this picture, the tang is too long. but that’s a known thing – my grinder wheels are 8×1. I have a narrower wheel coming in the mail to do the early rough grinding and bring the shoulders up closer to the bolster. the tang is plenty heavy, though – it’s just an aesthetic issue for now.

Amber varnish on the handle brings us to a close. Shellac and oil would also be fine, or whatever else you’d prefer. .

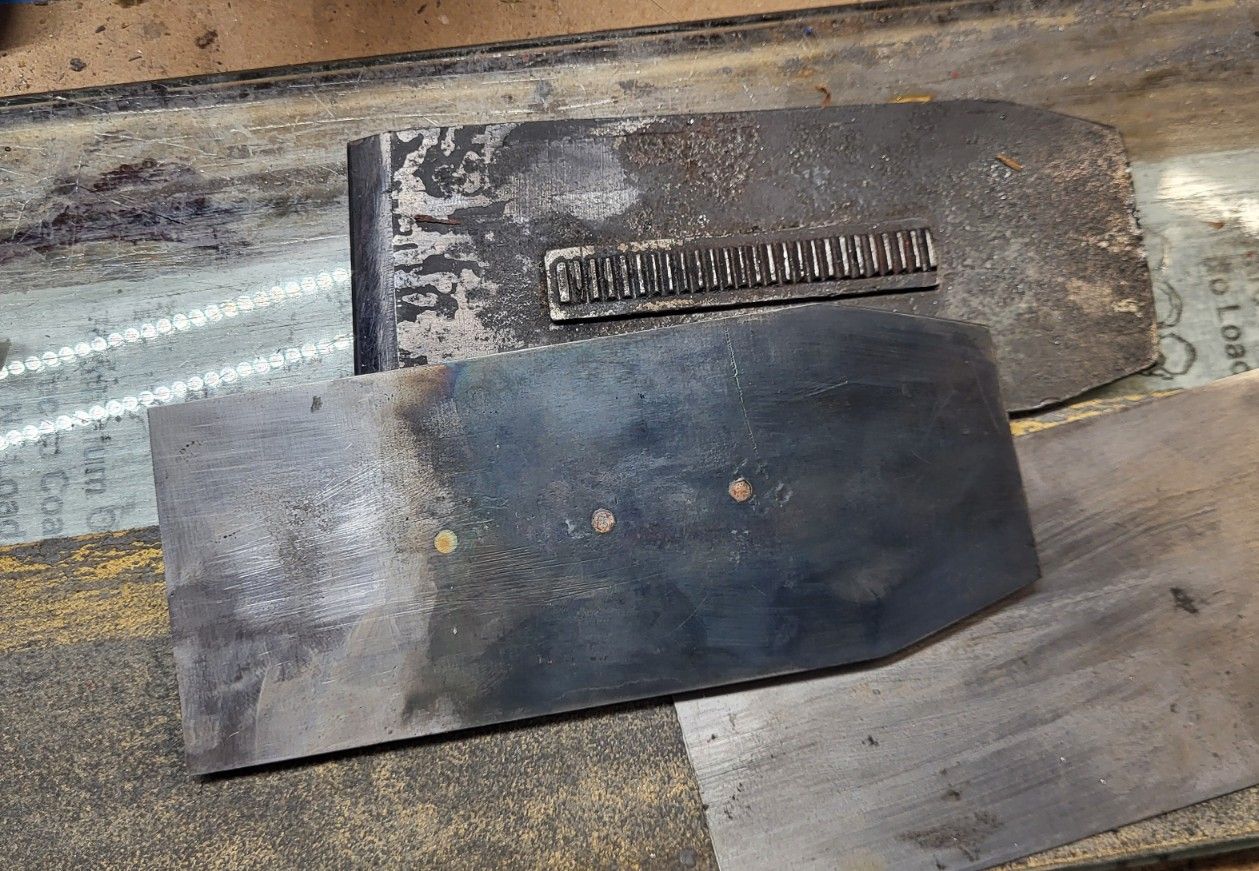
I didn’t discuss how I make the handle. It’s separate from the chisel and it’s just a handle with the socket hole step drilled freehand. How do you get drills that like to wander to make a hole in line with the handle? Freehand. you drill a little and adjust the direction of the drill as you’re going so that the handle spins without much runout. You’re looking at the drill that drills the handle in the background. I’ve got no tolerance for trying to jig something like this up – it’s lazy, time consuming and the result is often worse. We are makers, and can trust our hands and eyes.

Hand Forging a Chisel from Round Bar – #2

After the prior post, I had a chisel that needed a tang. Admittedly, I am not quite to the point where I want to hammer that tang out immediately – a little break is nice. However, I’ve done it and can do it. Which brings something to mind for me in terms of hand work. There is a version of tired or fatigued where you can take a break or set up a rhythm that I refer to in definitions on this site as “the count”. Work happens neatly and is pleasant when you can do that.

Then, there is a level of work where you push yourself and perhaps it only accomplishes a little bit more, but it ruins you for the day, or in the case of my arm and elbow, may lead to problems in the long term.

Hand work doesn’t involve that kind of thing. Hand work involves the former, as it allows you to assess what you’re doing and not be distracted by pain which leads to errors of stupidity or contemplative neglect.

Don’t do it.

I will be comfortably hammering one of these chisels out entirely in one stop soon enough – it may be chisel #12 instead of 6. That happens not just from brute strength, but neural development, efficiency and control. That combined with your brain understanding what’s easier is part of what I like to refer to as craftsman’s magic. You get better at things just by doing them, they get easier, you don’t have to become a strong back weak mind version of yourself.

On to the chisel.

Here’s where it stands after guillotine and hammering

Kind of ugly. I would prefer grain direction fan out from back to front but the tip of this chisel sort of has the grain flowing in like the toe of a shoe. I’ll grind that off. I’m sure this steel still has directional favoring as far as toughness or resistance to breaking goes.

there’s a lot left here and in time I may get close to the finished product above the shoulder, but the penalty in this case is about ten minutes of heavy grinding.

After a total of perhaps 15 minutes of grinding, I’ve arrived to this point.

this probably seems quite a leap, but I can’t really give you much advice on grinding other than making sure the general direction or flow in the roughed piece is the same as the ground part. you just have to grind and file things to learn to do it. Unless you make 100 of the same thing, you are not going to establish a mindless routine. Not that getting to that level would be bad if still doing this by hand, but I would say grind just shy of where you want to go and file or then light grind to finish. That’s what i did here.

There’s nothing special about my mark here, by the way. It’s a piece of old file that I heated, then when it was cool (unhardened), imprinted some reverse letters and put on mock serifs, and then used a checkering file to crate a postage stamp border. you can make your own if you can find the reverse stamps, and then just mutilate something to make those little serifs on the ends and bottoms of letters.

My grinder for this is a combination belt and wheel – it’s a strong jet 8″ grinder. They make at least two. This one draws 11.5 amps and it’s nice to have it on tap. You can grind something this size without ever slowing the machine down.

This area is a mess. there’s another one of the same thing with a larger narrower wheel back right, my OSS, which is typically a light use tool for guitars and obviously gets cleaned off if making them, and on the left is a 4×36 direct drive bench sander.

Dust collection or fanning metal dust is an absolute must. Wood dust is annoying. Metal dust is that squared and probably a much greater long term health threat. I have a bucket below the belt both to dip tools and to catch most of the dust so I can throw it away later in a big rusty brick. The vacuum is hooked to the dust port on this grinder and it doesn’t catch everything, but it catches a lot and throws it into a bin.

The fan sitting on the top of the heap sends all of the remaining fines and smoke out of the garage in a gentle breeze. I don’t grind with the door closed. In winter, whatever is being ground is hot enough that just having it in your hands will keep you warm. I thought that was odd until I read that it’s more effective to warm someone by warming hands than full body warming if the input energy is the same. That was something from a doctor discussing hypothermia, not something from bro science.

After some more filing I’m here, starting to file the bolster:

width doesn’t matter to me on tools, and I like a slight taper in width with the bevel edge being widest. This chisel is probably between 5/8th and 3/4ths. It’s a mule, anyway. If accurate width is important, you can leave yourself a hundredth or two of fatness and belt grind it off after heat treatment. If heat treatment distorts more than that, you’ve got bigger problems. Whatever the case, hitting something within a couple of thousandths in finished width is not difficult.

Filing the bolster is done with chisels that have been made safe edge and also had some of the corner transition to the cutting side ground off. You’ll figure out what’s right if you file a few of these.

Files are consumables, and there’s no need for anything expensive here. The round filing at the shoulder is done with cheap files, the heavier filing is done with mill files and a cheap double cut half round file, and taper saw files and chainsaw files do a good job of cleaning up the rougher work.

Just like grinding, filing the bolsters on is better learned by doing it, and not by memorizing a 14 step process. That’s nonsense you will pretty quickly realize you’re filing flat facets on work like this and that dragging the file backwards is a good idea because it prevents pinning. Again, files are consumables. Don’t trade a dollar of file wear for an hour of wasted time or ugly results.

Something important does come up here:

You can overcut things or file into the tang. You don’t want to do that. When filing the bolster, I file five strokes and look, five more and look. This happens in rhythm. It both keeps fatigue away and also allows to see things that are occurring and adjust without having to think about it. And importantly, it builds in rhythm an assessment that prevents overcutting. This is something worthwhile in all hand work that looks good if it’s done just right and terrible of done a little more than just right.

Heat treatment is next, where we could find out the whole thing has been a waste of time of we get serious warping. This will be the first thing I’ve ever heat treated out of 115crv3, but the heat treat schedule and the composition suggest that warping should be my only problem if there is any. Water hardening steels like a fast quench, though, and the potential for warping is already there. Go too gentle on the quench and the chisel won’t be full hardness- that’s even worse.

The most common thing with chisels for me is vertical movement or bow. For example, the flat back of a chisel ends up not close to that and grinding it out leaves the tip thin.

it’s once in a while, not every other, and the skill to do these water hardening skills right – especially with manual heat treatment by judgement as I’m doing – is why you don’t see alloys like this used by the tool making companies who sponsor manbun parties.

Hand Forging a Chisel from Round Bar – #1

I’m going to post the process that I’m using to make a chisel from round bar. Two things about this – I’m sure it will be refined as I make more chisels, but it is already practical. Second, this is my sixth forged chisel from round bar and only one of the other five is fully finished. But, I’ve made a lot of chisels hammer tapering flat stock and then affixing a separate bolster, so those two pieces of information is useful. You may get to this point in six chisels total (i doubt it) but if it takes longer than that, I’ve paid my dues and enjoyed it rather than running from the failures and hoping to avoid them.

The point of this, as mentioned in yesterday’s post, is both to get to more forging, but more importantly, to have the chisel made from a single piece of steel. I’m making this chisel out of 115crv3, a relatively plain steel (less plain than 1084, more plain than O1, and miles more plain than A2, for example). I’m using this rod type even though it’s kind of hard to find because I want a chisel that is going to land in the 63 or so hardness range with a solid double temper of 400F, and 0.9% or 1% steel can suck wind a little bit in trying to achieve that and not be a bit chippy. This steel is 1.15-1.25% depending on the melt. I expect to lose a little bit of that as decarb from forging, but not too much due to the induction heating instead of sitting in a hot gas or coal forge. Induction allows you to focus more on the part you’re hammering and heat adjacent areas enough to avoid cracks, but not have to heat a whole blank end to end to upper forging temperatures.

So, unlike most of my very wordy posts, this is going to be more pictures and fewer words. The goal here is just for me to share what I’m doing. The goal in the future is to really get the amount of chisel made forging vs. grinding and filing increased. I’m not there yet, but have made huge strides just in six.

Here is the round bar – 20mm 115crv3 steel. I’m not fully decided yet and have ordered three more bars of the stuff with some smaller, but I think I’ve learned enough thus far to know that I don’t actually need anything smaller because drawing it out is easier than expected. That’s not to say it’s easy – it’s a little physically demanding by hand.

115crv3 alloy rod – sold in the US only in one place and apparently intended as stock for material conveying systems.

The first step is to start drawing the stock out from the bar. There’s guess work here until I’ve got more experience – as in what will yield a chisel between 5/8 and 3/4″ from the bolster down, and hopefully a little over 5″.

I leave a lot more at the tang shoulder because this chisel will have a classic taper with top curvature (eat that CNC), and then use a guillotone to start to establish the tang.

That gets me to this.

Blank after adding the roughed tang.

You can already see why I like doing this – the bolster does not have to be upset to greater diameter, the basic rod is there and it is high quality, so I know it won’t be brittle or weak.

This is what the guillotine looks like. It’s apparent from this making and others that I will probably want to make a guillotine anvil/bar set that will taper this more into the shoulder and perhaps leave the tang area a little shorter than the 3/4″ flat default. But those are things to learn. I’ve already ordered more 4140 bar stock to make different anvils – this will become a useful tool for a one-man operation.

The guillotine, resting. You lift the top bit and put the work between the bars and then hammer and turn.

To this point is about 15 minutes of heating and hammering. 1/3rd of 1 and 2/3rds of the other. I’m using a 4 pound hammer and am by no means a physical specimen, but I’ve not handed in my man card yet in exchange for looking in the mirror and always-clean pants and hands.

After establishing the roughed tang, I draw out the steel in about the taper that I want to have less some room for grinding and finishing off the outer layer, as well as the expectation that more will come out of the tang area. Not much needs adjusting near the business end, but the tang area is nice to leave a bit to work with as distortion there is a pain.

The last 1/4 to 1/2 inch of this will come off. it’d be nice to have left a bit more on the end, but we’ll live. The objective here is to get closer to straight top and bottom to avoid distortion in the quench later. I will grind the top curvature in, hoping that the warp in the quench doesn’t make that difficult. The actual tang thickness will be ground down quite a bit, but I will probably mark this one with my stamp so there will be some distortion on the blade below the tang from doing that.

It’s slightly wider at the shoulders than the business end, and grinding will deal with that pretty quickly.

Hand Forging Chisels with Integral Bolsters

I’ve made a fair number of chisels. I don’t know how many exactly, but probably about 150. At the outset, I shrunk bolsters onto a tang by heating a bolster, tapering the tang (fatter as you go down the chisel – opposite of historically) and then allowing the bolster to shrink onto the tang. They could move, but hard handle wood and a stout brass ferrule probably would’ve limited that.

It stuck in my head that I wouldn’t be a “real” chisel maker until those bolsters were not able to move. So, over time, I experimented with forge welding a mild steel bolster onto a high carbon steel chisel. Using the same steel would’ve been better in some ways (easier to weld) and less good in others. But being a bit of a chicken, knowing that the weld could fail if it wasn’t great, I’ve always left those bolsters a bit bigger than what you would see on chisels historically. Bigger meaning thickness – more gripping surface on the tang of the chisel. If the weld fails, it usually does immediately if you strike it, so I put the chisels in a mock handle and hammer the end of the handle hard. It’s usually even easier than that, though. The welds are either good or they aren’t.

Here’s where things depart from “how it was done in the past”. Chisels that were actually made by hand often have butt welds on them, and I’m sure industrially made chisels do, too. As in, even where you see that bolster and assume the tang on an all steel chisel goes through the bolster or the bolster was upset or die forged in place, you might rather find the bolster was upset on the end of a blank and the tang is actually butt welded. With wrought iron, this was common, but for purposes of making chisels, I don’t really care too much for laminated types as I’ve had three failures in chisels that I’ve purchased – all three were related to the back of the lamination. And making something like an all steel paring chisel allows for much more control of the chisel’s spring. you should be able to lean into a bench chisel or paring chisel, and with my parers, you could mallet them if you could stand how high your hands would be.

The departing from how it’s done in the past is I want to make chisels out of a single piece of steel, hand forged and ground. To do this, the idea is to get bar stock big enough to form a bolster – remember, I only want hardenable steel – nothing more formable like iron or mild steel – and then forge and grind the remaining steel and file the bolster into place. I have finished one chisel and hammered blanks out for three more. This requires either square stock or round rod, and in the US, the steels that I like to use are sold mostly as flat bar – so my beloved 26c3 is out when making these types.

One finished chisel and another rough blankhammered and ground from W1 rod

Hammering the steel from rod out to this point is no joke, either. I don’t have a power hammer, and at this point hope not to have one. I hope to improve my ability to hammer to draw these chisels out in 10 minutes instead of the half hour it took to do the first one and near that for the second.

The funny thing about the first chisel above is that the bolster – the first one I’ve done that is integrally part of the steel, actually looks like it’s forge welded on as a separate piece. A clue to how it’s formed is in the second blank.

There are plenty of other questions to answer – the most important being whether one can hand hammer round stock as much as is needed here, not allow too much carbon to escape into the atmosphere, and then in the case of a hand maker, normalize and heat treat by hand and eye and get a good performing chisel that won’t be bettered by anything commercially made. I think the answer to that is that it can be done.

The first chisel is handled now and seems to work fine malleting – but after getting carried away grinding the tang above the shoulders, it could use some aesthetic help with the tang to shoulder length being shorter on the next one.

Forged W1 steel chisel with London plane tree handle

The bolster looks a little wonky – but that’s actually due to an attempt to finish grind the bolster to a fine finish with a high speed wheel. Not a great idea. Filing and hand finishing will be fine for the tail end of the process.

Bevels that you see on the chisel don’t change from any prior process – they’re always ground onto the chisel after the chisel is hardened. If they are there when the tool is quenched, you get a banana unless you’re using A2 or some other steel meant for accountants obsessed with eliminating skilled labor.

It shouldn’t be too hard to visualize what goes on from the blank above that’s not finished to the chisel that is finished. It’s a little bit of back and forth. The rough shape is formed, and the better I get at hammer swinging, the closer it will be to final dimensions vs. these early attempts kind of wasting a lot of time and steel and belts and wheels with grinding.

It would certainly be easier to do this rough work with a power hammer, but it’s true at the same time, I don’t want one and my shop is under the house on a slab shared with the basement – it would be undude for the house, and the family, and cheat me out of experience that I need. Thus far even in 4 chisels, it’s apparent to me that I’ll never form these smooth and easy the way Williamsburg can do with two guys and buttery soft wrought iron, but 10 or 15 minutes could be enough to get the initial blank. ready to start grinding. And in case someone thinks 10 or 15 minutes should be what it takes to make a chisel, it’s more like two hours for a hobbyist if you’re really going to do all of this without taking shortcuts or investing in a lot of equipment.

I’ll spare everyone why I think excess carbon is good in a chisel. With W1, after forging, the carbon content is probably down to 0.9% or so, and I’d like more than 1. And fortunately after starting this process making, I’ve found some European DIN 1.2210 steel sold here in the US in round rod (about 1.2% carbon) that may be a suitable substitute for 26c3.

The anvil that I’m using is 125 pounds, though. I can tell moving metal will be a 4 pound hammer or more venture, and it’s a bit much for the anvil. Which creates another problem – where does one find a reasonably priced local 250 pound anvil that’s in good shape? That’s an unknown – what is known is that something like a JHM ductile iron anvil (hardened, though) is a little over 2 grand after paying freight, and a ridgid forged steel anvil is closer to $3k with taxes and freight. Doable, but in principle, something I don’t want to give in to yet.