1095 Steel – Finally – Good to Master, but No Ultimate Use

1095 is a steel that most people think of when they mention modern handsaws or card scrapers. Or perhaps older knives and some current kabar knives. Except none of those knives are actually 1095. They’re a modified alloy with chromium and vanadium.

But, you can’t really get that publicly.

I had a relatively lengthy post – OK..all of them are – about solving 1084. Solving 1084 had to do with just how fast grain grows in 1084 if it’s overheated a little. Other steels seem to like a fast overheat just before quench, and 1095 is one that doesn’t suffer too much. but….

What’s wrong with 1095?

You’ll probably never see 1095 in commercial tools other than spring steel. It’s really cheap, and it tends to have some of the manganese (hardenability) replaced by chromium, presumably because just adding carbon to 1084 results in a really brittle steel.

Chromium takes up some of the slack for missing manganese in terms of hardenability, and 1095 is what you would call a high hardness steel with poor hardenability. The former refers to hardness potential. The latter refers to have fast steel has to cool to get there. 1095 needs a fast quench. Parks 50 is the only thing I’ve found that gets it right. You can screw around with water/brine and intermittent quenching or whatever else, but Parks 50 and a very thorough quench will probably harden better than anything you can do with water that doesn’t end in cracking.

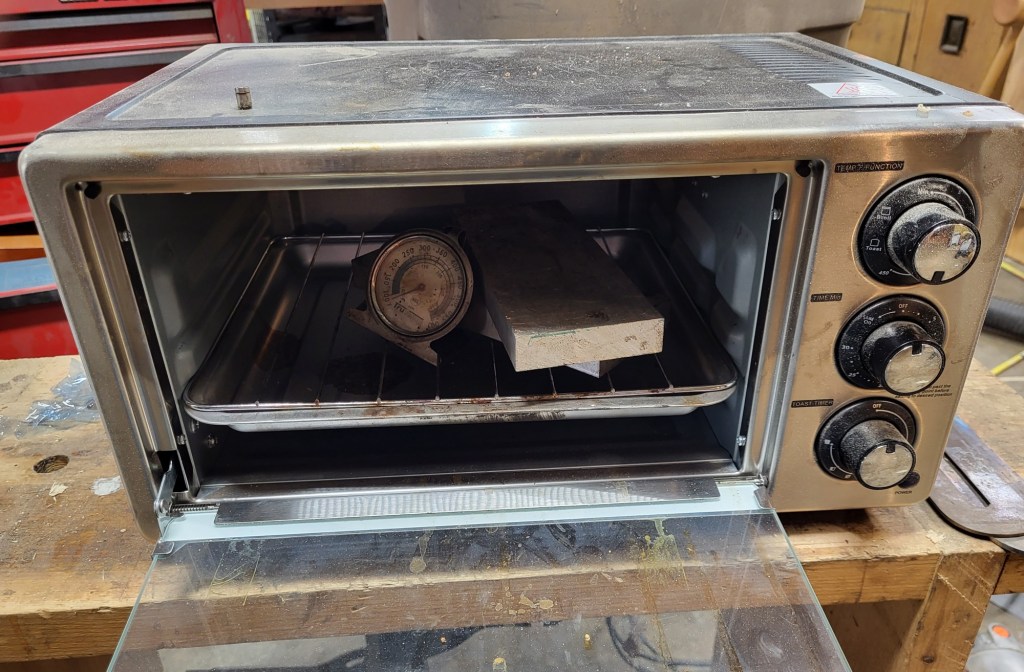
I have since found “solving” 1095 that it’s tolerant of a little temperature overshot, which probably has to do with having chromium in the alloy. But less tolerant than 26c3. So if you’re going to quench it, heat it past nonmagnetic a little but not too much and not for too long, then quench it as fast as you can and get it to the lowest temperature you can at the end of the quench as fast as possible. For me, this is parks 50 for a couple of seconds and then immediately to cold water after the high heat has been removed, and then into the freezer. This sounds stupid, but I leave a band of frost on the freezer and within about 30 seconds from hot like to stick a plane iron or chisel to the frost in the freezer and then I leave it in the freezer while the tempering toaster oven and the “metal sandwich” that stabilizes temperatures heats.

But….that’s not what’s wrong with it. What’s wrong is two things: 1) there’s nothing really in 1095 that will prevent a soak from getting and leaving a lot of carbon in solution – far more than the eutectic limit. 2) I don’t think the quality of 1095 that’s available now is that great, but some is good. And I’ve been warned by several people that the quality is iffy.

All three sources that I’ve used for bar stock have been different. It’s nice to find someone who lists the alloy, and then purchase whichever source has the highest chromium level. And hope that it’s quality – if it’s not, move on.

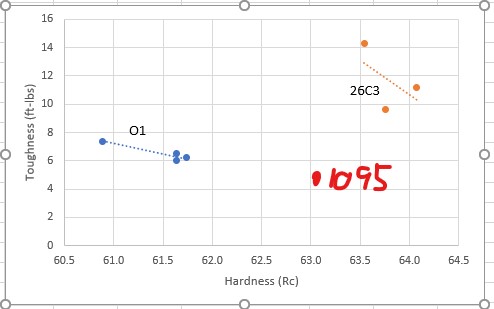
What about #1, though? if steel has too much carbon in the lattice, and not in iron or other carbides, the form of martensite is different and it can be filled with small cracks. If you get 1095 just right, it’ll be about as tough as O1. if you don’t, it might be half as tough, and in my experience, that’s enough of a problem to have a chippy plane iron.

I still like it better than 1084 when it’s done right as far as plane irons go. Why? it feels sharper. I can’t think of a real reason to use either 1095 or 1084 for plane irons at this point, though. 80Crv2 makes a better plane iron than 1084 and 1095. But it’s nice to experiment, and if you can really nail 1084 and make it work at high hardness, and the same with 1095, it will improve your accuracy and make heat treatment of other steels better.

Three Tries – Three Different Steels

First, I sent samples to Larrin Thomas without thinking much. I just applied the same heat treatment routine that I would use for O1 and 26c3. I think this causes a little bit of grain growth. Keeping the thermal cycles tighter (right at the point nonmagnetic starts to occur and then let the steel cool) will keep the grain from growing and keeping the temperature overshot lower will keep grain small but beyond just the looks, the result is slightly less hard. My 400F samples were 63.1 hardness and something like 4.3 ft lbs toughness. You’d expect something more like 61/62 and 8-10. Had i tempered them further, I have no clue – maybe they’d have been OK.

After solving 1084, I did the same with 1095, snapping samples and both observing grain size and seeing how easily they broke untempered. Steel should break easily when hit with a hammer untempered, but there are alloys that retain austenite at a high % that would prove that wrong. None of the plan steels that I’ve tried will resist breaking though. Breaking tempered steel would be more accurate in terms of actual usable toughness, but high toughness steels can become really hard to break so I don’t do it – the grain is the focus.

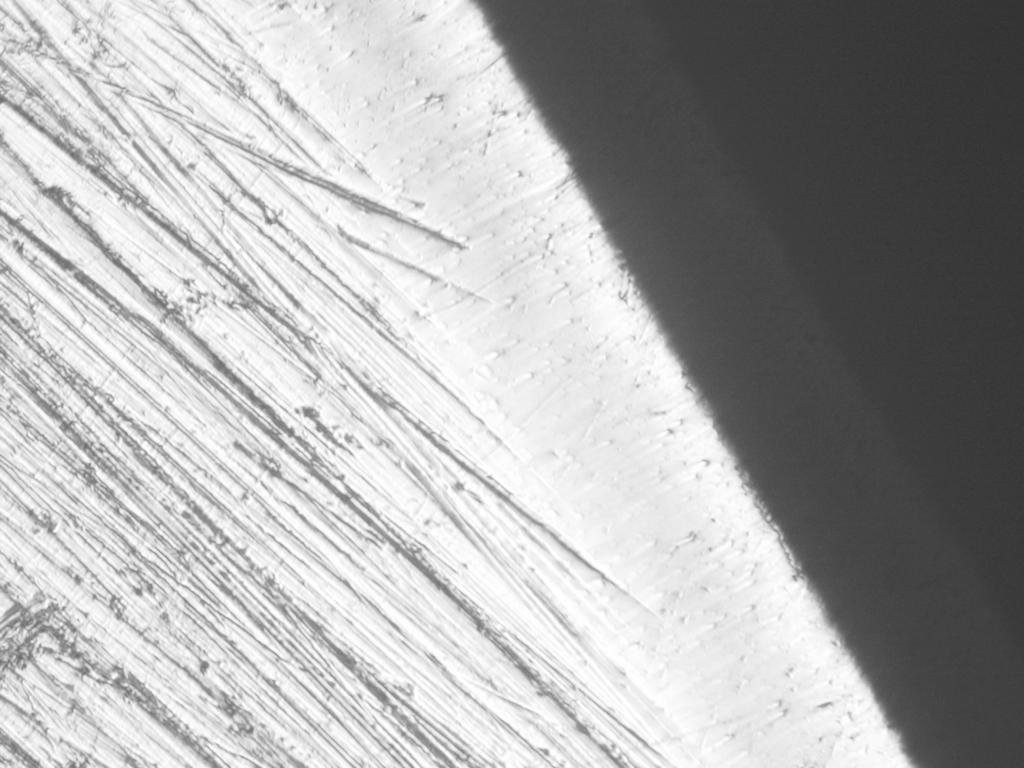
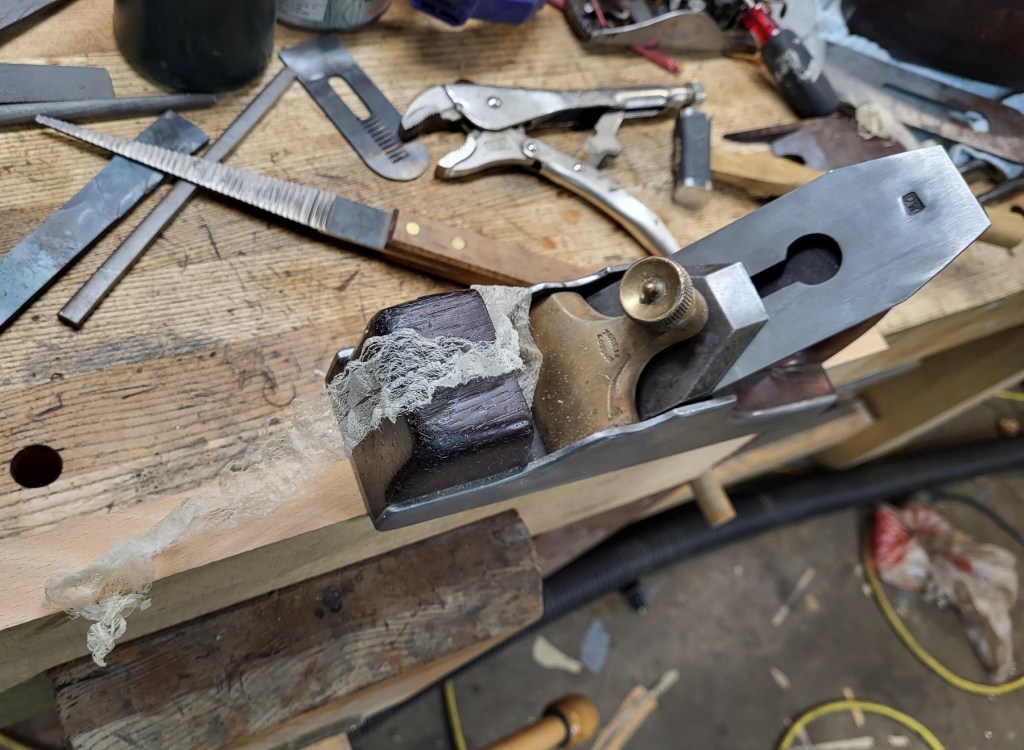
The first 1095 that I bought was from New Jersey Steel Baron. Since I didn’t have Parks 50 at the time, I was kind of unimpressed by it. It was also very cheap, so I didn’t care that much and put it aside. fast forward to now and I like the version that New Jersey Steel Baron sells. I try to avoid anything that would resemble a soak to maximize the amount of carbon in carbides. I do this with a pre-quench and then a sort-of anneal in vermiculte, and then do as much as possible to not go past nonmagnetic for thermal cycles before quenching.

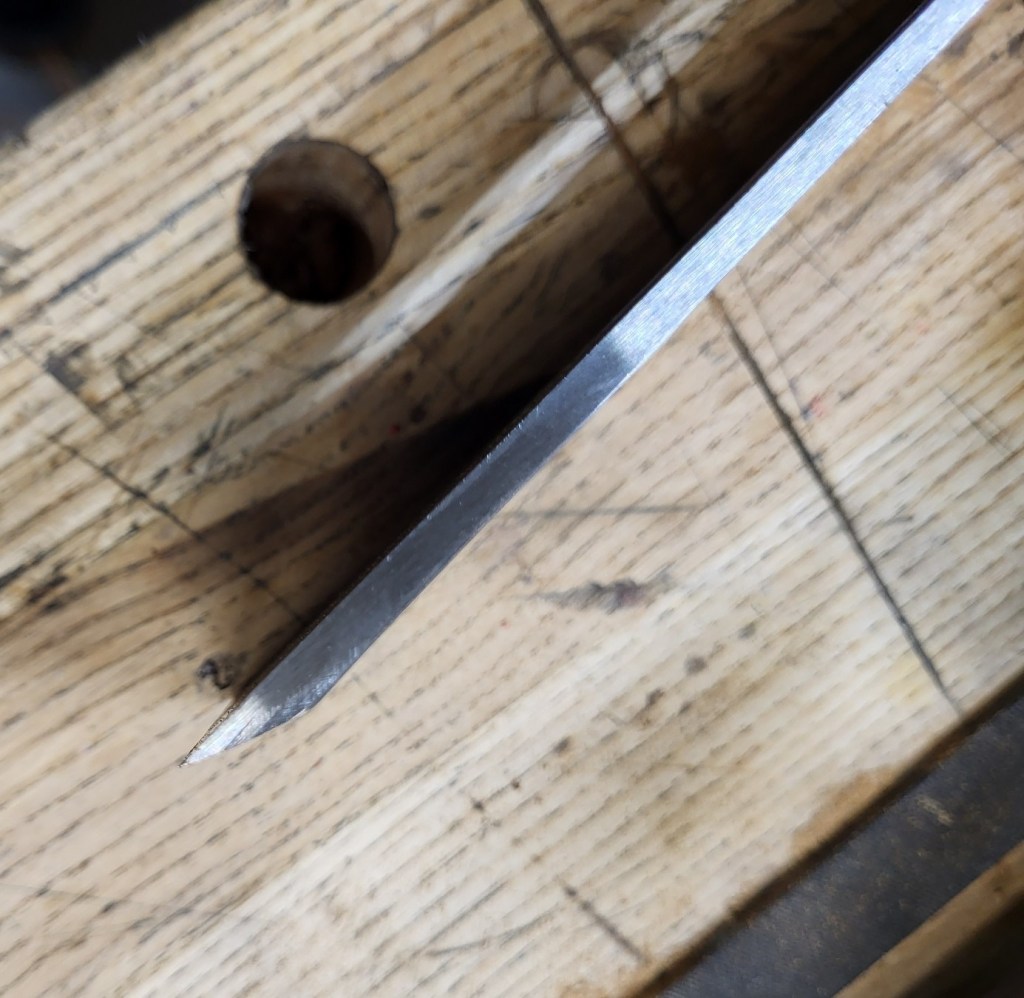
Still, the result isn’t exactly a cornucopia of carbides and I haven’t found the free lunch. But the early samples that I made showed almost no carbide and I’ve gotten to this point. The iron may be a point softer, but the edge holds up. And the straightness of the edge is wonderful. This uniformity seems to be important along with an edge that doesn’t look very rounded right at the tip (AEB-L, for example, wears longer, but the edge shows a more rounded profile – I don’t know why this is).

NJSB 1095 tempered at 375F – a very sweet plane iron.

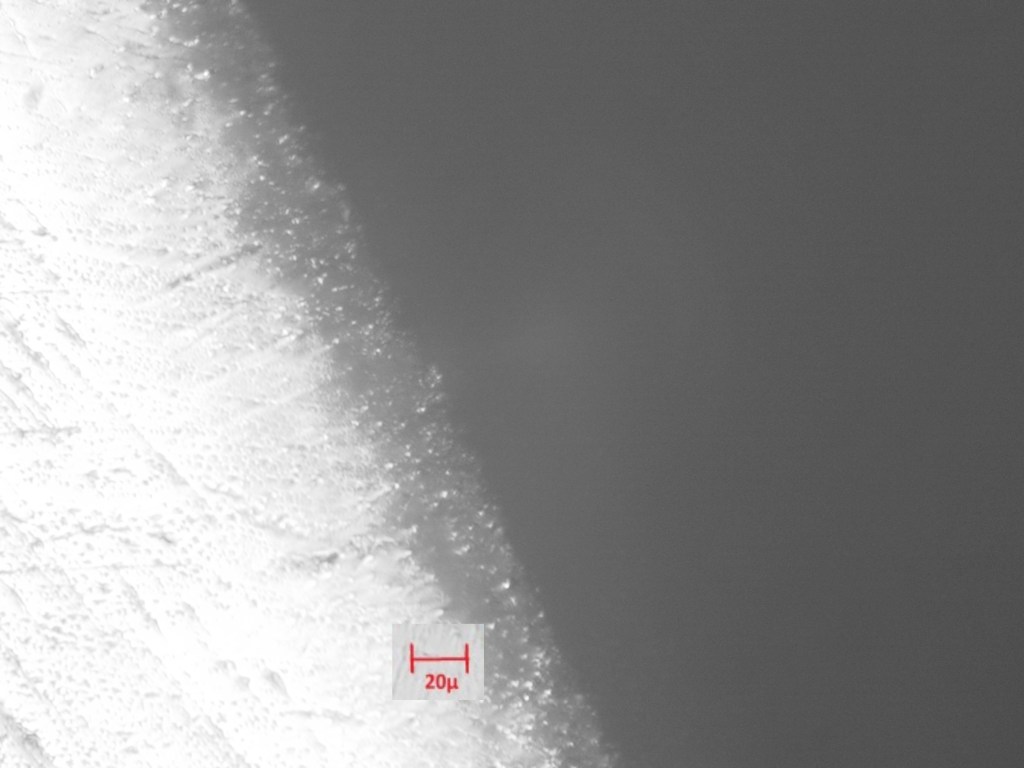
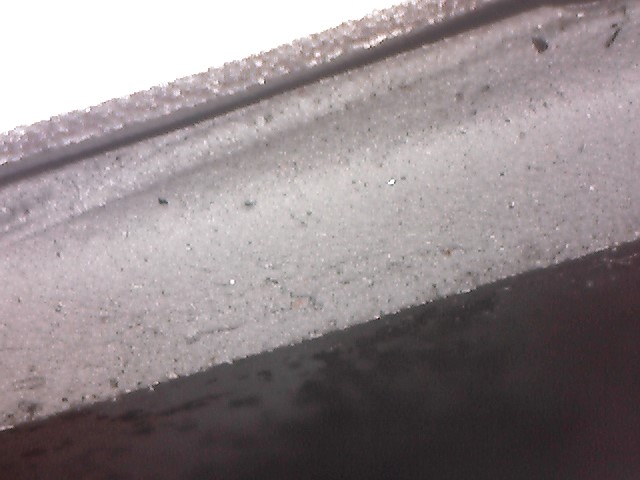
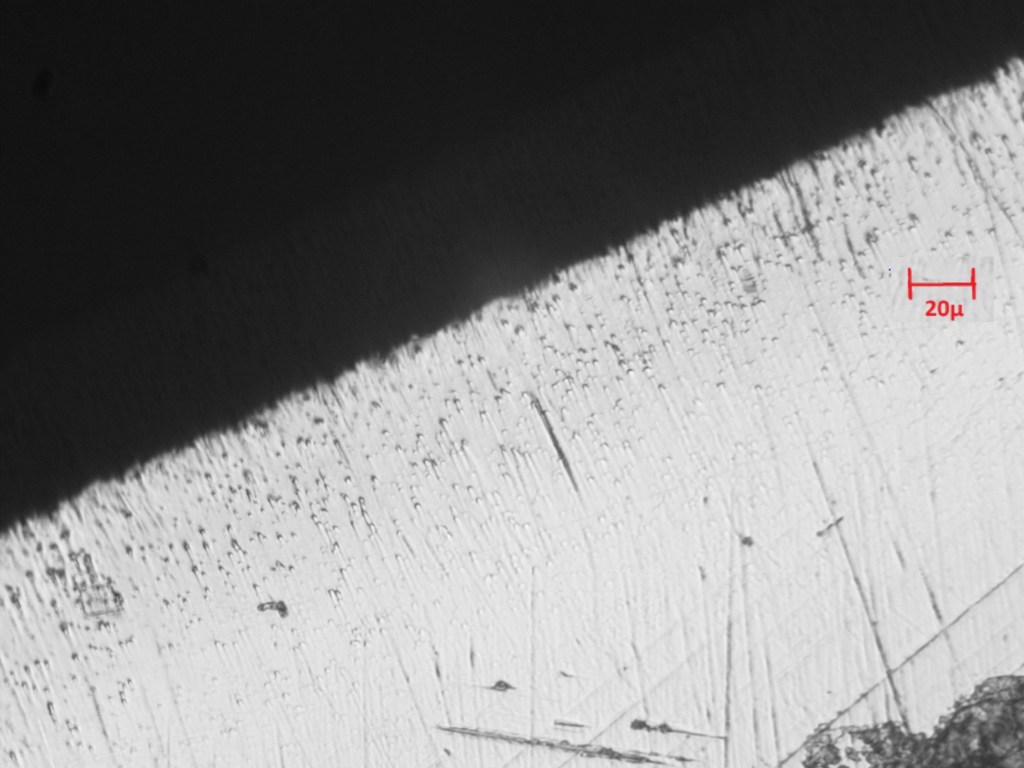
The second 1095 that I bought was from Alpha Knife Supply, which is where I get 26c3 (love it for chisels, obviously). The listing doesn’t reveal the mill but mentions that if you want great quality, finding bohler or ordering a melt from bohler is safe – or something to that effect. So, it’s probably not bohler, or the listing would say. This 1095 seems to have some oddness in it – not terminal by any means, but the shiny spots in it look like something that wasn’t fully dissolved, and I didn’t normalize the steel or do anything unusual, it’s just bar stock, so I think this is how it arrived. This bright spot wears just a little slower and leaves a stripe on wood that can be seen but not felt.

Alpha Knife Steel 1095 – nice fine carbides, but what is the bright area? It’s about 4 thousandths long. Is it undissolved Chromium? Notice that the edge isn’t as neat – reminds me of 52100, and then it’s very neat on either side. The effect on wood (there are more spots like this in the edge) is little stripes that aren’t as bright looking.

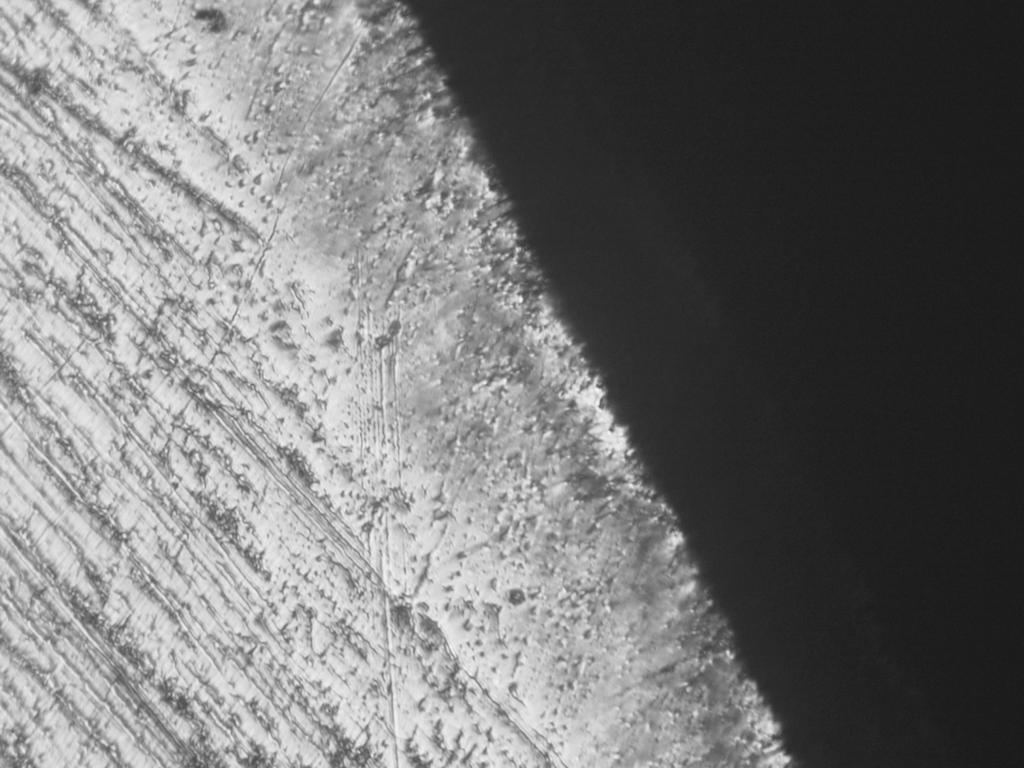
The AKS sample here is actually the first one I got right, and I puzzled about the stripes in use until getting the blade under the microscope. If the iron isn’t very good, there will be defects, anyway, so you don’t know right away if you did something wrong or if it’s the steel. It’s *rarely* something in the steel.

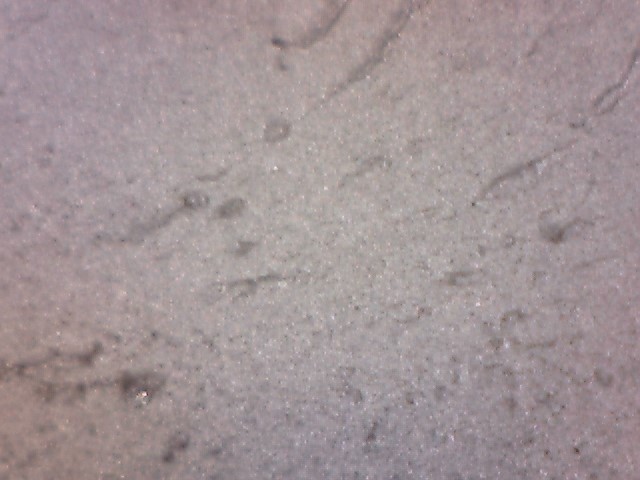
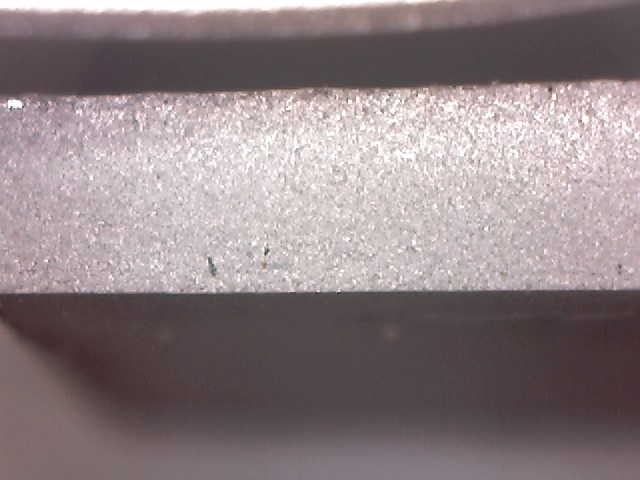
In an effort to find 1095 with more chromium, or more like an an observation while browsing for other steels, I found that USA knife maker had a listing with chromium near the upper end of the spec range and also had added nickel. The results of that are also good, just as the NJSB version. There’s no guarantee that some of the vendors aren’t selling wholesale to each other or selling from the same wholesale source, so the first and third pictures could be the same stuff just from different sellers.

usa knifemaker’s 1095 steel

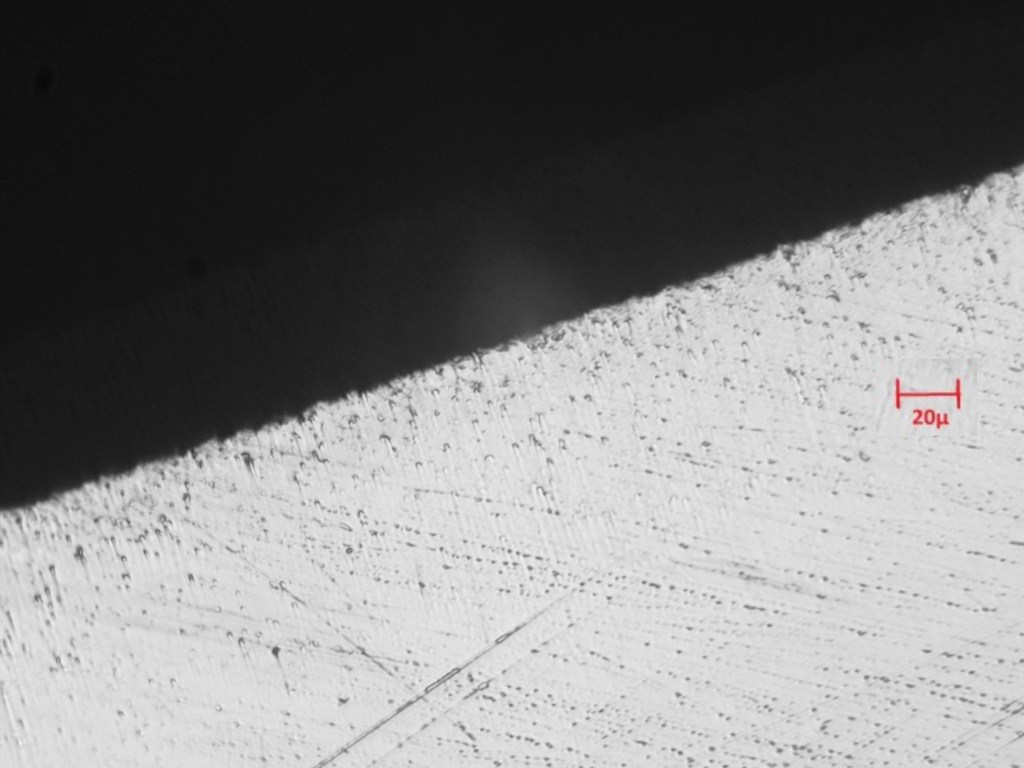
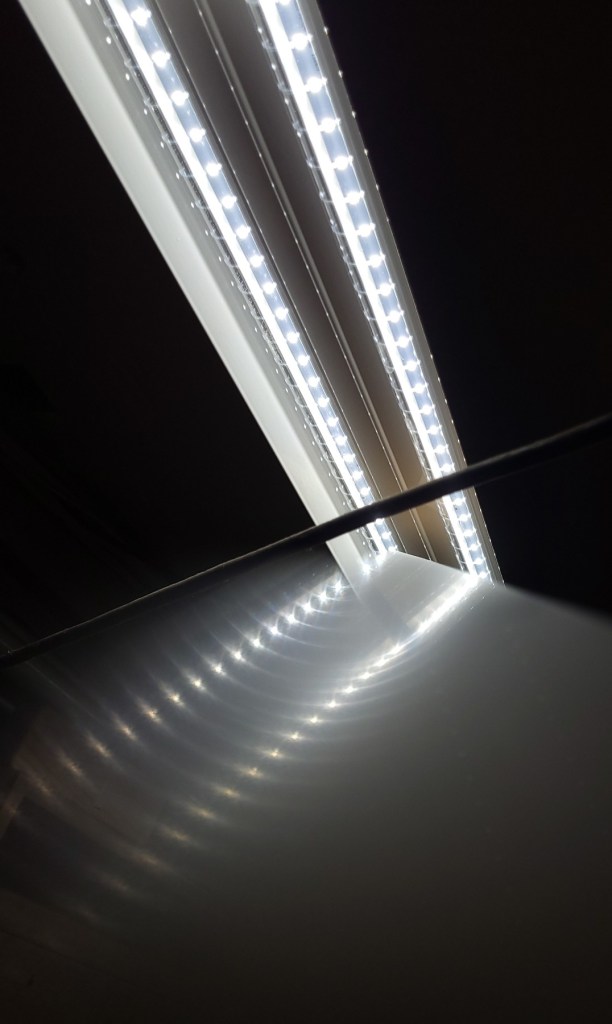
I don’t see much there, but will take another shot at wearing one of these irons. it seems the key to getting a really robust view of the carbides has to do with setting the cap iron closer and wearing more deeply in to the back of the iron.

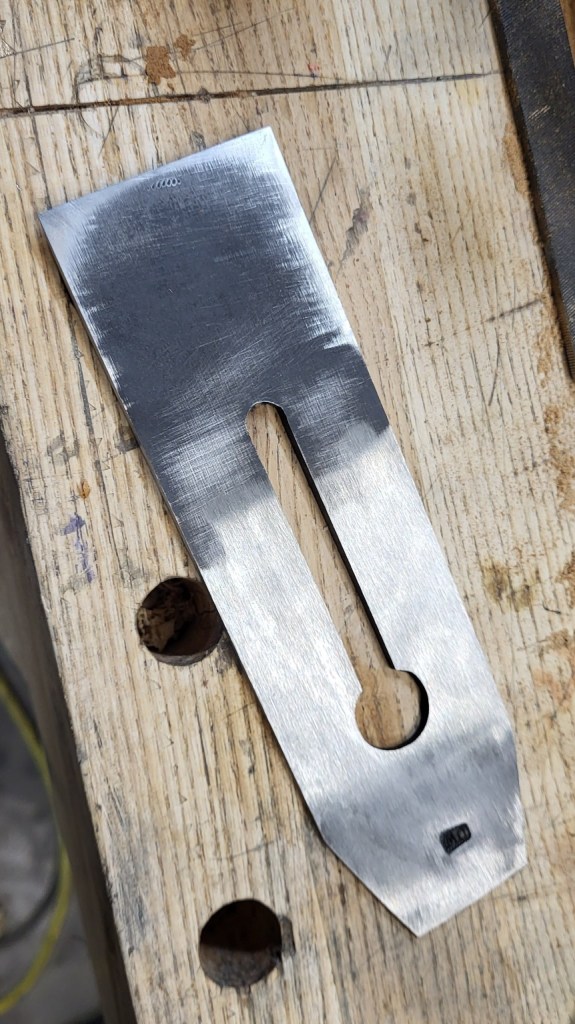
nonetheless, this iron seems to work well.

I haven’t done any roughing of wood lately so I don’t know if toughness will be an issue. These irons subjectively wear a little less long than 80CrV2 or O1, but not too much less. the edge quality is nice and they feel more crisp than 1084.

But I also can’t think of a practical advantage to continue to make or use them. It’s just nice to get them right.

1095, like 1084, is cheap. if it costs more than $7 of bar stock to make an iron, I’d be surprised.

I sure would love to get a hold of the Sharon 50-100B (I only have the version without vanadium) or Carbon V or whatever Kabar is currently using to make knives. I get the sense that the extra chromium and the vanadium do the same favors they do in 80CrV2 and the toughness would be greatly improved enough to maybe be worth using that steel in chisels as well as plane irons.

AEB-L Stainless – Not What I Expected

I heat treat in a propane forge. That generally means I can’t do what’s important for stainless steels, which is a high temperature soak. I can do the other part of the need for chromium stainless steels, which is get a small area of steel really hot. But along with breaking the rules, this is usually highly controlled for temperature and duration, and temperatures that you really can’t get away with in the open atmosphere.

Instead of doing that, I preheat steel quickly to above critical, let it cool just back to where critical would be and then ramp up temperature by eye to as hot as I can as quickly as I can and quench. I’m aiming for almost yellow and not much exposure time to open air and then quench and get to cold as fast as possible. Stainless and high chromium steels often will cool with plates just fine, but I’m just tinfoil hatting that I will come up a little short and I want the quench to be fast.

Is this a long term plan? No. If a stainless shows potential, then at some point, I will either get a furnace or I will send a batch off and give half of them away at cost. But I’m not there yet.

V11 is Somewhat Stainless

A few years ago, two posters on woodworking forums talked about an XRF of V11 showing that it is CTS-XHP. I don’t know if it is exactly, but the composition matched CTS-XHP spec. XHP is a relatively high carbon steel with enough chromium to be referred to as stainless – very high if you’re used to numbers like 0.8 or 1%. I don’t know enough about steel chemistry except to speculate that a lot of the chromium gets tied up with carbon when the carbon content is high and stainlessness won’t just be discernible by percent of chromium because chromium has to remain in the lattice and it even has to remain in the right place in the grains in the lattice. Put differently, a very very low carbon steel may be very stainless with 13% chromium, but XHP is only borderline stainless if you’re really going to neglect a knife.

Why did I bring up V11? I learned that the high temperature soak for stainless steels that frees elements to go back into the steel’s lattice/solution before quenching isn’t just important for dissolving chromium carbides. If you reason that you don’t need to do that and you can just heat it and quench it at a lower temperature, it will lack hardness. As in, you can’t just reason that you’ll work with what’s already in solution quickly and get hardness – it comes up short.

That comes to play here. I’d suspect that if you’re willing to make XHP really hot really quickly and quench it and then run it to the freezer very quickly after finishing the tail end of the quench in water, you can get 60+ hardness after temper. That is, you can get close to the furnace schedule. In doing this, you’re relying on the bars from Carpenter Steel being good quality to start. It seems to be fine.

Here’s another why – XHP has a lot of carbides in it, and it’s a little lacking in toughness in chisels. There’s a little something else going on that I don’t know – it could be volume of carbides (cracks start in carbides) or it could be lack of the same directional property that some other steels have. the following link shows a micrograph of XHP, the white “balls” are carbides, you can read the entire page which is half history lesson at knife steel nerds.

AEB-L, however, is a completely different animal.

What is it?

First start with the micrograph (you can click this)

Notice how fine it is? It’s much lower in carbon. XHP is about 1.6% carbon and AEB-L is about 0.67% carbon. A drastic difference. I’ve quick heated it in the past without knowing just how important the high temperature is and it makes a kind of soft iron that needs to have the edge buffed to not fold. Then it planes a long time, but that’s no good.

AEB-L is also cheap – it’s a steel used to make razor blades. Knife steel nerds also has a nice write up on where it’s used. Just follow the link above and search for AEB-L.

An interesting side fact here is the idea that PM steels are the finest grain-wise ignores reality. PM allows steel compositions that would be too coarse if it cooled from a large ingot, but it doesn’t negate the fact that there are other compositions that are very fine without needing a powder process. This results in AEB-L being finer than any powder metal stainless that I’ve seen.

What’s the Draw of Fine Grain?

Somewhere this seemed to imply “it’ll be like carbon steel but stainless”. That’s kind of true, maybe? If you read about AEB-L, it can be done in furnace and finished with a cryo dip after the quench to get very high hardness and still have good toughness. 64, in fact. it should hold up at high hardness better than XHP/V11, be finer grained, and I surmised maybe a little easier to sharpen.

So, yesterday I gave heat treatment another try concentrating heat just on the last inch of the plane iron, quick quench, finish in the freezer. I don’t know what the hardness is, but it must be close to 60 as it shows no ills. It also appears from pictures following that there’s no evidence of suffering anything from not being soaked – for woodworking purposes at least. it would be interesting to see what it’s like at high hardness, but I don’t have the means to get the steel any harder.

Suddenly vs. prior samples, this sample has strong hardness and it’s not quick to hone. Prior versions of this had planing test edge life of 1.6 or 1.65 times more than O1 steel. I’d need to use this iron planing for about 2500 feet in edges just to test that once, and I don’t really have the desire right now.

The reality is that wear resistance makes it slower to sharpen and it is. It also makes it grind kind of hot, which isn’t what we want. It’s not a high temperature tolerant steel and the temper is 350F in the sample here. Grinding it to an accidental brown edge will have undesired effect.

This is part of the conundrum with steels like XHP and now confirmed with AEB-L, too. When you grind these steels, which you’ll be doing a fair amount if you use tools much, the steel wears more slowly and it grinds less cool. XHP takes about twice as long to grind even without considering that and AEB-L speculatively took me twice as long to establish a bevel on a belt grinder. Just estimating based on wear life in wood, AEB-L would grind only about 60% as fast, but that’s compounded further by having to stop more to dip.

Overall, finally getting a hard sample and that’s a little bit of a road block to day to day use (it’s annoying). But it’s worth having a look at how it wears.

This image is the wear after 540 feet. It wears slowly and the wear area looks so odd because of the lack of any visible carbides even at 300x optical . I usually get wear pictures on carbon steels to see carbides at only about 200 feet of planing on cherry. If this iron felt like carbon steel in wood – like in a free lunch way – longer wearing, feels the same – I’d consider planing a volume of wood.

But, it doesn’t. I don’t know why for sure, but I’m starting to get the sense that some carbide volume right at the edge makes for an edge that wears more thinly somehow.

So, this iron would last a long time, but it doesn’t have the feel that carbon steel does, and strangely, XHP/V11 with its high carbide volume has a really keen and sharp feel. Its achilles is that in less than perfect wood, it takes nicks like anything else, or maybe even a little easier, and grinding and honing them out is twice the work.

So, I think I’m back to using plain steels. Too bad. if I ever get a furnace and a dewar of liquid nitrogen, I’ll consider trying to make a very high hardness sample and see if the edge is different.

So…..razor blades? I don’t think AEB-L is ever used in a plain razor blade. I think it’s used as the steel stamping, then it’s honed, and then the edge is coated with something hard. You can see ads claiming razors are platinum coated or whatever – I have no idea what they are actually coated with, but I have honed the coating off of them before when they are dead to see if they can be resharpened, and what’s left is just steel that’s too soft to work at an acute edge.

Steels that d0 well in straight razors rather do have a relatively large volume of carbides compared to AEB-L, but they’re iron carbides and not chromium carbides.

Free lunch yet again not found.

But I have confirmed previously that this steel, which is slower to sharpen but not difficult like steels with a lot of vanadium, will wear much longer than A2 steel and it’s creeping up on XHP – and it’s cheap. About $10 per plane iron in steel costs.

I have no idea if the qualities of picking up shavings more easily during a wear cycle are important to the average user. They should be for anyone who may be sometimes planing several hundred board feet from rough each year as how easily the shaving is picked up is far more important in terms of effort than how many feet are planed carefully in a test. This same factor is why I don’t care for 52100 – it will technically wear longer, but it requires more effort from the person using the plane to keep it in the cut as it dulls and that just isn’t very practical.

For Reference

Here’s how much wear I encountered in the O1 test on the same board after 540 feet. You can see that a great deal of wear has occurred rounding a larger section of the edge and forcing me to increase the light level significantly.

80CrV2 Steel – Way Better than Expected, and Probably Better than O1

Half the price of O1 and at least as good in plane irons. I put off even considering this alloy for chisels because the data sheet shows it being around 60 hardness at a 400F temper. I find favor with most 1% and higher steels around 400F, but admit that I don’t have a great reason to believe that it’s the best temperature for everything.

The other thing against 80CrV2 is that it’s a not an expensive steel but it’s not as cheap as it could be with some retailers, and the prices is around what you’d expect for O1. While making an order a couple of weeks ago, I found that NJ Steel Baron doesn’t charge too much more than the very lowest cost HC steels like 1084 and 1095.

So, what is it? I’ve never heard of it as a woodworker, but saw someone else attribute a statement to Larrin Thomas that it is used in woodworking tools. If you’re purchasing LN, LV or other boutique tools, it’s probably not going to be there. Maybe it’s used in carving tools and plane irons in europe, or maybe it’s used in what are lower class chisels for woodworking, but the top of the range hardware store chisels in the $15-$20 each. I really don’t know.

From 1084 and 1095, the Troubles

1084 and 1095 gave me trouble until I snapped samples to see what color and time they will show before grain growth is a problem. 1095 isn’t too bad, but 1084 is a different story. Shoot a little too high before the quench and grain growth doubles. Do that while thermal cycling and the point of cycling gets lost, plus the quench. You have to be attendant with it, and give it only a few seconds if chasing the quench temperature up and not nearly as high as something like 26c3 will tolerate. Put differently, the routine that I used to better any published results for 26c3 results in *very* poor 1084.

I’d hoped to find 1095-ish with chromium and vanadium. The former to add some toughness without sacrificing hardenability, and the latter to pin grain size, allow for the overshot that I like to ensure hardness. It’s not to be, and 52100 just isn’t very good for woodworking.

1084 also will not ever wear as long as O1, but it does OK. that isn’t a problem with chisels, and the toughness of 1084 was good enough once I solved not growing grain that it will make a fine plane iron tempered a little lower. Translation – it can be as hard as O1 and 1095 will tolerate planing.

Seeing the better than expected corrected version of 1084, I made a couple of plane irons out of 80crV2 and used an offcut that was waste off of the same sheet and snapped samples. The grain is as fine as anything I’ve ever seen that attains high hardness, and the hardness was a little better than I expected starting with a 375F double temper. I suspect it’s around 61/62, about the same as O1 tempered at 400F.

I’m going to avoid going into a broad discussion about how much carbon is in solution (not in carbides) in each of the steels, but for brevity, some steels suffer from too much of it remaining in the lattice and not in carbides. The resulting toughness vs. pictures of the snapped grain or micrographs can seemingly be 1/3 of expected. This isn’t always bad – o1 is far less tough than 52100, but it’s nicer to use.

What is it?

Despite the dreaded “chrome vanadium” name, it is not some soft shiny steel that makes a terrible chisel. That label given to the variety is ill attributed because someone knew the combination of favorable properties – limiting grain growth and toughness, but paired them with a low carbon amount – often 0.5 or 0.6% carbon. This isn’t really much good for woodworking, and the 0.6% variety is listed a lot in not-quite-hard-enough-chisels from China. When I reharden them, they are only a little better – there’s just not much potential.

80CrV2 is 0.8 or 0.85% carbon, manganese of about 0.4% (just over half of 1084), Chromium taking place of some of the manganese (0.5%) and a small amount of vanadium (0.2%). It’s a water hardening steel, so we’re not likely to see any of the boutique US makers making it. The chromium and vanadium are enough to make it more friendly to heat treat than the plainest of steels, but they won’t make it feel gummy or slick like A2, etc.

In woodworking, you will often see O1 labeled as plain carbon steel, but if you work with older tools or 1095 or 26c3 or whatever else of that sort, you’ll notice the feel of the alloying in O1. it’s not bad, but you can feel it. it’s more obvious in 52100 due to the chromium content (1.5%), and, of course, once you get used to plain steels, A2 feels terrible. V11 also gets its slickness for a huge dose of chromium.

I can’t well compare grain size from snapped samples with 80CrV2 to anything else I have because I had to double the magnification on my hand scope to 100x optical to see any difference in samples just heated from bar and quenched, then thermal cycled and then the same as the latter but with an intentional simulated careless overheat.

Here’s the snapped sample from the quick heat at 100x:

Next, the same magnification but with three thermal cycles.

that’s outstanding. Even looking at this under a loupe you can’t see much.

Here’s the kicker – doing the same thing as above but allowing the sample to overshoot in 15 seconds to a very bright orange resulted in….wait for it.

Nothing. This is not a long duration forge heat, so it’s not license to just disregard what temperature does to steel. This would be more like what a beginner may unintentionally do. It may look at first sight like the second picture shows larger grain than the third, but I think that the actual sample had a little more toughness breaking and if you look at the individual grains, you’ll find them similar in size – especially given the limitations of snapped samples being photographed with a microscope that I got for $12.

1084 steel is constantly recommended to beginners. I think they have no chance if they’re using a forge. This is what beginners should be starting with. But the forgiveness allows more advanced forge heat treaters to get otherworldly consistent results without being as taxing as 1084.

There is toughness in reserve with this steel, so it would probably hold up in a plane iron tempered hard (like 63/64). Hard tempered irons are OK, I guess, but I generally like something around a hardness that the washita likes – somewhere around 62. More hardness means slower sharpening and the sharpening effort seems to increase faster than any footage gained planing.

So, How Long Does it Wear?

About the same as O1 – which is nice, because 1095 and 1084 don’t last that long, and neither does an old Ward iron or an iron made of 26c3.

To test this, I planed a single board alternating with an O1 iron that I already have and one of the new 80Crv2 irons, and I took pictures of the carbides about 2/3rds of the way through. I want to see how long each planes, but discern difference in how the edges feel because there’s a fair chance I may start using this stuff in my own plane irons.

The bottom line is at similar hardness, the edge life was almost identical. On the cherry board with a chosen shaving thickness, I planed 783 feet with 80CrV2 and 778 with O1. When clearance runs out, it lets you know ahead of time, but when it tips over toward not allow the plane to pick up a shaving, it seems to happen all at once. the margin of error in this test is probably 25 feet of planing, so figure these are about the same. that’s all I need to know.

Pictures of the carbides – O1 first, and since there was a lot of heavy edge wear, I had to turn up the light on the microscope. What I’m looking for is a nice even edge, and even carbides.

In the 52100 post, I showed O1 with much less wear. This is Bohler O1 and I think the others was starrett. But the real difference is far more war, exposing more shadowing with carbides in the worn edge. That is, some part of them is pointed directly back at the lens wheras the edge is rounded and appears dark because it reflects light elsewhere. there are a few odd carbides here or there, but these are seemingly 2 or 3 microns. Maybe they’re tungsten.

Now, the 80CrV2:

These are extremely high magnification (300x optical – the height of the picture is less than 1/100th of an inch in reality), but look at the tiny evenly dispersed carbides. The slightly different shape in the wear – who knows, it could be just how the steel wears or slight differences in cap iron setting. nonetheless, anywhere you see anything that looks like it’s even 2 microns, it’s probably two carbides close together.

it felt just a little sweeter. The evenness of the edge probably shows why.

So, what are we looking at in costs? A sheet of steel that will make 6 stanley plane irons costs $32.50 as I type this. There’s enough left for half a dozen marking knives or several nice kitchen paring knives. After allocating shipping to this sheet, we’re in the ballpark of $6-$7 an iron. bumping up to Lie-Nielsen or Infill thickness irons and the cost goes up a little bit, but I’d consider making a few LN replacement irons as there is no alternative to dumpy A2 now. I don’t have LN planes any longer, but I do have spokeshaves, and the A2 blades for them are just a terrible choice.

What about Chisels?

26c3 is probably unbeatable – it sharpens easily, it attains really high hardness easily and the crispness of the edge is superb. It’s not nearly as widely available, either.

But I will probably make a few 80CrV2 chisels just to see what they feel like at 350F temper and then down from there (or up in temperature and down in hardness). I think 26c3 is easy to get right, but a beginner may not have much chance of doing that in a forge, and my test samples bettered published specs, so I would be hesitant to guess how good it is in a furnace. The knifesteelnerds suggested heat treatment doesn’t get results that I get, and I think that’s a shame, but the steel itself may also not have that much value to knife users who can be wooed with the promise of something better that isn’t functionally better.

And in all fairness, though I have not a single positive thing to say about Devin Thomas, Larrin is the one who in his characteristic brevity when I asked about a 1% CrV steel, suggested 80CrV2, and maybe seeing the suggestion the 15th time tipped me from feeling like I didn’t need to short carbon well below 1% because I have the skill to work with steels more difficult ….to trying it anyway.

Would We Ever See it in Boutique Tools?

I doubt it. There are some things that I do to chase hardness that require hands on skill and some experience. I’ve now probably heat treated at least 300 items and I have not just heat treated them, but I have been using it as a fun exercise to try to get better and more consistent. I’ve also never had to do it on a Tuesday afternoon with a hangover or organize 50 items at a time. If I harden and temper 10 items in a busy week, that’s a lot, and I usually limit what I’m doing to cycling two items at a time. I’m kind of dumb, and trying to keep track of more than two things that are changing colors and in and out of the forge is a good way to make a mistake.

Why Not 52100 for Tools? It Just Isn’t as Good in Wood as Some Lower Toughness Steels

Well, to start out with, I ended up getting banned from a knifemaking forum because I wanted to talk about heat treating in a forge. But I really went there in the first place to try to find 1095 with upper end of the spec chromium and a little bit of added vanadium. That would make forge heat treatment really easy. It turns out, you can solve (if you’re me) the issues with 1084 and 1095 pretty easily just by manipulating temperatures by eye with some samples, snap them, and then make actual tools with them and confirm they’re better. But I didn’t bother to do that until I got berated about “poor results” from one of the most undesirable individuals I’ve ever met on a forum – Devin Thomas – the father of the metallurgist who did my test results for 26c3 and O1. I later sent more samples, as I’ve mentioned on here, with 1095 and 1084 without looking much at them just to see how they’d turn out.

The 1095 was mediocre and the 1084 was undertough by a lot. What resulted was finding out that though I’ve never talked to Devin, he was pretty pleased to see the second set of results from steels I don’t generally work with and pretty excited to ignore the fact that my other samples were as good (O-1) as book results and never-to-be-mentioned, I guess, far better than furnace schedule results for 26c3. Those weren’t by chance.

What is the problem? Apparently, Devin, who is by others accounts an accomplished maker and provider of some materials to other knife makers, doesn’t like anyone to talk about heat treating in a forge. I don’t really care what he likes, but he doesn’t know much of anything about woodworking tools and I couldn’t get discussion out of anyone else about questions that had nothing to do with it. He gets my award for the least desirable person I’ve come across on any forum for inability to discuss something unrelated to what he wants to drone on about. So, eventually I got banned for talking about heat treating in a propane forge and posting the results because I refused to stop talking about it. The official reason “poor behavior and being suspected as a returning troll”.

This is BS, of course – I don’t have more than one ID on any forum and have a distaste for people who maintain multiple logins. I can’t think of a single person who does that and adds anything positive to any forum.

I may also be underestimating the whims of advertisers on the forum or other paying service providers. In short, talking objectively about what you’re doing and after much goading, showing factual results that aren’t in line with assertions you weren’t asking about in the first place? It must be some kind of threat.

The very simple fact is that by not following published schedules, I got better results than anyone has ever published with 26c3, and it breaks the rules of not normalizing steel and then giving it an austenitizing soak before quenching. I had no idea those things were supposedly rules in the first place. they can be needed for some steels that do need them – 26c3 doesn’t. If far better results than steel done with those steps isn’t proof, I have no clue what is.

What resulted when I was found out to be a forge heat treater and then my comment that I wasn’t getting a furnace in the near future, from Devin, is something I wouldn’t have expected to see from a grown man, but life is full of surprises. I did later scroll back and find out that i’m not the only person who has been subjected to it, and there’s a whole group of (maybe well meaning?) sycophants who will request the moderators ban anyone who posts methods they don’t like. I suspect posting results that support them is even less well liked.

Where does 52100 come into this? I got the same thing I always get from people who have made knives when I don’t mention 52100 as a preferred steel.

What’s the problem?

52100 is very different than other relatively plain steels. It has an amount of chromium in it that gobbles (binds) a lot of carbon so that the carbon doesn’t remain in the lattice/grain framework. It’s also offered in a lot of inexpensive bar stock in very different starting structures. Some of those structures won’t achieve good hardness, especially if you just heat it to nonmagnetic and then quench it.

I have worked enough with it to know that I can get it reasonably hard in the quench – to the point that it’s difficult to deal with sharpening comparatively – in woodworking tools.

The lack of carbon in solution appears to make it too tough. This is a foreign concept for knifemakers – “too tough”. Tough keeps people from breaking knives – they bend instead. I don’t think people have the cajones to return a knife they bent but that didn’t break and then claim they weren’t abusing it. That’s great for a maker. Let’s be honest, too, few people are doing much with custom knives they buy outside of some really strange competitions that look just ourtright weird to anyone who is a woodworker. The average person is pushing a knife through things or slicing with said knife.

When I first started playing with it, I expected to find low hanging fruit, that 52100 hadn’t been used, and maybe it was a mistake not to use it. Maybe the reason was that it was harder to heat treat, or who knows what. I suspect that the early 1900s tools from the carbide patterns that I see are lightly alloyed water hardening steels with some addition of tungsten, and some may be oil hardening steels when they’re solid. but I don’t think I’ve ever used a tool that behaves like 52100.

Everything used in woodworking has enough toughness, but not an excessive amount. You wouldn’t expect to take a chisel, bend it over in a vise into an L and bend it back and not have it break, but 52100 can do things like that without breaking outright.

First Experiements

I made a couple of blades of all kinds. 52100 was one of them. Disregarding effort made, it planes about as long as O1. I didn’t test it directly against O1 right away and figured it should be good. it also has a persistent wire edge at “normal” plane iron hardnesses. In chisels, I found the toughness intolerable – when an edge would deflect it would just stay there increasing the cross section of the edge and making the chisel harder to get through wood. An unexpected problem.

I later compared a couple of the irons that planed about as long as O1 and noticed that as the two steels wear, 52100 takes more effort to keep in the cut and on woods that a plane likes to come in and out of the cut on (figured or runout), the cut was more rough at the same interval. that creates a big difference in physical effort even if both irons plane the same distance, and planes not staying in the cut is part of the reason the average person fails to get a finish ready surface off of a plane. This is what the carbides looked like – they were a little larger than I would’ve expected, but evenly distributed and all in all, not bad.

first shot carbides – not bad. the edge doesn’t look too uneven, but it looks like it doesn’t wear that crisply. This is hard to see, but a more vivid example of this can be found in my prior post about the mountford HSS iron. That iron also fails to cut nicely as it dulls. You get usable resuls, but not as good as steels that established themselves for use in planes and chisels – those being less tough or lower in alloy.

Compare the edge of that picture to O1

Notice the shape of the very edge of O1 – it’s more even and there’s no visual evidence of a thicker initial edge.

I think there is a fundamental difference in how the edge wears – how round or blunt does it get, and how does that effect planing.

O1 does not keep carbon out of solution the same way 52100 does and the alloy is different, but it’s easier for a fast heat treatment process to get a lot of uniformity. I think moving the cap iron around would show a few more carbides, but it’s not a surprise that they aren’t as vivid. the “stuff” remains in solution and creates a problem that metallurgists call plate martensite. This problem reduces toughness…..except for woodworking, I’m not convinced that it’s a problem.

Knife folks are still fixated on the fact that you can break O1 – what are they cutting? I don’t know. I think they cut the cheese more than they cut things with their knives. We don’t have that luxury in woodworking.

I keep coming back to O1 being a really pleasant steel for woodworking, but I’m not trying to create an argument for it – I’m working from outcomes first, which can be unexpected – it shouldn’t be better according to anyone, but if it shows better in outcomes every time, and it’s also easier to heat treat, and the issue of toughness doesn’t apply to us, maybe it would be smart not to deny the outcome. Even if you never figure out the cause, the better performance is right in front of your face. And if you hand plane 15 or 20 board feet from rough in a day, that difference will be drastic. It can work longer into the dulling cycle without you as the “planer” having to sharpen as often or you as the planer leaning on the plane and really creating a lot of problems that are both unpleasant and unproductive.

I also noticed while looking at grain size that these 52100 samples were outright abusive to my vise. I break samples by hitting them with a hammer. I want to see the grain size under a microscope – but you can also feel a difference in how hard you have to hit the steel to break it. A tempered factory file will break easily. A 3/16″ thick sample of 52100 that’s even moderately tempered may actually be a threat to break a vise.

what does that clue us into? the next reasonable thing is to leave it hardly tempered or untempered and see if the edge holds together. it’s really unpleasant to sharpen when it’s left really hard, but it’s not that slow to grind. the washita won’t touch it. Why is this reasonable. It’ll be much less tough at really high hardnesses, but it may still be tough enough almost untempered to plane wood without chipping.

52100 untempered. to my surprise, what no more tempering than it would get just from grinding the initial bevel, it did not chip. the hardness level is absurd. It must be 65 or 66 hardness as it’s relatively low alloy and even an india stone doesn’t do much with it. I think the only thing I’m really doing with the washita if I get a small burr is deflect it. Nobody would ever sharpen this with oilstones.

Figuring it would chip and then I would walk back the temper until it didn’t, I was wrong. it didn’t chip untempered. It was, however, a right bitch to sharpen when compared to tempered irons. Slower even on diamond hones. there’s nothing in it diamonds won’t cut easily, but at some point, harness can be so high that the diamonds don’t penetrate as much.

But…compare the edge to O1. I don’t know if the picture is meaningful, but the edge rounded look is still there………and the result of planing is that it again felt really keen initially and then continued to plane, but it doesn’t have the sweetness of O-1. the combination of attributes doesn’t offer anything. Again, a surprise.

I Put it Aside and Got it Out Later

After being goaded on the blade forums (and then banned for talking about forge heat treatment, or because of the outrage that the topic causes), I decided I’d see if I could get some of the carbides in solution without a furance. I don’t think this would be that hard. Here’s the thought process:

Larrin posted an excellent article about how much differently 52100 turns out in a furance depending on the initial microstructure. Some of this is canceled out by the fact that I use a temperature overshot when heating and no real duration, but probably not all of it.

When I first used 52100, i heated it a couple of times and quenched it, and tried a few things. Since then, I’ve learned to shrink grain with extreme reliability. I also think I can manipulate carbides a little bit without having too much carbon escape the steel. Again, a very high heat overshot, and then something I haven’t done before much – heat to critical with another iron (for mass) and stuff it in vermiculite. the hope is that I will get carbon back into solution (less toughness, higher hardness yet), and the thermal cycles will shrink grain without moving much of the excess carbon in the lattice back into carbides.

I would then follow this up with a temperature overshot quench (heat to a brighter orange as fast as possible then quench as fast as possible back to the lowest temperature possible). I have all of these mule irons on hand already, they’re just waiting to be turned into knives or something instead, but if I can actually change how they look under the scope, I will know I’ve changed the outcome without any question as to the difference in the bar stock used.

So, I did this – I know conceptually this is difficult to follow. But here are the same irons with microscope at same magnification. Apologies if the light reflection is slightly different.

First iron, 350 F temper, which would be untertempered for O1:

Smaller carbides, and seemingly less of them

I would estimate this first iron’s hardness at 62 based on the stones. the washita doesn’t do much with it, but it’s not intolerable. it cuts OK on an india stone. As with prior versions, the burr is persistent, but I’ll let the buffer deal with it.

This is after planing. Look at the edge again – it still looks like it doesn’t have the uniform sweetness.. And it doesn’t. It just doesn’t perform as well with thin shavings.

The hardness is a little better that before. Did I do what I think I’m doing? I have no idea.

so I did one more iron with the same thing, one of the ones previously made, and tempered it at 300F instead. It should be around 64 hardness. It feels like i is. the washita has no interest in it. For reference, the abrasive particles in washita are about the same hardness as rockwell C64. If you slurry an oilstone, it can abrade steels harder than the particles, but the mechanism isn’t by rasping grooves in the steel.

300F tempered iron – high hardness. Still seemingly fewer and smaller carbides.

this harder iron is unpleasant to sharpen if you’re used to something like 62 hardness O1. It’s not more abrasion resistant, it’s just harder.

The edge is maybe slightly finer and if I didn’t take too thin of a shaving, the plane wasn’t unpleasant to use. However, it wasn’t better to use than 62 hardness O1. it still exhibits more of a decline in ease of use through the dulling cycle.

I’m not sure exactly what I’m seeing, but I think for this steel and for 1084 at higher hardness, the edge wearing actually forms a bit of a burr, too, or something that reflects light in an unexpected way.

Whatever it is, the outcome remains the same. It’s just not as nice to use on wood.

And, I think that fact – that you can feel the difference and anyone actually making tools when people were acutally using them could feel the same has a lot to do with why we don’t see ultra high toughness steels in woodworking. No matter how much some knifemaker tells you “it doesn’t make any sense”.

The sharpenability of lower alloy steels like this at really high hardness is there, too. It doesn’t make sense to someone not sharpening in volume why it would be an issue, but you don’t get double the edge life for double the sharpening effort, and that’s ultimately going to be annoying to experienced woodworkers.

Assigning Fault – My Fault Failing with 1084 and 1095

Some time ago, I mastered controlling grain size and manipulating hardness of 26c3 and O1 steel. If this is your first post, you can find what those are with a google search.

The cycle that I published and used works for both of these well. I eventually sent samples to a metallurgist as I posed on a woodworking forum that I doubt that these ever vary by more than a point. This caused some people to call BS, but the hardness part is definitely true. Small variations in hardness around 60-64 cause a great difference in how a plain steel performs on certain stones. These stones are chosen because I know that one of them will begin to slow down on 62 hardness plain steel, a lot, and another will become slow on plain steel that’s more than about 65.

The metallurgist that I sent the samples to, I have a feeling, doesn’t care for my methods. I get that. I don’t normalize steel. I think for plain steel, it’s not necessary, but one has to be willing to snap samples and do some actual testing of results before determining that it’s worth sending something for testing.

When I sent my samples, I didn’t care that much about toughness, but the market for knife makers is much bigger than independent tool makers, so a lot of the testing has a big emphasis on toughness. Toughness has a lot of influence on whether or not someone will break a knife, and in the world of knives, a broken knife is a huge problem.

I sent the samples, asked about hardness, and then got the hardness results first. I was happy with them. The person doing the testing had concerns about the level of finish I did with the test samples (figure a fraction of a stick of gum size) because I had to precisely size and finish these little samples freehand. The tolerances are pretty tight for freehand. However, toughness results were also fine. Compared to hardness, both were as good as the metallurgist’s published results – that is, the toughness and hardness balance was good.

Here is the chart I received – I markered in the 1095 result. That will make sense in a second.

These results are no fluke, but I haven’t worked up and snapped samples for anything else, so I couldn’t guess anything other than hardness, which I can tell on a stone.

Here’s Where I Went Wrong

Out of curiosity, I then sent sample coupons of 1084 and 1095 later, and I heated XHP and sent coupons of that. When I first attempted to match XHP to V11 steel, I heated it very hot very quickly, but later learned that one of the reasons for high heat is to normalize. I’m not normalizing steel, so I didn’t heat the coupons to the same high temperature – in my mind figuring that since I wasn’t dissolving chromium but just hardening a sample, the high temperature wasn’t necessary.

I was wrong. The sample should’ve tested about 60/61 hardness at my tempering level. I’d made two knives with lower heat and they also seemed a little soft – you could just barely file the knives before tempering. They probably are – the test coupon came back 57.3 hardness or some figure within a couple of tenths of that.

I didn’t do my due diligence and attempted to reason into a change without testing it. I also never snapped 1084 or 1095, but just assumed that they would work just as well with the method that I use for 26c3 and O1. Well, they don’t. Off of the top of my head, I believe the 1095 averaged 63.1 hardness and 4.1 or 4.3 ft lbs of toughness. This was with a 400F temper, which is off the charts compared to published results without liquid nitrogen – something I don’t have. I did make a couple of samples of 1095 irons and they are OK, but will nick a little too easily and they were always harder than expected.

Why? I assumed that my prior heat treat cycle would just work and I didn’t so much as snap a single sample before sending anything off for testing.

Bad idea. 1084 was even worse. 61.5 hardness or so on average and toughness even worse than 1095, which is the wrong direction. I was unhappy with the results, but I don’t use any of these steels for anything, and for my own consumption, if I could bump an XHP sample to 58 hardness and just buff the edge to make up for the slight lack of hardness, no real problem. Toughness was good enough that breaking wouldn’t be a problem.

I was so pleased with the 26c3 results and that I’d made a claim of being able to make samples separately without varying hardness that I reasoned that there shouldn’t be an issue, especially with 1084, not testing anything. It’s always suggested as being easier to heat treat than O1 or 26c3. I’ll put aside XHP for now until I have a chance to run another sample to high heat and see if it completely thwarts a good file on a sharp corner. I failed to do something that only takes ten minutes at the most. Create a small coupon for myself and observe grain size.

Yesterday, I finally addressed the 1084 issue by making a couple of samples. I was shocked to find out both with grain snapping and testing with a magnet that what works for 26c3 in a forge is overheating 1084 – a lot. My eye is trained to see the point where 26c3 transitions to nonmagnetic. 1084 transitions (unexpectedly to me, but probably not to others) at a cooler appearing color. And then the second part of the mystery.

I intentionally overheat 26c3 during a quench. It takes about 10 extra seconds to do this and the result is imperceptible change in grain, but higher hardness. This is a nice thing when making chisels, and maybe not worth as much excitement making knives.

You can compare my results to a simple schedule of expected hardness and toughness here – I tempered steel at 390F for 26c3, two tempers. To be conservative, I think it’s also useful to check toughness a point or two softer than my averages as one end of the coupons is a point or two (it varied) less hard because it’s held by tongs and it’s not changing from hot to cold as fast in the quench. As in, my samples average about 63.8, but you could compare chart toughness at 62 and I think that’s fair.

Link to Chart of Expected Results

Link to more about 26c3

No matter how you look at it, the forge results are unexpectedly – at least to me – good. I never sent any of these coupons for analysis until I’d made 26c3 chisels that hold up in side beside testing better than anything else I have that’s not Japanese. But I still figured the samples would have some kind of shortcoming. They didn’t. I think I could do 100 of these on 30 different days and they’d very little.

So, What’s the Problem

The 10 seconds of chasing the heat higher to prep for a fast quench with 26c3, and the same color of thermal cycles that I’d trained myself to see by eye – both grow grain a little in 1095 and a whole lot in 1084.

If I’d done 10 minutes of due diligence and maybe 1 hour of various trials and a little bit of analysis, I’d have known not to send either sample, and in not doing that, I wasted my time and the time of the person doing the testing. But I think in advising against heat treatment, they may have at least gotten some enjoyment out of the fail. I didn’t get a chart for the second set, so I have no chart to display. The results, though, match what I felt with 1095 irons – hard and a little bit under tough for the hardness, and half of the toughness that they would’ve been done properly in a furnace a point or two softer.

I finally started this with an offcut yesterday. It took less than 10 minutes to make these samples. These are 1/10th of an inch thick bar stock. Having little for analysis, what I do to refine cycles (and did for 26c3) is snap samples along with some kind of performance test. The first sample is just whatever the steel is heated once without any intentional overshot and quench.

1084 – low temperature quick quench

Then, I will intentionally overheat a sample, and see what it looks like. This is with about 10 seconds of chasing the quench temperature higher than needed to get better hardness. Exactly what I do with 26c3, which shows no visual change in grain size.

Grain Growth With Minimal Overheating Time – this coarse grain will result in slightly higher hardness but much lower toughness.

This is a shock, and the difference in coarseness is drastic. I’m sure my tested samples were at least as large as this, but they may have grown during thermal cycling. I never broke one to look, but i have looked at 1095 in the past. I didn’t break one of these because I didn’t have extra steel after cutting samples, and if I did break 1095 at or near the same time, it wouldn’t have looked quite this bad. based on the test results.

The steel that is supposedly an easy starting point is no good for what I usually do. so, I made a third sample, increased the grain size slightly and then used lower temperature thermal cycles than what I do for 26c3, and heated it quickly a little hotter than the first sample.

overheat, lower temp thermal cycles, and quench (ignore the bright stuff, that’s actually just a piece of plastic that the sample rests against, and it has a metallic silver finish on it – inconvenient here as it looks like huge metallic grain. the teeth at the bottom are those of a fine/small single cut mill file).

1084 is my worst steel, so it’s the one I’m trying to conquer first.

I can take the unbroken part of the middle sample now and confirm that the grain will get close to #1 above, then I’m well on my way.

And sitting around and guessing at the various problems – a complete time waster (“was it the steel? Maybe it wasn’t rolled and treated well? Maybe it was mixed up with something else?”).

I don’t think any of those happened. I know now that I made bad samples because of an assumption that the cycle used for 26c3 should be fine for any plain steel.

If you are going to do heat treatment in a forge and develop something that’s relatively easy – The 26c3 cycle is easy for me – reflexive at this point – you absolutely have to snap samples and confirm that you can heat treat without increasing grain size before moving on to anything else.

I’ll post tomorrow or in the next few days about the very simple quick method of doing this.

Carbides vs. Steel Lattice / Matrix

I figured reading through my last two posts, they’re kind of dense and assume you know some things that I don’t really fully know.

For example, chemistry. I’m not much for chemistry. I know what H2O is. CO2, also. it doesn’t go much further than that. If you are a chemist and you find a mistake here, have at it.

What was I assuming would happen with some addition of chromium to the prior 1095 steel composition.

Steel is generally two parts – you can see the two parts in my carbide pictures. The lattice or matrix is who knows what – I would refer to it as just that, the lattice or matrix. If the grains grow large, it becomes less strong in many cases. The carbides are what they are. A composition or accumulation of something that so far as I can tell is another element with carbon. So, if you have a lattice that can undesirably absorb excess carbon, then maybe if you give the carbon somewhere else to go, that won’t happen as easily.

What are some compositions of carbides? Iron carbides, or cementite 3 iron atoms and one carbon. By mass, iron is much greater so the actual weight is more than 90% iron.

Chromium carbides – three chromium and two carbon, but there is more than one composition for chromium carbides and to look further, my eyes are glazing over. I think the “3 and 2” type is the hard carbide that we appreciate as woodworkers.

Tungsten carbide, one tungsten, one carbon – and so on.

It’s my supposition that the addition of more than a little excess carbon to the steel toughens it by giving some of the carbon somewhere else to go. Beyond that, I can tell you from experience that hardening 52100 with a simple non-oven regimen is more difficult than 26c3, 1095, O-1 or the recent crush – Sharon 50-100 (1095-ish plus 0.6% chromium). I have no idea why 52100 is more difficult, but a furnace appears to solve the problem for most knife makers.

52100, you see, has a little more carbon and more than double the chromium vs. 50-100, and for that matter, also vs. O-1. I’m guessing, and you could probably find the real explanation easily, that there is enough chromium to occupy a lot of carbon and less ends up in the lattice- especially less excess.

I find this kind of interesting, and here’s why – two pictures of O1 steel and 52100. I really thought 52100 would be a go-to for chisels because it can obtain absurd toughness. That means that you can probably push the temper harder and still have enough toughness -great strength and enough toughness. With so little alloying in it, you would expect it would be very fine grained with an even edge – one that looks like a laser line.

52100 – wow – for 1.5% chromium and no more than that plus a little excess carbon, it sure does show a lot of carbides standing proud of the matrix once worn. This iron was plenty hard, but the edge wears differently than O-1 and less uniformly – the result is that it doesn’t seem to stay in the cut in wood as well, so you put on more work to convince it to. Great steel for a knife that will be abused, but I think its a step backward for woodworking.
O-1 steel – some excess carbon, plus a little chromium, silicon, tungsten, nickel and some has a trace of vanadium to discourage grain growth with accidental heating – this doesn’t. Carbon is 0.9% here – there are carbides, but micrographs of the steel show that they’re extremely small. They don’t show up visually. O-1 suffers from unexpectedly low toughness, but the reasons that I’ve read are beyond my scope. It’s tough enough for woodworking and that’s good enough. Chasing more toughness than needed often leads to a poor outcome.

The progression of carbide elements over time is interesting. It seems like a little bit of excess carbon (like 0.25%) is not a good thing.

The 26c3 alloy that I use for chisels is very little adjusted from iron and carbon plus a little manganese except for a small amount of chromium. It is much tougher than I expected, though furnace schedules don’t show the same toughness at same hardness as my samples did. I showed 63.8 hardness and 12 ft-lbs of toughness on average where the commercial schedules show about the same hardness and 8 ft-lbs of toughness in the same toughness tester and the same test.

This is a gift – a steel so good for hand heat treatment that at least at this point, seems to fare better than the commercial heat treating schedules. But I think – just guessing – what allows this is what also makes 52100 better to optimize in a furnace. That is, I don’t soak steel – it’s a fools errand in the open atmosphere. 52100 needs to be soaked precisely at a temperature that carbon will migrate away from the steel – so it’s a no-go with an open atmosphere forge. However, it is so tough – even in my samples, that it is hard to break at high hardness. Many multiples of O-1 steel toughness and I think that toughness creates a problem in that the edge of a woodworking tool – it will deform and hang on when we want any small damage to just let go.

This explanation is also why you can’t just rely on a knife forger or amateur knife smith to tell you what makes a good plane iron or chisel. Much of the hobby knife crowd loves toughness and edge stability is secondary in general use. Why? If you have a broken knife, do you care how well it holds an edge?

But, back to the carbides. Iron carbides were common in plain steels with excess carbon. Where else will the excess carbon go when it can’t be dissolved into the lattice further? At the turn of the century and maybe before or a few years after, whatever the case may be, tungsten became popular. Tungsten carbides add wear resistance but they dissolve at temperatures common in forging. As the amount of them increases as a % of steel composition, the forgiveness in this process decreases. There is tungsten in O-1, but it’s very little.

At some point, chromium (A2 and others along with stainless steels) and molybdenum (M2 high speed steel) show up in greater quantities. M2 is apparently cheaper than tungsten high speed steels, and A2 has better wear resistance than O1 along with air hardening as a side benefit, and it moves less when heat treated. That last bit is economically attractive for commercial users.

Back to the tungsten – the interesting thing about early tungsten steels is that they improved toughness. Did they do this by attracting carbon? I don’t know – ask a metallurgist. Maybe tungsten also does something in the lattice between the carbides. But too much of a good thing and tungsten carbides don’t disperse evenly and that’s not great. Japanese blue steel suffers this problem- it can temper harder than O1 steel, but most of the samples that I’ve seen have carbide dispersion problems. See the picture below of a plane iron made by tsunesaburo, and this is at *half* of the magnification shown in the carbide pictures above. This picture was taken several years ago just trying to observe edge wear and see if any alloys nicked or failed more easily.

Tsunesaburo laminated stanley replacement iron after planing – based on Larrin Thomas’s micrographs, what I observed years before testing plane irons was probably coarse tungsten carbides. the iron was fine otherwise, but the surface wasn’t as bright as it could have been and it only planed about the same distance as O-1. I like (objectively) my own O1 irons better. they are smooth, faster sharpening and aren’t suffering from a defect that robs a little from them. Luckily, I can show you pictures of my own iron to show the uniformity at the edge is much better. It will be for any good O-1 iron, including hocks. Hock’s irons look like mine. I think they’re a bit overhard, but you can temper an O-1 iron a little further in an accurate oven.

So, why deal with more carbides in the first place if they’re not being used to help the iron and carbon perform better? I know what I wanted that answer to be when I was a beginner – finding a “better” and better and better and harder and harder and longer wearing and so on plane iron. This is a fascination with beginners and an opportunity for marketers.

In an ideal situation, the carbides in an XHP (likely V11) iron will leave the matrix evenly and the steel will look like dense tapioca. This is great until there’s a nick in the edge, because you have to hone through those carbides to remove it. I haven’t yet seen a steel with large carbide content that actually holds a fine edge without nicking a bit more easily. The bargain is lost a little bit for someone who can hone quickly and freehand. Simply put, we want to hone away wear, but not defects. Especially not defects in steel that wears slowly.

XHP, either the twin of or the very closely related brother of PM V11

The answer as to why this nicking occurs, and why I’m interested in alloying elements to support iron and carbide and not to become more and more dense and chase more wear, is that carbides are brittle. Cracks start in carbides, and then travel out. What little I’ve been able to find in terms of pictures of carbides and cracking started always shows the carbides cracking first. I’m bold enough to say this flatly because along with those pictures, Larrin Thomas says the same thing.

The curious part is that there’s no hard and fast rule easy for a woodworker to follow – 1095 and O-1 are relatively low toughness with little visible in them that would look like a starting point for a crack. 1084 and 52100 both also look very fine in micrographs – both can be extremely tough where 1095 and O-1 hit a point where you can’t just temper them further to get more toughness. That’s called “tempering embrittlement” or something of that sort – it’s beyond me and fortunately it’s beyond the point where I’d temper anything – often 450F-500F plus in simple steels.

Larrin Thomas has a great site – he knows 8000x as much as I do because he’s a pro. I don’t like to read too much first before experimenting because there are too many variables, but I find his site to be superb for explaining things after I don’t get results that I’d like to see. In the context of this conversation about carbides and the lattice in steel, seeing the actual grains in the lattice is not something I’ve observed visually. I think to do it well takes an SEM and some kind of etchant – usually nitric acid for visual work and for an SEM, I don’t know. Nitric acid isn’t generally something sold to the public as an etchant, though it’s not illegal. It’s a little dangerous, and Larrin told me snapping samples would be good enough …he didn’t say for a dummy, but I’m saying – for this dummy, it’s good enough.

However, you can look through micrographs on larrin’s site – there’s a lot of them, but in there somewhere is most of what we’re familiar with. To see the micrographs of XHP (V11) and the various D2s (there are three – despite the persistent myth that D2 is always large grained and not available in PM – one that is touted by uncurious people on woodworking forums), A2s, 1095 and so on. Even 26c3 is there. Sharon 50-100 isn’t.

What’s nifty on these micrographs is to see steel heat treated by pros, and then to see if my samples show any carbide distribution issues. So far, I’ve had good luck, though subpar results in 1084 due to lack of experimentation, and a slightly soft sample of XHP for a technical supposition that I changed to after just making XHP really hot and quenching it early on.

Lastly, am I picking on PM V11? Not really – I adored it in a standardized test. In regular work, I saw too many shavings splitting too early in the process and split shavings lead to more honing work. I mention it rather than A2 or ingot (non powder) D2 because I think the middle is a no-man’s land. as in, what’s the point of A2 now if you can get V11 for almost the same price? if you have to have the wear resistance, I’d choose V11.

But I also think if I’ve put information on forums showing that V11 lasts twice as long planing a pleasant piece of wood that if I see something that works against that in regular work – and I do – sitting on it is unethical. I’m a nobody, but there are people who will quote stuff that I publish and when I see things I’ve said being used in a context where they don’t actually hold up – no bueno.

(oh…and by the way. how is the word strength applied here differently than toughness? Tough is resistance to breaking completely. Strength, at least at the first level, is being resistant to deformation at all. Some steels tolerate a lot of deformation before breaking completely, but those steels tempered for very high toughness tend to be less great at having strength and a stable fine edge)

The Forgotten Carbon Steels – Where Did They Go?

When you begin to make your own tools and branch out from O-1 steel, there’s an interesting array of alloys that can be done well in a forge. 1095, 26c3 (my favorite for chisel making, better than anything commercially available outside of Japan), 1084. Of course there are plenty of mellow steels in terms of heat treating complexity like A-2, and V11 (probably CTS-XHP).

O-1 is the first steel I ever heat treated, and it works well. In my heat treat article I advised if you’re not looking to learn much, just buy spheroidized O-1 steel, or really any good brand of O-1 steel, heat it quickly a full color past the point where it becomes nonmagnetic, quench it and temper it.

But I branched out, 26c3 was something I’d never heard of, and my results with 1084 have been mediocre as it’s not something I’m interested in using and it probably needs a simpler cycle than the one I’ve published on here.

I’ve rehardened various tools and blades over time and found as documented on here that even among three stanley irons and a chisel later, none are the same alloy. Where did all of these steels go? The answer is, I think, two parts: 1) some may not have been used by the general public in he first place whether or not they are still available, and others are out of production.

This leads us to 1095, which I expected to be a little softer and with good toughness and uniformity because the micrographs are very fine. In fact, it looks twice as fine as 26c3 when I snap samples. In my samples, it’s 1/3rd to 1/2 as tough and quenches and tempers harder than one might expect. In my case, 400ºF tempered samples came back at 63.1 c-scale hardness and relatively low toughness somewhat in line with what industrial charts would predict at that hardness. I could and may continue to experiment with it to see if I can improve the results slightly, but realistically, optimizing something that’s not ideal just leads to a little better version of the same thing. With 1095, I have a few irons that are high hardness, very crisp and easy sharpening, but they develop tiny nicks more often than I like. Put a different way, if I was running a business and had only 1095 plane irons and chisels, it would operate fine, but I’m in toolmaker mode.

1095 Knives and Saws – Knives aren’t Really 1095, Probably for the Better

Woodworkers think of 1095 as spring steel. Charts for knife companies show that “1095 isn’t a very hard steel, but it’s tough, and it’s 55 hardness” or something of that sort. The latter is just idiots collecting specs that they’ve found somewhere and making a chart, leading to more unintentional idiots presenting them on woodworking forums and making assertions. Often with the bend to them that what’s really missing in history is superior modern steels. This becomes a full lagoon of mixed animal turds once the discussion starts. I’m past that, but you can catch me once in a while going off the rails and blasting someone who claims to be an expert responding to specific questions with confident answers that make no sense and are sometimes perfectly incorrect – as in, exactly the opposite of reality.

If you have a question about steels, you’re free to ask me. If I don’t know the answer, I’ll point you to someone who does.

I’m sure this isn’t confined to woodworking.

So, back to 1095. 1095 saws are probably just that, 1095 spring steel. What is it? More or less 1% carbon, some manganese for hardenability and not a whole lot else. Spring just refers to the temper, or how hard it is. At spring temper, you can bend steel readily and if you don’t intentionally find its limit, it will return to its original shape. 1095 knives, however…..I doubt any are 1095. But many are or were marketed as that. What they really appear to be is steels that are relatively low alloy, but that have additives to improve toughness vs. 1095, and in some cases, probably to make the alloy more amenable to less costly industrial heat treatment processes.

I long believed that if I could start making things from steel, it would just be a matter of finding really plain steel (iron and carbon) to get vintage steel-like results. Like really vintage – 200 years old instead of 100, and then I could find one with higher carbon and get biting hardness and uniform wear – that is, a strong chisel edge and no nicking when try planing and finish planing. I was off base. Small amounts of alloying elements used correctly can make things easier for industrial heat treat, but they also can yield better results. We are generally talking fractions of a percent, and not like the chromium additions in huge amounts to A2, D2 or V11 (which is probably CTS-XHP) steels. If you like those steels, by all means, carry on. I don’t like them as a woodworker so I’m not inclined to use them as a toolmaker. They don’t offer anything for an experienced woodworker working with hand tools as the best they can offer is a fair exchange for sharpening and grinding efforts. If you’re a beginning, this isn’t going to make sense, but if you’re not, I’m referencing the fact that at some point, you will become so fast and accurate with sharpening that everything is proportional to time until wear resistant parts of steels don’t protect them from nicking. As soon as that’s factored in, things tilt back toward the plain steels. There are few users that I’m aware of that can take advantage of this. I know some, and I’m one of them. Most experienced woodworkers who use a lot of hand tools end up in this group – looking for fineness, edge stability and a steel that agrees well with stones.

Once you find yourself in this situation, you can ignore the folks who want to talk about bessemer converters or powder metals, or whatever else. Those are all interesting topics, but they seem to lead to the idea that something different is always better, or comments about grain size. I encountered one last week made by a self appointed expert stating that V11 (XHP) is as fine- grained as O1 steel – confidently stated. Except it’s false. V11 has a large volume of chromium carbides – exactly where it gets its wear resistant. For the volume, they’re well distributed and round. However, the micrograph shows that the carbides coarsen the overall particle size by a lot – perhaps 5 times more coarse than O1 – or more. V11 is more like taking A2, adding more carbon and a bunch of chromium and then distributing the carbides evenly. The largest carbides in both are about the same length.

Pointing out things like this (at length, it’s my style -not my chosen style, just my style) is usually not appreciated and those offended by being corrected when they’re providing not just bad opinions, but constant true factual falsehoods – those folks generally don’t like being corrected and probably don’t care if they’re correct in the first place.

Sifting through this – to the knives – phew. What’s wrong with a biting sharp knife out of 1095 that’s a little brittle? I don’t think I mentioned it above – real 1095 at high hardness would work fine as long as you don’t bend it or twist it in a pocket knife. Guess what people do. I think a huge part of the market of knives, nearly all of it, is made with the benders and icebreakers in mind. Why? Imagine you don’t know anything about knives. You open a metal container or split a piece of wood by prying and the tip breaks off. And maybe it’s part of a set. What do you do? Even if it’s years later, apparently the answer is that you complain to the manufacturer and demand a replacement.

What if you got a knife that was boring, soft and had a fat dull feeling profile. 90% of the market or greater doesn’t care. So, we all end up with knives that are less easy to break even if they aren’t as good at slicing and cutting.

What appears to be the case with Kabar and others who are known for making easy to sharpen, but a little soft, 1095 knives is that the name is used as a branding term for plain carbon steel, but the actual steel is a 1% steel that has some additives – especially chromium or chromium and vanadium.

Cure horror movie music. That’s a term – chrome vanadium – that woodworkers hate. It’s also often described as a soft steel that’s not very good because many tools made with it are proudly stamped chrome vanadium and they contain a smaller amount of carbon than we’d like because limiting carbon prevents dealing with reduced toughness that can occur if excess carbon dissolves into a steel lattice. But, there is a whole class of chrome vanadium steels where the chromium and vanadium are small amounts and the resulting steel is much more plain than even O1. Carbon can go well above 1% and these steels can be used in straight razors. However, the CrV variants that are available inexpensively in europe don’t seem to be marketed here and importing them thanks to shipping costs doesn’t make any sense.

What Does this Have to do with this Blog?

The answer is simple. Whatever alloy stanley used for the block plane iron, I’d like to find it. It looks like plain steel with a little bit of tungsten in it based on less than ideal carbide dispersion.

Whatever alloy Kabar used, I’d like to find it. I can see older spec sheets. 1% and 1.1% steels with small additions of chromium in some cases and “B” versions with a small amount of vanadium added. Very small, but enough to keep grain size fine in less than perfect heat treatment. Not enough to make a bunch of hard to sharpen vanadium carbides that are more suited to turning tools.

These steels, in this case several made by Sharon Steel, I was finally able to find. But only one alloy in one size. The rest, I’ll have to keep looking. The bottom line with these things – the 1095s in knives that aren’t 1095, is that many are gone and there isn’t a hot market for retail sale of steels that are water hardening and lower wear resistance.

So, I’m all the way up to finding one. 50-100 sharon steel – “1095” with 0.6% chromium added and maybe some other trace changes, but the chromium addition is the key. Will it be the 1095 that makes a great plane iron? It’ll have to be, because I can find it only in 3″ wide bars, 0.145″ thick and 3 feet long. it’s out of production, and the retailer selling it (USA knife maker) is just selling found old stock. Too thin for chisels, too thin for tapered plane irons, too thick for stanley irons. I can grind it into knives or make infill plane irons with it.

Unfortunately, other than one or two finds here and there, getting the feel of the steels in place 125 years ago, or pushing the hardness up on something that was well loved (like the Kabar knives), the opportunity is mostly lost to history.

This has gone long, but luckily as of this post, I have already made one infill iron from Sharon Steel 50-100. I’ll post about it separately as you may need a break. If you got to this without any pictures, ghee-whiz nonsense, or misdirection to get you to buy something that benefits me or generates a commission – congratulations. You’re probably in the minority.

Older Style Tapered and Slotted Irons

What? Tapered iron in an infill plane? Works fine, especially for testing fine shaving quality.

Something I’ve forgotten about for quite some time is ever attempting to make a tapered bench plane iron freehand, or even in a jig. This may sound like something that should be reserved for machine tools, but I’m convinced that the golden age of laminated plane irons (mid to late 1800s in England) existed not based on precise jigging, but rather on a job grinder who was able to grind taper into irons on a wet wheel quickly and also grind some concavity into the backs of irons.

I realize also that most folks may have never thought about this concavity, but visualize the old plane irons as follows: The top of the iron that faces the cap iron will be flat. This is the side opposite of the bevel.

The back or bevel side of the iron beds against the plane bed. If you can help it, you want the iron to bed as close to the mouth as possible and again at the top of the bed with not much significant contact between the two. At least not on a double iron plane.

A well sprung cap iron will create some of that concavity on its own by bending the iron itself, but but this bias exists on older irons, anyway. I think the reason is because without it, the point of contact still could be a little bit further up the iron’s length vs. being right at the top of the bevel on the back. Getting these little details in your favor and not high centering or having uneven bed pressure makes a plane lock down tight, work well though minor seasonal movement over time, and adjust appropriately. As a maker, these biases are important – not only to ensure success, but to ensure excellent success.

But most tapered plane irons that I’ve seen new – other than japanese irons – are just two flat planes that aren’t parallel with each other – a sign that they’re either created in a jig (older irons) or just machined and ground (newer).

A Couple of the Doses of the Cant’s

About a decade ago, I wanted to try to harden a plane iron, but I knew as much as most people know. Almost nothing. A professional plane maker advised me not to bother as I’d be able to make a tolerable iron but never a good one. I’m past that.

Another professional plane maker gave me a different “can’t do it” around the same time when I asked if there was a way to taper plane irons for a hobbyist. The advice at that time was that it would take a minimum of $3,000 (more now) just to be able to begin to think about tapering.

I wasn’t thinking the same way – the precise machine way, and came up with a way to taper moulding plane irons well enough, but it was crude. Crude but it worked and was almost free.

My point isn’t to celebrate that I got past the can’ts, but more to mention that doing it – whatever *it* is – is often solving a problem and maybe you can’t solve it right away. I could taper moulding plane irons pretty easily. I tapered a thick plane for an infill shooter years later with a cheap ryobi belt sander idler, but it was a slow process – 2 hours of dusty filthy burnt hands with less control than I’d really like. These things have been incremental, satisfying curiosity, the involvement of handing the process – by hand – is bliss, rather than the thrill of solving a problem, and the the rigid boredom of repetition thereafter.

For reasons I don’t have a clue about, I bought something completely unrelated and got the wild idea last week that now that I have an 8″ contact wheel belt grinder, I could probably make taper plane irons. So I’ve made two. The first one was a bit slow, but by iron #2, the grinding adds about half an hour of time to making a larger plane iron. In this case, the entire process from start to finish is about an hour before a quenched iron goes into the freezer.

What was the unrelated item? 1095 Cro-Van. 1095 itself is a good spring steel. As a knife steel or chisel steel, or even a plane iron steel, it’s not that great. The steel itself triggered this idea – what to make – because I could only find it in a thickness that would probably be suitable for an infill plane. And somehow, that got me thinking about tapering it (too thin) and over to the rack for O-1 and off to the races.

No Great Reason – Sometimes Just for Making

I don’t really have a need to make these irons. My second double iron plane was a cocobolo smoother that I like, but I really like a stanley 4. That smoother has an I&H sorby iron that is a touch soft – unusual for that brand. Irons that are a bit soft and made of water hardening steel don’t last very long smoothing wood, but set the shaving a step or two thicker and they work wonderfully. About like a try plane – for people who measure shavings, somewhere from half a hundredth to a hundredth thick shaving in cherry and a little less if the wood gets harder. If you’re working entirely by hand, especially on something like sticking for mouldings where you also want a pretty good finish, that’s very useful.

It occurred to me that I could make a copy of the iron, but a smarter move would’ve just been to run the original iron through a quick set of thermal cycling and then reharden it. I made the irons instead. In the back of my mind is also that I’ve always made wooden planes with irons that someone else made. There’s no compromise to the design of a good iron and cap iron that I’m willing to go to, so making something like a single iron plane with a flat iron in a wooden plane isn’t going to happen – why bother when you’re working at my level – the level of an experienced dolt, not just an inexperienced dolt.

To apply the taper, I used a wooden block, a pair of vise grips, a belt sander with a platen and the contact wheel on a belt grinder. It worked great. That doesn’t explain the process well, but it’s literally what I used.

The first attempt of anything for me is always something I’m wiling to fail at and learn from, but the first iron turned out fine. It’s not perfect, it’s fine. This line of thinking – knowing what you want to do but then going and doing it and counting problems as guiding you to the right solution is important – it dominates sitting around and pondering hypothetical problems and successes. Knowing exactly what you want to make is important, but knowing exactly how you’re going to make it isn’t. If you’re creative, you figure that out. The second iron took half as long to make and I made it more accurately because of what I learned from the first.

I don’t really have much of a point other than that I’ve crossed something off of my list. The idea of working freehand often and being creative with a belt sander platen, the idler and the contact wheel on a belt grinder is why this was successful, and I’d put the idea of making a large tapered iron on the back burner long ago – if it takes 3 hours to make when you can find good Mathieson and other irons online, there’s no real point.

It’s also a reminder that if you don’t allow yourself to get boxed into things other people have had success with, the little things you learn to do by feel will open the door to do some things you may not have intended. Once you get to the point that you know exactly what you want to make, start making it. If some part is hard or fiddly, figure out another way to do it. I can almost guarantee that you’ll be able to make something twice before you’d ever get through with one paralysis analysis version, and it’s pleasant if you don’t take yourself so seriously that you feel like you’re too good to fail or that you can’t throw away something you make.

Lastly, understanding all of these little aspects of what makes a good cap iron or a good plane iron, including this curvature on the back of an iron, has resulted in being able to stuff both of the new plane irons into their subject planes with no adjustment to the wedges – they fit and work ideally right away. That wasn’t by accident. I liked the proportions of the original irons and have the ability to match the taper. The biases that an intelligent maker came up with in the past carried the rest of the load.

I don’t have a way to video this process, and also don’t have a wiling camera to help. Being realistic, I don’t think too many people would want to try it, so other the bits and pieces mentioned here, I think I’ll defer and not go into detail about the method – it’s less important than celebrating something that would’ve seemed too difficult 10 years ago but now is fairly low effort. And celebrating not falling into the trap of following the can’ts or “won’t be any good if you make it by hand”.

A Few Pictures

I’ve got a fair number of wooden planes, but not an enormous number by any means. Maybe a dozen bench planes and smoothers. I do have infill planes that will take the same size irons, so some of this is done with those – both used in this case are norris A13s – one beater of a smoother and one long panel plane that I forgot to photo.

There may be some disagreement, but the reality is that the spring in a double iron plane makes really small adjustments in a smoother less easy. It also makes the plane a real treat with a shaving a little thicker – like a truck with heavy suspension. I use the infills to take thinner shavings and test the surface quality the iron makes, and after getting the edge fully prepared, ensure that a the iron can plane a hundred or a couple of hundred feet with a fine edge and not develop any nicking. So, these pictures are generally at random and the ones that show no planes at all are the edges of the boards being planed – and the reflected image on them.

2 1/2″ wide iron for a trying plane

2 1/4″ iron for a larger smoothing plane
Note how subtle the curvature is. This is consistent with most of my older irons. Apologies for not glazing the side of the iron – it would be easier to discern if that had been made bright.
Iron in a large cocobolo smoother that I made. This was one of my first double iron planes, and the dark wood hides aesthetic issues. It OK in the pictures – the little nits aren’t quite as flattering without the dark shadows.
The larger iron in a Mathieson plane. I like other top-of-the-iron styles better, but it’s nice if the iron top and wedge are similar. Mathieson and Ward both made wonderful irons, though. This replacement is by no means needed. and I could possibly have 100 double irons waiting for planes otherwise.
The smoother iron being tested in a beater norris 13 that a flattened previously. Impractically thin shaving, but checking crispness of the edge and then observing how thin shavings are before they may split with some wear is a good indication of edge quality. This is an early edge, and the bevel grinding on this iron is done by me in a hurry. it’s good. After a little regrind to get past the metal that saw harsh 36 grit grinding, I think it’ll be even better.
if a shaving is thin, you can see things clearly through it. The wood is beech in this case, you can just see the edge. I started with walnut because it’s pleasant, but ….
Of all things unholy. There’s plenty of metal dust in my shop, so finding it on wood isn’t a surprise. However, I always thought walnut was a safe wood to test edges, but look closely at the white dots in the grain….silica. I planed some of this off to double check that it’s not stray metal particles. I’ll stick with cherry and beech. the little white dots are hard to find – where’s wal-silica-do…but whether you see them or not, you’ll find the little lines the nicks leave on your work. Not appreciated when trying to differentiate contaminants from edge quality.
Picture one examining the brightness of the beech edge after planing. The same edge that’s peeking up from the infill plane above.
And picture two -using the board edge like a mirror. Cell phones don’t like glare – a solid photographer could show just how reflective this really is.

I haven’t yet made a cap iron or a cap iron screw, but I think I’ll live long enough to do that.

Tempering Simple Steels Accurately

Two items of note before going into detail about tempering: 1) you can temper anything pretty easily if the tempering temperature is below 450F. That means that if you have an overhard Japanese tool or anything else that’s just junk to you, it’s likely that it could be improved tempering. 2) I am not a knifemaker, and i don’t use high speed or very high carbide content steels that have a very high temper or two tempering ranges.

If you’re going to temper complex steels, you’ll need to get something designed to temper high speed steels.

Otherwise, the focus here is tempering recently quenched tools, but for most things used in woodworking hand tools, a good quality oven or toaster oven will be all that you need.

What is tempering?

Quenching relatively simple steels is a matter of converting nonmagnetic microstructures of steel – austenite – to martensite, and doing so as completely as possible. You can read knifesteelnerds.com if you want to know more about those states, but for our purposes, we assume a quenched tool starting with brittle martensite and peak hardness. For almost all uses other than a blunt scraper, you’ll find untempered steel doesn’t hold up to anything – not even sharpening.

Tempering is a process of heating the untempered microstructure to the same microstructure with somewhat less hardness and more toughness. For hand tools, I’ve found with O1, XHP (similar to or same as V11), 1095, 26c3, etc. to prefer 375F to 425F. As a rule of thumb, you’ll trade about a point of hardness for each 25 degrees. that means big temperature variations are unacceptable and we’d really like to achieve something more like a 10 degree deviation at most.

How much tempering, when can it be done?

A single temper with really simple steels will take care of 90% of the result and leave you with something usable to very good. Some retained austenite can be converted to martensite during the first temper, so official schedules generally recommend tempering twice.

Your job if tempering steel is to get steel through its thickness to be an even tempering temperature. Whether you do that in hot oil, in a kitchen oven, whatever it may be doesn’t matter. However, other than very simple small applications, I’d recommend staying away from tempering over a flame.

Most schedules suggest tempering right away. If you arrived here after reading from the quenching page that it’s nice to park steel in a freezer to really chase as high of initial hardness as possible – at least on a budget where liquid nitrogen is out of the question – then that really means it doesn’t matter that much. Tempering sooner will reduce warpage, but good technique quenching should limit that and we’re chasing hardness above perfection in warp avoidance. Long story short, temper sometime before you use a tool

I’d recommend tempering twice. And if you make something you really like, have a stable setup.

Tight Budget Equipment

The range that we’re discussing here – 375F-425F is well covered by a toaster oven. Toaster ovens probably vary a lot in quality, but I bought the cheapest toaster oven I could find on eBay – something like $24 shipped. the toaster oven cycles on and off and surface temperatures below the elements deviate wildly, so an easy way to mitigate that is to use the trays that come with the oven and block direct heat from whatever you’re tempering, and put the tool you’re tempering in a sandwich of metal to increase mass, have something else take the direct heat from the heating elements and have the overall tool temperature variation be smaller.

400F tempering generally results in a color change on the surface of bright steel to about light straw color. if you see purples and blues, the edges of your tools are getting too hot, and the remedy is you start over and re-quench. However, a little blue on the bevel of an iron may be misleading if the entire subject item isn’t blue – try the tool first.

You’ll also want to invest in one of the cheap hanging thermometers (analog) that are designed for ovens. If you use a kitchen oven instead of a toaster oven, you’ll find in some cases that your oven is not close to what it says the temperature is, and that while the oven cycles, the temperature varies like a sine wave pattern. In all cases in my experience, even convection ovens have drastically different temperatures in different spots. So, use the same spot in the same oven with the same setup. Consistency is key. Right next to the glass on a toaster oven is also, of course, not going to be as hot as the center of the toaster oven.

If you have a non-contact thermometer, you can also put something non-reflective in the oven with the piece you’re tempering and get a reading. More sources of information are better. In my case, as long as there is some shielding to the steel being tempered, I’ve found the indicated temperature on the toaster oven to be within about 10 degrees of what it says. It’s easier to get the same temper than it is with a larger oven.

Exactly what I use and Do

I use the aforementioned inexpensive toaster oven. This rarely heats lunch – it’s in my shop and quench oil makes it smell like a smoky candle. If you can only temper in a regular oven, O1 steel and vegetable oil is a good idea or your house will stink like petroleum or smoking candles.

You can see in this picture that there is a lower tray. This toaster oven came with a second flat tray that can go under or above, and I will sometimes put the steel between both trays. It takes a very long time for the “metal sandwich” to get to temperature doing that, though, so use of the top tray to shield away from heat is usually a only if the metal sandwich outsides are thinner.

In the picture are two heavy aluminum plates, and thinner may mean unwanted older plane irons, or 1/4″ mild steel bar stock.

I temper twice, an hour per cycle. The steel needs to cool between tempering cycles, but not long, so I pull it from the sandwich, and put it on the floor or the bench for a minute or two and then cool in water and then start the second cycle. There’s no need for a big rest between cycles. That term, an hour, means an hour after the thermometer shown reaches a stable temperature.

For ease, if quenching isn’t done right before bed, I will throw the aluminum plates in the toaster oven as soon as I drop the steel off after quench in the freezer, and then after an hour or so, start the tempering process.

For simple steels, that’s it. needling away at ensuring temperature stability and accurate measuring is important, and the toaster oven, plus the thermometer, plus a third check if available is nice.

There are other alternatives for temperature stability, too. If you have a small metal can and can put chisels, knives or irons within the can and not touching the sides, that’ll work well. You can also use a container with sand in it – I use the metal sandwich because it’s available and works. Grade yourself on outcome, not style. If you quench and temper accurately, even with a cheap setup, you’ll see almost no hardness variation with oil hardening steels and variation of less than 1 at the extremes with water hardening steel.

One last point – the Japanese tools

I find 375-425F to be a great range for everything listed above, and I’m partial to the sweetness/hardness combination of 400F. However, Japanese tools that specify 65/66 hardness are at the lower end of hitachi’s (white/blue steel) range. You’ll see comments that this or that blacksmith is tempering at 100 Celsius, or 212F. There’s nothing to gain tempering tiny amounts, but it does provide bragging rights for people with no nerve endings.

If you find yourself with an older japanese tool that’s extremely extremely hard, it may be 25 or 50 degrees of temper away from being a real treat. You’ll need to remove any wooden parts, abide by the accuracy discussion mentioned above and start tempering at 325F and then increase by 10-25 degrees depending on your patience until you find something you like.

White steel and steels like 26c3 will be 2 points or more harder than O1 or A2 at the same temper, so sweetness in the result can come with high hardness. 26c3 can hit 64 hardness after a hand quench and temper at 400F. The samples that I sent for testing averaged 63.8, and O1 averaged closer to 61.5 on the c scale. 26c3 is similar to japanese white 1B. Had I tempered it around 325F, it would’ve been less tough than I like, but would’ve hit 66 hardness or so.

Unless you’re working pallet loads of paulownia, you’ll probably find 325-350F will get you a nice japanese chisel from one that started overhard, and you may still find yourself with a very sweet 64F chisel at a 375F temper.

Higher and Higher Temper Can Yield Subpar Results

Larrin Thomas (knifesteelnerds.com) writes about tempering embrittlement or something similarly named. Apologies for poor handling of proper nouns if I mangle names or proper noun, but what this means is more important than exactly what it’s called.

The useful fact in this case is that simple steels often reach a point where adding temper leaves them both softer and less tough. Or, put differently, the result is worse no matter how you look at it as the tradeoff to get better toughness by reducing hardness is lost. We don’t want to delve into this. From what I gather, this range for simple steels can vary, but is above 425F. If you want a softer steel than O1 at 425F (about 60/61 hardness), you’re better off switching to something with less carbon and tempering it in its sweet spot than you are trying to temper a harder steel softer and softer.

The Hardening Process – #2 – Cycling and Quenching

The basic hardening process with a furnace involves three steps. I do not do heavy forging, so if you do, I think you will have difficulty getting the same results as these as it’s no easy task to heat steel to forging heat and then refine the grain afterward.

The Three StepsAll Before Tempering

  1. Shape, heat, anneal steel. There’s no reason to get complicated here. I shape steel during this. Heating is hot enough to hammer a general taper to the steel to reduce the amount of grinding that I need to do. I do this three times. Hotter than critical temperature by a full shade and let the steel cool while hammering to black. Overheating here may cause headaches later
    • If you’re dealing with good stock, nothing is gained here if you’re not shaping.
    • Too, you could do a whole bunch of things here, like a single heat and anneal in vermiculite. I don’t do this, but it’s popular and a google search will help you find out more about it.
  2. Thermal cycle steel prior to quenching. In this case, heat steel until just prior to critical. Realistically, it is probably changing phase but not completely, and then partial quench in oil until the steel is magnetic again. This is quick and there is no holding at temperature – the quenches should be done before the steel becomes completely magnetic. Let the steel cool to air cool or close to it after the third iteration.
  3. Quickly heat steel to nonmagnetic evenly and as fast as you can heat it. Allow the steel to get to a full color past nonmagnetic and then quench in appropriate oil until fully cool. Or…
    • Finish the top part of the quench in quench oil, and then once the item being hardened is mostly cool, switch to ice water
    • Same as the prior bullet, but just room temperature water and then toss whatever is being hardened in the freezer

A couple of rules:

  1. The steel is never kept at high temperature for long. As little as possible. Heat changes the structure of the steel. If steel needs to be at a high temperature for duration to normalize, this process probably will not work well.
  2. Quench oil needs to be able to transition the first part of the cooling fast enough. The faster transition occurs, the harder and the deeper the hardness of the steel will be. Steels that are made for cooling in oil are more tolerant of slower oils – like O1 steel. If you’re using 1095 or 26c3 or some other water hardening steel, the results will be subpar in a slower oil. The quench oil I use for everything is Parks 50. It’s not cheap and the smoke point is low, but the hardness results are excellent and consistent.
  3. The first part of the quench needs to be fast. The second part doesn’t need to be as fast, but the lower the terminal temperature, the better the result. If you are finishing steel in ice water or the freezer, it needs to get there very quickly or you’ll get no gain. Don’t put hot steel in the freezer – the hot part of whatever you’re working with will be working against your effort to cool the steel in the freezer. Continuous immediate cooling down to the lowest temperature possible yields higher hardness.
  4. Chasing higher hardness is also correlated with more warping. If you’re using water hardening steels, you’ll be dealing with warp. You can introduce plates or chilled plates to the middle of this process to reduce warping, and mind bevels on things like plane irons. It’s fine to pre-cut cutting bevels, but don’t go overboard or they will help induce far more warping than you want.

The next part of this is a burden on you. When you are learning to heat treat steel, test it. How? You will end up with small cutoffs or scrap, and when you do, those bits of steel are ideal for testing process. Take something well known, like a quality file, snap it, and take a picture of the grain. Files have excess carbide, so they make a good starting target. The carbides make the grain appear a little bit coarse. If you’re using O1 or 1095 or something with less carbon, you should be able to snap your own samples after they’re cool – and before tempering – and look at the grain with a hand held microscope and see that you can create fineness superior to the file steel.

Take digital magnified pictures of your snapped samples and keep them with process notes. Snapping the steel means just that. Before you temper steel, you can hit it with a hammer or put it in a vise and break it. Files will also break easily. The only steel I’ve found to have toughness right out of the quench that can be unnerving is 52100, but 52100 has surplus chromium carbides and I don’t think it’s as good for woodworking as O1, so I don’t use it. It benefits greatly from a furnace normalizing cycle and I’m trying to avoid a furnace. It’s slower and with 1095 and O1, I can match published schedules for hardness and toughness in combination. With 26c3, I can better published data, and only with 1084 so far in this type of steel have I created a dud in tested samples. I never bothered to follow up because I don’t think 1084 has any advantage over O1.

What you’re looking to do with your making of samples is train your eye at the same time. Training yourself to see what red looks like before steel becomes nonmagnetic. Training yourself to see the color at nonmagnetic transition so that you can heat steel a shade further before quench. Getting repetition.

You need your eyes for this. Little checks and tricks and tempilstiks or whatever are too slow, this is all quick.

If someone tells you this kind of experimenting is a waste of time, then you don’t really need to hear from them. To cycle small samples takes only minutes – it’s an ideal thing to keep your brain working and thinking and analyzing when you may not have the time to do something more substantive in the shop.

If all of this seems like too much, just buy good O1 steel (starrett, precision, whatever it may be), heat it quickly to a shade past nonmagnetic and quench it. You’ll never do anything in woodworking where the results just from that will be lacking.

Tempering is next.