O1 Steel for Woodworking

I often toss around the trade names for alloys (can’t keep track of the brands that try to hide – if you recall yesterday’s discussion of W2, there are something like 30 trade brands for the same thing).

But what I don’t have is my thoughts on steels that I have experience with, so you can reference them if you’re the rare person who comes across this blog and want to know basic characteristics.

I think it may be a good idea to put a summary of characteristics for each, and some description. There are descriptions of steels all over the place, but they are not commonly described in a woodworking context, and when they are, often by ad copy and lacking accuracy or tangible meaning.

Characteristics of O1

(characteristics are not for high speed turning or drilling)

Reasonable Hardness Range: 59-64c. Sweet Spot: 62c

Toughness: At the lower end of suitable (but still suitable – only a problem if heat treatment is poor).

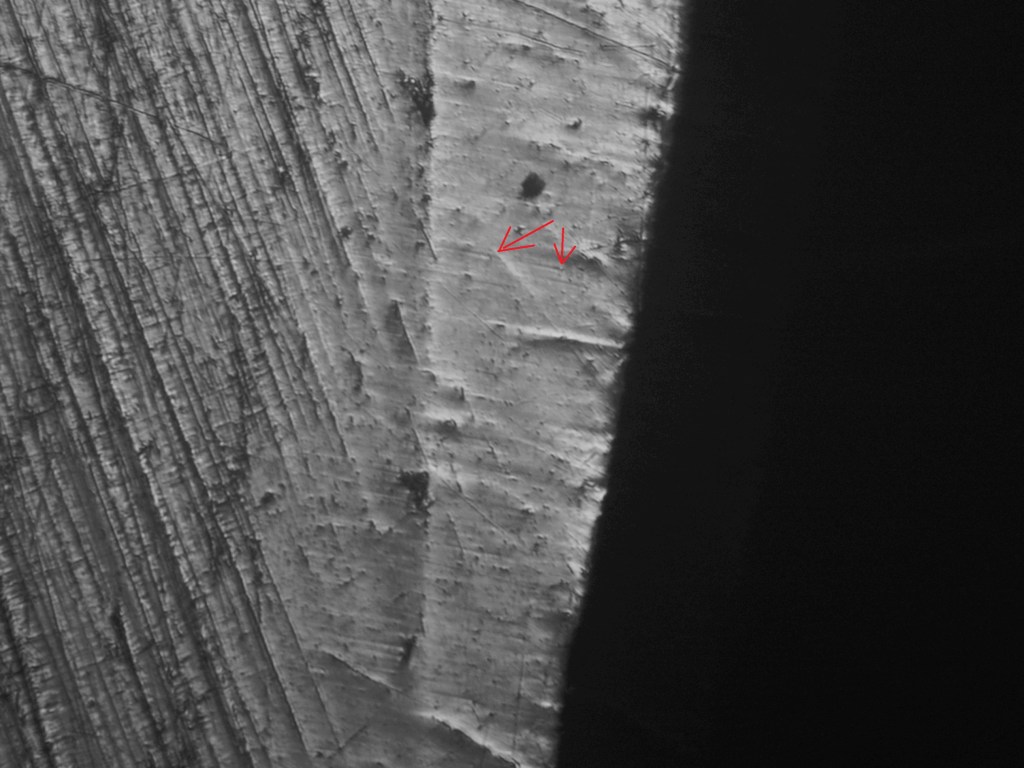
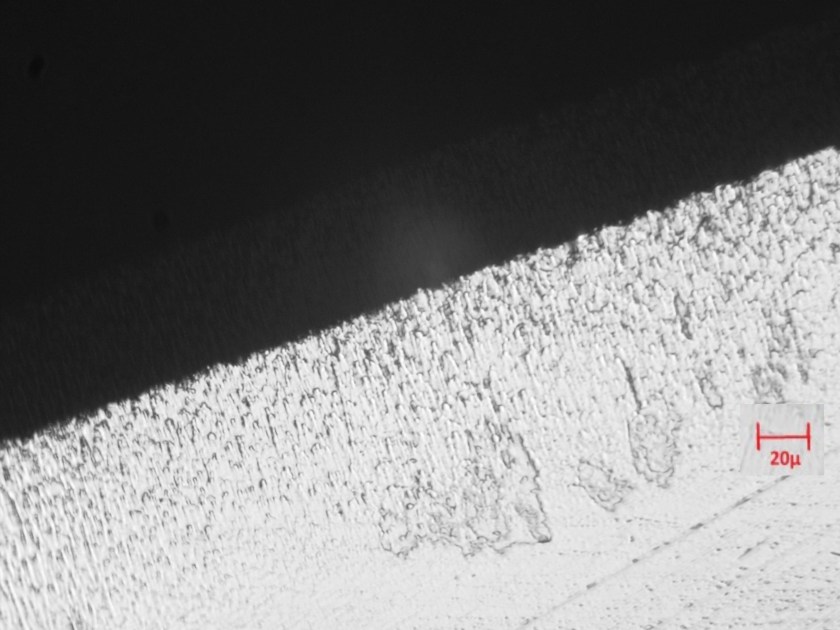
Edge Fineness: Very good (fine carbides in the 1-2 micron range, evenly dispersed)

Edge Stability/Keenness While Dulling: Good – stable edge fineness for anything but fine razors. Retains good sweetness while dulling during planing (smoothly picks up shavings and retains uniform edge until sharpening is needed to remove wear)

Wear Resistance: Good. We’ll use 62 hardness O1 as the bar going forward as no skilled woodworker would be dissatisfied with edge life at that hardness, though amateurs may perceive they should be. That’s a different problem.

Elimination of Defects in Routine Sharpening: Good with good heat treatment. A skilled user is unlikely to need to “stop and grind nicks” before an edge is dull.

Brief History

O1 is a relatively modern (for steel) follow-on to water hardening steel. It’s more hardenable, meaning that it has more additives that are required to harden steel (manganese, and chromium notably) with chromium doing something positive in small amounts with iron carbides according to Larrin Thomas. The composition of the steel in general will be provided at the end of this article. My thoughts are generally that you can feel the alloying in O1 if you get used to water hardening steel. it’s “slick” feeling on stones at same hardness, but not nearly so much as something like A2.

The through hardening (= the entire cross section of a tool being hard through and through rather than just in a surface layer) and relatively easy machining makes it ideal for some die making and machine shops, so I think we will not see it disappear from woodworking use, but it certainly wasn’t developed for woodworking. Actually, I’m not aware of any steel that was ever developed for woodworking – we’re a small market and we use what’s available.

Increasing Manganese for hardenability wasn’t really an original idea. In the 1800s, an early type of air hardening high speed steel was discovered or developed (Mushet steel – you can look it up). As far as I know, Mushet relied on a lot of manganese (double or more that found in O1, ten times or more vs. some fast quench water hardening steel). Too much and steel is brittle – the fact that we’re not using Mushet steel probably has to do with brittleness or cracking because it’s possible for steel to be so easily hardenable that in open air, it would cool too fast to be stable.

What happens in general for us (this always depends on what you’re comparing O1 to), the alloying improves wear resistance (increased hand plane life vs. water hardening) over very plain water hardening steels. The overall effect of the additives leads to strangely uniform small carbides given the amount of alloying, too. In terms of the reduced toughness, there is still enough for woodworking. That’s important – the world of all purpose knives and boutique knife makers where a lot of robust steel discussion occurs…..very fascinated with toughness. People return knives they break. We typically don’t break tools made of O1 because we’re not prying in tree stumps to make a youtube bugout camping video. What we like is strength and stability of the very tip of an edge that’s in the wood severing fibers, and O1 is relatively good for both of those.

Commercial Availability in Woodworking Tools

O1 is relatively common in boutique tools. some variation of it may be in older tools, but most European tools that don’t mention the type of steel or mention Chrome Vanadium are generally not O1. If a manufacturer uses the alloy, they usually mention it as use probably was uncommon in thinner cross sections (plane irons) until the last several decades.

Iles makes good chisels in O1 that seem like they’re right in the sweet spot, though I’ve had a set of boxwood handle chisels that were a bit soft. LV offers an array of irons that are a bit underhard to be as good as they could be in my opinion, and Hock tools offers tools that are on the other end of the usable range. There can be reasons for both of these – but it’s my opinion that a typical user would prefer something done between the two.

For Hobby Toolmakers

Not a great steel for forging, but there’s little that a hobby toolmaker should be done that involves any of that. Leave that to people making reproduction lock sets and starring on cheesy TV shows. Bar stock from good retailers or known mills (Starrett as a brand, Precision Steel (brand), Bohler (mill), etc – ever so slightly different in composition but all good).

Stability in hardening is middle of the road but far more stable than the most unruly of water hardening steels, and just generally heating to nonmagnetic and then some past that (quickly, like seconds, not minutes) results in good tools that will match commercial offerings.

No special oils required to quench due to the additives. And easy to grind, drill, file, shape with only moderate air hardening if heated to red heat while working.

Typical Composition:

Carbon: At retail, usually 0.9%-0.95%

Manganese: 1.2% (you’ll find out that vs. plain steels, this is a lot)

Chromium : 0.5%

Tungsten: 0.5%

Silicon: 0.3%

Vanadium: Up to 0.3% (but in US retailer offerings, usually not included).

These are what I’ve seen from easy-to-find retail sources, and not necessarily a full industrial spec (range may be wider).

Sites like Knifesteelnerds.com have more information on the history, and the owner (Larrin, a “real” expert metallurgist) will perhaps have something more specific in terms of historical spec vs. current. Interestingly, steels as they were offered originally often have changed over time depending on the conversation. For example, if there is a precursor to O1 or a whole series of oil hardening steels, what remains now may not be what was initially popular due to improvements or changes for other reasons.

You can also find generalized specs at steel suppliers.

If you want to machine O1 quickly, finding it in spheroidized condition (if listed) is a good idea. If you just want to grind and heat and quench bar stock, getting the steel in annealed condition should be better. Steel that’s spheroidized can be intentionally cooled very slowly so the carbides have “balled” to be larger and further apart. However, Starrett is spheroidized and before I knew that, I heated and quenched it in soy oil and the results were good. You can do better once you know a little bit more, but I’m not sure any woodworking tool user would notice.

Final Thoughtit’s the Reliable Fairway Wood off of the Tee, Especially if You are a Maker

In the hardness sweet spot for me really the middle of the range, and 61.5-62 is about where I end up with a 400F temper, it’s like a reliable golf shot that scores well. Everyone always wants something for nothing, but O1 is a steel that gives you a fair something for something. And much of what’s in current woodworking tools gives you a little less than that fair “something for something”.

There’s nothing that O1 is really lacking in practical planing or chiseling, so it becomes the bar I judge other steels by. If I mention O1, like in the post about experimenting with W2 to make a large chisel, that there’s something I want a little more of vs. O1, it’s hard to describe if you’re not used to small improvements. Those mentions aren’t because I think O1 is something I couldn’t live with, but for example, if another steel may find its sweet spot in chisels a point harder with less alloying, I find that nice. Not differentiating for day to day woodworkers, though.

If anything, I think if you find you like Hock’s irons (but you may find that they nick easily before they’ve worn a little bit) or you want O1 from Lee Valley, but you find edge life short, it’s worth asking LV (who now has purchased Hock) why the irons aren’t offered at a target of 62 or 61/63, whatever is practical. In actual practical planing, i’ve found better life than when harder or softer, and chisels are far superior at 62 vs the low end of the practical range.

W2 Steel Chisels – Surprisingly Good – and Surprisingly Hard

It’s early February. Those two characters (W2) probably make people think of doing taxes. And the steel is probably very little known.

But I followed up the first pair of chisels for little boys with acromegaly trying W2. Why? 80crv2 is OK. It’s missing something hardness-wise, which results in a chisel that’s maybe sweeter on the stones, but I prefer something with some hardness and bite.

There are all kinds of options to try next, but I do not have a heavy blacksmithing setup, so getting a giant ball bearing or a piece of round stock 3″ wide and 3″ long and drawing it out is no bueno.

You’ve probably heard of O1, which I could get. O1 makes a decent chisel, but I’m looking for more than decent. It also lacks toughness (resistance to breaking -not chipping, but breaking from prying). I don’t think the toughness is a big deal as I’ve never broken anything in O1, but I want a notch up.

Day to day chisel making, for me at least, is 1.25% carbon 26c3. It’s unusual for chisels, but it makes a superb chisel. 80crv2 emphasizes toughness and, and there is probably a little bit more improvement in the hardness department, but if the window is that narrow to get it, I’ll leave it to plane irons. It makes a nice fine grained plane iron.

W2 – By Composition

W2 is, by composition, similar to a 1095 spec (0.9-1% carbon for the only retail source), but with the addition of vanadium, and in the case of what’s available, maybe even less hardenable (needing an even faster and more warp-risky quench).

It is low hardenability (needs a very fast quench to get high hardness), with small amounts of manganese and chromium added. And there are a few other alloying elements (a trace of tungsten, silicon, …). The vanadium is important to me. I can make a good chisel out of 1095 now. I couldn’t early on. It also suffers from toughness problems, but more importantly, I haven’t always seen uniformity in broken cross sections in 1095 – and those are the result of quality problems.

If you read the internet for a while, you’ll probably see a history of steels in the last 200 years that goes like (and this is curated for boutiquers – not a complete professional history).

Cast steel

Followed by W1 steel (not W2, but more on that in a second)

Followed by O1 steel

Followed by A2 (boutiquey), and Chrome Vanadium – a very generic term often derided, but the CV steels go anywhere from paint can opener quality alloys to razor and hard drill rod). And in this, is apparently, 80crv2 used commonly according to Larrin Thomas. We just don’t know who uses it. Probably European makers.

The W-steel groups and mild steel and pure iron (instead of wrought) weld electrically. Presumably, their presence came about due to industrial need.

O-1 is more simple – increasing hardenability makes it so that the steel is more stable and can be cooled more slowly and still get full hardness. This is a big deal to a manufacturer, and it’s important for a machine shop making one-off dies or parts. Oh – and also importantly, if you need a reasonably good die, it can harden in much thicker cross sections than cast steel and W1.

O1 is a good steel, and wonderfully easy to execute – and this discussion is keeping me from talking about W2 -but there’s a little something missing from it for me, both in irons and chisels. We are talking about the narrowest of things. I could make all of my tools out of O1 and work wood and never lack for something to use and make nice things efficiently. I think the same isn’t true for everything out there. For example, if I were actually going to do a large volume of work by hand only, I’d have no tolerance for Lee Valley’s V11 chisels. They work, of course, but their abrasion resistance is out of place on chisels and the edge doesn’t hold up as well as cheaper steels at same hardness.

That itself may sound odd to folks who have had O1 and V11 from Lee Valley – because LV specs O1 pretty soft and it doesn’t hold up well in apex critical things – like chiseling. That’s a choice on LV’s part – I could only speculate as to why – whether that’s a product of manufacturing ease dealing with O1 or if it’s a preference to have something that sharpens really easy at the cost of performance.

Oh – and that dimensional stability thing. O1 was seen as very stable compared to water hardening steels. But A2 and other air hardening steels as a follow-on are more stable yet, and O1 is fast becoming panned by commercial heat treatment services. Rob Lee mentioned the same thing to me (publicly on a forum) – that he likes O1 – but with his business hat on, he likes V11. When I quench XHP (which is V11 by Xray analysis results), it just stays straight. I get it.

So in the history of what we see used in boutique tools, stability wins. And 1095, 26c3 and now confirmed -W2 – are far from being stable in heat treat. They will warp if you don’t do everything right, and the faster you chase the quench and lower the temperature tail at speed, the more the warp. We can learn to deal with that – both in improving technique and in follow-up grinding.

So that brings us to W2 (vs. the W1 you’ll see mentioned everywhere). The original specs of these water hardening steels are very wide. That probably has to do with patents. 0.7% carbon to 1.5% carbon with ranges for other alloying elements. While the classification is wide, you may love a 0.9% carbon version and not 0.7% or especially 1.5%. I don’t order W1 steel because it’s not often found with a mill origin or certificate of actual composition.

But W2 is sold by New Jersey Steel Baron with batch certificates and a much tighter spec. So without being able to get my favorite (26c3) in 3/8″ bar stock, it’s just the thing to try. Carbon appears to be about 0.91-0.97%, manganese is half of what you might expect, and there’s a small amount of chromium to help hardenability and probably to keep some of the carbon in carbides and not in the matrix of the steel – too much carbon in solution and not in carbides leads to toughness problems. This is what is occurring in 1095 and O1.

And the steel is from Buderus and not “mill not named”. Good.

It sounds like…..

…..a plain steel that will require focusing on a simple but well executed heat treatment, an eye toward limiting warp, and rewarding chasing the steel from hot to cold as cold as possible and as fast as possible. And it’s not expensive, which is nice, but not that big of a deal for a hobbyist.

Could it be the steel that makes tools that feel like “old tools”? O1 doesn’t feel like old tools, nor does 80crv2, and I’ll admit, if 26c3 is landing at 64 hardness with a full double temper, it’s a bit hard compared to older tools. And the potential to use it up to 66 hardness after tempering – it will stifle sharpening stones.

Reading about W2 finds me landing at blade forums. That’s the site that I got banned from for talking about forge heat treating and being insistent that for simple steels, there’s no drawback. Interestingly, what I asked initially was if there is a “1095 with vanadium”. The answer there was no and my answer as to why (having the vanadium to pin grain size small and drive temperature past furnace soak temps just prior to quench to chase hardness), that’s what started trouble. “you can’t do that!!”. 26c3s results bettering furnace results (by a lot) and O1 matching wasn’t enough proof and nobody could seem to mention that W2 is available. So finding discussion of it there after the fact is humorous.

The discussion is littered with comments of not getting it hard enough, which isn’t a surprise – live by the furance, die by the furnace. Chase it slightly hotter than needed for a matter of only a few seconds and then quench as fast as possible and guess what -that concern went away. It’s bonkers hard. Right on the heels of 26c3 before tempering.

A brand new file will not touch it, not even the slightest anything on the sharpest corner. After a double temper at 375F, it still has a bit of a hard tempered attitude – just what we want in chisels. it’s a bit stifling for an india stone and skates on oilstones. That sounds like it’s too hard, but it allows use of the india stone to do minor work (grind for anything else), and an oilstone will polish and leave a blinding edge.

How the Chisels Turned Out

A review of what I want. A chisel that will not roll, but will not chip easily. 26c3 does this. A chisel with high hardness as that’s needed for holding a reasonably fine apex. 26c3 does this, of course. 80crv2 fell short in both of these a little. And excellent burr performance if possible – as in, a burr is raised on the middle stone and disappears on the fine stone without creating a nuisance after finish honing as softer steel might.

The hardness ended up higher than I anticipated so at this point, other than experimenting with some samples later and snapping to examine grain (more for longer-term consideration to use in both chisels and plane irons), the one thing that will expose large grain is chiseling something really hard. Like near water density wood across the grain.

26c3 handles this. 80crv2 rolls quickly.

W2 handled it just fine.

one 80crv2 chisel on the left – two in W2 at the right

The back sides. The left and right chisels are done and working. the one in the middle, I’m keeping along with the left. I’ll mail out the other one in the next two days. Chisel 2 is probably not prepared yet in this picture, but back flattening and setup was done after. Both w2 chisels are better than either 80crv2 chisel by a lot – which is a good thing. That was the objective.

These chisels are good enough that I’m not going to make two more in 125cr1, which NJSB listed just recently as an alternative to 26c3.

When I mention all of these alloys, I know it’s dizzying – without describing them and the characteristics, the discussion lacks resolution. But the details probably make for the need to ….make notes. I can’t really help that. Anyone who has worked through these discussions of steel will be long past “1095 is for saws, O1, A2 and V11 are for chisels”.

We’re not really looking for light and airy at this point – we’re looking for results, differentiation and learning. As one of my college professors said (in a challenging class, where it always seemed like he kept us confused and thinking hard) “learning hurts”. I have one goal when making chisels that stands out to me with everything else secondary. Can the chisel that I just made match anything vintage that I’ve seen and better anything current outside of japan. The answer for 80crv2 was no. So far for W2, the answer is yes. Finding that is what I want.

How do I Test?

I test chisels right off of the first grind. That’s two-pronged. First, it should be the worst part of the first several inches of chisel length, and second, if I can’t make that part workable, then from the making standpoint, I need to revise what I’m doing. It may be true that commercial chisels or irons can be lacking for some length, but that’s preventable.

If they are better a little further in, that’s fine – but I want the first grind and sharpen to have ideal characteristics.

I test in order:

  • By feel of the grind – if a chisel is soft, I will be able to tell finish grinding. This is unfortunate because it lets the air out of the balloon a little early. By soft, I don’t mean it’s 53 hardness instead of 63, I mean if it’s 60 and I’m hoping for 63, you can feel a pretty significant difference in how the chisel feels while grinding, and of course, some difference in the speed. Softer leads to more of a bite from ceramic belts, and harder more of a skate.
  • By feel of honing. For plain steels, a little bit of skating and not much steel removal on a fine india, hardness is high (62+, perhaps 63+). Skating on oilstones mostly aside from honing peaky scratches, also same hardness. Anything less, and it’s a matter of how much. Once the burr is established, in this high hardness range, it will generally come off of a plain steel on mid-fine oilstone and what is raised further will not be large. Softer can make a decent chisel, but it’s not my objective.
  • Buffing off the burr – the amount of “stripe” made at the very apex is highly dependent on hardness. Subjectively 59/60 hardness will buff twice as fast as 63/64.

And then tests in wood:

  • Paring hardwood (picture below). i try to pick something that is hard enough to be differentiable. Not pine or poplar.
  • Malleting a volume of harder cherry or hard maple. Cherry isn’t as hard as maple, but what damages an edge on one malleting seems to work on the other. Put differently, if I mallet a volume of wood and see any sizable defects, I’ll find it in either one. Zero defects in an edge is acceptable. It takes a fine microscope (not a 40x loupe, but something more like 150x optical to really differentiate and fine if there is nicking and how much. Sharpening removes a thousandth – anything more is a hassle if it’s avoidable. That is, a long interval of heavy use should be addressed by routine sharpening. A mediocre chisel won’t meet that standard unless it’s made pretty blunt).
  • Paring wood again after malleting is also fine – the surface should remain line free.
  • If that is passed, I have some older rosewood that is more than 90% of the density of water. It will destroy the edge of a mediocre chisel malleting across the grain. If a chisel is really good (a properly made japanese chisel, or one made out of very good quality files -properly – or 26c3, or the best of vintage chisels), it will tolerate some amount of malleting with a regular (not steepened) edge and take no more damage than the depth of regular sharpening.

How important are these tests? For you, maybe no big deal. For me as a maker, or some kind of critical comparisons of what you’re doing – furniture, fly rods or whatever – they are what will make you better. If you don’t have the fire for that, you’re destined to end up talking about making things on forums and not making much.

About the Toothpaste – and Failed Forge Welds plus Mediocrity

Finishing a pair of the large chisels has allowed me to brush with dogshit flavored toothpaste again.

Below are pictures of one of the two chisels – sans the really final aesthetic work around the tang and up.

So, what are the pluses? The 80crv2 isn’t underhard. And the chisel (which is nearly 15″ long – and by itself weighs as much as a set of bench chisels with handles) is more useful as a paring chisel or sizer than I expected.

That’s fine. But, I expected the chisel to be better overall.

Why? First, this is the third forge welded bolster. I usually use mild steel with 26c3 chisels, and the bolster is smaller. I don’t like to overheat a whole lot and distort things, so a small part of the tang and the bolster blank are brought up to forge welding heat and then the business happens.

But, 80crv2 doesn’t seem to be amenable at the same temperatures, and what I probably would really love to have – pipe dream – is a high current induction heater to just turn the whole area yellow in a short period of time. I use an oxymapp brazing torch near the junction, which is a bit of an art as it could easily melt the steel and cut it. This after the whole joint is already as hot as it can get with two ts4000 torches. As often as I see advertisements that propane torches or forges can get to welding temperature, I’d hate to have any of my steels at that temperature long enough for them to get there – and in my experience, they don’t, anyway.

So, imagine, if you will, spending three hours or so on a chisel, putting the handle on, setting it and having the bolster move.

No bueno.

That brings up a gaggle of other questions afterward, because the area at the forge weld needs to be resurfaced and another go at it is needed. Each time, the tang gets a little smaller. Fortunately, it’s big.

If the weld is good, nothing should move it – not even smashing at it with a steel hammer. The first few times I learned to weld (smaller) bolsters on 26c3 chisels, I could tell if the weld was good by taking a chisel that maybe I’d keep for myself and hitting the bolster to see if I could seesaw it. If I could hit it long enough to bend over the tang and no separation or movement came in the weld, it’d be good for the long haul in a chisel.

So far, that’s been true. The weld is either deceiving and it moves quickly, or it never has after that.

The solution in this case was to find bar stock of something plain that’s higher carbon. this is harder to form and the whole process is a pain in the ass, but I think in this case, the steel that I used is forge welded. This chisel is for me, so maybe it will never matter. What I used, because I couldn’t locate 1095 that I thought I had on hand (did I actually throw it away? I may have – different story for a different day) in 1/4″ – was W2 steel. Which is only a slightly more modern water hardening steel than “cast steel”.

Two things became apparent. One – I have no interest in something that hard to forge weld. Two – if and when I make more than the first pair, they will be a different steel.

And then I finished the thing and tested it.

Mediocrity

80crv2 has some claims to fame. It is very tough, meaning your attempt to lean on this chisel and break it would be futile. If you could get it to do anything, it would bend instead.

It has ultra fine grain, and compared to lower carbon steels, it can get reasonably hard.

After setting up the chisel and paring beech and then malleting cherry, it seemed fine, but without iron carbides that are in something like files or 26c3 steel, you can feel that it’s a greasy smooth feeling very fine steel and it doesn’t have the bite that you’d recognize in something like Japanese chisels or really good older English chisels.

And so, trying to figure out where it just wasn’t right, I malleted end grain rosewood.

And without a lot of accommodation, it just doesn’t have the edge strength or stability. Is it on par with harbor freight chisels? No, it’s better than that. But it takes some effort to make something like this – just physically and time wise, so I cannot live with the idea that it won’t match the better vintage chisels, let alone the ones that I’ve made out of 26c3.

And because you can always double check a double check, I chased down an earlier chisel that I made out of a file (which is strikingly similar to 26c3 steel) and that chisel tolerated malleting the rosewood test stick that I use. One that is a little bit more dense than usual.

So, what now?

These are difficult to make due to the size based on what I have at hand, but I could get better at them and cut the time in half and probably not care.

There just isn’t enough upside with the 26c3 – something is missing vs. steels that have a surplus of iron carbides. I could tell when making plane irons that 80crv2 and 1084 both have this property – this greasy ultra fine feel, and when you make a comparable 1095 plane iron, you can instantly feel it has a crispness that 80crv2 and 1084 don’t have.

If I could get 26c3 stock in 3/8″, the fix would be simple. I could make them out of O1, but I just don’t love O1 long term for chisels – it’s also a bit greasy feeling and its got problems with toughness. Would anyone find them? I doubt it, but toolmaking to me is an ideal. It’s about trying to make something that people would prefer without having to think about it or be lobbied or convinced. O1 is OK. I want to get closer to 26c3. So I found W2 bar in 3/8″ and we’ll have another go at this pair of chisels and I’ll figure out what to do with the first two.

I kind of expected the chisel to be a little better technically and more awkward and useless feeling shape wise.

The good part of this is I’ve learned a few things that will help down the road, making forge welding a little bit easier. And I’ve got a couple of ideas of things to try when doing the bigger forge welds.

I’m aware that on bigger chisels like this, that I could create a physical step as a barrier for the bolster, but I don’t want compromises if they aren’t required.

I guess that means that instead of a final post when these are done (one is, the other will be the same), I’ll have a later post to see if W2 solves the problem.

What is W2?

W2 is just a water hardening steel – at least that which I’m buying – that is like 1095 with a little bit of vanadium added.

That itself is a funny thing. I got banned from bladeforums for talking about heat treating in a forge and refusing to agree that it was stupid, but rather wanted to talk about it further and get some other folks to try it with more of an eye on doing and testing (snapping samples, etc).

What led to that? I asked if there was a 1095 steel or a 1% carbon steel that was like drill rod but with some vanadium.

All of the answers were no. 80crv2 was one of the suggestions. Carbon V was another (the old sharon steel that was used in the many decades old camillus type knives that always seem to be so crisp and easy to sharpen). Nobody mentioned W2.

That place is just another forum, though, and I’m done with forums. You get stuck dealing with too many other peoples’ baggage, and ultimately create nothing positive in return – which is what I’d gotten to.

Magnacut vs. 80CrV2 – Carbides and Edge Smoothness

After the debacle in the first three posts about Magnacut where it looks like my sample benefitted from having the initial bevel ground off to get to harder steel, I figured it would be interesting to pattern carbides. I’ve only had one steel that wants to defy this – AEB-L. AEB-L wears in a kind of weird shape, and very smoothly and it just looks like grease or clay on the worn surface. This would seem to be a good quality as it suggests “ultra fine” visually, but AEB-L wears longer than 80CrV2 and O-1 – without cutting as keenly as it dulls. It’s noticeable, especially if you use both in the same board and there is figuring or anything other than easy planing.

My typical trick to expose carbides is to set the cap close so the chip rubs against the back of the iron and then plane cherry, which has a “dry” feeling when planing. I have the same maple from the third test in the vise, though, so I’m using that. I noticed three years ago that the wear on irons looks different from maple than it does from cherry or beech. I don’t know why this is, but it leaves a smoother looking surface. Maple is less nice to plane than beech because it doesn’t accept an edge into the wood as easily, but it doesn’t seem to plane much less in footage before dullness.

Anyway, I expected to see a dense matrix of small carbides in both of these samples based on what I saw from cherry, but the pictures show a little more subtlety.

What to look for

I’m generally comparing what the edges look like, the carbide size, uniformity and prominence, and then feel as the edge dulls. You can’t get the last from reading this. Feel importance to me is how easily an edge planes and how cleanly it planes features. For example, 52100, for some reason, is never as sweet as O-1. If you plane a figured surface with it once it’s even been in the wood 100 feet, it will require more effort to stay in the cut and the actual surface will be more scuffed and scratchy feeling.

Surprisingly, AEB-L with its ultra-fine look also does this. O1 is reasonably “sweet”, 26c3 is very sweet (but less long lasting than O1) and 80Crv2 is very sweet, meaning that even as it dulls, it seems to enter the cut and stay in it better. Simply put, I’ve tested AEB-L in the past and found that it would last a lot longer than O-1, but I would use O-1 because it’s less work to use, anyway. Neither is hard to sharpen, but O-1 does sharpen and grind a little faster, which you’d expect.

You may not feel how drastic this difference is between various steels without sharpening them similarly and then planing alternating in the same piece of wood.

You’ll have to take my word on sweetness because I haven’t found a visual characteristic that’s 100% reliable aside from a ragged edge will not be that sweet, but not every uniform looking edge is that sweet. V11 looks like 52100 on steroids (same type of carbide), but V11 has pretty good sweetness if you can avoid chipping, and 52100 doesn’t. Seems backwards since V11 looks more toothy.

Magnacut Smoother Wear

Magnacut 300x magnification – smooth look, decent edge, but strangely wavy with wear. Reminds a lot of AEB-L even though the composition is much different.

Notice the red arrows. it’s no easy to see the carbides, and it appears the final sample as mentioned before shows the advertised fineness.

Carbides and steel grains aren’t the same thing. The actual steel matrix grains are bigger, but I can’t show them without nitric acid, which I’m not looking to deal with as it would necessitate storage in an external shed based on my physical carelessness with things. So, the grains are an unknown, but the carbides are definitely small and no big odd ones appear.

At the edge of the arrow, you can see a carbide with its “comet tail” where steel was protected behind it. The rest of the smooth structure reminds of AEB-L. which is better would be up to you – AEB-L irons could be made available pretty easily, but I’m not sure there’s a market for them and personally, the sweetness of 80Crv2 is worth a lot more to me than the extra edge life of AEB-L. The comparison of the two steels here finds the same with Magnacut. It’s an interesting steel, but I wouldn’t swap it out vs. 80CrV2 or O-1 at an appropriate hardness level (as in, not soft, and not pushing the upper limits of the tempering range).

To get an idea of how small these carbides really are and how fine for both of these vs. a steel with larger plentiful carbides, I’ll toss a picture of XHP’s (PM-V11) carbides at the end.

80CrV2 Smoother Wear

I put a picture of 80CrV2 wear in another post already, but this is different wood, so it’s appropriate to take another picture. I got lost a little bit in planing with this so it may have planed a few more feet than the Magnacut iron. Regardless, it’s clear that it wears faster when planing, but it has excellent sweetness remaining keen as it dulls. As good as anything.

80CrV2 at 300x – notice the smooth but considerable wear, and the smoothness of the edge. The tiny dots of carbides are easy to see. The faint diagonal lines across the wear bevel are oil even after wiping off the bevel four or five times. This is an illustration of why even when you think you don’t have oil on your tools, they will benefit greatly from using oilstones to sharpen instead of waterstones.

Visually, 80CrV2 at this very high magnification looks more uniform at the edge. It feels like it as it just cuts more smoothly in wood. Edge life is similar to higher hardness O-1 based on my testing and may be even a bit less. Not much, but a little.

Day to day cost neutral, I’d pick this over Magnacut. There’s not much technically interesting about it compared to newness of Magnacut, but it’s just a little nicer to use. It’s also nice that it’s dirt cheap but for that barrier that you need to make your own irons if you use it. It’s also not stainless, but stainlessness of irons only became a “thing” when the folks imagining woodwork became the majority over those who are actually doing it, and the whole tool care hocum is a product of selling nonsense to beginners who think there’s magic in little 1 ounce bottles of “nano-quark” rust preventive pushed by their favorite ethically-deficient influencer. My suggestion? Use oilstones. If that doesn’t stop rust, then cut back the number of tools you have and use until they’re not rusting.

My eyes are still open for the next steel that’s going to be better, functionally, without making conditions. Like something that wears twice as long as 80crv2, but has the same sweetness and actually makes for less work. I don’t know if that’s practical. Magnacut is a good attempt, but all things considered, it doesn’t get there cost neutral, but it would make a dandy kitchen knife at this same hardness.

Dandy enough that I think Lake Erie Toolworks should think about finding someone who would grind chef and paring knife kits out of Magnacut leaving just a bit of finish sharpening and handle fitting for folks. It’s again something I wouldn’t be interested in, but there’s the inclination in my mind for someone to “adopt a steel” and be willing to buy more than just irons. Especially if they can get them at the same place. They would have to be expensive given the cost of the steel, but none of this is aimed at the teenager who is choosing between their next plane and duct taping shoes for a couple of months.

And, finally….the picture of XHP that I mentioned I’d link here again for comparison – this really puts into perspective how small the carbides are in the two steels above.

CTS-XHP wear after planing – 300x magnification. Notice the density and size of the carbides. This is likely the same steel as PM-V11, and if not, it’s insubstantially different. The large carbides do not, though, correlate with poor keenness while dulling. V11/XHP have nice sweetness while wearing, with some tendency to nick and a long potential edge life that increases the chance you’ll gather nicking.

Magnacut 3 – Testing after Grinding Off Length – ahhhh….relief

It’s still the same day as posting the prior two posts. I intended to let this sit a while until I had a practical task, but something about the other results didn’t sit right. The results are negative, but maybe it really is just heat at the initial edge. I walked to the shop to think about it and grind off most of the bevel. More than 1/8th of an inch, though that may not have been necessary, I don’t want to inch up to seeing if this is fixed by getting away from the factory grind.

So, I also noticed that I have a few maple shorts left that I’ll never used – I forgot about them. That gives me a chance to bungle up their edges with the cordless circular saw and then plane them and time the planing.

I figure that I planed about 8 minutes on maple with the prior edge in test #2, and 2 in poplar (go ahead and say it…”popular”). So, that’s what I did except I skipped the poplar.

Grinding: uneventful. it grinds relatively nicely, it’s fine and it doesn’t get that hot and at no point was any part of it – not even the very top, hot enough to boil water or burn my hand.

With a belt grinder and ceramic belts, this whole process, even being careful, takes about 5 minutes including installing the updated edge.

Noticeable Change!

When I went back to the stones, the updated bevel is harder to hone. I’m somewhat surprised by this, but I’m a feel toolmaker. Test and observe outcomes, but get feel at the same time. I was surprised how easy the initial edge was to hone, but it doesn’t have bad wire edge / burr behavior, so I ignored it. Maybe it was easy to hone because of the small carbides – this is actually a thing in heavier honing – small carbides will make things a little easier until fine polishing.

This seemed very positive, except it does seem like I shouldn’t have to find the heart myself. I don’t use machine shops for anything, so I can think of (as someone who has done practical heat treating) two possibilities. An exposed bevel that gets heated a bit too much in temper, or one that is ground and even though doused with liquid or cut intermittently – either will work – done just a bit too fast.

The resistance on the diamond stone, india stone and then through the 1 micron diamonds on cast seemed greater, but again, the wire edge came off nicely without any fanfare (this is a good thing).

I proceeded to plane 8 minutes timed, stopping the timer each time I ran out of edge and had to cut some width off with the cordless saw, and then resuming again planing with the timer on.

Far better results

I didn’t bother trying to make this take longer and test several irons against the Magnacut iron – I just wanted to see if the same task could be a little better. By feel, too, the shorts that I had were a little more agreeable than all of the bed slat boards, but they’re still hard maple, and I didn’t baby them.

The edge damage this time is far more minor, and this is an iron that has a better feel of being something I could live with. It’s now slower to hone, but that’s a trade we expect to make with plane irons. I should wear almost as long as V11 in an idealized situation.

Magnacut 150x – after grinding of significant length – typical minor damage. This is inconsequential and most of the length of the edge used looks like this or better. Regular honing will remove all of it, which is important. We always want to have an edge that has damage no deeper than regular honing because the talk of “stopping to grind out nicks” is something that sounds good in a Pop Wood article, but you will tire of it about like you would a girlfriend who is never there on time but OK otherwise. It makes you wait for something you don’t need to wait for.

Magnacut 150x – typical minor deflection – but even at that, not occurring on much edge length and not worrisome.

Only one more signficant deflection occurred. Fortunately, you don’t have to ask if this is a carry-over from the prior test as I removed a lot of edge length grinding the bevel back.

Magnacut 150x – worst damage encountered in the third test. Wide, but note how shallow it is. Not as bad to hone out. Note that the wear doesn’t look as significant. The wood could be a little more favorable – wear appears to show up as darkness in these pictures.

This is a resounding difference vs the factory edge, both in feel and in the depth of defects. None of these will leave large topographical lines and most probably won’t leave anything you can discern, and a full wear cycle may remove a good bit of them.

Too, with that, just minor buffing (and not edge life reducing large amounts in nature) could also eliminate the defects. And this is on interrupted hard maple.

I am glad I didn’t sit on this, though I no longer have the fervor for testing, I do have it for fairness.

I didn’t expect that the initial edge would be a little underhard (my perception, not proven), but I also didn’t expect because of that, that we’d see a big improvement. As little different as these may look vs. the earlier, the difference is drastic – from intolerable, to usable and practical, at least from these tests.

How much would you have to grind off? I don’t know. I don’t have any qualms about grinding length off of irons and cutting an entire new bevel, but this is a steel that doesn’t tolerate excess heat, so if you are the type who can’t grind without burning carbon steel, you may just want to wait it out if this is a characteristic of all irons.

I mentioned in the prior post that we like to see almost all of the edge totally undamaged, and in this case, almost all of it is.

Now, I can go set the cap close and wear a “cup” of steel out of the back of the iron by letting shavings ride it and we’ll see if we can find a more copious reef of carbides to look at. The point? Only curiosity.

I think this would make a wonderful kitchen knife, but it is out of my league for shop heat treating for the most part.

Though it’s of no consequence here, the other save on this is that I can safely unload this iron – safely as in all in good conscience, and if it had not improved, I’d be more or less forced to keep it and maybe segment it into two very expensive stainless marking knives. I really didn’t want to do that.

Magnacut – Second Practical Test

The first test was a surprise, but the iron is new, the task was identical, but the planes weren’t the same, and honing was freehand.

A day or two later, cutting bed slats to go on son’s loft bed presented the opportunity to use the same Stanley no. 6 with the Magnacut iron and another plain steel iron – one I made out of 80crv2. This time, the comparison will be a little more than fair.

Edges for both irons were refreshed with secondary bevels at 32 degrees on 1000 grit diamond and then finished slightly steeper (about a degree) on 1 micron diamond on cast iron.

I would normally hand saw wood like this, but to make for a little more to do, I used a cordless circular saw to rip lengths. Without a track guiding the saw, this leaves a much sloppier cut than hand ripping, which we need so that the edges aren’t just planed clear of handsaw marks in three or four swipes.

Cap iron set: same as previous, about .02″.

Wood: 1/2 hard maple, 1/2 poplar (whatever I had to waste on bed slats)

Planing: Alternating the iron every several minutes being mindful to plane at least as much maple with 80crv2 both in actual work as well as time planed.

I made the 80crv2 iron when trying various steels for plane irons. It is marked “80CRV2 A-T” (thermal cycles), which means that it received a low nonmagnetic heat and then was stuffed in vermiculite to cool slowly, and then before hardening, I gave it a series of below-quench-heat (barely critical or subcritical) heats and then one quick high heat well past the furnace target but no soak or hold and quenched and tempered. If it was tempered hard, it would also have an “H” on it, but it doesn’t. So, it’s probably around 61 hardness at a temper – somewhere around 375-400F.

In general, you can think of 80crv2 as something the average white-collar buyer wouldn’t distinguish from O-1, but it is a steel that wears similarly long, but has better toughness. It requires a faster quench to get good results, but it’s also less expensive. It’s more highly regarded in the knife world because it will tolerate more abuse than O-1.

You can also think of it as 1084 with just enough alloying added to make it better than 1084. 1084 is very warpy, needs a very fast quench to hit its highest hardness potential, and will experience very fast grain growth giving newbies little error between growing grain and underheating and ending up with tough but too-soft steel.

For this test, I was careful to avoid any contaminants or dirt, and careful not to be careless with the planes while planing. Maple is relatively hard on edges, but I would say it’s also not totally out of the league of cherry. Whatever occurs in maple will just occur less frequently or slower in cherry. Poplar is a patsy and I’m sure it didn’t add anything here, but I needed a few more boards.

First, the Magnacut Pictures

Note, I didn’t take pictures of initial edges. It becomes too much in terms of things to look at. The sharpening process and initial edges look the same as the magnacut in the first test. All pictures are again, the backs of the irons at the edge. There’s a second motivation here – I think i like 80crv2 better all around than O1, but I’m not sure, and in the back of my head is whether or not its additional toughness may be a detriment. I haven’t used any of these mule irons too much other than just to compare. I expected that a steeper honing guide edge would perhaps help Magnacut and different wood and a different task may help eliminate issues that are one-time in nature. E.g., if there was something in the face of the cherry that I wasn’t aware of or who knows what else.

Magnacut – 150x – edge wear on an undamaged section. The sections
“coming unglued” are wear. They don’t wipe off. Undamaged lengths weren’t uncommon, but they weren’t close to uninterrupted, either, unfortunately.

Magnacut – 150x – edge wear and typical minor deflection. This is no big deal and will probably be removed with regular honing. If all of it looked like this, it’s possible that additional planing would round the edge and the damage would stop.

Magnacut – 150x – more typical damaged sections. Damage of this size (at the bottom) leaves visible lines and you’re unlikely to hone the damage out with a normal maintenance honing.

Magnacut – 150x – worst damage. Within 10 minutes of planing, the planed edges were loaded with lines, but one was prominent. I knew I’d find something like this. There was no “big knot” or anything that caused this, so I don’ know if it started somewhere and propagated or occurred all at one time. You will spend a couple of minutes on a coarse stone to remove this and be back to the grinder with much less honing. Too, the surface that’s left isn’t acceptable for anything.

Magnacut – 300x – a relatively undamaged section viewing at high magnification in search of carbides. If you look very closely, you can see a few tiny whitish dots. those are carbides. I may plane an edge of clean wood later with this and 80crv2 with the cap set close to see if we can get a better pattern. The damage at the edge here isn’t fabulous, but it doesn’t really threaten much or leave topographical lines on work. Keep in mind, this picture is a hair under 1 hundredth of an inch of edge length.

Second, the 80crv2 Pictures

80crv2 – 150x – typical edge length. There is only one spot of damage on the entire length, so there’s no need to show several sections of undamaged length. See the next picture for the only damage that occurred.

80crv2 – 150x – the only observed damage at the edge. This should be removed or close to it in a typical honing section, but this iron has more edge life left and some of it would be worn off of the iron’s length if no more occurs.

80crv2 – 300x – close look for the carbides. Hard to find here but you can find small light colored dots here and there. the diagonal lines may be careless sharpening on my part, or they could just be oil that didn’t get fully wiped off. Simple steels are somewhat tolerant to

The take-away from this is that at the very least, I will grind off the bevel of the Magnacut iron and reestablish an edge that comes from steel further into the iron. That may help.

If it doesn’t, then the solution to get the edge to last is to start adding buffing or additional total angle. Where that would start to help is something I’m not sure of. At 33 degrees or so in this case, it’s about as steep as I’d want to go for a target for daily use and increasing the initial edge angle shortens potential edge life, regardless of the side of the bevel it’s on. It may improve actual edge life, but I’m not going to set up a bunch of “not actual work” tests to try to figure all of this out. I have the need for some cases made of cherry in the next couple of months and if I don’t get to them sooner than that, I will get an idea of the reground edge in that work then.

It should be uncommon to find high-cost tools with overheated initial bevels, but one never knows.

On the second little sub-topic of whether or not 80crv2 is better or as good as O-1 for my own personal use, in knives, it definitely is (takes twice as much energy to break at 62 hardness). I’m not sure in planes, but would also say that what little damage shows up here is inconsequential.

Magnacut – First Practical Test

This will be a long post, so I will post in less conversational and more kind of fractious text to try to make up for it. In 2019, I tested a large number of plane irons that were purchased, borrowed, and in one case, made by me. The tests involved smoothing wood only on edges to keep the cuts even and fair, and the process was very controlled. In the end, highly alloyed irons (CPM M4 and PM V11) separated themselves from the group, and I declared V11 more or less superior in the tests. Against CPM M4, it is the case that you can actually by V11 (probably carpenter XHP) in a commercial iron for a reasonable price. Everything about V11 in the test was wonderful except that it didn’t grind/hone quite as nice as plain steels. But it returned edge life to make up for it.

This seemed a little odd, but tests are tests and I recorded everything. It seemed odd, because years before, I tested a Custom 5 1/2 from Veritas – with V11 – against my own beech try plane sizing plane bodies from rough. The aspects of the beech plane other than the iron made it better for the work and I could do more actual planing volume before resharpening.

I was so pleased with the smoothing test, though, that I used the V11 iron and made a bunch of XHP irons for jointer, panel plane type work and smoothing. In work where the wood wasn’t already flat, like jointing rough wood edges, V11/XHP fell flat, nicked more easily and took longer to hone or grind. What worked well in the test didn’t turn out to work well in real life woodworking. Unless you are only smoothing wood, which I guess some people do, and then maybe it will work out for you. Continuous cuts in wood are the minority for me.

Lesson learned. I made knives with the rest of the sheet of XHP that I’d purchased and sold the V11 irons in the middle of all of this, anyway.

That’s important as background for why this test is just real work and not a controlled setup where you can measure everything and ensure everything is fair.

The Wood and Planes

Wood: Rough cherry sized for loft bed ladder sides. Same board ripped in half. The two subject planes and irons each clean up and flatten one half. No other planes.

Irons: Magnacut and a house O1 tapered iron hardened and tempered to about 61/62.

Planes: For Magnacut, a very clean and flattened T20 Stanley #6. For the O1 iron, a heavy cocobolo coffin smoother that I made years ago, larger than a typical coffin smoother, and heavier. 2 1/4″ wide. The plane isn’t new, but the iron is new. One I made this year and have used little.

Cap iron set: about 2 hundredths from the edge. Not a fine smooth set, but more like a try plane set.

Bevel conditions: Magnacut – factory bevel ground a little shallower than as arrived after initial planing, so second bevel. The O1 iron is also likely first bevel, possibly second.

Sharpening: freehand second steeper bevel set by india stone and then finished on an oilstone with diamond powder followed by 1 micron diamonds and a strop. This isn’t needed with O1, but diamond finish is a good idea with anything that has vanadium greater than trivial amounts. No physical difference in sharpening method or observed edge.

Planing: same shaving thickness for both planes based on observation.

Acquisition of the irons: purchased the Magnacut. Made the O1 iron.

(I think it’s important to note that the iron was purchased at random, I did no contact the seller and have on bias about how it will perform either way other than the hope that it would offer a “V11-ish-but-less-nicking” type experience based on micrograph pictures and toughness data )

Pictures Backs of Irons after Planing

Pictures at 150x have a height of .019″. 300x pictures, half that.

First, the Magnacut iron pictures. See the descriptions under each.

Magnacut - 1 micron freshly sharpened edge. Focus on edge uniformity and less on the wide polished flat area.

Magnacut – 150x – 1 micron diamond edge finish. Focus on the edge when looking at pictures and not the abraded flat area. This is an edge about 2 to 3 times finer than an 8k waterstone.

Magnacut – 150x – undamaged length of edge after planing. Note, the edge has become a little bit more round with wear and probably some shortening of the iron length.

Magnacut – 150x – typical smaller denting along much of the edge.

Magnacut 150x – largest deflection damage

Magnacut 300x – typical edge areas with small deflections but also looking for carbide size. No large carbides visible, but wear may not have been enough to expose them. Smoothing with a close cap iron makes it easier to find carbides. No seeing any at all does help confirm that the production steel is fine like the micrographs of earlier batches show. The smudgy smooth look is wear.

All in all, it planed pleasantly, but the nicking did leave lines on the work. The large nick shown left a relatively wide very visible nick. It was at the corner of the iron, or within about 3/8ths of the corner.

Total time planing was less than 10 minutes with both planes used here. The damage is a surprise, along with relatively common back and forth between smooth edge sections and areas of small nicking. If the O1 pictures show much better, a more careful test will be needed with two irons in the same plane honed using a guide and an angle setter to ensure fairness.

The damage that’s shown is the type that leads to an iron feeling dull and refusing to cut as easily before much wear has occurred. The same as I observed jointing edges with V11 and using a jointer on jack-planed board faces. Without a direct test, I couldn’t say which of the two (V11 vs. Magnacut) performs better.

Second – O1 Iron Pictures

I did not take as many O1 pictures as I wasn’t yet sure I’d post anything of this test without confirming the results in a follow-up test. There was also no edge damage anywhere on the O1 iron, which lessens the need to show “typical” and “worst” damage on the edge.

The second reason this wasn’t a pre-meditated test, but more like middle of the process idea, is that coffin smoothers – even heavy ones – will beat up your elbows if you try to do too much non-smoothing work with them. My elbows were already well-used for the day, and they were feeling the punches from the coffin smoother. Moving to the 6 (normally would be wooden try plane) was a way to lessen the pounding.

At any rate, here are the two pictures:

O-1 Plane Iron – 150x – Typical Edge Wear. Note there is no damage anywhere on the edge, but you can see that the wear is greater in the same task. The O-1 iron did a little bit more planing due to some twist on its side of the board, but not enough to explain the greater wear by itself.

O-1 Plane Iron – 300x – Searching for carbides again. The light colored dots that you can barely see are probably carbides. Confirmation again that it’s easier to find them when wearing a pronounced shoot groove on the back of the iron when the cap iron is set closer to the edge. Note the wear smudge, but edge uniformity remains excellent.

Again, no damage pictures to show, so the story for O-1 is short.

The surprising results call for: 1) Picking an iron to test against Magnacut in the same plane, 2) using a honing guide to make sure the results are as fair as possible.

These pictures show what I believe was happening when V11 suddenly didn’t perform as well on my bench, too, unexpectedly showing nicks and leaving lines on work and ultimately being more trouble to use than O1. Steels like O-1 and 80crv2 don’t have much wear resistance, but the difference in honing off 3-4 thousandths of Magnacut vs. just doing a routine edge freshen for O-1 is significant. When removing the damage above in subsequent honing with a guide, a brisk session on a 400 grit diamond stone and extra attention on the 1000 side still needed a second go to completely remove everything. Failing to complete that just means you’re starting with an already damaged edge.

Failing to remove uniform wear down to the very last bit without edge damage still results in a finished surface coming off of the plane.

So much for the short text idea.