Mulling Mulling

After writing yesterday about pigmenting the varnish, any beginning art student would probably say “hey, dum dum…you have to mull the pigment into the finish or it’ll be gritty”.

Mulling pigment also binds the pigment to oils if done in something like linseed oil. I haven’t done it – too lazy, but I’ve used linseed oil and pigment to paint things outside. I just mix them – it’s sloppy – as in the result isn’t that great, but if the oil goes on like flat paint soaking into the wood, it still looks fine.

In a fit of “you have to do it to experience it rather than read it and just imagine it”, I bought fine pigments from Rublev. There is a lot about making varnish bases for paints in Ralph Huff’s book. I think you will see something from Steve Voigt about it at some point, but there are things simply stated in the book that don’t make great sense -like making a varnish and then adding a similar volume of oil.

Once you do things in practice, that makes sense. I think I already said that brushing varnish can be a pain because it’s string or its adhesion causes it to pull all different ways when you’re brushing it. You can thin it, but it doesn’t lay out like lacquer does and it takes a little work. It’s a superior finish, but if we’re being reasonable, who here needs a better finish than plasticized lacquer? I don’t – you can repair it forever. But what I can’t actually do is buy it and then spray it here. It’s too obnoxious and I already cannot tolerate brushing lacquer fumes without getting dizzy and being off the mark for the rest of a day. No thanks.

At any rate, the book refers to “Grinding pigment in”. That makes me think of a vitamix, which would probably also work, but I don’t think I’m going to try it.

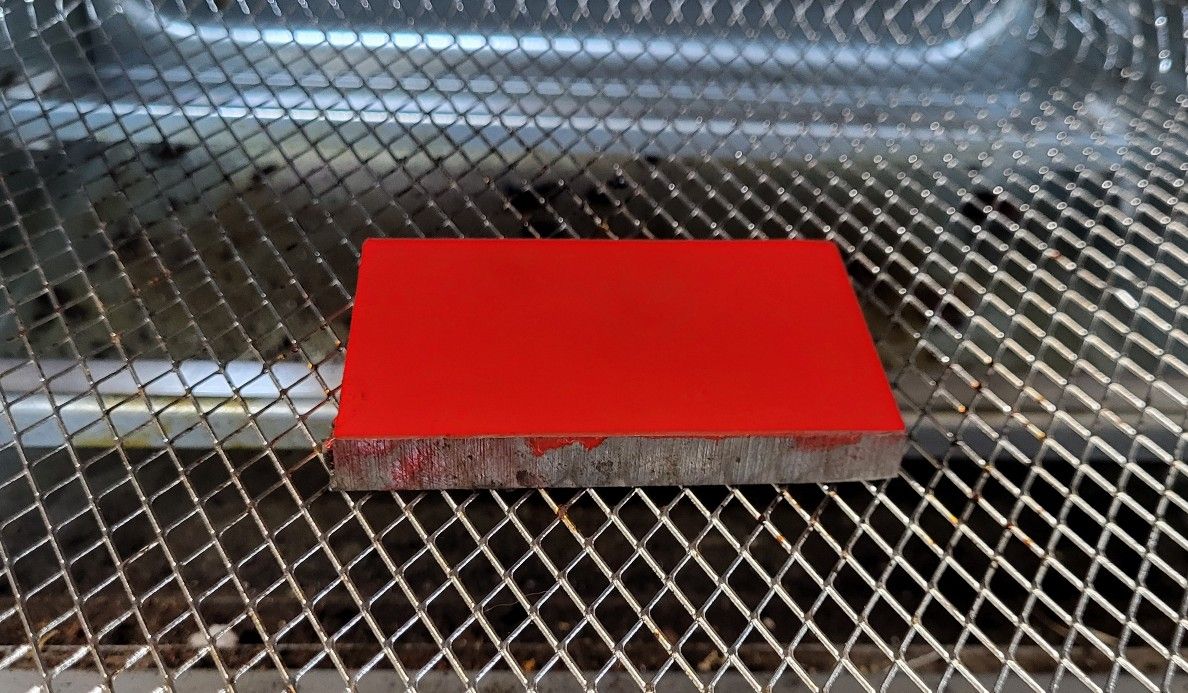
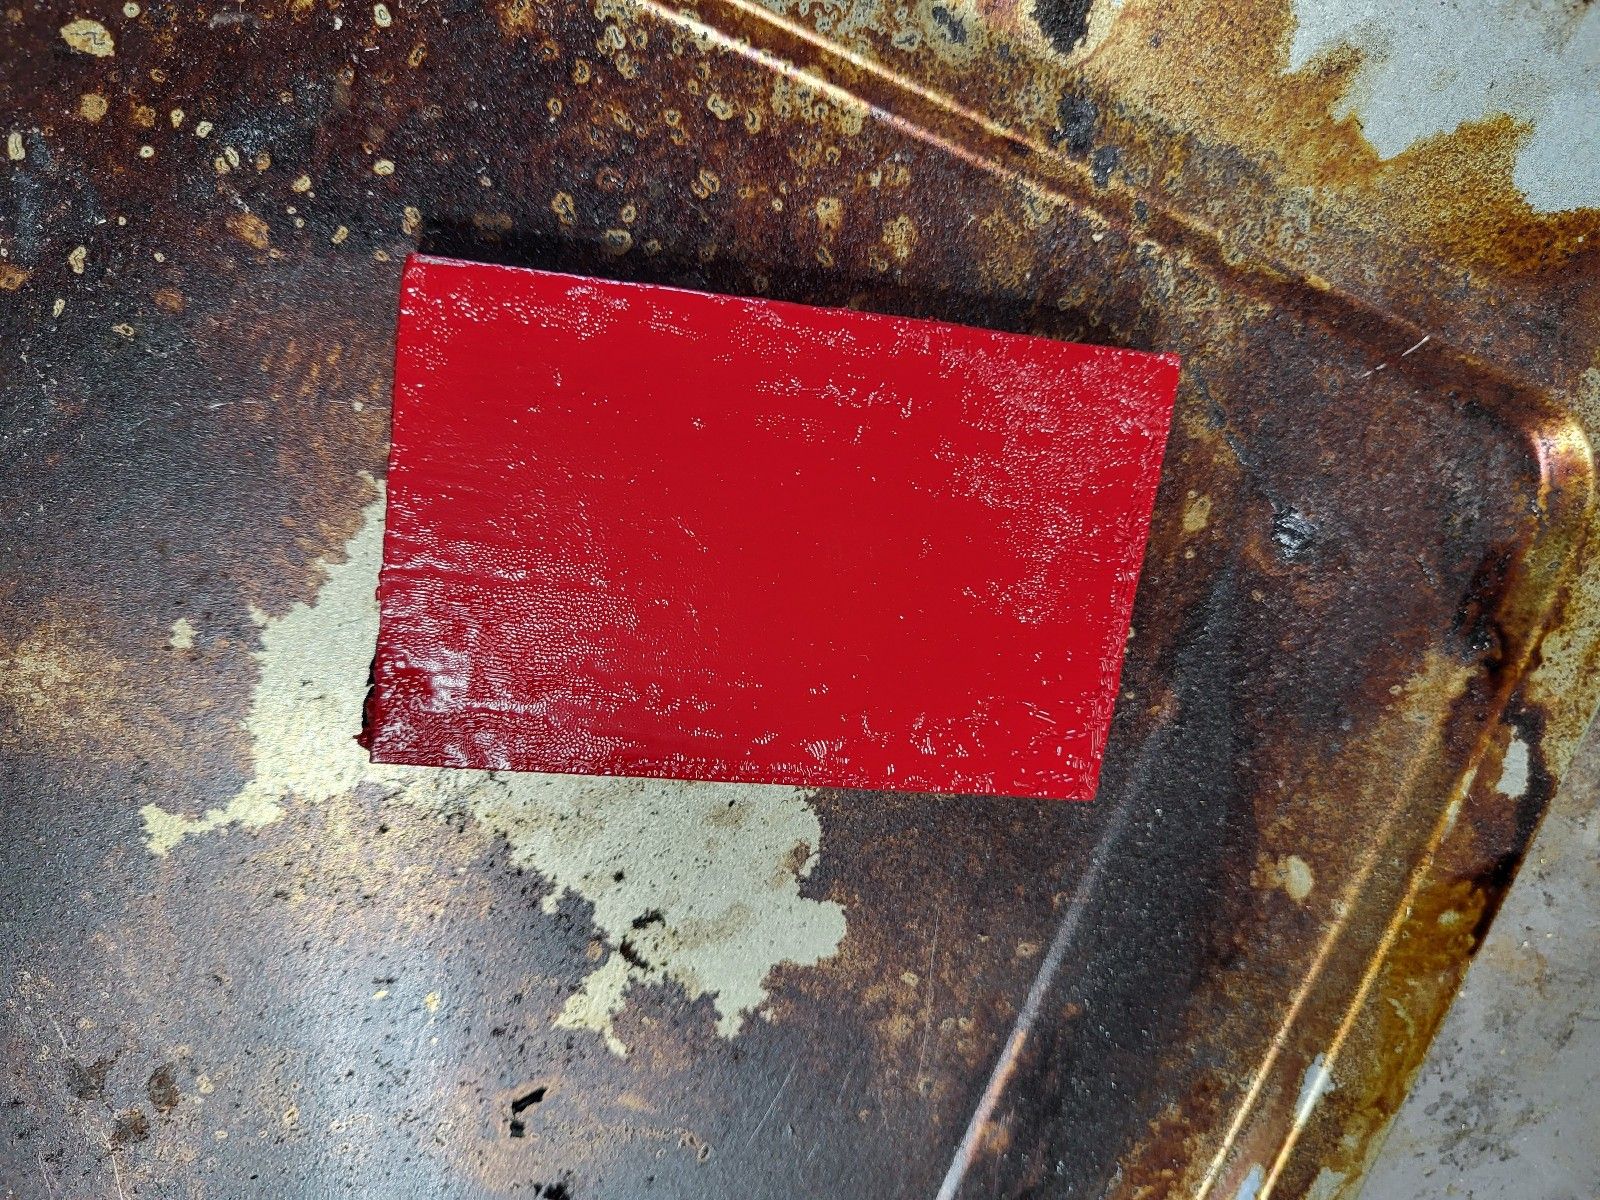
I assumed the little nits in my japanning trials were probably mostly dirt, but they’re more likely at this point to be pigment that wasn’t mulled, and taking a kiridashi – ok, not a real one, one that I made – and squashing the pigment on a hard plastic surface gets the big stuff out but not all of it.

Mulling is a step further and at one point from what I’m reading – of course I’ve got zero hands on – mulling was part of the process when buying pigment as an artist – the pigment needed to be mulled to make it finer, and then to bind it into a medium.

https://www.naturalpigments.com/artist-materials/how-to-make-water-based-paint

I haven’t read far about it and I’m not going to read that much. I’m waiting for a wide flat glass muller to show up so I can get on with this and then read. Do, then read, is always more effective than read, tell everyone you know everything and try it 12 years from now.

Mulling appears to be a lot of work, and it’s not done with high volumes of finish at a time. But I’m hoping to japan a few small metal items and I’d maybe come up with something else if making a varnish paint.

I often drone on about getting in contact with people who are doing things and learning from them, not people who primarily write about things. George Wilson changed my life as a two bit maker. I’m now two and a half, but just in how he thinks and talks – I am wired for that, but I was afraid it would be a waste of time.

I am making varnish only because Steve told me three times that you can actually make varnish – which I’d done, but somehow by the third, I’d noticed he said you could make better varnish than I’d made.

Now, I need to get out locally and see if there are artists supply places in Pittsburgh that sell pigments – because it’s pretty easy to blow $100 quickly on pigments, and some in person looking may be helpful. I think at this point, the fine pigment idea for varnish isn’t going to be a great thing for slathering all over stuff outdoors, but maybe there are more reasonable grades. I think I will not ever paint rooms in my house with paint I’ve made, but it’s not completely off the table.

By the way, we are, of course, lucky that these days, you can buy pigments that are already finely ground. I think from what I gather using cadmium red, what’s more the case here is that I’m breaking apart some particles that may be fused. I’m not going look at them under the microscope yet to see what’s going on. That seems a little undude, but if you have the bikini, wear it microscope, look through it.

Baking Pigmented Varnishes

This may sound like an odd title, but you already know of a baked varnish. Ashphaltum japanning. Coincidentally, the older texts refer to something like a gilsonite asphaltum japanning as a cheap finish. Japanning was used on a lot of metallic items in layers, with the higher quality work being a base and then clear varnish on top. Things like sewing machines, and so on, and decorative items for high class, probably up from there.

But experimenting while tempering some knives last week, I put the long oil tung/linseed varnish on a knife blade that I had sitting around – one that I made early on and will probably never turn into a knife because it will rust faster than rust. The hardness of the baked long oil japanning was shocking. That on the wood can still be dented by a fingernail and it’s a couple of weeks old and may always have this level of pliability. But the baked varnish was stuck to a knife blade that was just bare metal and not that easy to get off. it didn’t shatter off like paint – you could scrape it off but you had to scrape to the metal. No prime, no cleaning the metal, and so on. the color of the varnish in what was probably a 400F cook, though, was a dark straw. I was tempering knives at 340F, but the test blade was exposed to the radiating heat from the elements while the knives were safely tucked in between two really big thick plates of aluminum to block that.

Black Japanning and What?

Asphaltum is actually a dark brown, but you get enough of it with metal behind it and it looks black. it becomes the resin in a varnish and it crosslinks to the oil. You can do that cold and cook hot enough for it to become a varnish after it’s applied, or you can do like I did and just cook it together and keep it like that so that there’s no stirring in the future and no settled anything. I prefer that.

But it triggers any reasonable or unreasonable person to say “what else melts around 350F and crosslinks with oil. As in, is there a whole palette of colors that might be available by simply finding natural resins. I think the answer is no. I’m sure there are others, but it’s too complicated.

So it may seem like there is something about asphaltum, and there could be in terms of how it chemically bonds with metal. But the long oil varnish is worlds better than any spray paint no matter how good the spray paint says it is, and it will cost little.

Knowing that it went to dark straw, then the question is – what will look good? I think a mid red and a mid dark, but bold and deep blue would potentially be nice on tools, and comparing a lamp black base long oil varnish to the asphaltum japanning would be interesting. I shot very bright on red pigment to try the red, and here’s what it looks like:

Cadmium red. Not exactly maroon. The long oil varnish is in the bag and you can grind or mull pigment into oils and finishes, but I’m not doing that. We have some freedom here, though – adding oil to this mix with mulled pigment in it would be no big deal due to the reality that in a cook, it would just crosslink with the varnish and still end up with varnish.

This idea of how good the varnish is baked isn’t something unsubstantiated – the old texts talk about the varnish being superior when it’s baked instead of drying by other means. You just can’t bake everything at 400F, though, even though there are some references in terms of how to prep wood to try, anyway.

Laying this 80s-reminding color on a chunk of steel gives this:

Pretty bold. One coat left marker on the steel “80CrV2” still telegraphing through, and a second problem. The picture above is after slathering another coat on if I recall.

That problem is crows footing or whatever you’d like to call it. Which I believe is always or maybe almost always the result of the finish skinning and pulling on itself before the layer below has given up all of its solvent.

The result is this, though:

The color isn’t darkened much, either, but I cooked this at 350 and shielded it some. it needs more heat to become a bit more subtle in terms of what I was expecting.

Less heat to start, or really low heat for a while is an option, but the other that may be more intelligent is just to let the varnish gas off and cure for a day on the piece and then bake it. I’ll see how that goes.

At this point, the second prong of this – cooking at a higher temperature to darken the varnish to a less bold color is in the works.

it’s the durability of the varnish that’s desired here. It would be lovely if the top layer was glossy, but we can actually do what they did for higher quality work, which is to set the color based on the finish applied as the base, and then bake another clear varnish application on top.

Cleanliness when applying the varnish is key – any little piece of dust or anything, even metal sanding dust from cleaning off the steel results in piles of little dots. One of the things that varnish really loves to do is take a tiny fleck of dust and stick to itself (the varnish) above that dust and make it look 100 times as big. it could be that the solution to that is still adding un-cooked oil in with the varnish so that the finish lays out more like a lacquer, but we’ll cross that bridge only if we need to. if you look at the japanning on any older plane you have, it’s good, but it doesn’t look like an automotive finish with no imperfections in it.

I don’t have a real need at this point, but I’m curious. I wouldn’t mind ruining a few older planes with surprise colors, but done so well that it raises the question “why would someone who can do something that nice do something that wrong?”.