This is a continuation of the oddball plane iron replacement for an original that will not harden properly, at least without risking the original warping in brine. that would normally be a “so what”, but the iron in this case has an adjuster tab peened in and brine would mean grinding the bevel off to prevent warping at the very least.
As of the prior post, I’d tapered a blank – just a blank iron to match the dimensions of the original roughly. 
I hardened and tempered that iron, which isn’t any different than any other iron but for avoiding hardening anywhere that I’ll need to drill to install a tab on the back by peining – in my case with bronze rod.
Hardening and tempering was relatively routine but for a surprisingly high out of the quench hardness. the terminal hardness after a long double 400F temper is 62.5 – this iron is bohler O1.
The tab in the picture above is in the ballpark of 0.1″ tall at the top of the notches, but perhaps slightly less. I have a 1095 steel bar that I got from an online supplier, and it’s defective. I’ve seen this supplier in action coming up with reasons other people are at fault and don’t want to risk access to things they have that I like, so it’s better just to put something cheap like this aside. Years later, this is just the thing for that steel. It’s defective in an annoying way (shiny inclusions that wear at a different rate than the rest of the steel), and one that doesn’t at all threaten usefulness here.
Fast forward after measuring the tab here and cutting some off of that bar, I’ve affixed the bar to a piece of wood with nothing more than CA, which will come off easily later. The first order of business is both drilling holes for peining and the second is rebating the tab. 
There’s probably a million ways to do this and if I had to do more, I’d rig something to use the die grinder and then finish file. Instead, I just filed and floated this one, which took about half an hour – no desire to do it twice.
The file setup is simple – leave a certain reveal below a block of wood and that sets the rebate width:
Filing this is simply a matter of holding the block upside down and running it against the stop block, stopping every 5 strokes or so to brush the filings off.
At this point, some things are particularly sloppy – I could’ve drilled the holes in a press, but I did so with a cordless drill. They don’t need to be perfect and this isn’t that kind of project. I think the sloppiness will be inconspicuous.
But before I move on to the tab, I left a little excess on the end of this iron just to check the grain. Since this isn’t a fast process, I just want to double check by putting the iron in a vise and ticking off some of the newly cut bevel:
This works better from the bevel side. You just take a tiny bit off. The punch is sitting low here, but in use, we’re hoping to take something 1/3rd the size of a BB off. 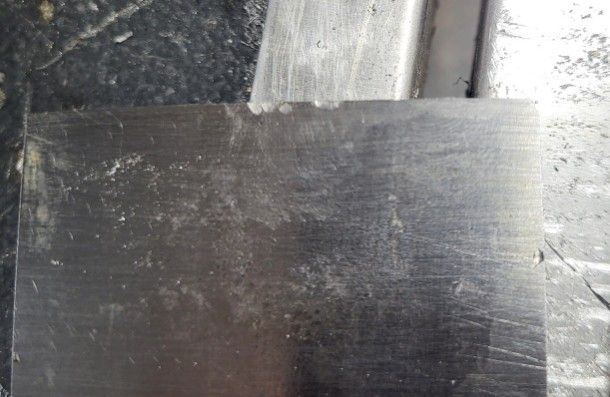
I got to this point hammering with the punch and took more and more aggressive strikes and this would’ve been enough – there’s no toughness problem, but just for the purpose here, I turned the iron around in the vise and struck from the bevel side. These breaks are really irregular most of the time when they occur, but I only need to confirm that the steel doesn’t look like a million little shiny diamonds. Here’s the hand scope picture. It’s not a great picture, but I can gather from it what I need: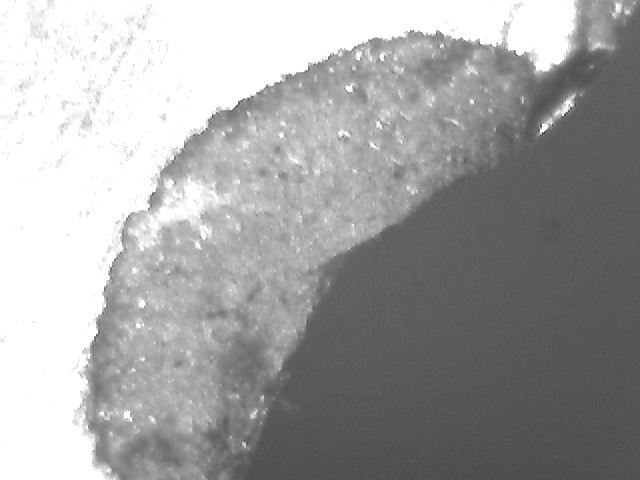
This is at 75x. you’re going to get some shiny areas due to shearing, but this looks good. Within the gray matrix, I just want to see uniform gray matrix and not something that looks like a pile of glitter.
This is what bad looks like, and this is at half the magnification:

These may not immediately look that different, but notice there are a few glints here and there on the first sample, at double the magnification. I think those are probably shear from the awkward tearing, and they may be more than one grain. In the second picture here, you can see that the whole sample is pretty much enlarged. This sample is from my experimenting with 1084 to see how tolerant it is of heat (not at all, but it doesn’t need extra heat) and then prove that it can be shrunk back to better than off the rack bar. You get the point. This kind of glinty grain would make a chisel that just chips a little at the edge, but over time you just won’t be able to tolerate it if anything else is at hand.
Part three / finishing this will follow.
