How Many is Enough? At least One More…

Not the last plane remaining to include shop made irons, but added to the closed handle rosewood jack, and the rosewood and gombeira smoothers.

Probably mentioned in another post, but I have two try planes of my own make. One was my first try plane, which was the third double iron bench plane I made. It’s OK. The second is a plane that I got lazy on and didn’t cut the mortise quite straight up and down. that one is actually solvable by adjusting the iron and cap iron, but I never did it. I use the first along with a vintage try plane that I like because sometimes I just like to use old stuff. There’s a credibility to the nice old stuff that my wares don’t have because……you can’t buy age, and you can’t buy provenance of a golden era plane that was made and sold in a competitive market of professional users. That’s gone.

What you can do us buy that older plane for less than the cost of materials in mine, so…there’s that.

This plane is euro beech, but the handle is american beech. It’s nicer than my earliest planes, and it has a 65 hardness plain steel iron in it. Those two together are important to me. Strength from hardness imparts edge stability. Plain steel at 65 means hardenable. The fact that it’s a 1.25% carbon steel means it’s still relatively relaxed getting to that hardness at a 400F temper or a few degrees above that.

There are still some things that could be improved in terms of lines. I chicken out on the handle and always leave the top and front strap a little tubbier than they need to be. A shorter handle looks nicer, too, but what if I decide to give the plane away? My hands across the knuckle are only about 3 1/2″ or a little wider. Someone with a 4″ hand across the knuckle could use this plane, but probably struggle on an older Mathieson plane until they realized they don’t need to have all four fingers on the handle.

Haven’t tested it yet, but anticipate no issues. This one is a little more free in the wear, etc, in terms of clearance in hopes that I won’t end up doing any extra work rubbing the shaving hard into the wear in tight quarters. Some of my tighter smoothers and jack planes do give a sense that the angle off of the cap iron into the wear, along with tightness, are so much so that even shavings not straightened by the cap are being straightened by the wear. It looks nice to have a plane that’s really tight like that, but there are limits to practicality.

I may build more planes this year, not sure – but in the background is a desire to make the chamfer a round over on the top, but elegant, change the carved details and make a much more artistic handle that’s not guarded by material bulk.

This is my first euro beech plane. At horizon, euro beech is still what’s available, and realistically, at not less than about $20 a board foot. Is that really a big deal? I guess it isn’t – if the wood is perfect, I’ll pay it. Some of the blanks on the page look less attractive. This one came out of a billet that wasn’t sawn that well, but there was room to resaw it, and the result is very attractive to my eye but for the contrast in how much color changes vs. american (oh, the wedge, too – also american to my recollection). I like the warmer color of the american stuff, but as this plane gets a few more coats of varnish, it will be sort of tarty and it has the wonderful three dimensional effect in that parts that are dark turn light and the converse as you’re walking past it, making it look a little alive.

If you look closely at the right eye in the last picture and the plane itself, you can tell that I corrected the bottom of the eye a little. It just looks better if the bottom of the eye doesn’t look like it flatten out entirely in the longer thin area of the eye.

There is a cap iron under the wedge, of course. You can’t see it and neither can I, but it’s there. Shop made like the rest of it, but for the modified knurled screw that I cannibalized to come up with the screw itself.

Oh, and the little bit of dirt trapped under the varnish on the front side of the handle – jeez. That stuff shows up less on the bare wood but big time after finish is applied. It reminds me of a childhood friend of mine who could not eat anything other than clear jello without creating a rings around the sun type look….food dirt. I saw that as it was occurring with varnishing and admittedly did nothing about it. One of the luxuries of making things for yourself.

No test shavings yet -the handle glue is drying as the plane sits here, and to some extent, so is a tung oil and wax sole. Just under 8 pounds – a nice weight for a fat guy like me if the upper end of possible use includes rosewood. And nice even in cherry, especially cherry of suspicious quality or grading.

Metallic Plan Co. Iron Part 3

I need to mark the tag. Having the plane in hand will offer the chance to make sure the tab engages.

I need to either count teeth, which I stupidly did before, or be smarter and take the marks from the teeth on the original iron and transfer them – tape on in this picture, pencil over the tap and then transferred to the rebated tab that’s not yet attached to the replacement iron.

If you look in the original post, the tab on the iron is crooked – but you can see it above here, too – it’s not perfectly parallel to the iron length. The replacement tab is still on the CA block, which allows for easier work starting the initial teeth and hoping to minimize any file marks on the final iron, still left a few file marks on the iron after installing the tab and correcting the teeth.

At this point, I removed that tab from its wooden block and marked center on the iron and CA glued it on and drilled through the iron just going through the holes that already existed on the tab, knocked the tab back off then and removed all of the dried ca glue and then peened the tab in place with brazing rod. I wanted the rod to be narrow diameter so that some of the tooth is still steel and won’t be bent or folded by the matching teeth on the plane’s adjuster.

And noticed that mine, too is crooked – I guess it moved a little while I was placing it and then made that issue permanent by drilling. Oh well. A little late to fix it without unnecessary trouble – a check of the plane shows that it’ll still be fine with the adjuster, just like the original. The plane’s adjuster has a lot of lateral room seemingly to allow just for such an issue. Smart. The initial teeth with the tab peened to the iron look like this:

Woof – those teeth are pretty ugly. The bronze adds an interesting challenge if you work by feel – it feels like grease when you’re filing it and it hides that you’re filing steel at the same time, you can’t feel it. I’ll do what anyone with self respect would do, fix the teeth a little and blue the whole iron so you can’t see them very well.

At this point, the iron is close to being done, and is it flat enough? It should be. I did check the iron before peening the tab on – it’s ever so slightly hollow along its length, which is just what I wanted. If it was convex at all, rather than lapping it flat, I’d belt grind a tiny hollow in it. like several thousandths, but something that will show up as visual confirmation everywhere on the iron. it’s probably a lot flatter than the original. I ground the top corners off, and cleaned things up a little but not like a brand new surface ground iron – I don’t want it to look like CNC in an old plane. that looks stupid and it would be doubly dumb to waste time going over this iron to hide that it’s hand made.

A couple of the teeth could still be evened better to improve the uniform look. but we’ll see how it works, first. I did nothing else after this but apply some carnauba wax so that it if it rusts, it won’t do it on my watch.

I do wish I hadn’t been in a rush through some of the parts – the holes not in line, the wonky teeth and the tab going on somewhat diagonal. But it’ll be fine and none of that stuff will show up when the iron is in the plane. From start to finish, it took about 2 1/2 hours to make this iron. It’s not exactly simple, and with limited tooling, I had to figure out what I’d do to rebate the tab and so on, so the first one always is a little ugly and takes a while. It would still never be a one hour project without having a production setup that would take enormous amounts of time to create. That obviously wouldn’t make sense, and posting this in an online forum would probably draw some retired machinists who would tell you how they’d do it. See if they can set something up in 2 1/2 hours including heat treatment. And do it for free.

Metallic Plan Co. Iron Part 2

This is a continuation of the oddball plane iron replacement for an original that will not harden properly, at least without risking the original warping in brine. that would normally be a “so what”, but the iron in this case has an adjuster tab peened in and brine would mean grinding the bevel off to prevent warping at the very least.

As of the prior post, I’d tapered a blank – just a blank iron to match the dimensions of the original roughly.

I hardened and tempered that iron, which isn’t any different than any other iron but for avoiding hardening anywhere that I’ll need to drill to install a tab on the back by peining – in my case with bronze rod.

Hardening and tempering was relatively routine but for a surprisingly high out of the quench hardness. the terminal hardness after a long double 400F temper is 62.5 – this iron is bohler O1.

The tab in the picture above is in the ballpark of 0.1″ tall at the top of the notches, but perhaps slightly less. I have a 1095 steel bar that I got from an online supplier, and it’s defective. I’ve seen this supplier in action coming up with reasons other people are at fault and don’t want to risk access to things they have that I like, so it’s better just to put something cheap like this aside. Years later, this is just the thing for that steel. It’s defective in an annoying way (shiny inclusions that wear at a different rate than the rest of the steel), and one that doesn’t at all threaten usefulness here.

Fast forward after measuring the tab here and cutting some off of that bar, I’ve affixed the bar to a piece of wood with nothing more than CA, which will come off easily later. The first order of business is both drilling holes for peining and the second is rebating the tab.

There’s probably a million ways to do this and if I had to do more, I’d rig something to use the die grinder and then finish file. Instead, I just filed and floated this one, which took about half an hour – no desire to do it twice.

The file setup is simple – leave a certain reveal below a block of wood and that sets the rebate width:

Filing this is simply a matter of holding the block upside down and running it against the stop block, stopping every 5 strokes or so to brush the filings off.

At this point, some things are particularly sloppy – I could’ve drilled the holes in a press, but I did so with a cordless drill. They don’t need to be perfect and this isn’t that kind of project. I think the sloppiness will be inconspicuous.

But before I move on to the tab, I left a little excess on the end of this iron just to check the grain. Since this isn’t a fast process, I just want to double check by putting the iron in a vise and ticking off some of the newly cut bevel:

This works better from the bevel side. You just take a tiny bit off. The punch is sitting low here, but in use, we’re hoping to take something 1/3rd the size of a BB off.

I got to this point hammering with the punch and took more and more aggressive strikes and this would’ve been enough – there’s no toughness problem, but just for the purpose here, I turned the iron around in the vise and struck from the bevel side. These breaks are really irregular most of the time when they occur, but I only need to confirm that the steel doesn’t look like a million little shiny diamonds. Here’s the hand scope picture. It’s not a great picture, but I can gather from it what I need:

This is at 75x. you’re going to get some shiny areas due to shearing, but this looks good. Within the gray matrix, I just want to see uniform gray matrix and not something that looks like a pile of glitter.

This is what bad looks like, and this is at half the magnification:

These may not immediately look that different, but notice there are a few glints here and there on the first sample, at double the magnification. I think those are probably shear from the awkward tearing, and they may be more than one grain. In the second picture here, you can see that the whole sample is pretty much enlarged. This sample is from my experimenting with 1084 to see how tolerant it is of heat (not at all, but it doesn’t need extra heat) and then prove that it can be shrunk back to better than off the rack bar. You get the point. This kind of glinty grain would make a chisel that just chips a little at the edge, but over time you just won’t be able to tolerate it if anything else is at hand.

Part three / finishing this will follow.

AEB-L and Making Knives

I don’t know how many knives I’ve made. It’s not hundred, but realistically, if you’re going to make knives for other people to use in a kitchen, you’ve got to tackle using stainless.

XHP (V11) is stainless, but not very. Food acids will discolor it and it can be broken fairly easily by the uninitiated, which both probably have to do with why Lee Valley is the only using of the Carpenter XHP alloy that I know of. Those things don’t matter that much in a plane iron. I still read often how great it is for chisels, but anyone doing a comparison with a better chisel in the same task side by side, grinding and sharpening on top of that, would probably decide otherwise. Its attributes suit planing more than chiseling.

There are tons of stainless steels that you can probably heat treat in a forge. I use AEB-L. AEB-L is a fairly lower carbon steel, but it’s a matrix type. Carbon is between 0.6 and 0.7, and there’s no nitrogen or molybdenum to step up the sharpness. When I make knives, I’m doing it as an amateur and handing them out – I want steel that sharpens like a chisel. I have missed the mark on hardness with AEB-L and XHP before learning just how much open forge heat it takes to get them to decent hardness quickly, and the knives are usable, and at least as good or better than something like a Wusthof knife, and ground to a better angle. But they’re better yet if they are more like a chisel hardness. Nobody has broken a knife yet, so I’m not concerned about someone breaking ice with one and breaking one – I know they’re not going to break from regular use.

AEB-L can reach higher hardness than you’d guess – if you have a furnace and nitrogen. Larrin’s shown as-quenched hardness that’s in the 64 range and if you double tempered where I do – 340F, the hardness would probably still be 63. I am working with a forge and a freezer and that figure for me is 62 and 61, respectively.

This week, someone asked if I’d make them a knife that was 6″ long and more in proportion (not a copy, but proportion) like a large japanese petty knife.

I came up with the following profiles varying things I’ve got on hand, and decided to throw in a common classic parer type profile since I’ve already sent this person, a friend, a very thin small parer that’s almost like a razor. It’s a treat to use one of those tiny little parers that’s really thin at first, but it’s not practical for working on a cutting board, and feels a little dangerous in the middle of food or coring. It cuts too far too fast, and if friction sticks it and it releases, it could be a real problem.

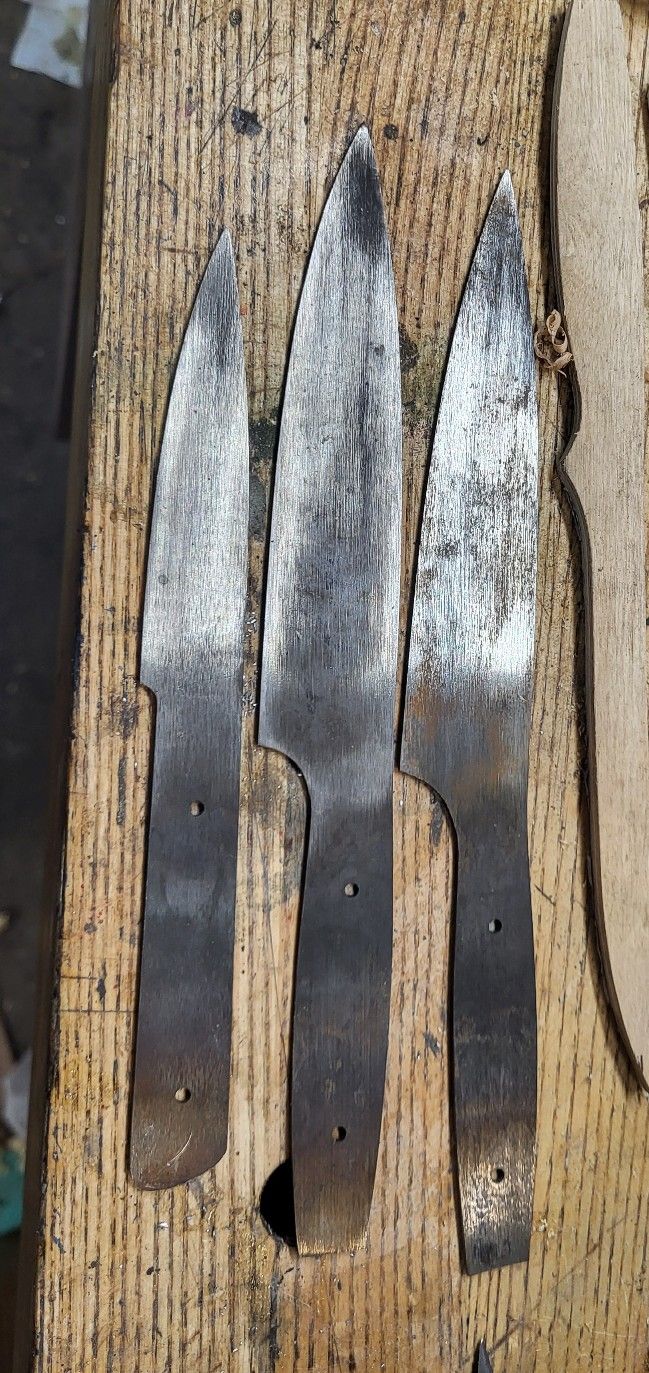
All of these knives are .062″ stock and they’ll be slightly thinner. Two of them are 61 hardness post temper, and one is 60.5. I’m pretty pleased with what experimenting has brought in terms of results as I thought stainless would finally lead to me buying a forge. Instead, I’ve gotten one induction forge and now am getting a second as the first has some quirks and I’d rather assign it to part time.

If you look at the three knives, there’s some subtle differences between the middle one and the one on the right. The middle is straight through and I think it could benefit from more hand relief and it needs to be more pointy to do what a petty knife would do. I’ll see through finishing it, but the feel led me to make the one on the right figuring it’s just not good enough.

I generally put simple slab handles on in some kind of nice wood and then pin with 1/8th bronze or brass. I do that so that replacing the scales if something should fail is easy. If someone can’t find 1/8th bronze, often a clothes hanger will fit and if not, you can buy brazing rods and sand or scrape off the flux coating or whatever is on them. I haven’t lost a handle yet either, and use 180F epoxy, but something will come off sometime.

Good choice for wood on the handles is something hard with closed pores. Gabon ebony, macassar ebony, brown ebony, katalox – all work nicely. You can pore fill rosewood. I think I’m going to try a wood on these handles called Sapodilla, but not totally sold yet. it’s hard, and it will eventually be a mid brown, but it’s purplish when fresh, and not very dark. it’s far less work to shape a handle that’s softer wood, but it seems like it would spoil the effort.

So, with the steel, there’s no long complicated process. I want no decarb with AEB-L and furnace schedules will create it without neutral gas or something covering the steel. Instead, I use a piece of exhaust pipe and torches. We need to get the steel to somewhere around 1950 at least, and in a quick heat, maybe slightly higher. A big propane forge has no control without a muffle and a muffle means hitting a temp and sitting for a while to get there. And preheating all of it. No thanks.

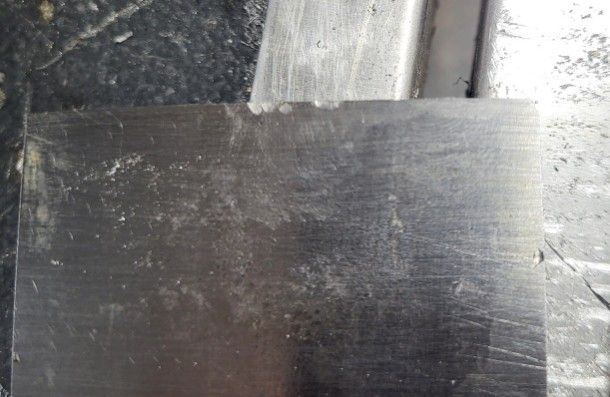
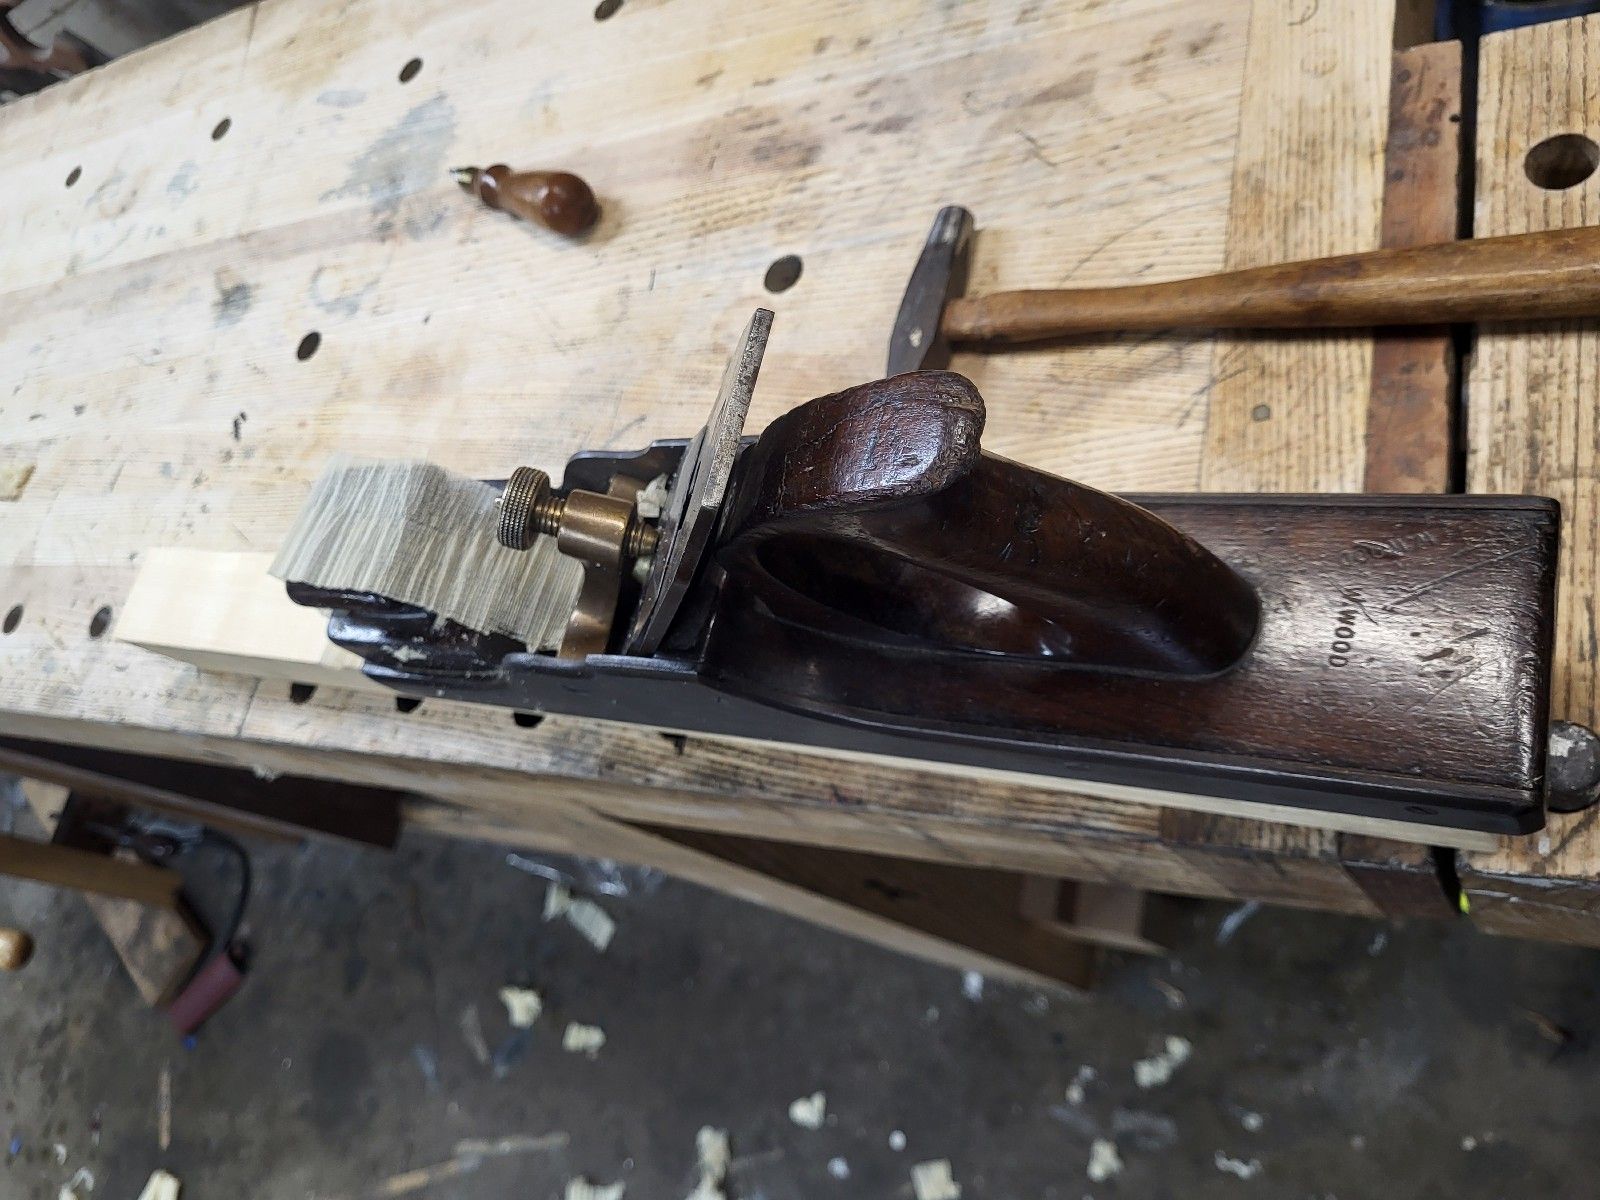
this is my anvil area. The top of the anvil may look rusty from disuse, but I’ve quenched a bunch of stuff with brine lately, and it looks like that in a hurry and then I sand it off.

The induction forge would be a treat to use for this if it made enough heat, but induction forges are keyed to a depth, and that depth is beyond the thickness of a knife. It will heat these blades to about 1500 to speed preheating if that’s important, but the magnetic forces try to go further into steel than there is steel there, they hit each other and cancel out. Otherwise this forge will take something like a chisel and turn it into falling apart sparking globs in a little over a minute – chisels are thicker.

I don’t have everything lined up totally here, but I get a non-flammable stand for the torches, whatever I have available, and set one in the pipe there and lift the back curtain that’s there for dust control when grinding. There is no mass in that pipe, just kaowool. there’s a second pipe to the right of the forge that I have used as a liner for the kaowool, but it’s better as a former – use it to tightly pack the kaowool and then insert it in the larger pipe and pull out the steel pipe and you’re left with the form and no need to heat that piece of steel pipe. It’s a detriment to something like this.

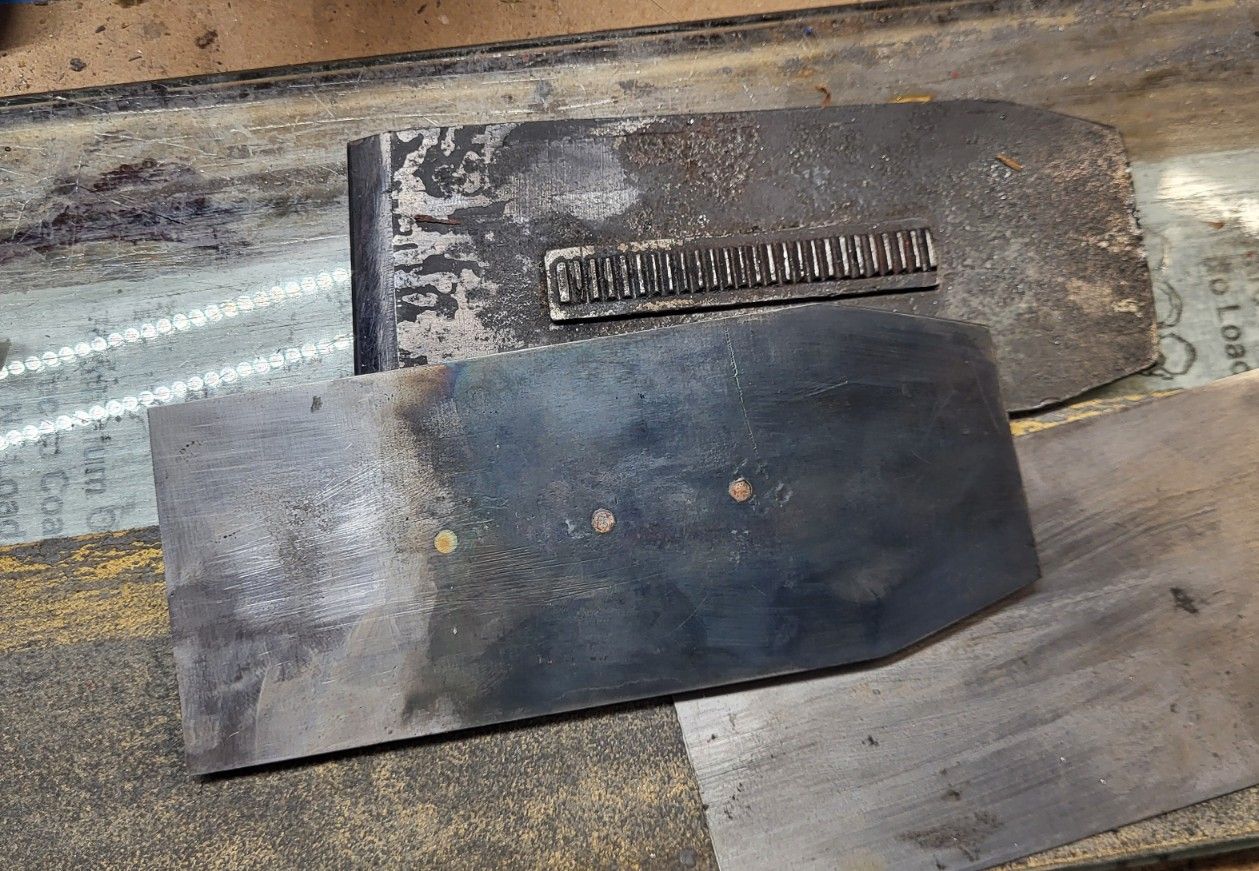
I visually get the AEB-L to a point that is a really bright orange and a step away from yellow, then quench the top end in an oil quench and over to the anvil it goes to get plated between the anvil and the aluminum tempering plate, which does double duty as being a thermal mass in the toaster oven tempering things like longer knives. the little hole allows a thermocouple probe which is kind of needed if tempering is going to be really accurate. And it needs to be. Good heat treating, tempering and cool grinding all have to be had or the knife will be garbage can fodder.

AEB-L warps, and getting the top part of the quench done quickly yields decent hardness, and then there’s time to get the lower end finished and constrain the steel so it stays flat. This is also usable for making plane irons and so on. The top part of the quench must be fast, and the bottom end really cold, but there’s a little time to constrain and the item being heat treated in between both of those, along the lines of 10 or 15 seconds here, and I have noticed no difference in hardness by not just rushing the quench. Stainless doesn’t need the same speed usually, but that trick works fine with 52100 and other carbon steels.

the final step here, especially with stainless, is getting the blank into the freezer. I have a little cheap freezer, but it will get down to -40F. That’s not remotely close to liquid nitrogen, and it doesn’t do as much, but it does improve results half a point or a point vs. letting a knife sitting around air cooling to a higher temp at the end. Larrin Thomas had an excellent article on this – liquid nitrogen gives you some time to screw around and still see improvement. If the temperature drop isn’t as significant, then whatever you’re hardening needs to get into the freezer or bucket of propylene glycol cooled in the freezer really fast. I swipe stainless with a file on the way to the freezer. Since as quenched hardness for me is about 62 with AEB-L , if it’s short, it’s fileable. Even if it’s only a couple of points short. Just barely, but you can feel it. All in all, from first contact with the oil to being in the freezer, it’s probably less than a minute and I speed up the cool off by holding the knife against the frost in the freezer and then dropping it in.

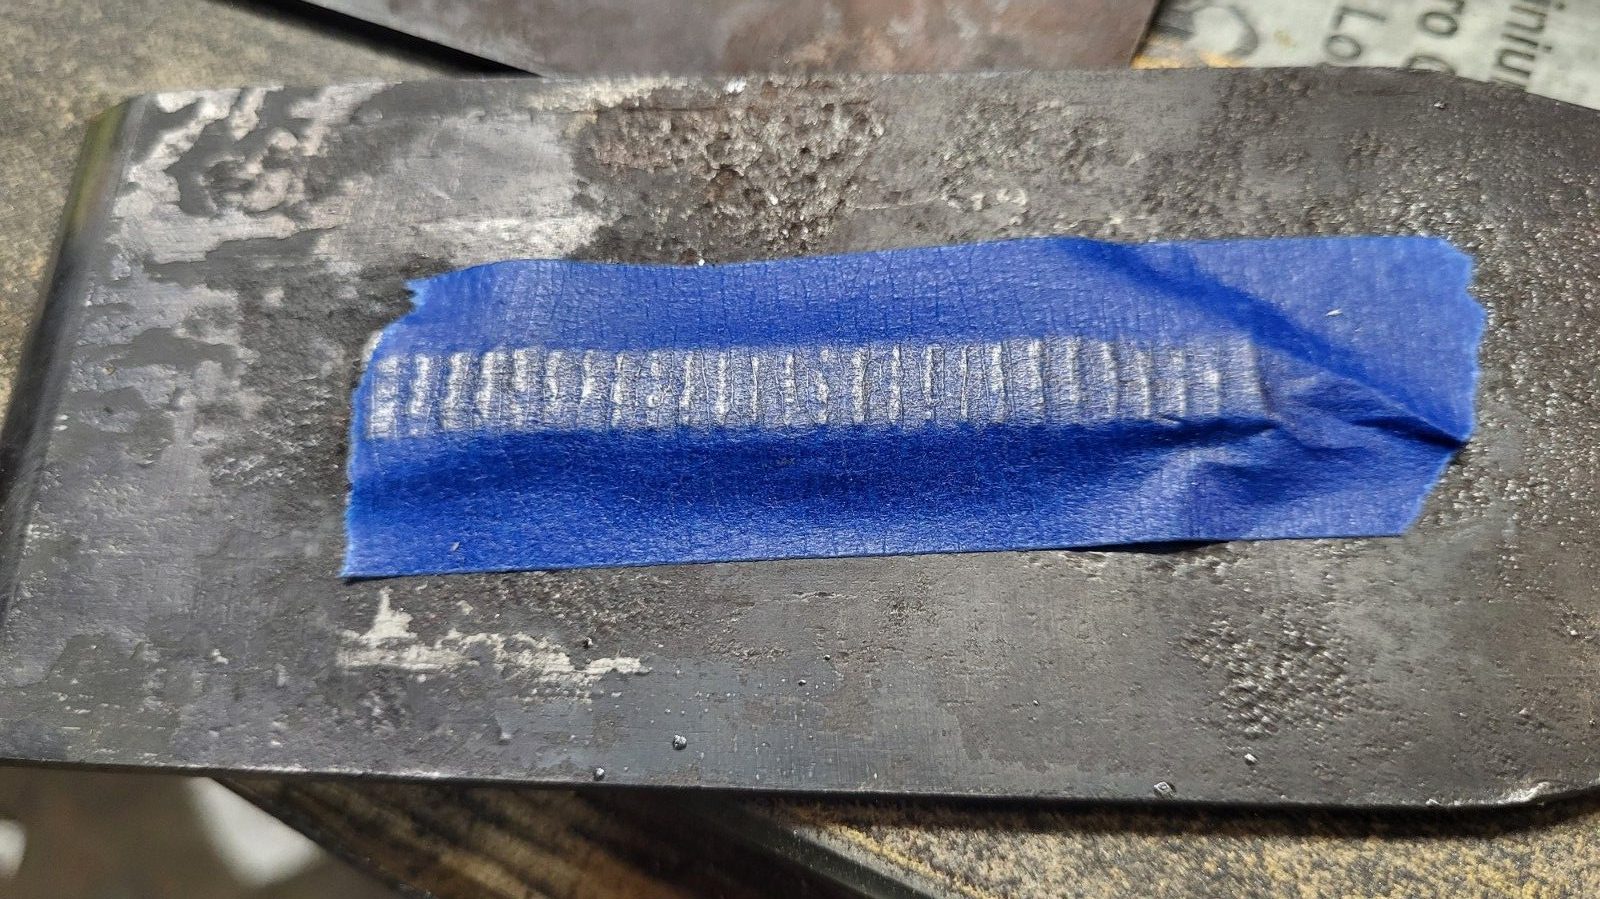
If you’re heat treating and not going to do any analysis other than checking hardness, you do at least need to snap samples and confirm your process doesn’t grow grain. This is a .062″ sample and it’s close to what I see with carbon steel. I asked Larrin what I should see because I thought maybe the high heat needed with bloat grain some, but Larrin said it should look similar. What the anomalies are, the shiny white dots, are probably artifacts more of my cheap hand scope. it’s hard to get a clear picture of these little samples and they break irregularly, so it’s not easy to get them in the metallurgical scope to look at where something needs to both be very level to the lens and also broken without any change in depth.

Whatever the case, this effort is fine and will make a good knife. The sample above is 62.5 which is about as hard as I’ll get out of the quench. could a furnace and nitrogen do better for a knife in practice? I don’t know, i think maybe it could, but I’ve made really thin knives out of AEB-L that are so thin I’ve accidentally bent them and then bent them back and given their hardness, that’s pretty good. And they sharpen well and hold their edge well, and the steel does fine in a plane iron. I don’t use it in plane irons because it seems like these ultra fine carbide irons don’t have the same feel as they dull.

While we can see the magnified grain here, the carbides do not cast a shadow on a plane iron when I wear away, so they are not visible and likely below 1.5 microns. The surface of the steel just looks like fudge instead.

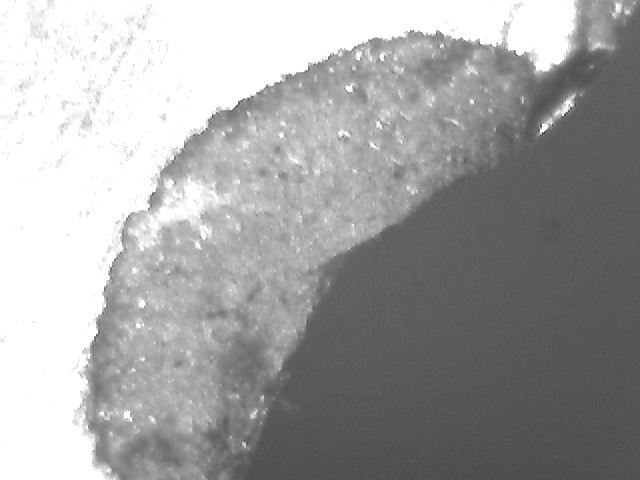
When I asked Larrin what I should see snapping grain, he remarked there is no easy way to see carbide patterns and I told him my little trick – which is to set the chipbreaker on a plane so the shaving rubs the edge with force and exposes carbides. You can see the carbides below from 80crv2 steel. These are about as small as I’ve seen – if they get a notch smaller, they won’t show up. They won’t show up for AEB-L and often on older cast steel, they also do not appear in any quantity.

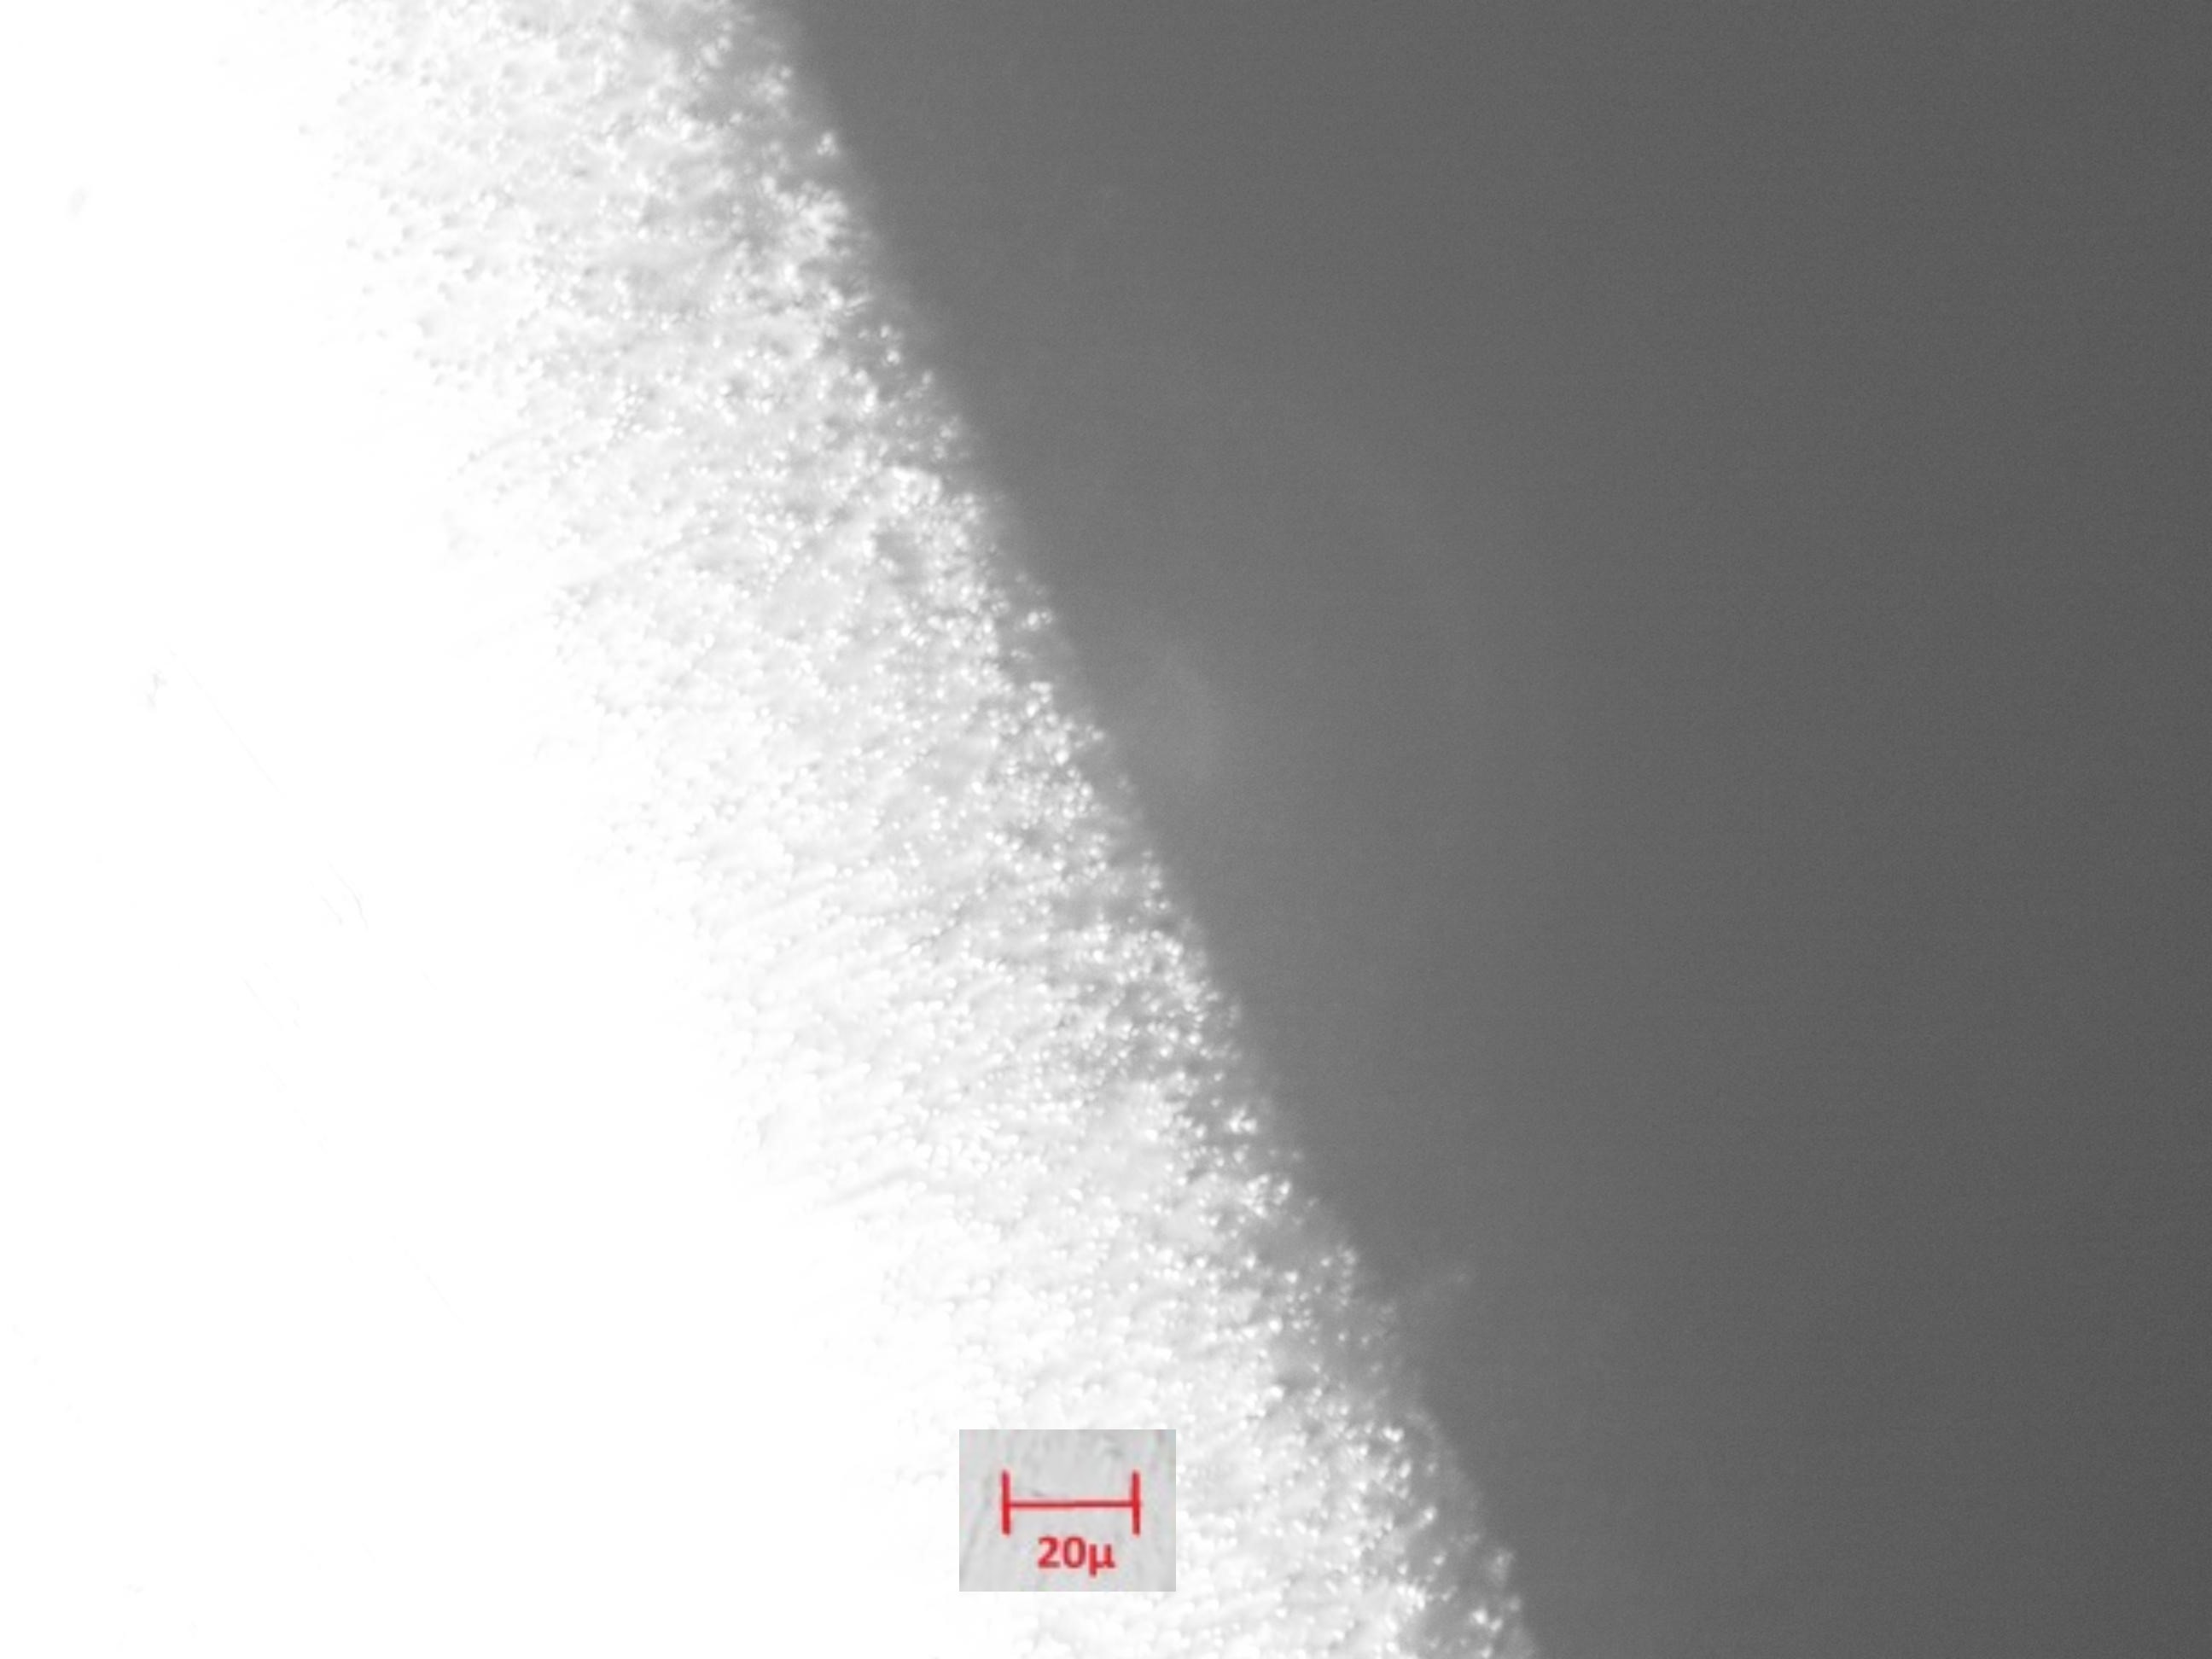
This is kind of a boring post, and it’s hard to make it relatable if you’re not doing the same thing, but it’s just another illustration of figuring things out and testing them.

Henckels sources “FC61” steel knives from Japan. Those are AEB-L, but they’re kind of expensive – between $130 and $300 per knife. it costs about $20 including the wood for me to make each knife, and about two hours. They’re not as complex – there’s no bolster or pattern welding, but there’s no bullshit, either. Humorously, the Henckels knives say “Kramer by Zwilling Meiji” and they’re made in Gifu, Japan. Probably by a separate contractor. They look nice enough, but the maker from Gifu could just be used without having to pay to use two more names and probably short the pay to the contractor. No thanks.

All of this is doable – the forge doesn’t need to be part of this and AEB-L doesn’t air harden easily when cut, so you can work with hand tools. You can shape the handles with a belt sander or by hand with files, but I guess it’s honest to say while it’s not difficult, there is some learning curve difficulty and this is one thing that I’ve gotten into where the hardness tester is immensely valuable in checking things quickly.

the stainless pipes – both the bigger and smaller are literally stainless exhaust pipe sections – the cheapest way I found to get something with some substance and strength in stainless.

A $225 “bucktool” belt sander and a spray bottle is enough to grind these into a finished knife without burning them – using ceramic belts. I do usually use a high speed grinder, though instead, but have done knives in stainless only on the 4×36 sander. This isn’t the same knife, but since I haven’t finished these knives, I figure a picture of a knife that was finished is in order – they’ll end up being similar to this. Understated, not expensively made and not expensive looking, but a small fine bevel and blistering sharp. I’m a little bit partial to hand finishing the sides not to a super fine finish for two reasons – one, they don’t instantly look marked, and two, if someone marks up a knife, then without doing anything else, you can always freshen the finish on these kinves by laying 400 grit sandpaper over a wood block in a vise and pushing the knife linearly across it. I don’t know why it bothers me, but I think it’s a shame to have a decent knife that is hard to freshen up once the knife gets covered with scuffs and little scratches.

Updated Thoughts on Scraping Planes – There’s no Practical Gain

If you’re reading this, you may have seen the Youtube video that was superbly done by someone in England. That being a very clear description of scraping cast iron.

So, I scraped 7 planes. Two infills and five Stanley planes. It may have been 8. I planned to scrape 1, but 8 just happened.

I had two Starrett straight edges, and now three. My 24 inch straight edge is a walk about for the shop and it has seen a lot of wear. There’s really no abuse outright, but it’s a $30 (square edge) and the corners are what you try to use if light does not go under the flat edge. And with a blunt square edge, it’s easy to get something flat enough that no light shows. Those edges take wear and it gets a little difficult to tell if you’ve addressed it cleanly with fine files and other tricks to clean it up. One of the easy things to do is check a surface with two parts of the straight edge. Scraping afforded the ability to get things flat within a fraction of a thousandth of an inch and start to see these differences.

So, I went out looking and found a starrett #386, thinking it was a #385 at less than half price, but it’s actually a lighter version for drafting. Fortunately, that’s not bad. But I got it for about 85% of going rate for a new one vs. 40% of the cost of a #385 (both being bevel edge). They have the same straightness guarantee, and I kind of like the lighter weight. It’ll be useful in the shop.

So, having gotten off track already – what’s the fourth? A 4 foot #385 that I bought new a while ago that never gets away from a carpeted area – it’s a reference until or unless something spoils that, but it’s also pretty heavy. And they have become off the wall expensive, so keeping it as a reference is fine.

Back to the planes. it’s very easy to scrape a plane to the point that a 0.0012″ feeler doesn’t have a chance. I found the bias I expected – that the toe and heel on my planes were above the mouth – and I’d also grown accustomed to liking that. It affords some control that makes planing a straight edge just in the process of planing off roughness routine – no extra staps.

A Dead Flat Ground Plane is Not Better Than Properly Lapped

What is properly lapped? Figure on something like a stanley 6, you can just get a .0012 or .0015″ feeler under the toe and heel using a good straight edge. This is a small number, but it provides a very practical benefit. When you use a tool room granite surface, this level of error looks enormous, but it also doesn’t take that long to scrape out, which is where the 1 became probably 8.

Can I tell any difference in use? I have to be honest, I liked the planes a little bit better before scraping, except for one or two that I was lazy on and didn’t finish the lapping job. For years on the forums, we have heard that you can’t do anything practical to a plane that compares to a surface grinder. Since I have quality straight edges and feelers, I could quantify what kind of error I was creating (intentionally) when lapping, but you may recall if you’ve read any of my conquests that I would also file the center out of a plane draw filing if it was that far out or already convex.

A person with a file, knowledge of planing, and a good straight edge will give you a plane that will suit you better than someone with a surface grinder. A person who doesn’t have that knowledge could lap your plane into a banana.

The idea that you can’t address cast iron or steel, even significant amounts, by hand, is bullshit. I get tired of reading the sentiment from people who don’t have experience with both types of tools – one properly lapped and one surface ground or 10 of each, or whatever. It’s usually someone with knowledge of something other than woodworking, be it manufacturing and testing things (like a lab engineer) or machining. I never see a legitimate long term hand tool user ever muse about machining being something that’s needed.

Rather than only scraping, as i’m getting close to a scraped surface being flat, I’ve followed each repetition with some focus on some light lapping of the tail of the plane being scraped. It’s a tiny amount of insurance that the tail end isn’t dead flat or even a miniscule amount low, but even just that little bit makes the outcome better than flat to the reference surface. Flat to the reference surface end to end is practically lightfast on the starrett straight edge, even leaned, edge to edge and corner to corner. An example group of pictures follows with a Norris No 13 panel plane.

Those pictures just show an iron that’s quickly sharpened fine india, hard ark (not the most expensive kind, slightly more coarse) and a quick buff strop. The wood is yellow cedar, though it doesn’t really matter what it is. A lower angle plane would be better, but this is just a quick thing for feel of what the plane is doing as the tail end comes to the wood. You can’t feel it, but I can tell there’s no magic here that will result in better function. The last picture is an attempt at showing a reflection on the planed surface. Of course you’d expect this, but the improvement in cell phone cameras really makes these pictures disappointing. The reflection is glare and the camera really won’t tolerate it, even in manual mode – it’s just blurred.

Interesting things I found

My lapping did leave the planes I lapped slightly bandanaed, but less than my finest feeler in most cases. That was filing and lapping most of the time recently, because it makes it so easy to prevent more banana effect, and the file is *really aggressive and fast*.

But, I also found that I had slight convexity across the width of planes and my lapping made the “error” slightly on the diagonal as the reference plate showed. I say that partially in jest, because it was an error only in the sense of being able to measure something other than straight and true. In reality, it was a nicer plane to use, and all of the absurdly thing shavings I’ve shown were with those hand lapped planes. The scraped planes don’t really do anything better, and the loss of the ability to ensure the far end of a board doesn’t fall off just by pressure variation in a through stroke is a legitimate minus.

So, You Shouldn’t Scrape?

I wouldn’t say that. But I would say if you have a good setup to lap, or file and lap if you have a plane that’s convex, there’s nothing really to gain.

You can see in the plane sole that I didn’t take my time and scrape very deliberately, so some of the scraping marks are deeper than others and there’s no perfect pattern left. Some of this is lack of neatness, and some is that I did work over the sole with 220 grit paper on a block and a lap, so the deeper marks remain and the others are more faint.

I’m glad to have tried it, and it’s an easy way to make sure that what you have (even if you lap the tail and nose off a little) is very dead flat to start.

I spent about an hour each on these planes in total – some less, some more. To do a perfect cosmetic job would probably require using carbide (I used high speed steel) or really careful use of the HSS, which can burr and then leave deep scratches for a ham and egger like me.

This points back to sending a plane off to a machinist. if you’d like to do that, you can. I think it’s a huge waste of money, and I’d never send this particular plane off to a machinist, but to get dead flat and the same feel as this vs. lapping, i’d be disappointed shelling out money to have that. And I’m being prissy saying the next part, but I think modern surface grinding looks really cheesy on a vintage plane. It definitely looks even more cheesy on cheap imported planes that have really really deep surface grinding marks.